|
As seen in the previous updates, there are some some things hobbywise that we found ourselves missing when we started out playing the Campaign. One of them was proper minefields, and a lot of the times a well placed minefield can dictate how the game will be played out. We played around with loose counters that could mark out the edges of the mine fields, or simply use the barbed wire pieces that we had. However, the area they marked had an uncanny ability to swell or shrink as the game progressed and players accidentially bumbed into them as they moved their forces around. Fortunately our Italian player jumped into the fray, and produced enough minefields to last even for the bigger four-player games. The solution of making them out of a square of MDF had a hidden bonus as well, as the act of deploying them is now less fidgety, as you don't have to measure every length of the area. 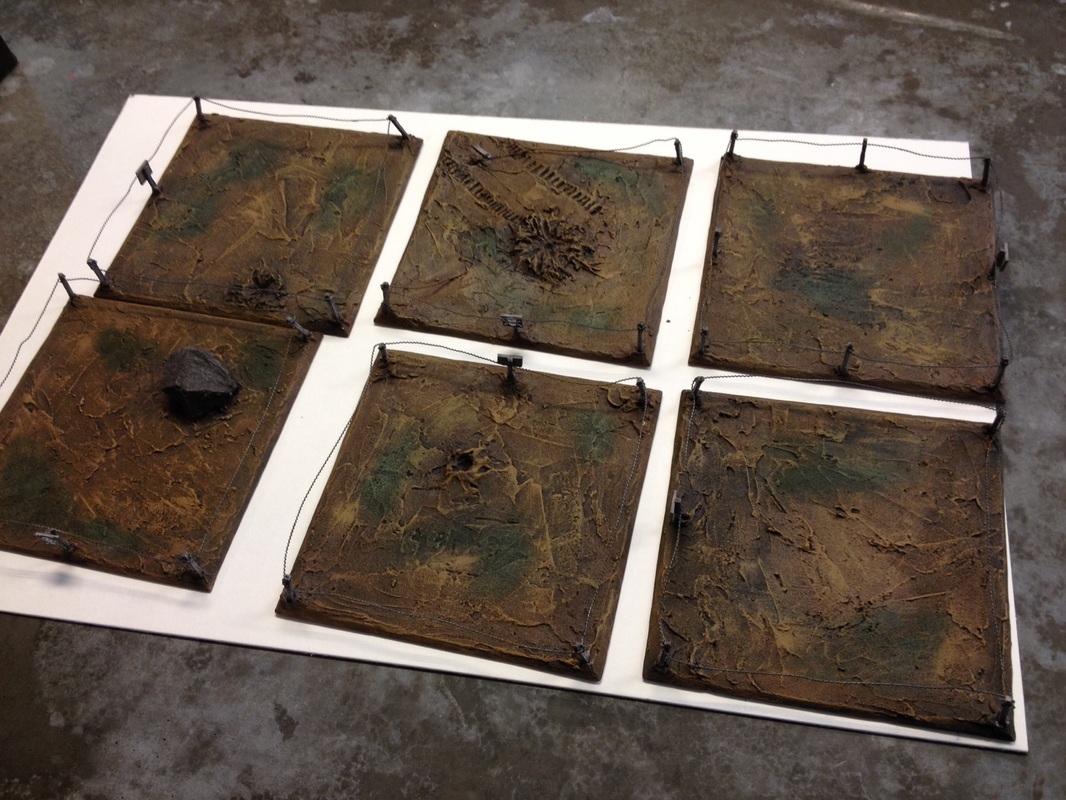  The minefields were based on the same MDF that we use to base all our buildings, and the ground is made of spackling paste. Some tread marks, explosion craters and universally legible signs add a nice flavour.
/Jonas
0 Comments
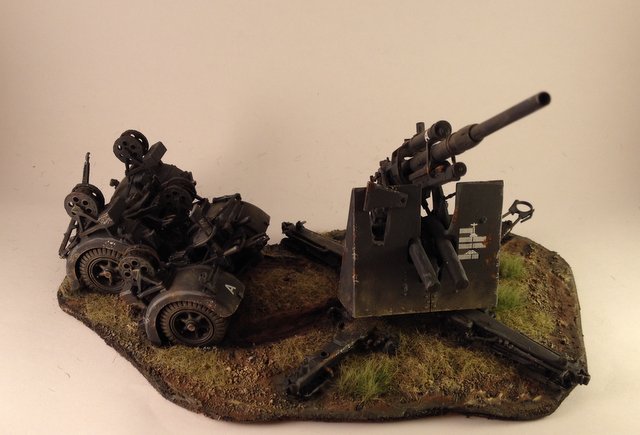
 Yesterday I finished my 8.8cm Flak 36. It's an Italeri kit in 1/48, and it was both quick and pretty simple to build. The cannon can even rotate and you can change the elevation of the barrel, as well as move it back and forth. It's built to be an objective or terrain piece, and I just put it on an old bit of MDF board that I had left from an old project. If you wanted to base it to look like it has been hastily deployed, the wheel pairs would most likely disconnected with one on each side of the cannon, not rolled together like this. That way it would be quicker to load it up again and tow it away. 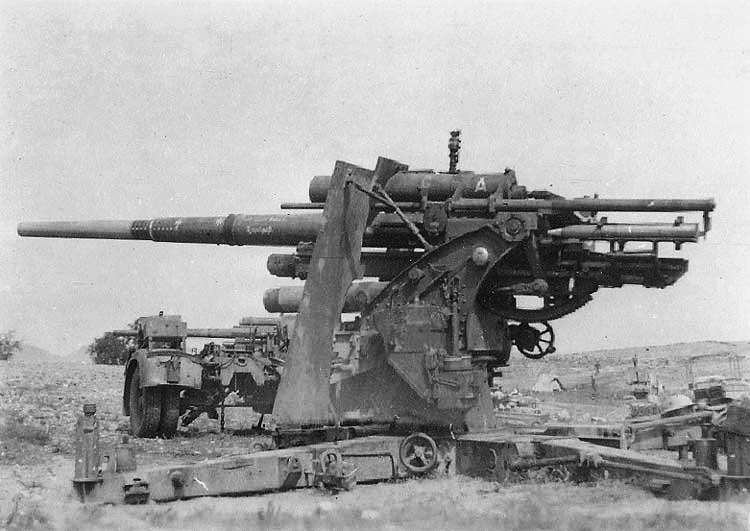 Notice the single pair of wheels in the back. The paint job was simple, I just covered everything with Panzer grey, and gave it a dark wash. Then I did a rough highlighting job with grey pigments. The chipping was done with a torn off piece of "blister sponge", first dabbing reddish brown and then a bright metal over it. I added some tiny specks of bright orange in the middle of some of the brown parts, to create a little bit of rust. Then I went over parts of the gun that would have seen the most dirt, such as the gunshield and the wheel pairs, with some mud-colored pigment and then some sand-colored pigments. Finally I put some static grass and a few bits of grass tufts on the base, and called it a day. I was a bit distracted since I was following the Sweden-Denmark European Championship qualifier, so the weathering is not always in the most realistic spots, but rather according to whim. If you are more careful with the application you can get a better result, but I like this way of weathering for wargaming models, as it takes very little time. Maybe just an hour or two of painting once the panzer grey was done and dry. But watching this movie, it's clear that the guns could get quite banged up with use, so you can add quite a bit of scratched in the paint without feeling guilty of overindulging: If you want to build your own Flak 8.8cm artillery, this movie shows some good examples of the variety in deployment: on wheels, on the ground, with or without gunshield, and sometimes covered with camouflage. The Italeri kit is great in that you can build it in all these variations. Cheers!
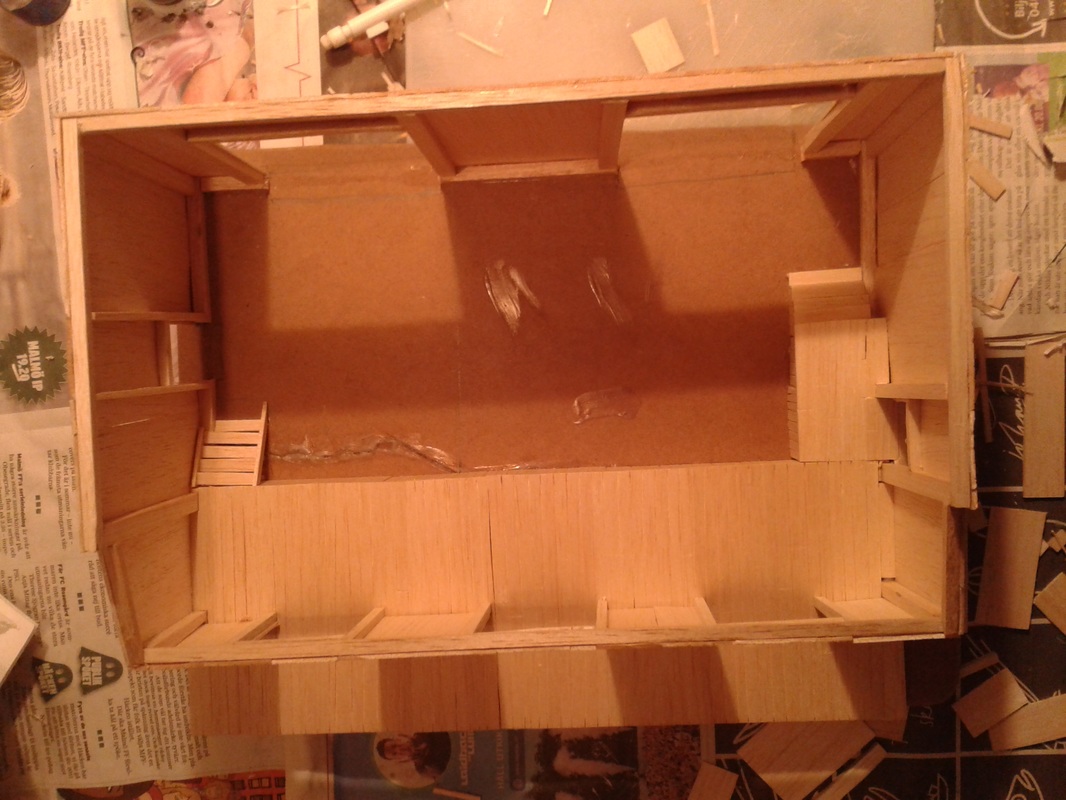
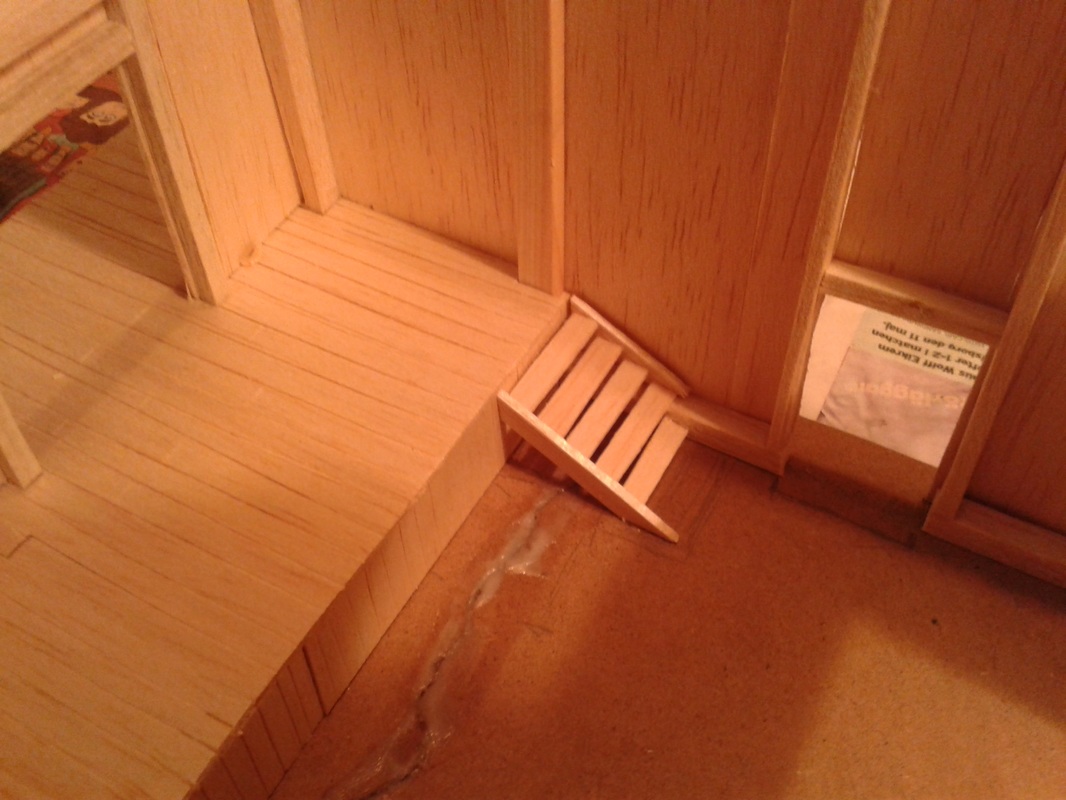
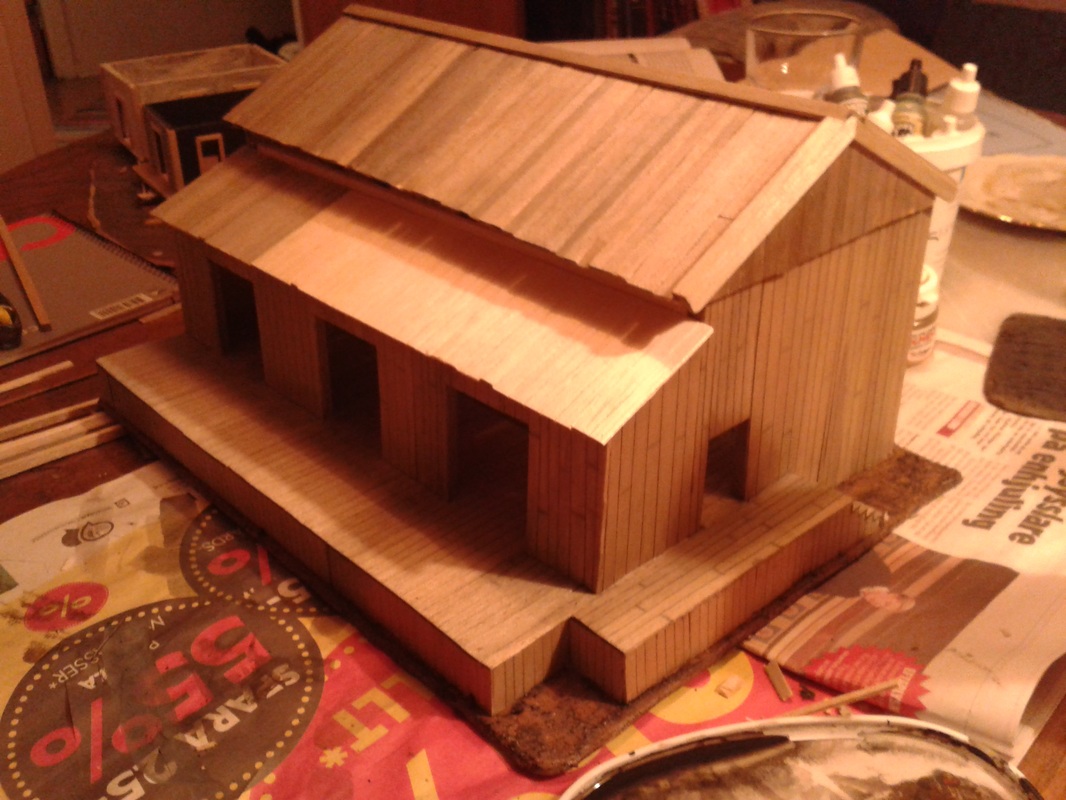
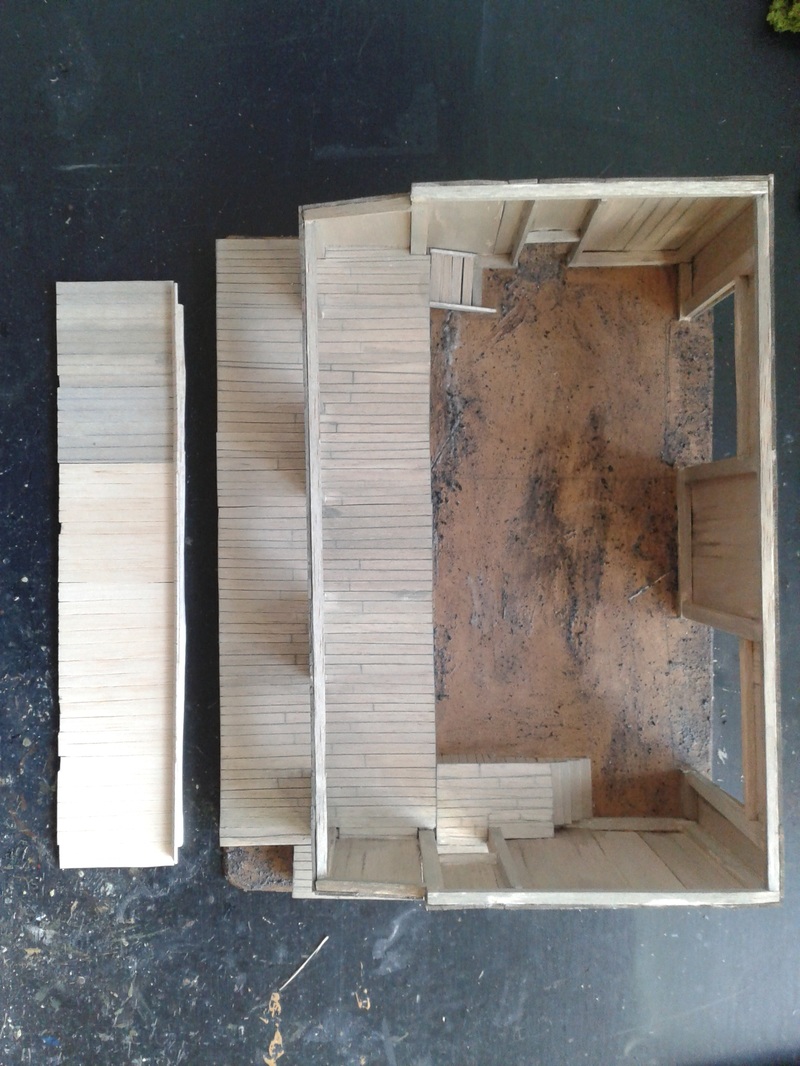
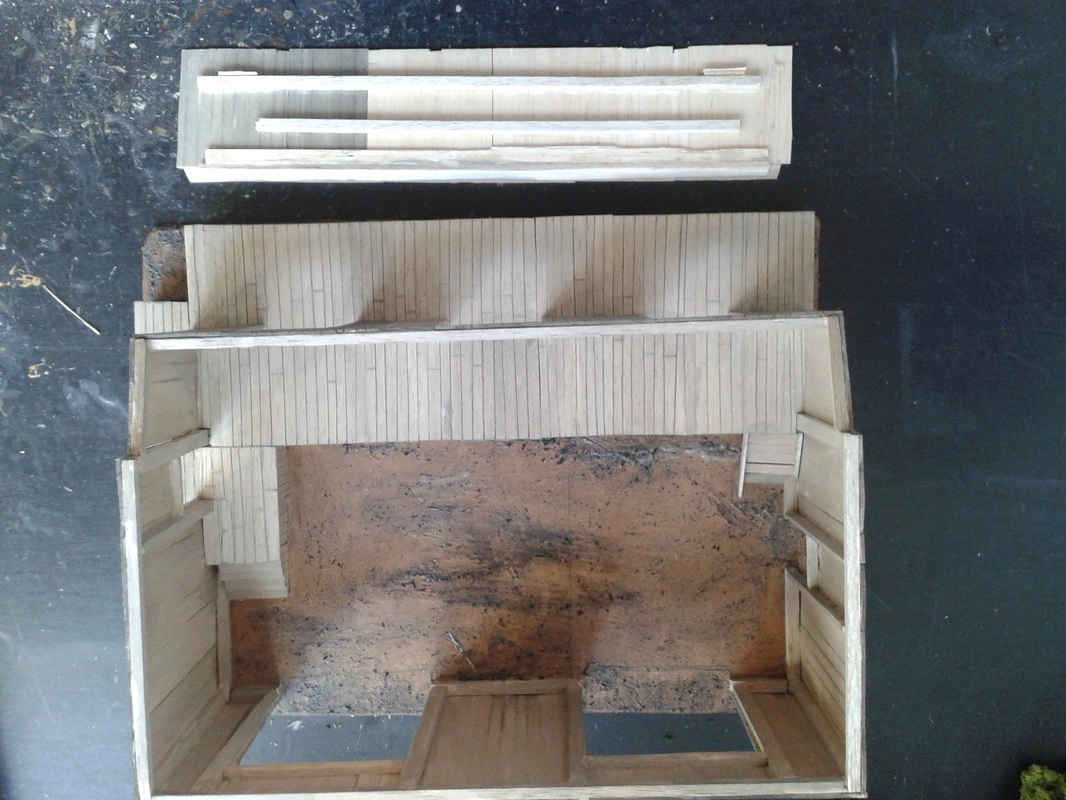
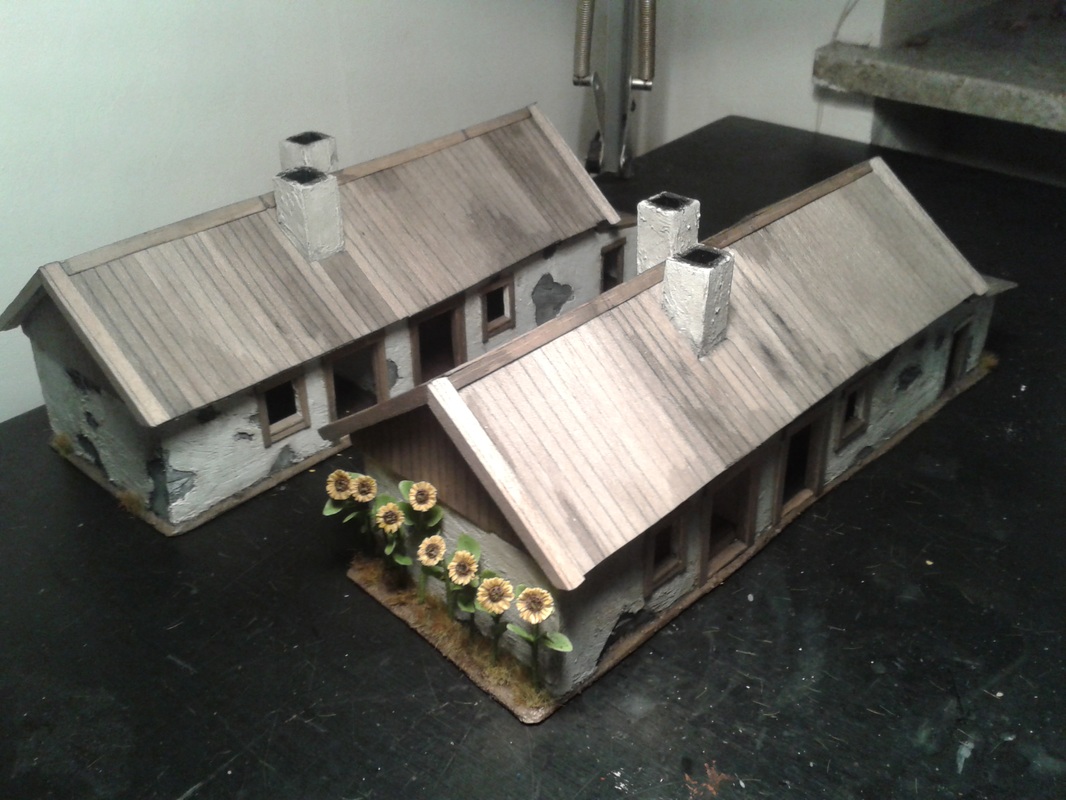
-Jonas I think more gamers should try to build terrain (particulary houses) in balsa wood! It´s surprisingly durable, easy to work with, looks very nice (in my opinion at least!) and is very fun as well. This building took me 15 hours to complete (I already had the roof from an old building we never used). The only things I used were:
I hope someone gets inspired! Cheers! /The balsa-building Shirty
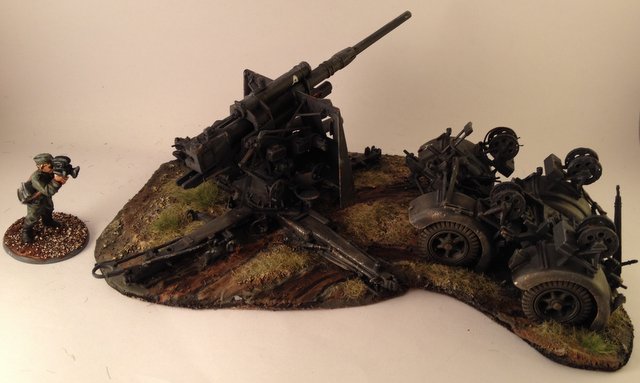
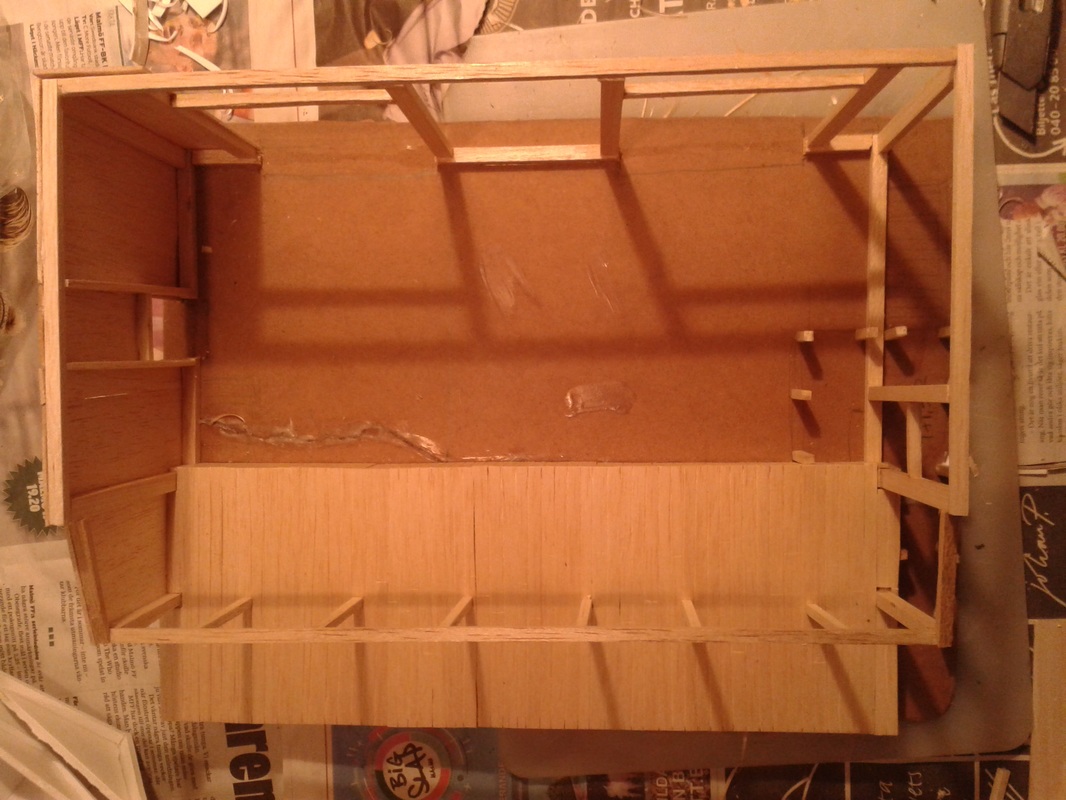
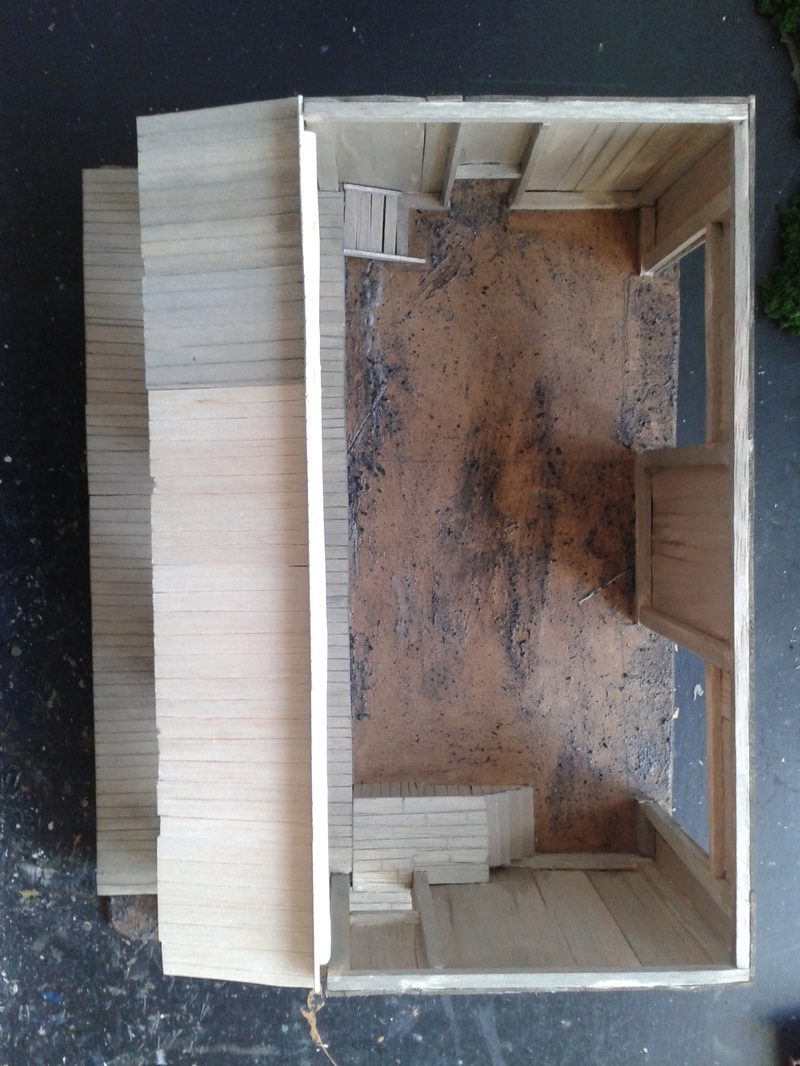
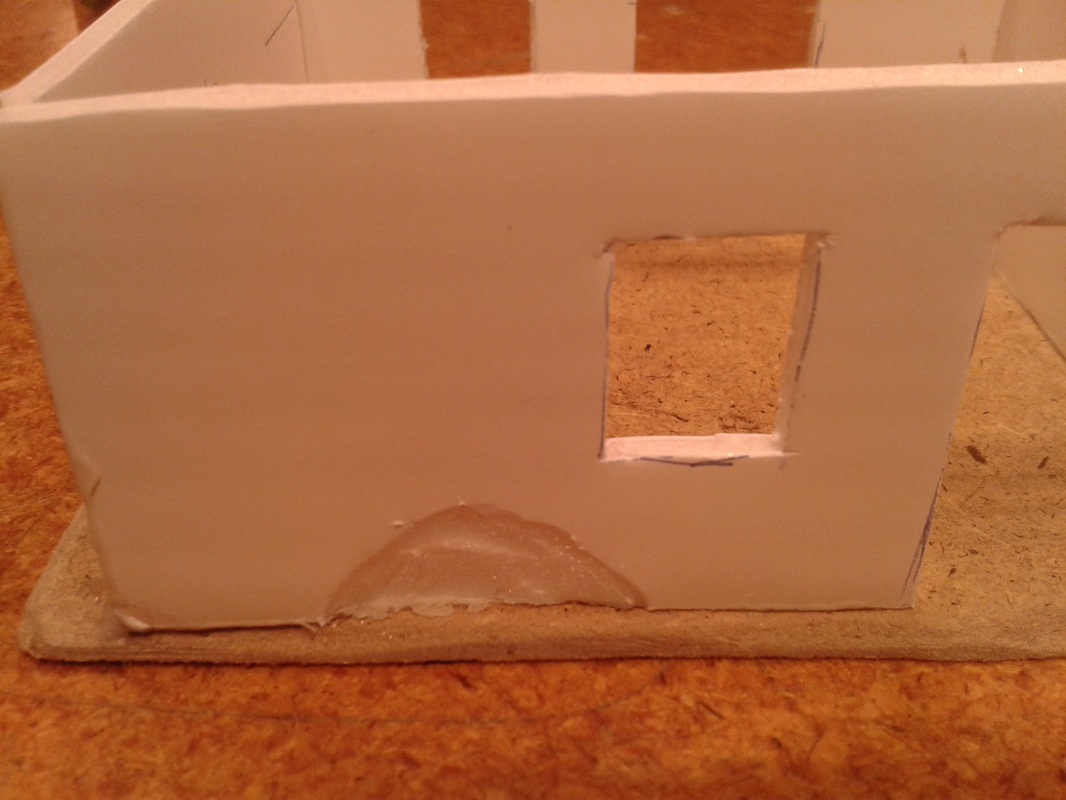
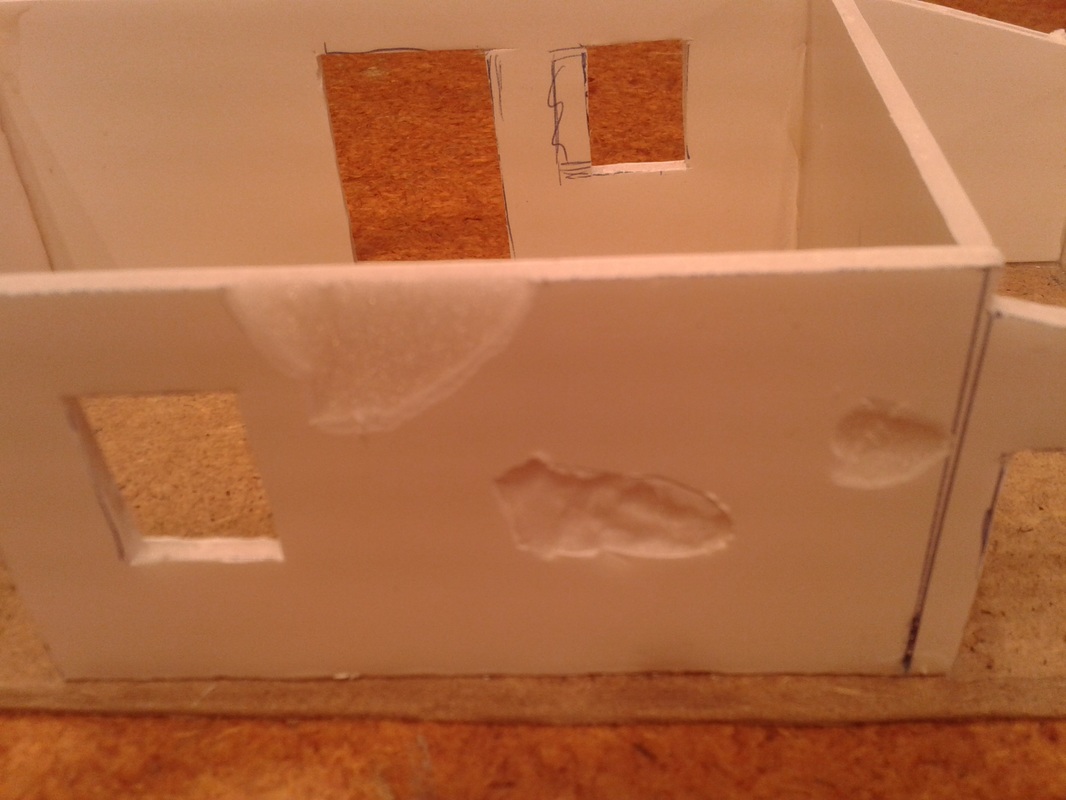
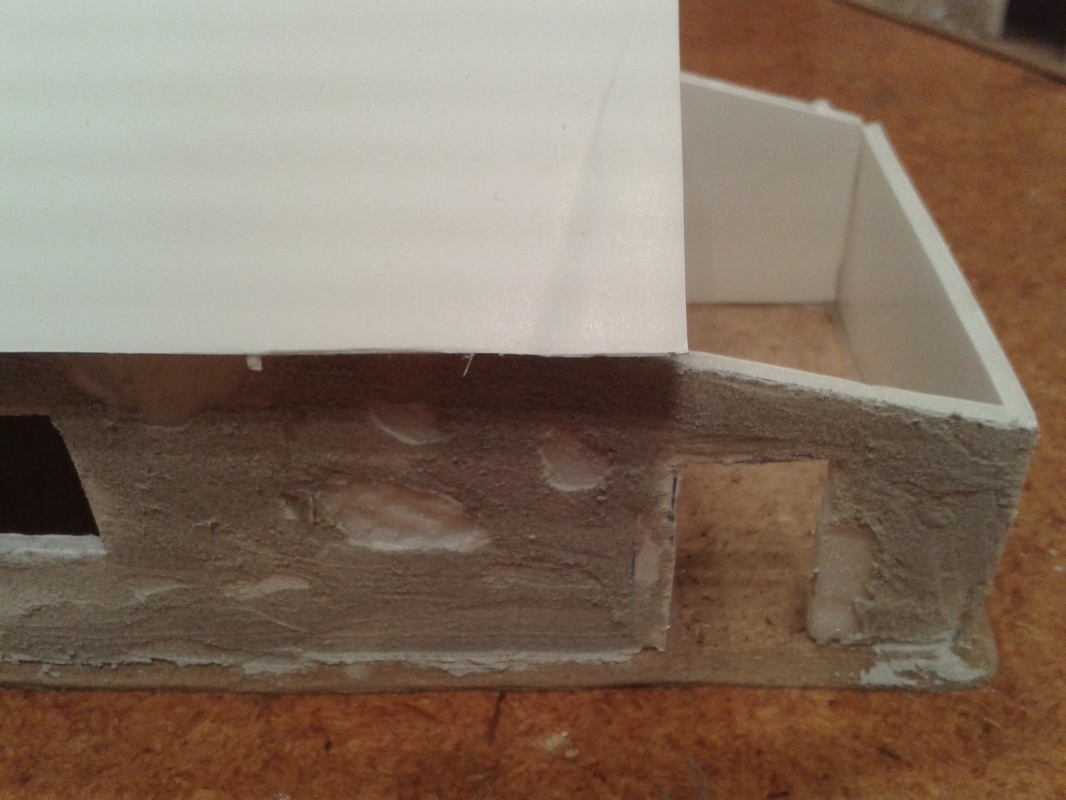
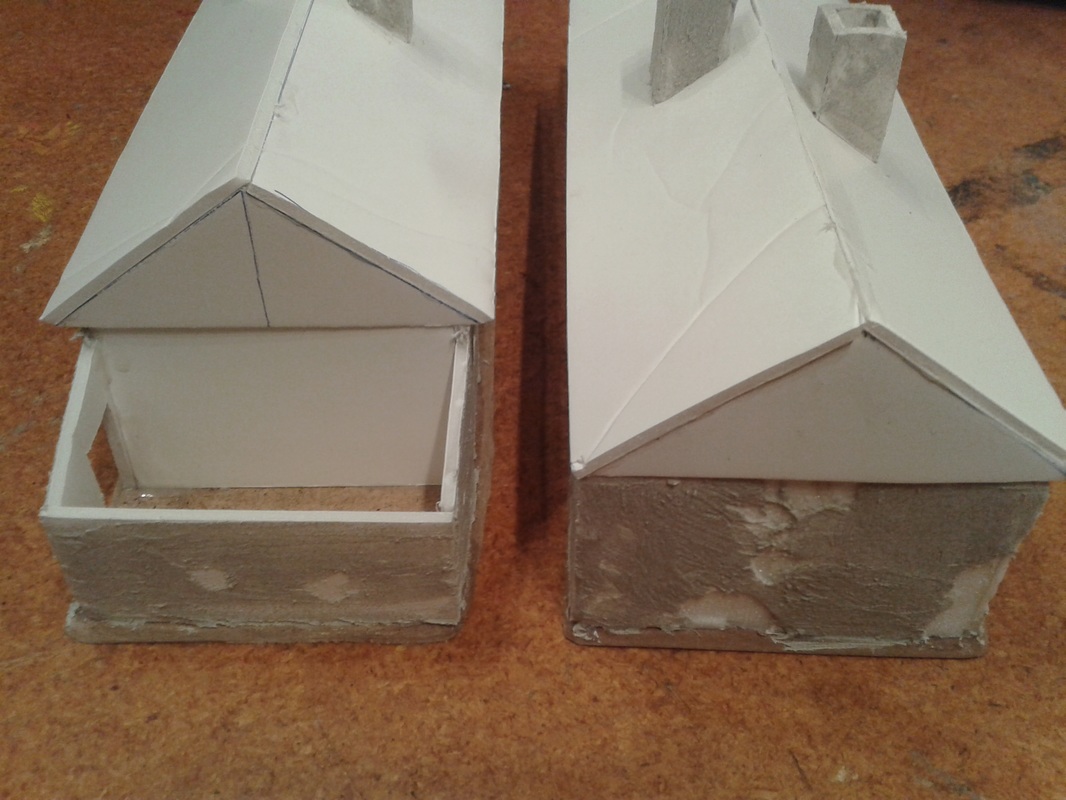
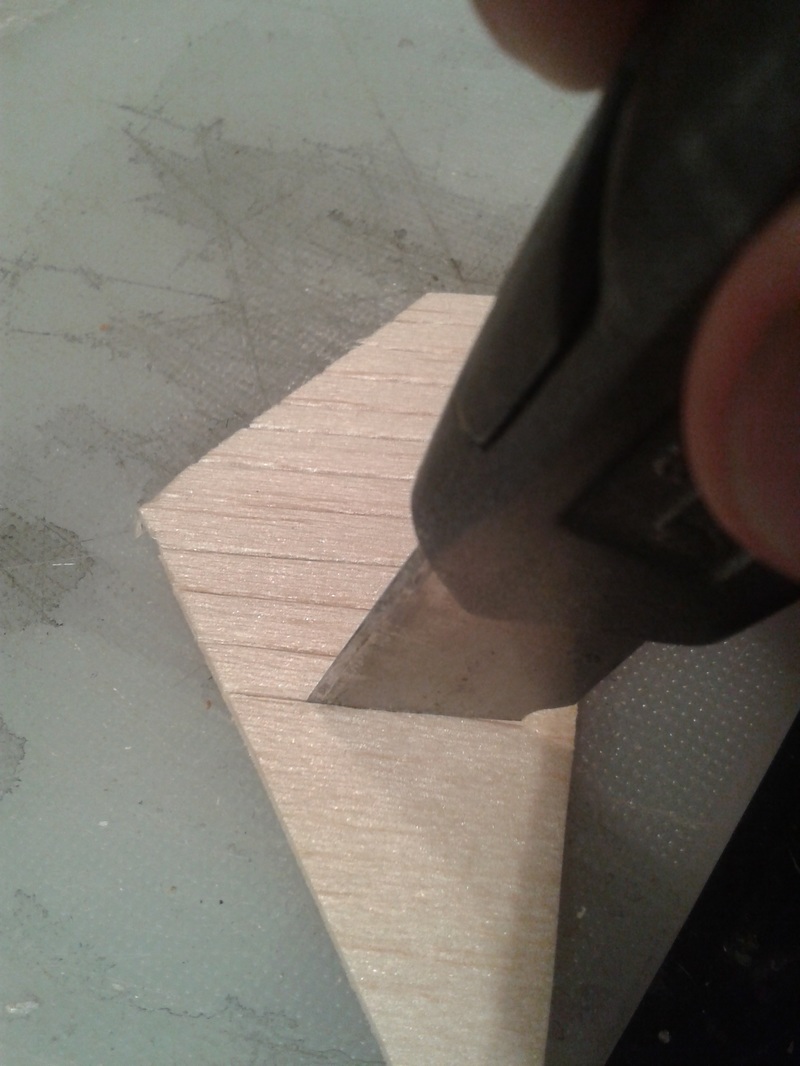
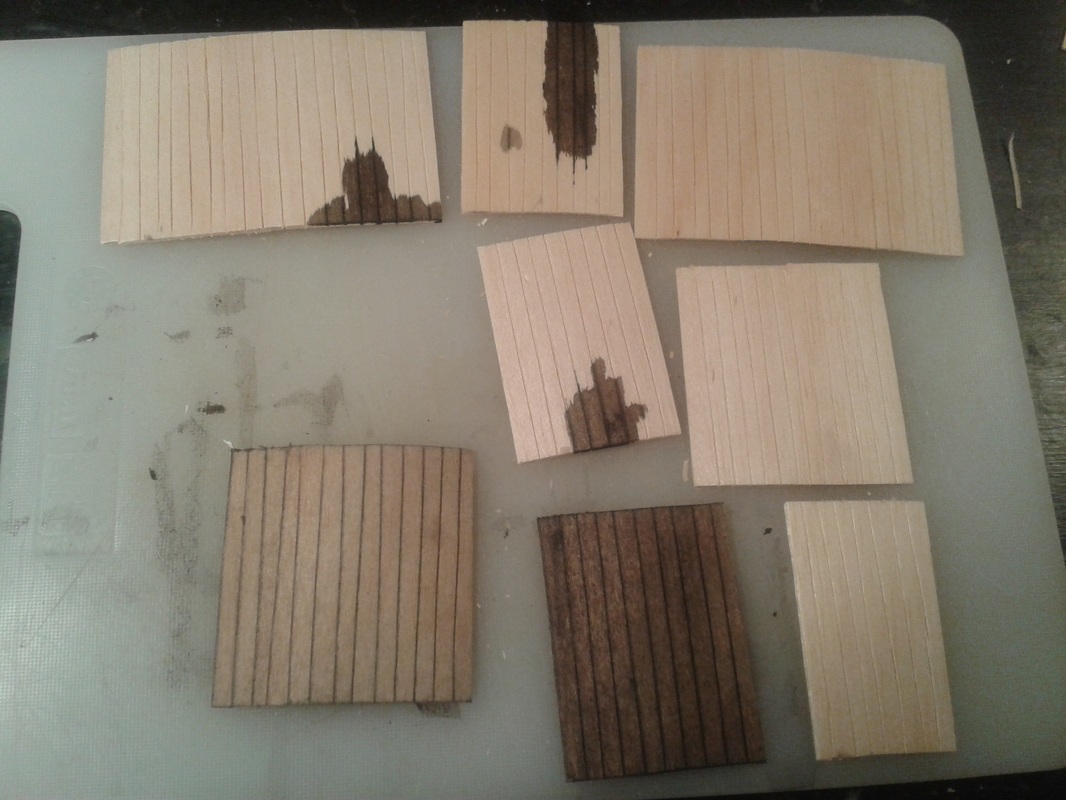
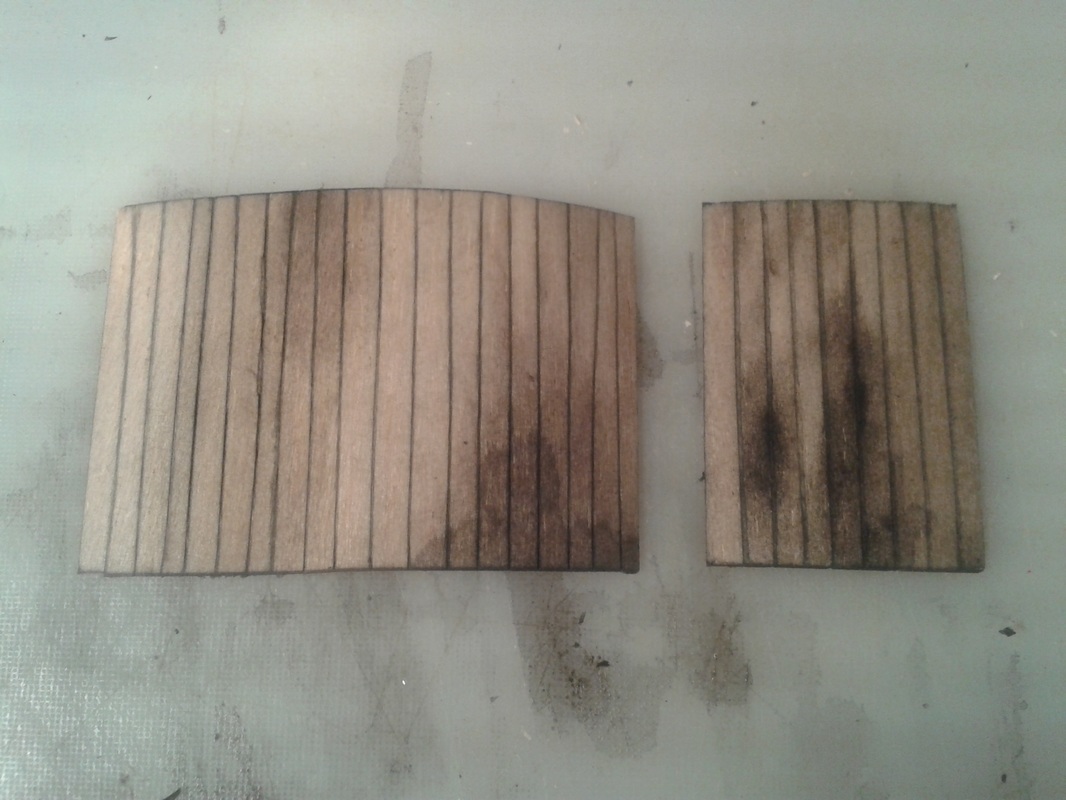
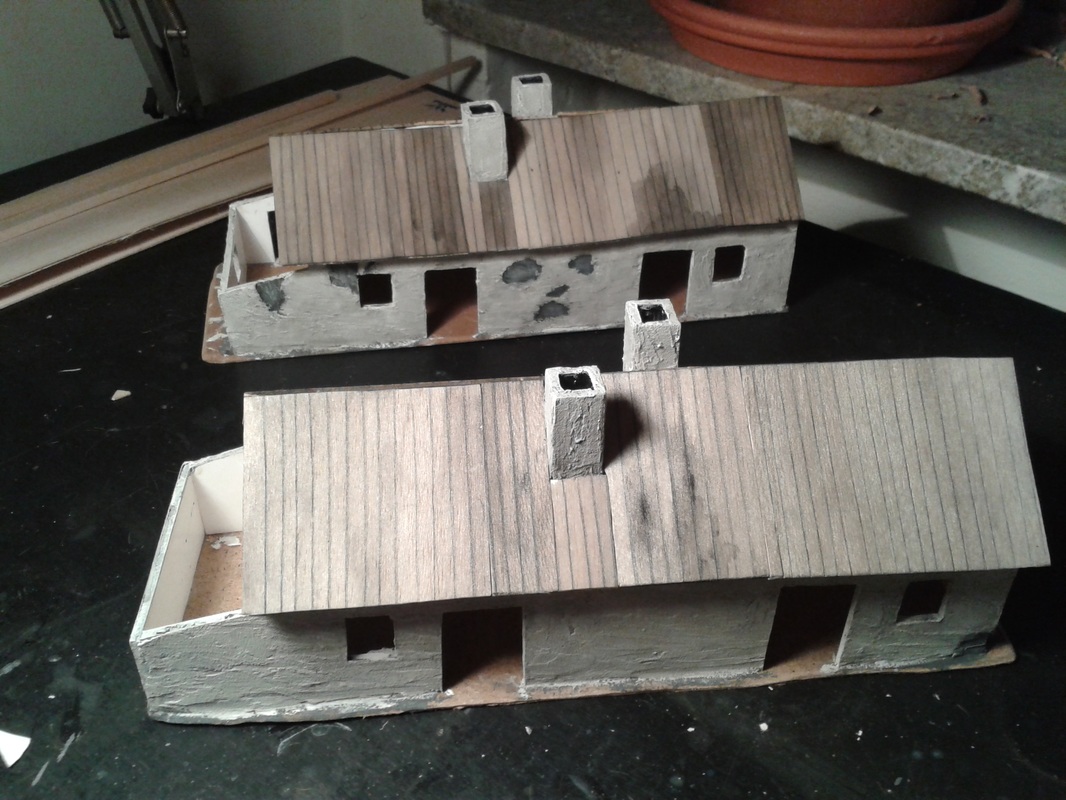
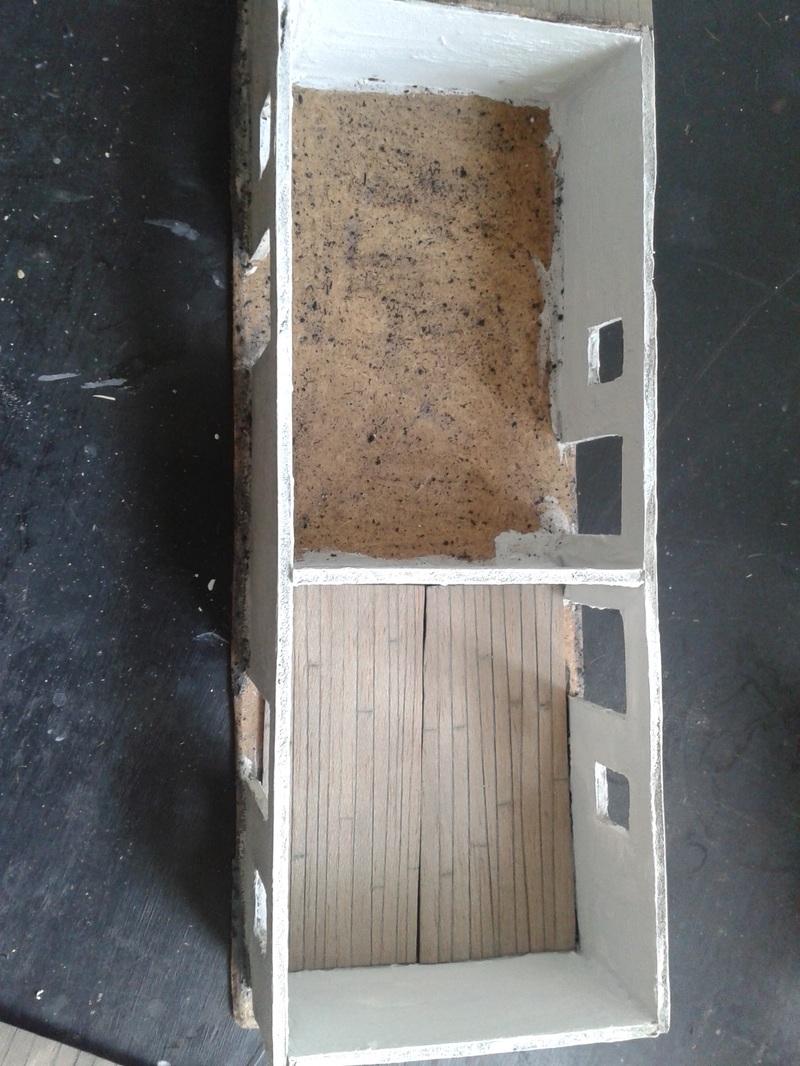
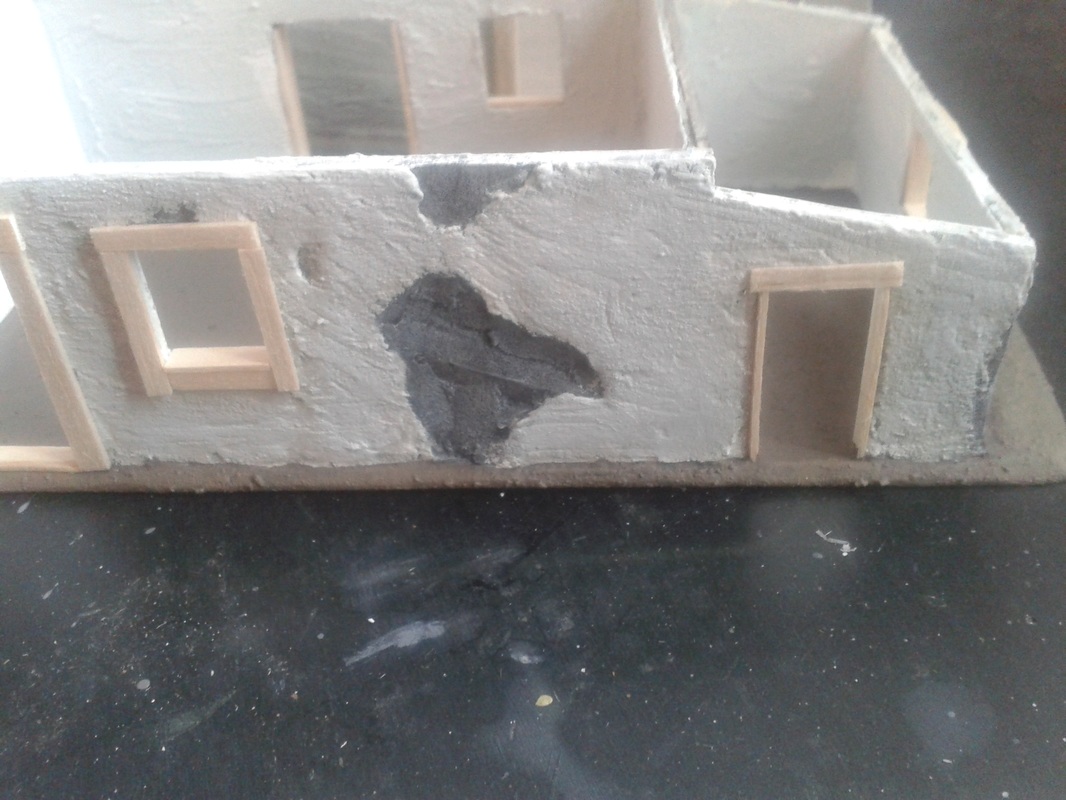
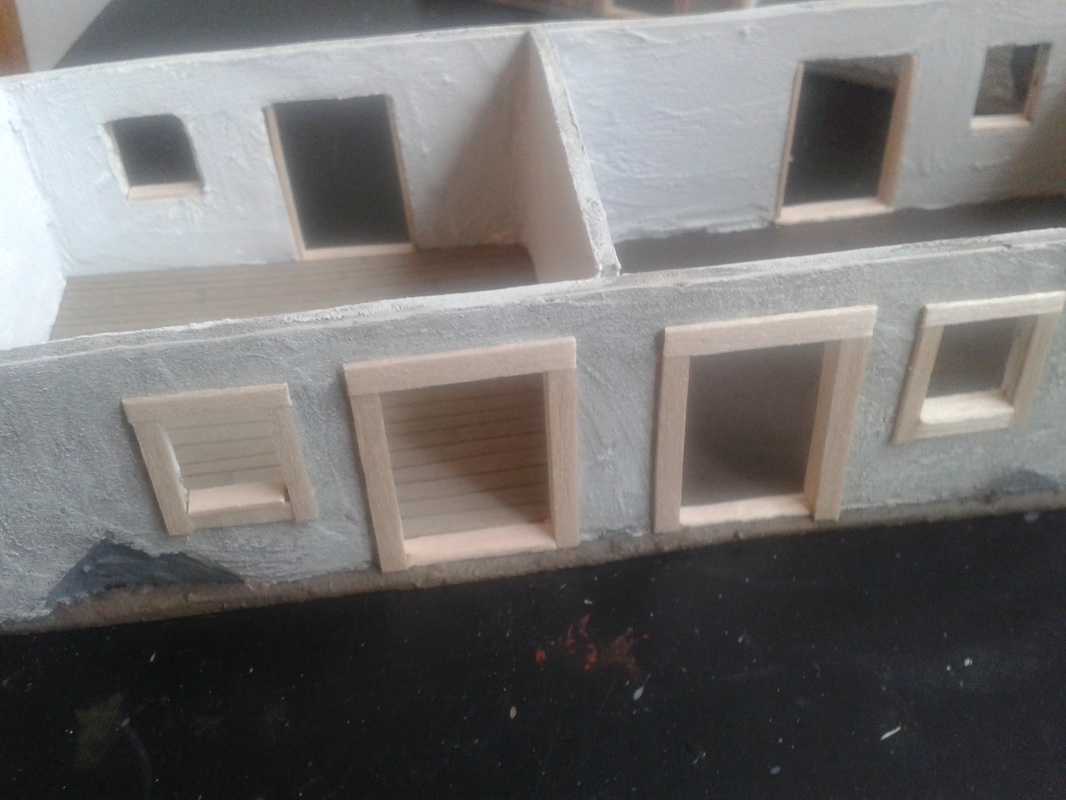
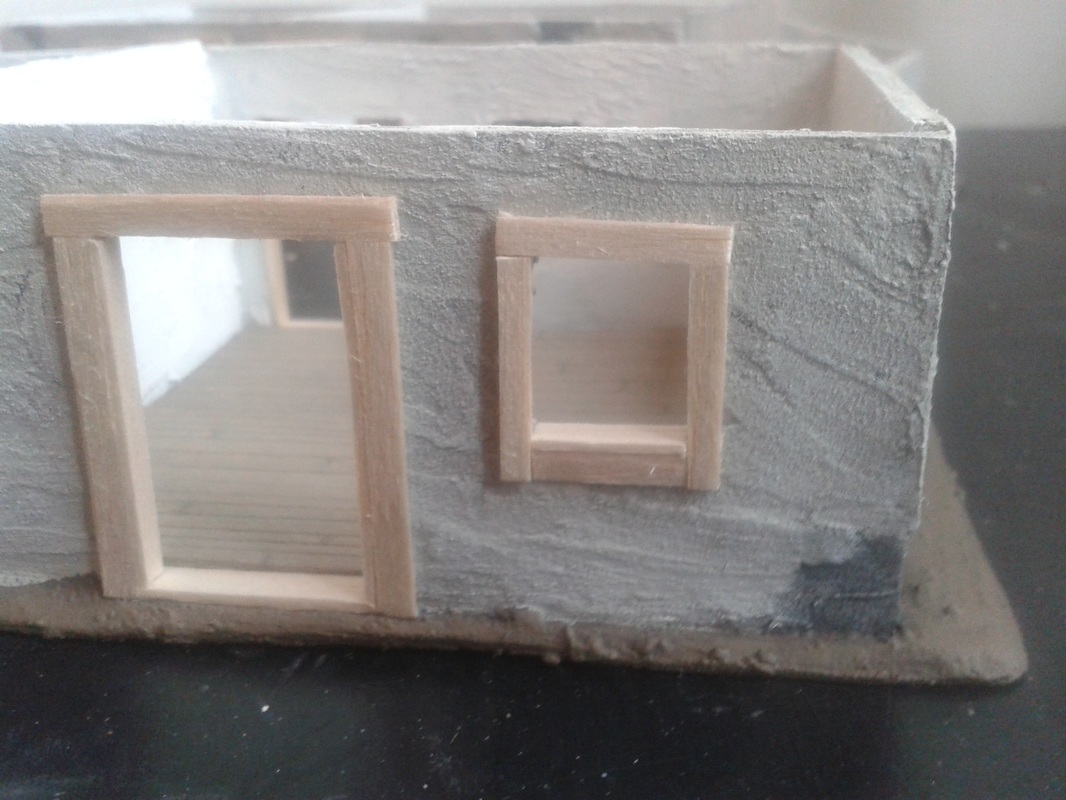
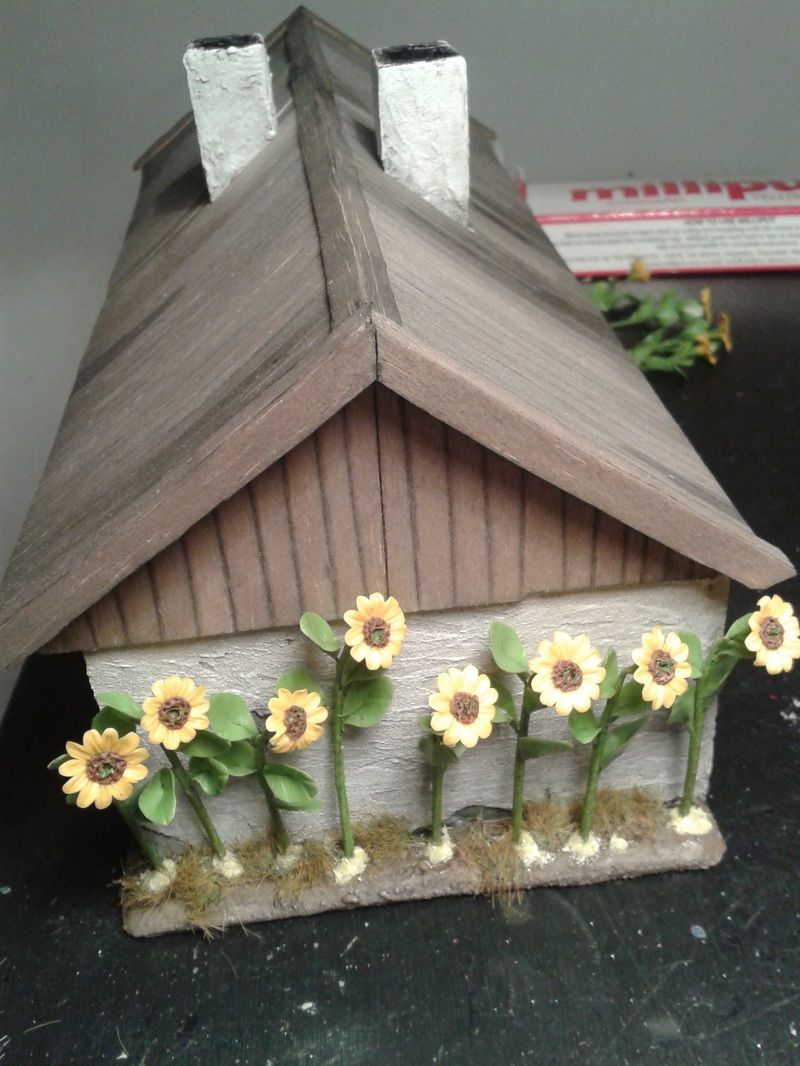
It is time to finish building Stalino so we can get the campaign going! I wanted the plaster on my houses to be in a bad shape. It looked like that on my reference pictures and it will give an nice 3D feeling to the buildings. As I built the walls in foam-board I just took a hobby knife and carved away in places where the plaster had given way! Then I took a medium filler with some water and applied it to the walls with an small flat stick, leaving the places where I made holes in the foam-board without filler. I think it turned out well, The filler gives a good structure and it was quite easy to apply, very easy if you don´t make any holes that you then have to look out for! The roofs will be made out of planks, and I will make them with balsa wood. To give the roof the look of repairs I painted the balsa sheets (1.5 mm) first and them glued them on the basic roof structure in foam board. This also helps you to not get PVA-glue on the balsa before painting as it really disturbes my very water heavy painting style. I treat the balsa with the back-side of a hobby-knife before painting as the "wash-style" paint I use (black hobby-paint, with much water) applies well, and in a couple of second it looks lika a wall/roof/floor! I painted the balsa in two stages and let the first dry before the second turn was done, in this way I achived a nice water/moisture-damaged look. Then I did some more balsa work to finish the roofs with barge-boards and so on. I used 1.5 mm balsa here as well, but it looked a bit rough so I had to trim them thinner with a hobby knife after gluing them to the roof... unnecessary extra work as I could have used 1 or 0.5 mm balsa in the first place! Then it was time for one plank floor. The other got dirt-floors as it was faster, a little too time consuming to get the balsa sheets in the right size for the rooms after the walls are built - if you want plank-floors, which looks really nice, make them before the walls are put in place. I also added door frames and windows. As this campaign is set for Stalino, which is located in Ukraine - we had to get some sun-flowers. We got them from Woodland Scenics who sells railroad modeling stuff. To plant them firmly I made a little ball of milli-put to stick them into and then glue them in. After I washed them with some watered down brown to get away from the plastic finish most model train stuff have. After this I was pleased! Something beautiful in the horrible year of 1941... It is said that many Ukranians survived on sunflower-seeds because that was the only food that the Germans left to them. But then one of my fellow gamers came to visit and with the comment of "Very cute, but don´t they look like gigantic buttercups!?" I knew something had to be done. So I trimmed the petals to a more sun-flower like apperance with a sharp scissors, which was a pain as they were already firmly stuck in the base! Building terrain is fun, but sometimes you need a break from building houses and telegraph poles. There are tons of things to add to your battlefield that suits the WW2 era, so I went and built an anti-air cannon! 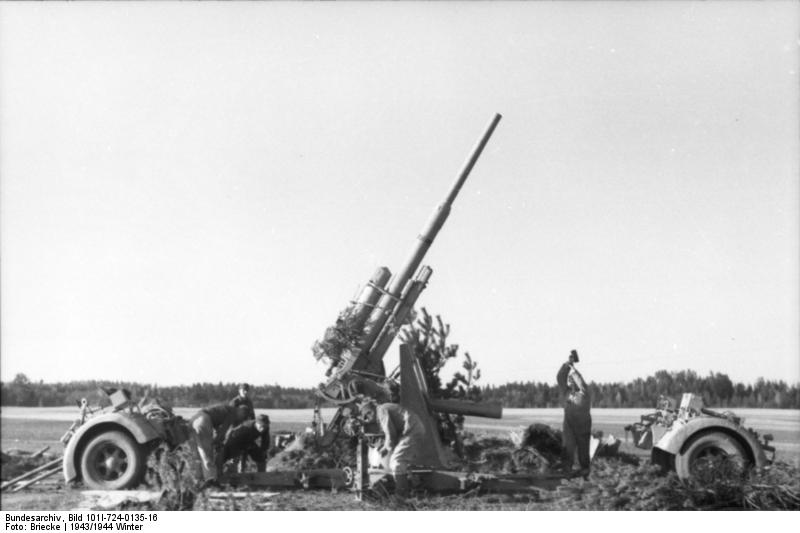 The German 8.8cm Flak gun, or "eighty-eight" as it got known as, was a weapon designed to shoot down planes. However, it quickly became obvious that it was deadly when used against enemy armour or fortifications. Able to deploy in less than three minutes and fire at both ground and air targets, it was both mobile and versatile. Chain of Command is a game that is played on much too short distances for weapons such as large flak guns to be a relevant playing piece. When used against tanks, these guns could penetrate armour two kilometers away!. However, there's nothing stopping you from putting an anti-air emplacement on the board, either just as scenery or as an objective. Can the enemy overrun your guns to pave way for an air attack on the nearby HQ? Or are your opponents going to stop your gun emplacements just as they are about to obliterate an approaching tank column far outside the tabletop? Or will you be able to smugly end the game with "I'm afraid the acht-acht will be quite operational when your friends arrive"? 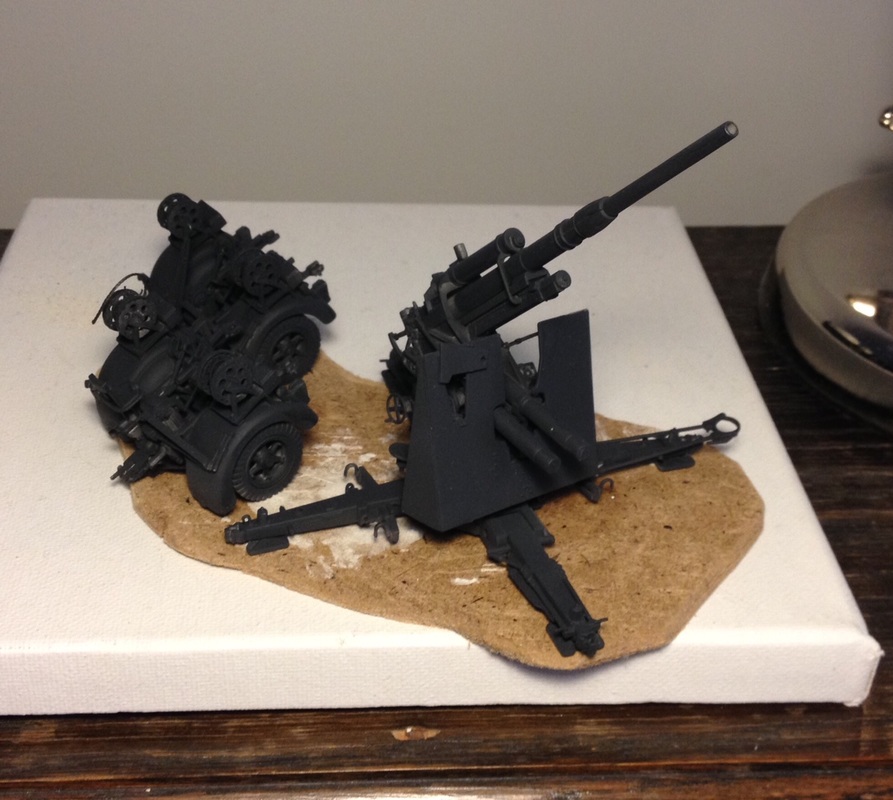 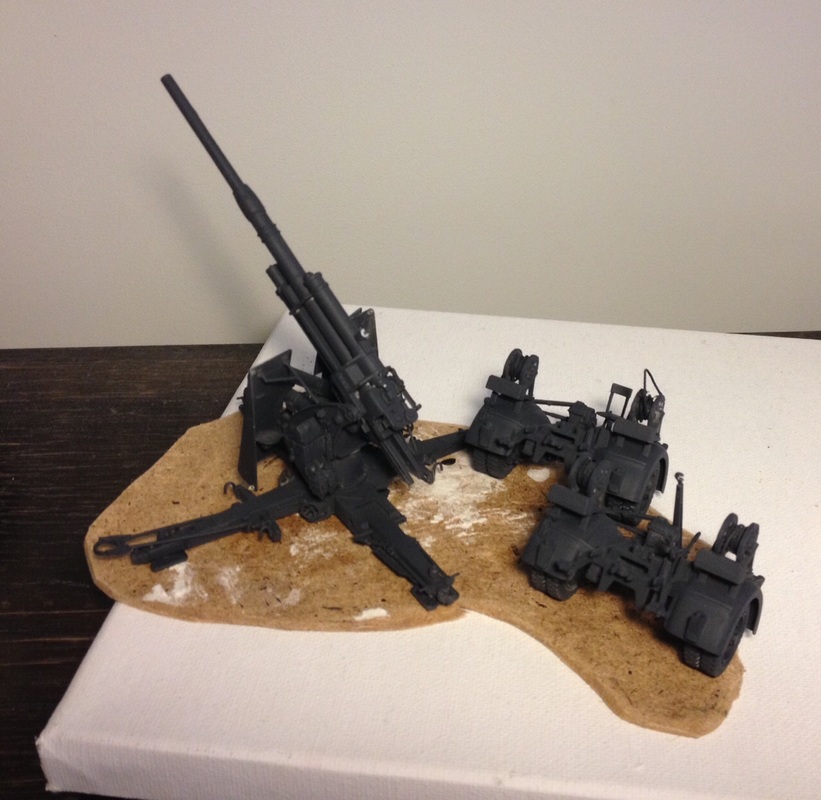 I had bought an oval base for the gun that turned out to be too small. However, luckily enough, I found an old carved out MDF base that was supposed to become an island for Trafalgar many years ago. It was just large enought to fit the gun and the two parts of the carriage. 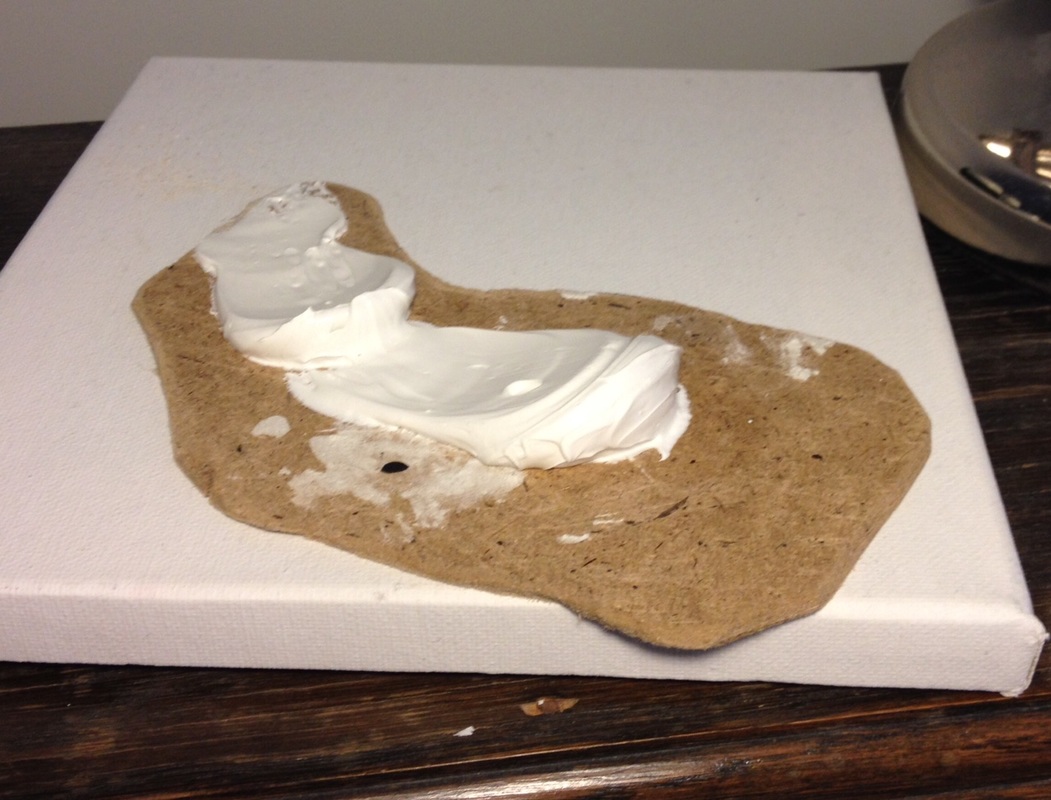 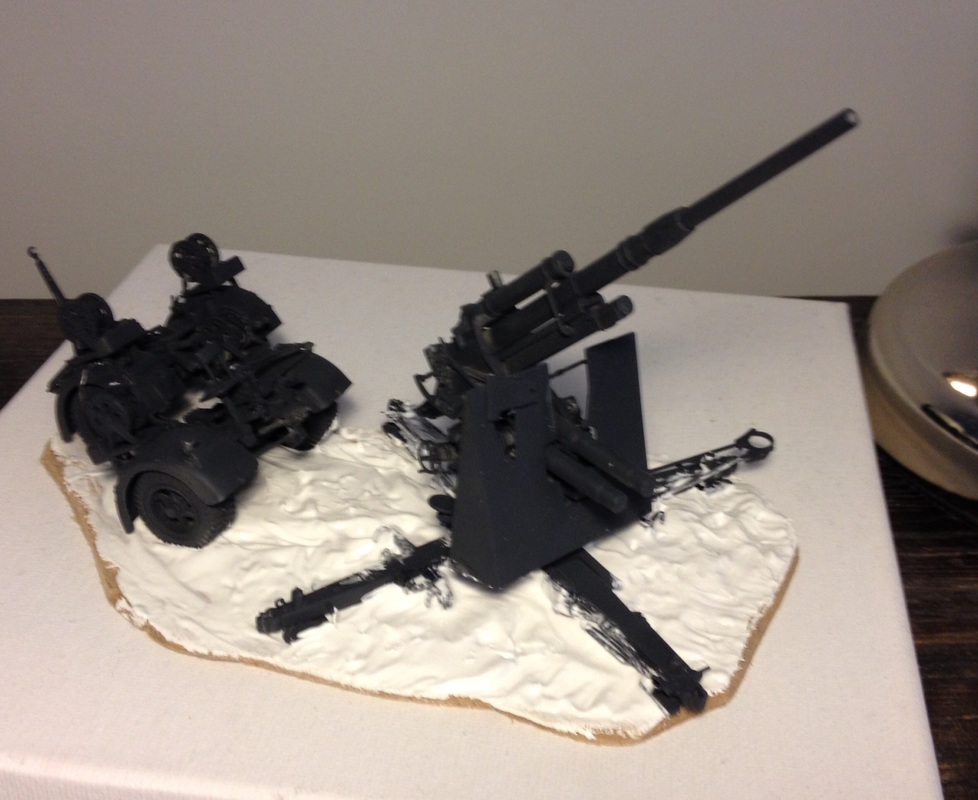 I applied a blob of spacle to the MDF base, and smeared it out. The gun and carriage was firmly smooshed onto the thick paste, and I used an old brush to make wheel marks from the carriage and to make sure that the gun was not completely covered in spackle. In the end there was still a bit of spackle on parts of the gun, but I blame the thick, Russian mud.
Anyway, I hope that it will be more fun for my Jerrys to take cover behind this instead of another stone wall. If you ever feel that you want to add a truck or artillery or something that doesn't suit your ruleset, you can always try to field it as objectives or terrain instead. Cheers, Jonas I've been thinking about small things to add to the terrain collection for Stalino, and what we're missing. And look at the top picture of this blog: what railroad is not accompanied by a poles holding up telegraph or telephone wires? In street view pictures of Stalino, there's also all kinds of telephone and power wires. 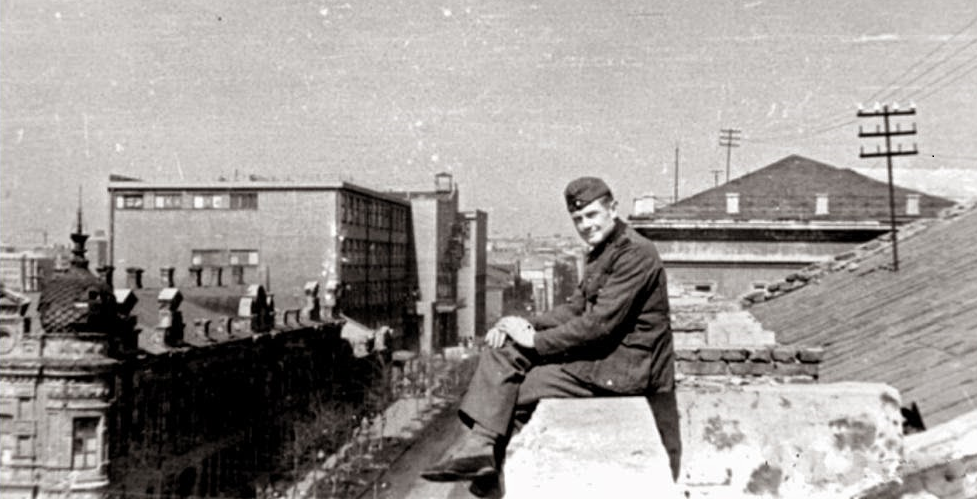 A German soldier on a rooftop in Stalino. There are several different kits both for complete poles and for just the insulators that holds the wires in place. I decided to try to make mine from scratch, as I had all the required materials: bamboo BBQ skewers, wire, green stuff (kneadatite), balsa wood and metal washers.    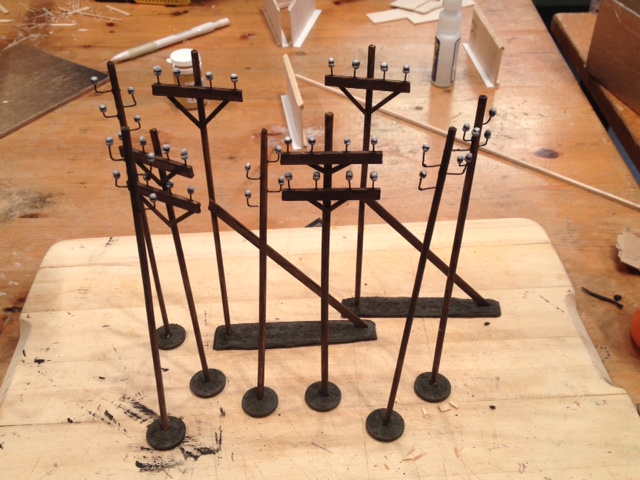 I made three different types of poles as prototypes. According to reference photos these would vary a lot, even along the same power line. I drilled holes with a pin vice where I wanted to put the insulators, either directly on the poles (as in the left-most version) or along a horisontal balsa stick (as in the picture second from the left). Some poles got a diagonal support board. These would actually often be attached almost to the top of the pole, so in future versions I'll change this design slightly. Some poles got two horisontal planks, some got one.
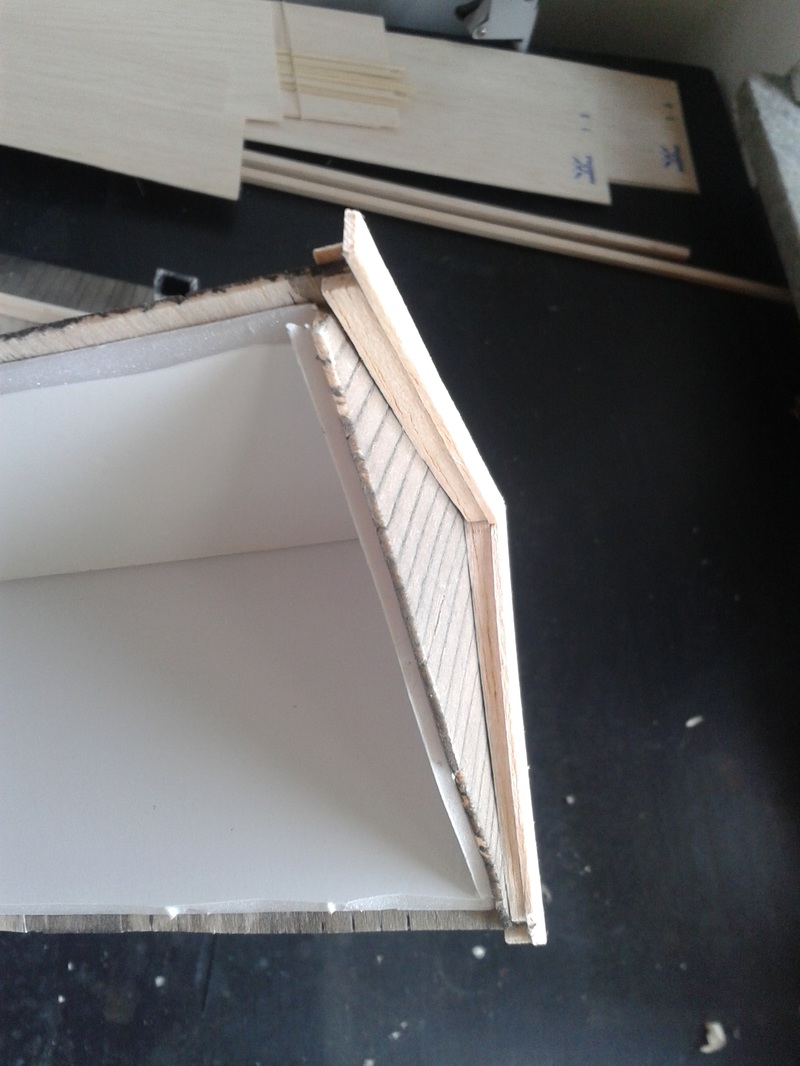
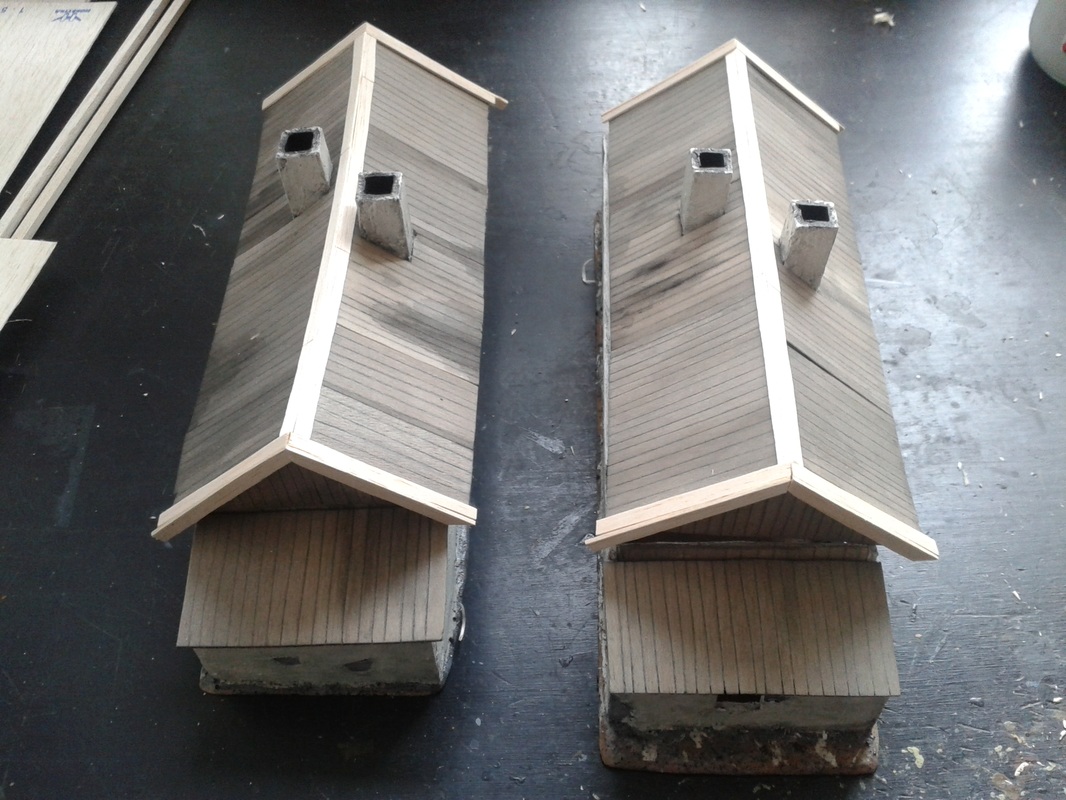
I cut off short bits of steel wire and glued them in the drilled holes. I bent the wire 90 degrees with a plier if it was attached horisontally directly into the pole. When cured, I made small balls of green stuff that I scored in the middle with a knife, and then placed on the wire to make insulators. The poles were attached to metal washers with a liberal amount of green stuff. The poles that were going to get diagonal support boards were put on strips of MDF board, which I drilled holes into to keep the pole in place. Finally I glued some sand on the bases. The wood parts were painted Oak Brown (Vallejo Game Colour), and the insulators were painted Stonewall Grey (VGC) and then highlighted white. The bases were painted like I paint my German bases, with a mix of field grey and dark brown. That's it. A terrain piece that is very simple and cheap to build, and quick to paint. I believe that it will add realism to our roads and give a more urban feeling suitable for the fighting inside Stalino. As a final bonus they can also be used to mark zones if you have a scenario that requires those. It's a bit more interesting to have to infiltrate your troops beyond those four telegraph wires, than to get them aross those four yellow dice, right? Hey, where did those dice go? Did someone just take the infiltration zone markers to roll for armour saves again? Cheers, -Jonas Midsummer weekend meant that I had Friday off from work, and the rainy weather kept me safely away from frog dances and other traditional Swedish celebrations. Instead, I took the time to finish the water tower. 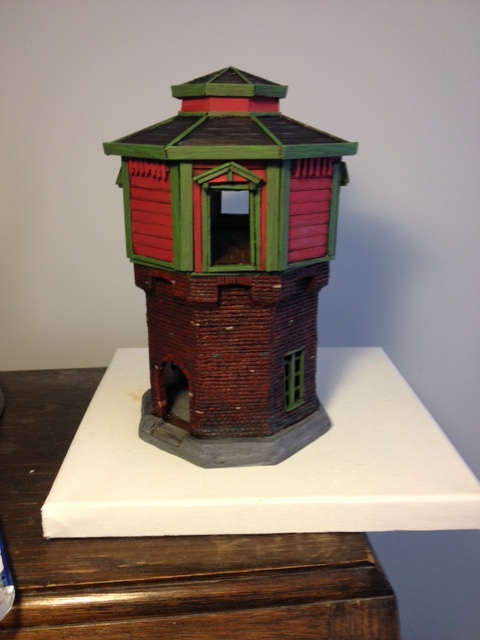  I painted the brickwork with Terracotta (Vallejo Game Colour), and then washed it black. I went back and touched up the terracotta, and then added a few pinkish and dark grey bricks, jus tto add some variety. Finally I took some light grey and sand coloured pigments, and brushed them over the lower parts that would be most likely to get dusted by vehicles and people passing on the roads. The green, red and black wood was inspired by a picture of an surviving water tower, and that's also where I got the small roofs over the windows and the latticework. This is an advantage of having reference photos, as I doubt I would have come up with these things on my own. I also find that these small details add a feeling of realism when you see the finished job. 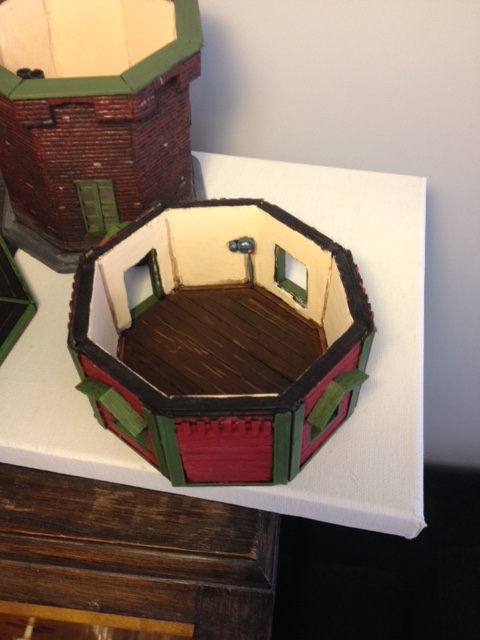 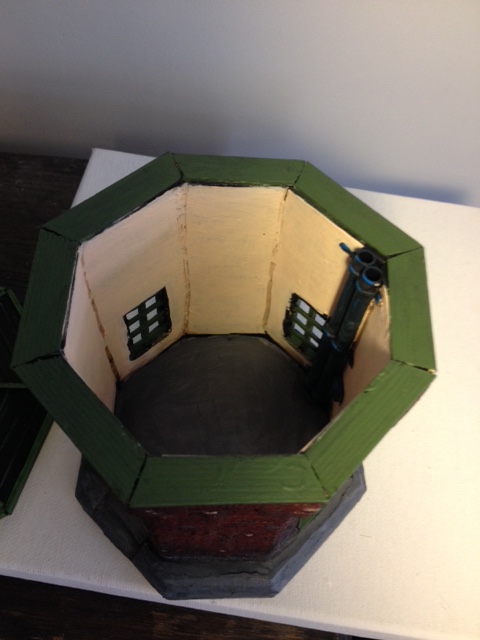 The insides were more improvised, and I had no pictures to go from. The main idea was to just have some empty areas to put miniatures in. I added a few extra stuffs to the walls but not so much that it got in the way for playing. Then I gave all the corners a liberal coat of brown wash. So here is the newest addition to the growing collection of Stalino terrain. Next up I'll see if I can make some telegraph poles to go with the train tracks, and we'll see if Shirty gets started on the main train station. ;) -Jonas 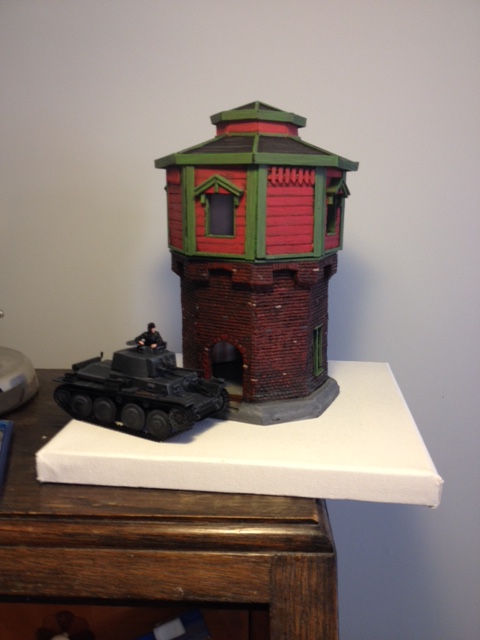 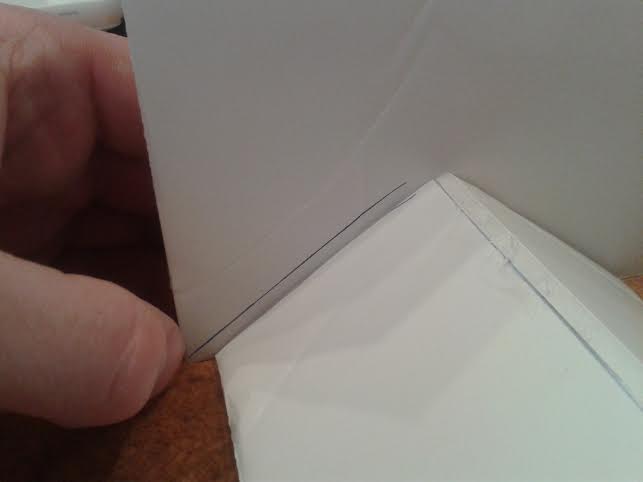 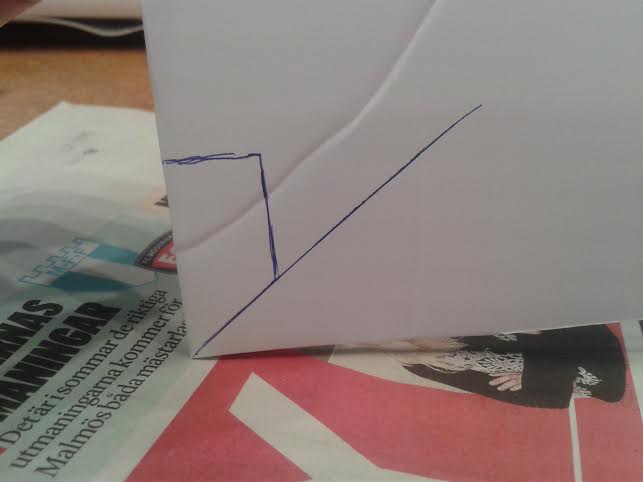 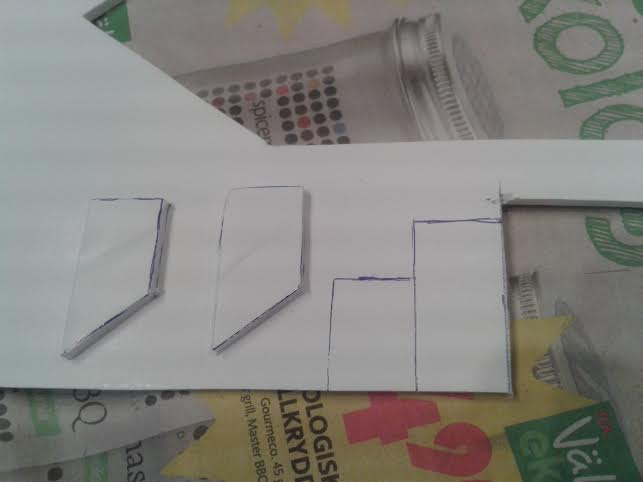 Then I cut the insides of each part of the chimney so that they will fit accordingly. You can probably skip this part and just adjust the size of the "front" and " back" to get it right. I came up with this when I used textured foamboard for chimneys for another project, and then the corners would end up ugly if you didn't cut them like this! Yes, I have some problems doing things in new ways. Then I glue them together with PVA glue. Other glues may be better, but one good thing with the PVA is that you can fix them along the way (repositioning the parts). I try to make them in turns as they need to dry a bit before you put the next part in place. It's perfect to do several at once when you are up to grabs with these little bastards! To get your houses to look real it is, in my opinion, very important that they have chimneys. As these are quite fiddly to build, many just skip them. I have promised myself to not do this again. Here is how I did it for my Stalino residential buildings. First, align foamboard to your roof to get the right angle. Then pencil out the "sides" of the chimney, plus front and back. I made the first one a little to big, and then adjusted for that in my second pair of chimneys. As there are two apartments in each house I need four in total. 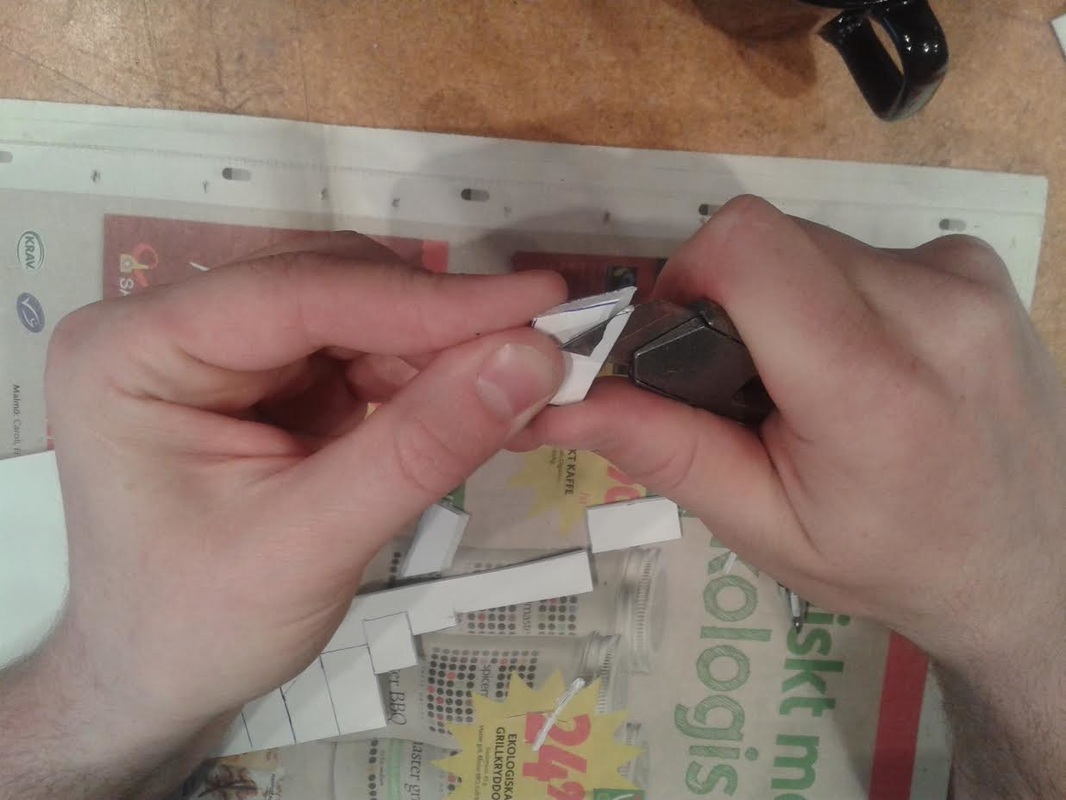 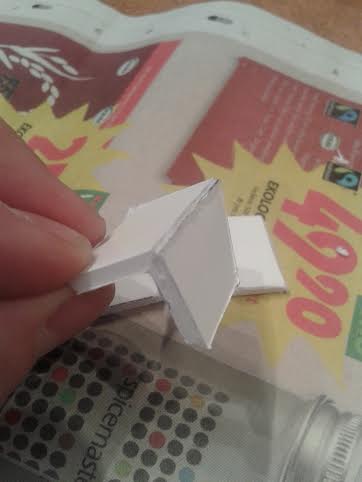 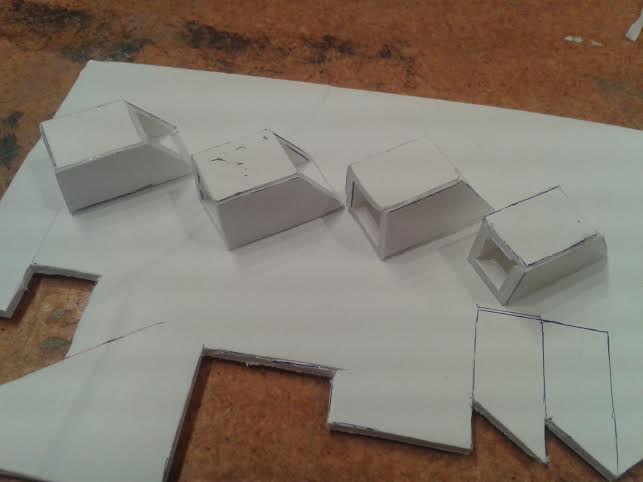 Foamboard is such a simple material to work with so I trimmed the chimneys a bit at the corners, then I glued them on the roofs! Here is the result: 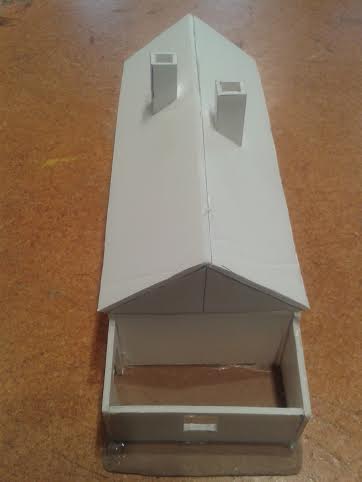 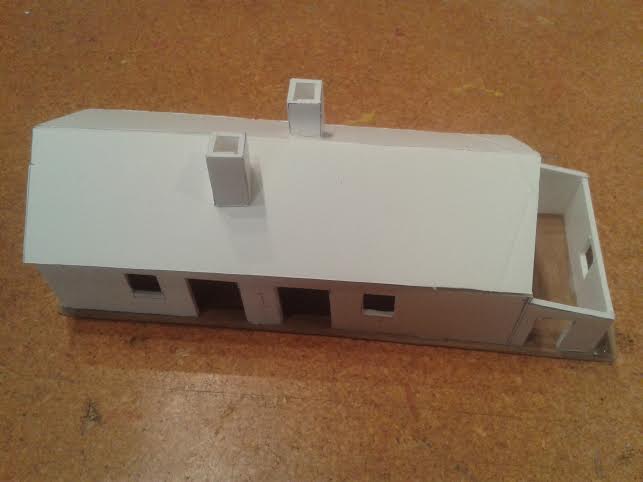 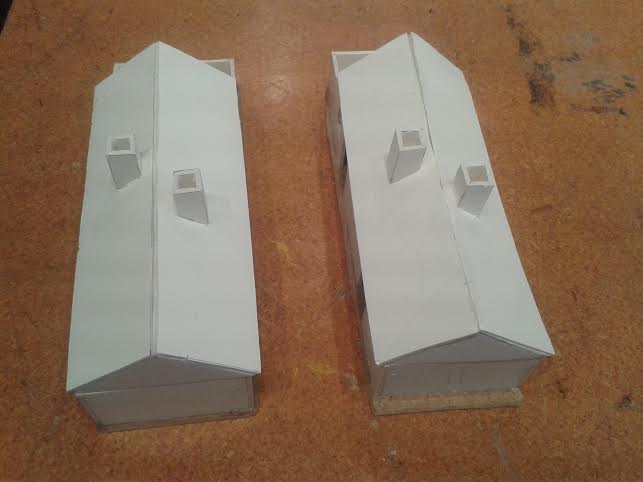 Cheers! /Shirty
We decided early on to make the Stalino railroad station a center of the campaign. We had some railroad cars and tracks from earlier on, and an almost built (but not painted) station already. Focusing on the railyards meant that we could look for interesting features to add to our collection, and still be sure that anything extra we built would be compatible with the other terrain. One thing that we wanted to add to the railyard was a water tower. I volunteered to build the tower gathered up a bunch of reference photos with the help of the clubmates. When I make terrain I like to have reference photos, as I find that it's simpler to try to recreate buildings than to invent something from scratch that's still supposed to look realistic. I can improvise the general shape of the building, but the detail work usually turns out much better with actual references. For this project we use a combination of old WW2 photos (to see which kinds of buildings existed back then) and modern photos of surviving buildings or buildings built in a similar style. When paired up, you can learn a lot about both design and colours. 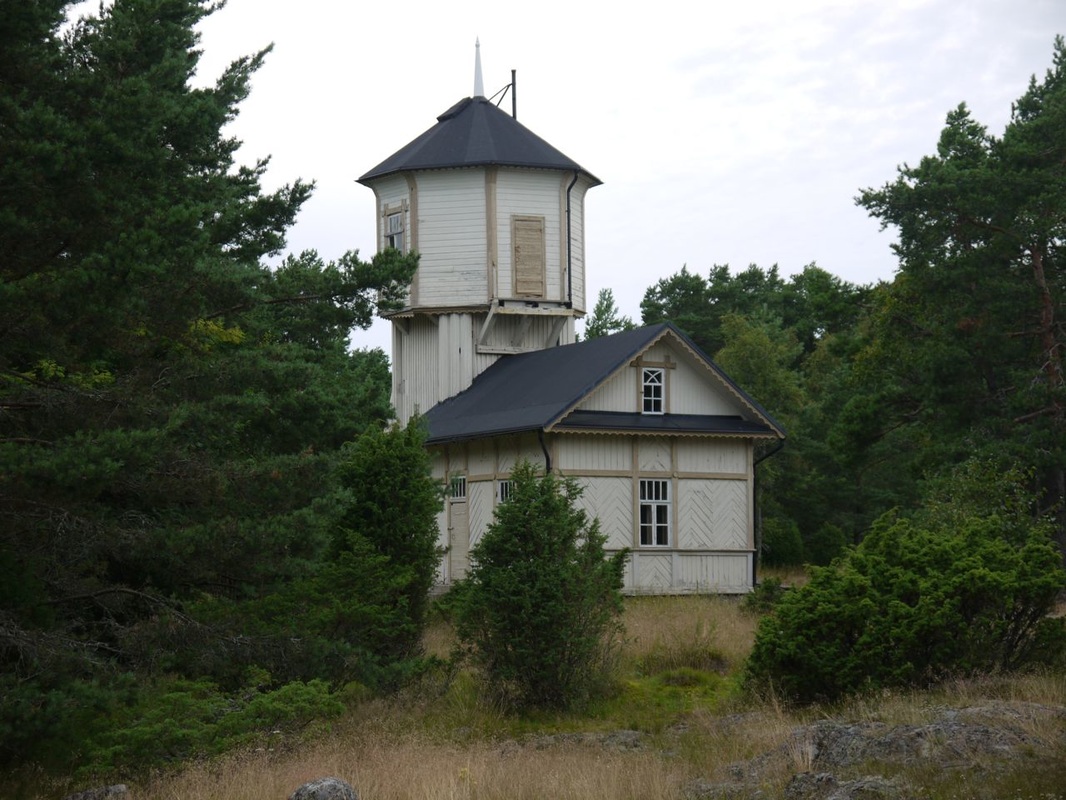 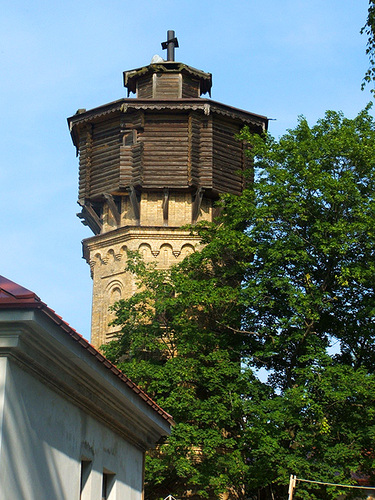 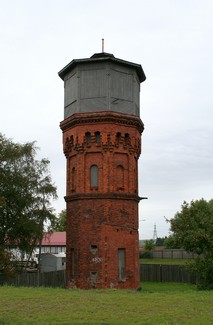 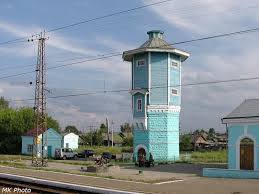 I wanted something historically correct yet a bit unusual, both to learn more building techniques and to make a terrain feature that sticks out on the table. This octagonal type of water towers existed prior to WW2, and are still seen in many places. The lower half is usually made out of bricks, and the upper half out of wood. This would be a great opportunity to try to make brick texture for the first time, and the octagonal shape is quite unusual. I guess we have a winner! 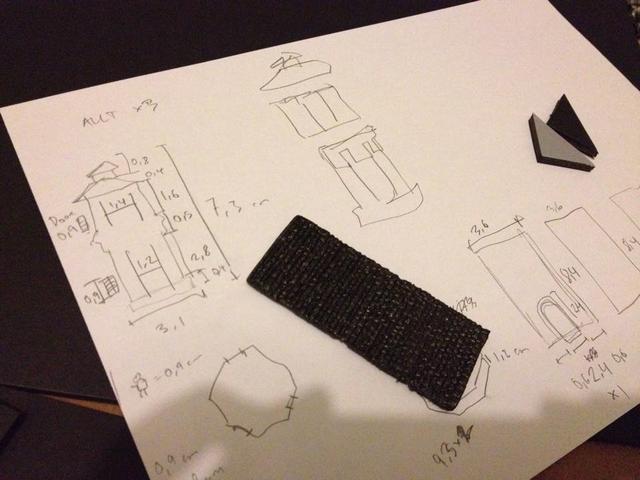 My first step is to study the reference pictures, and make some assumptions about measurements. I often end up measuring with a ruler on the screen, as silly as it sounds. Then I try to calculate what would be a reasonable size for 28mm scale. In this case, as you can see in the photo, I ended up measuring the actual size in centimeters on a photo of a tower, and realized after some calculations that I could multiply it with 3 to get how big I should make it for 28mm scale. The best point of reference in these cases are usually the doors, as they are kind of human-sized. Often you can make the buildings a bit smaller than their full scale counterpart, so that they do not take up too much room. It's more important to keep the proper proportions, so that it looks right. Also pictured is the first attempt at making brick texture out of black, pliable foamboard. It turned out decently, so I set out to cut out all the pieces I needed and glue together the tower. 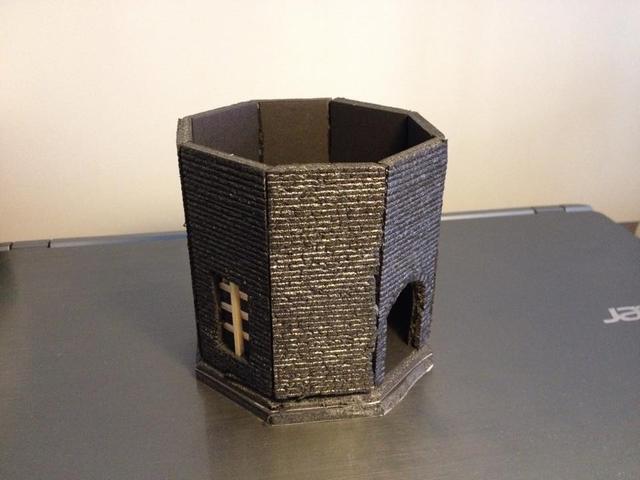 The octagon is assembled. Windows will be built out of balsa and cedar wood sticks. The base is also foamboard, and turned out to be too small, so I replaced it. Never be afraid to reconsider your measurements and re-do a step or two if it turns out to look bad in real life. I must have measured the lenghts of the octagonal sides wrong a dozen times. 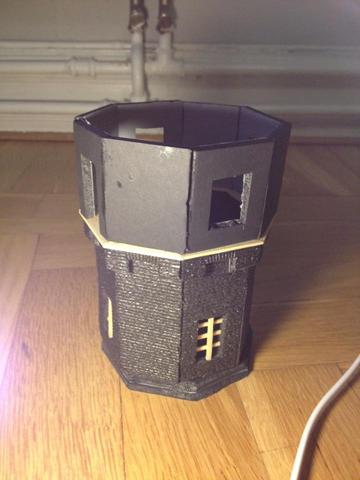 Second floor in assembly. It will be covered in balsa wood, so no reason to make brickwork texture on those sides. Still a lot of detail work left, and it still has the old, small, base. I decided to take a lot of liberties with the inside of the building, so it will not look like an actual water tower. To make sure that it is still usable as a terrain piece, I decided to leave the second floor open, so that you can place at least a sniper, a machine gun team or such in it. In reality there would probably be enough room for a small combat team even with a big water cistern in it, but with 25mm bases it would be impossible. Sometimes form wins and sometimes function, but usually it's about finding a good compromise.  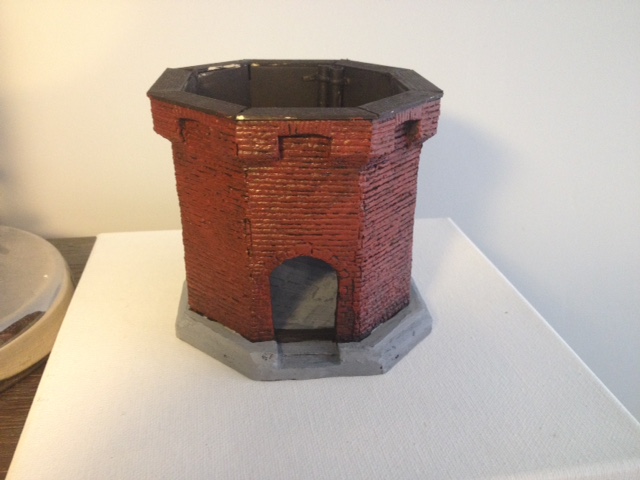 First layer of paint on the brickwork, with Vallejo's Terracotta paint. I'm going to experiment a bit with some different paints and washes, and see how it turns out. Notice the new and improved base!
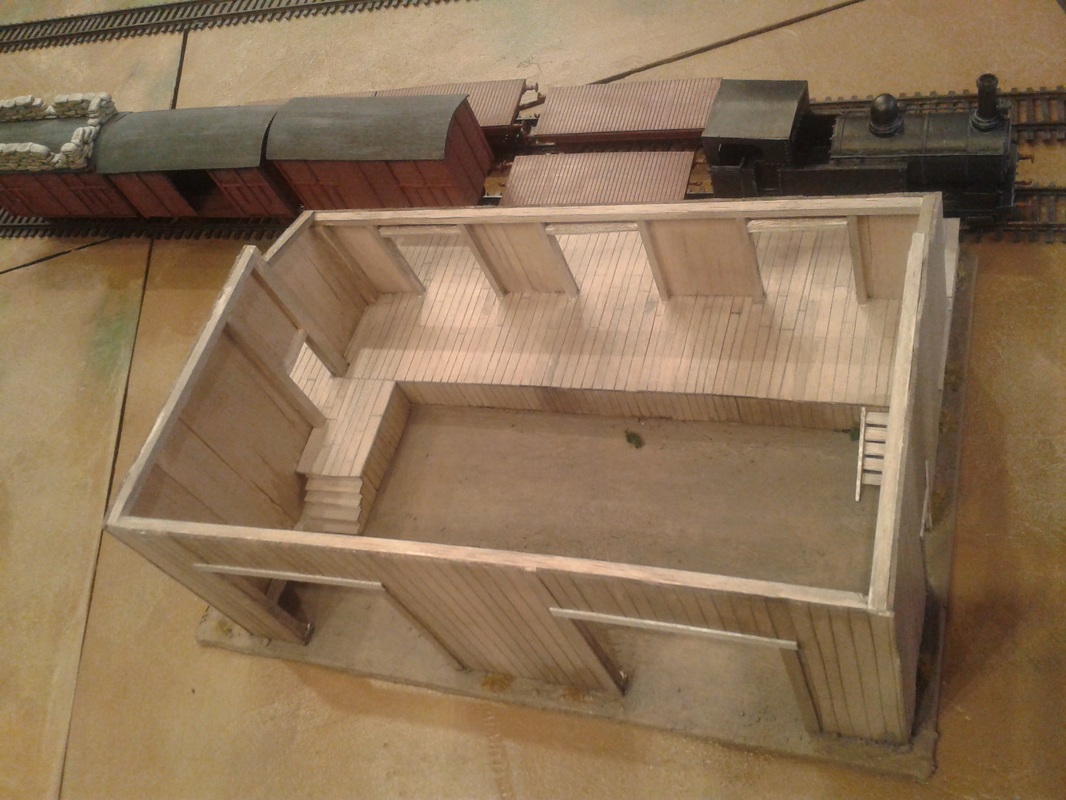
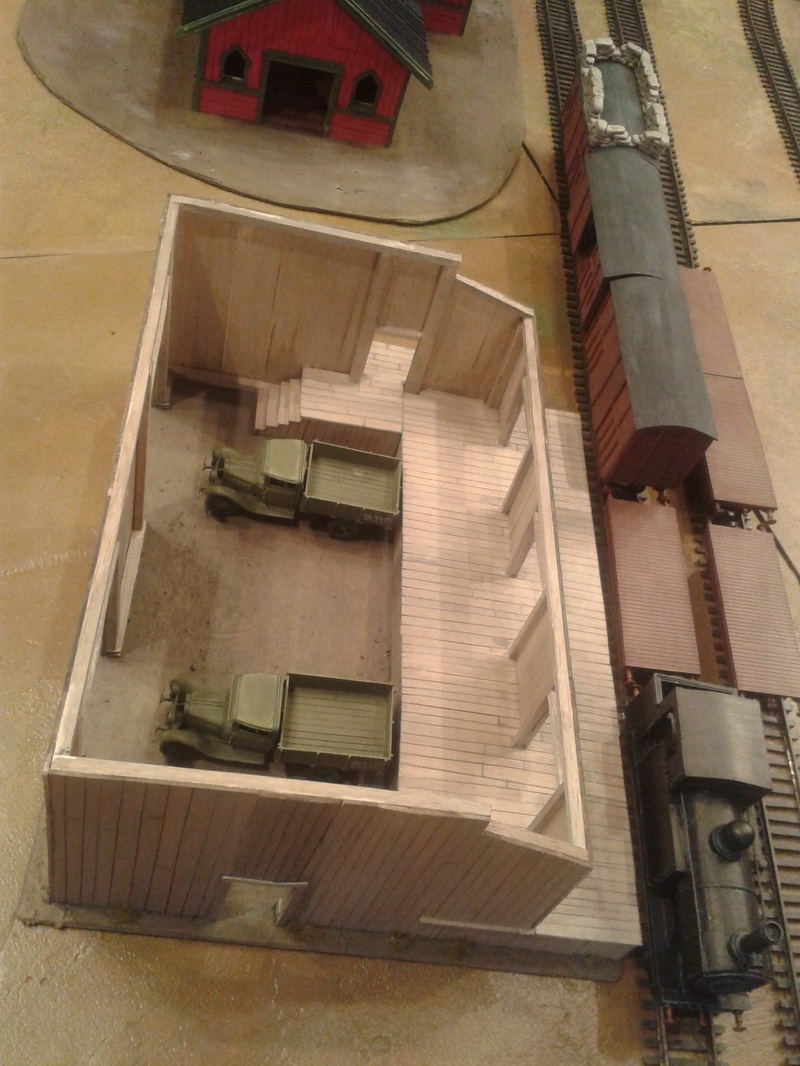
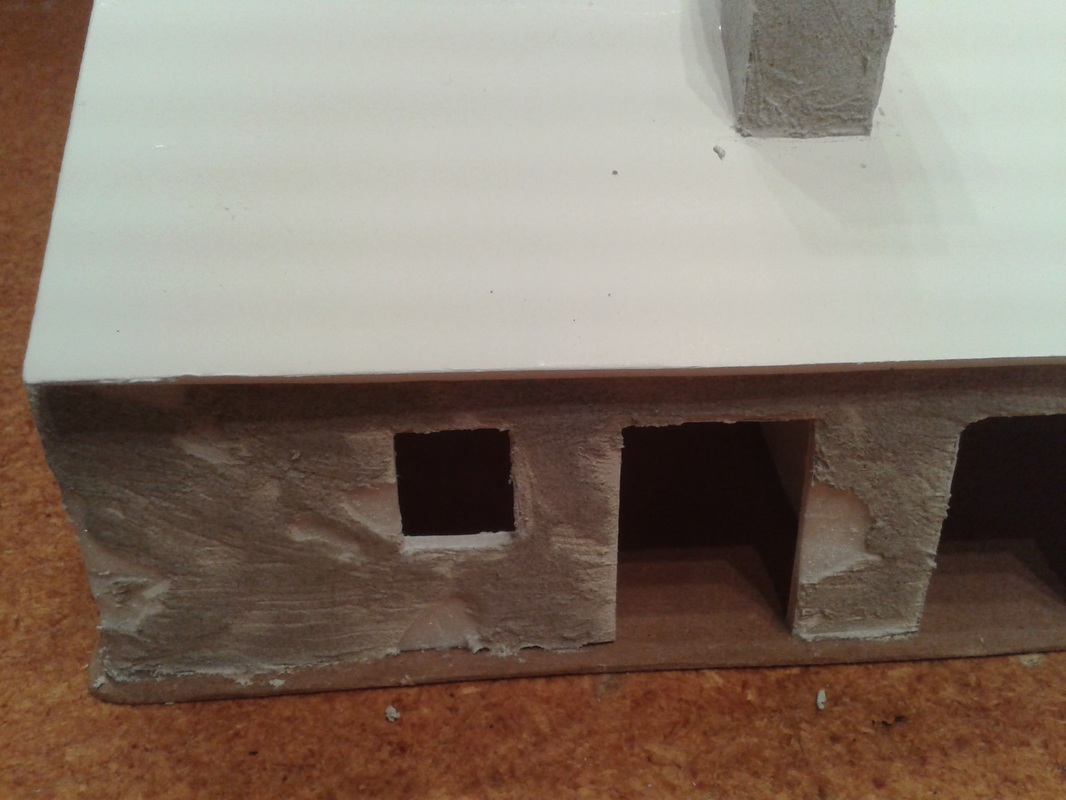
-Jonas After we took the decision to make quite a few new buildings for our Stalino campaign (it's going to be city fighting after all!), I got feeling and started to make two houses. They are inspired on the type of building you can se in the middle block of this photo, closest to the viewer, probably a several family dwelling. The photo should be from Stalino 1941: 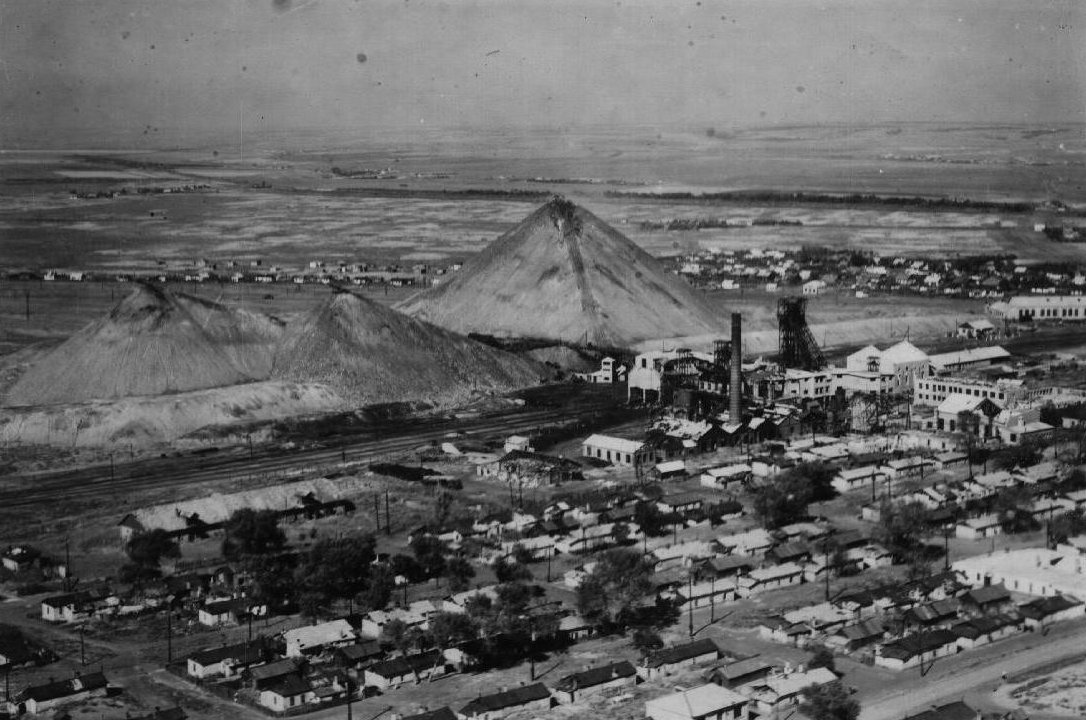 The industrial town of Stalino: railroads, worker houses and huge piles of dirt. Said and done, I took two MDF bases of proper size (4x12 inches) and then cut out the walls with this in mind. I used white foamboard for the structure. Then I easily copied the walls once to get the second house. I just put them on another sheet of foamboard and let the hobby knife do the work. I made doors and windows out to the backyard to make them more interesting for gaming purposes (the houses on the photo did not have this, but the campaign is about another train-station than the one above so I did not feel that I needed exact copies). 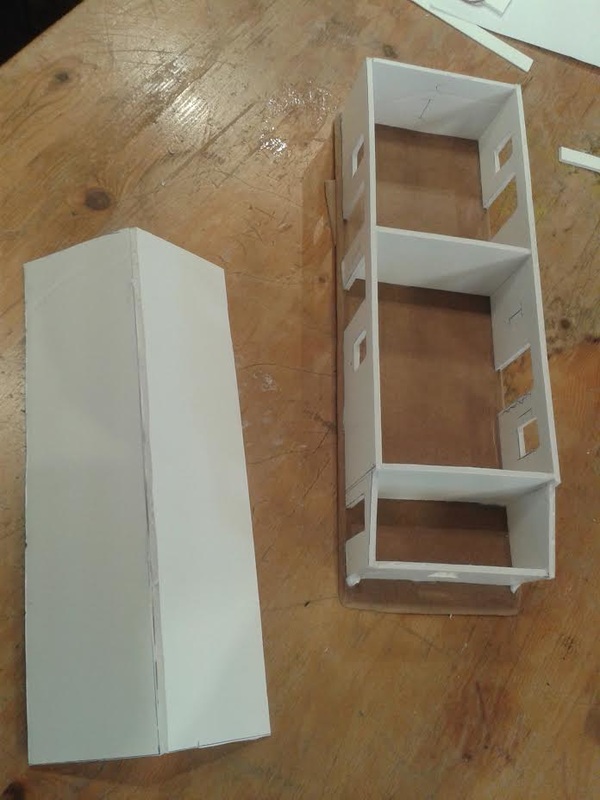 Each house has two apartments with no door between so I hope that one Soviet and one Fascist section will end up in each end of the house during play! Hopefully a interesting situation. We always have the roofs detachable so you can move around and fight in the houses. Front side of buildings: 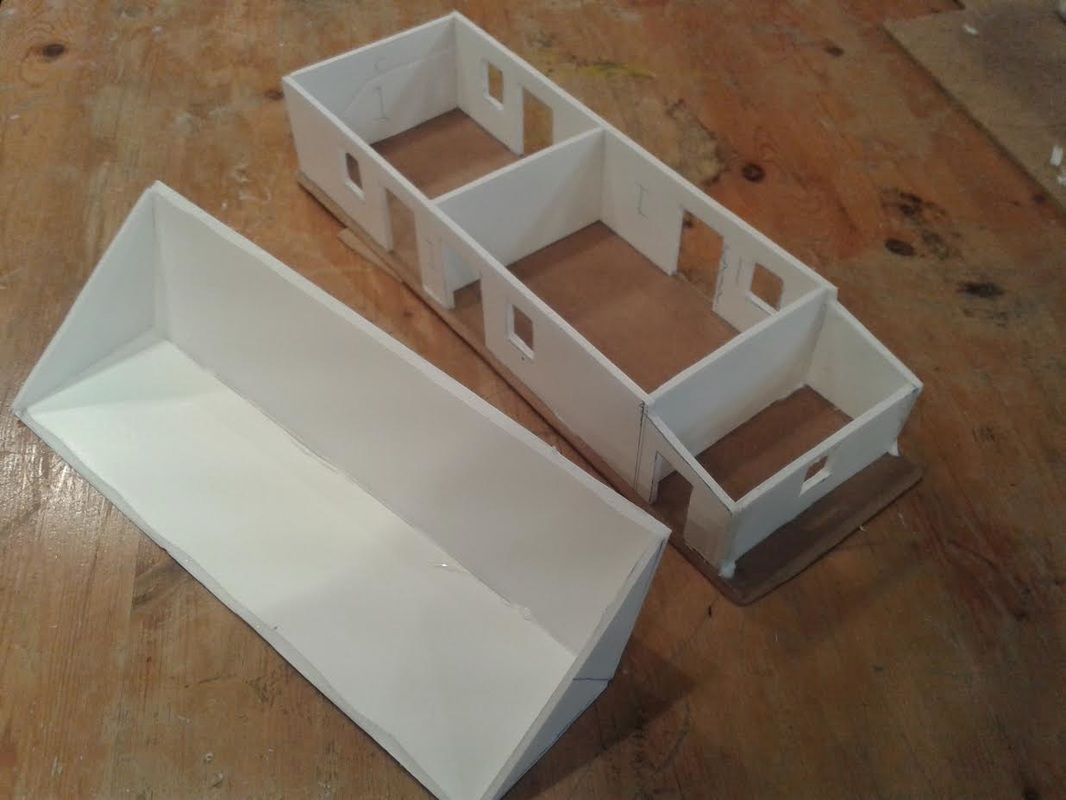 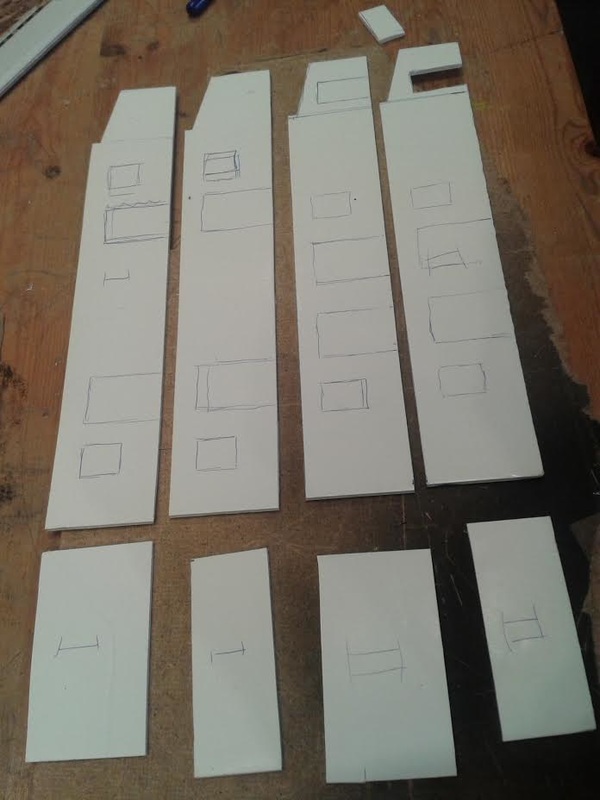 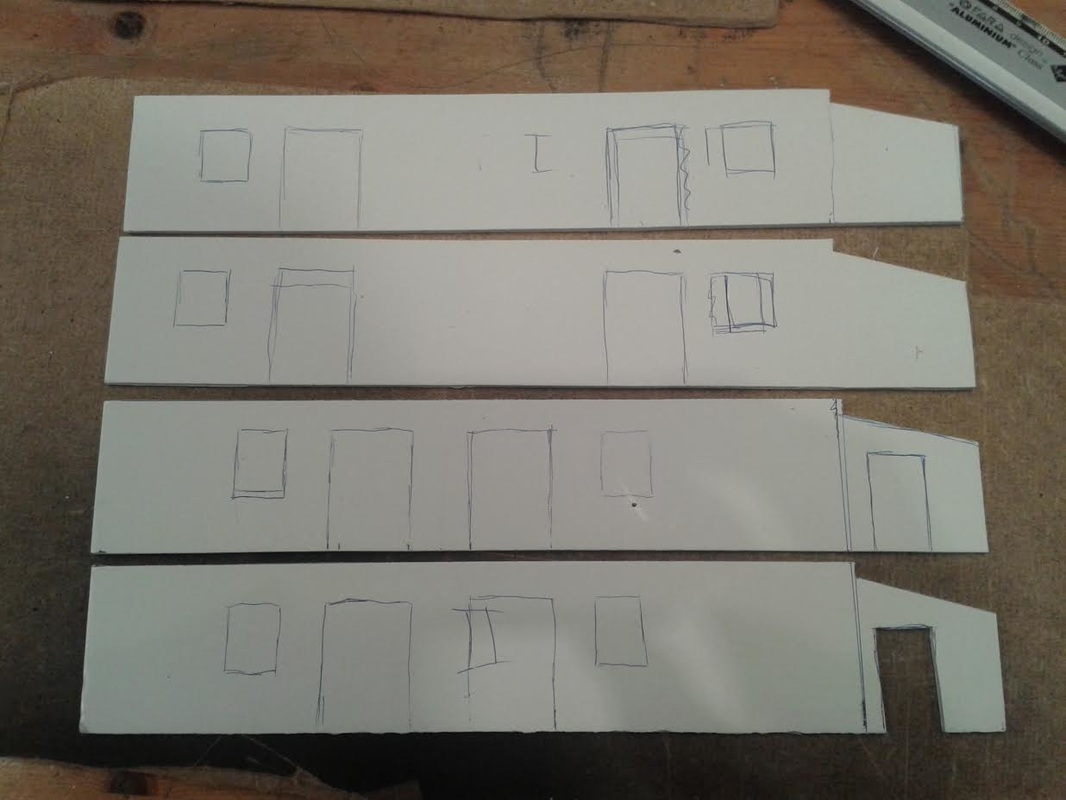 I glued parts together with PVA glue. After this I made the base for the roof in a similar way as the walls. 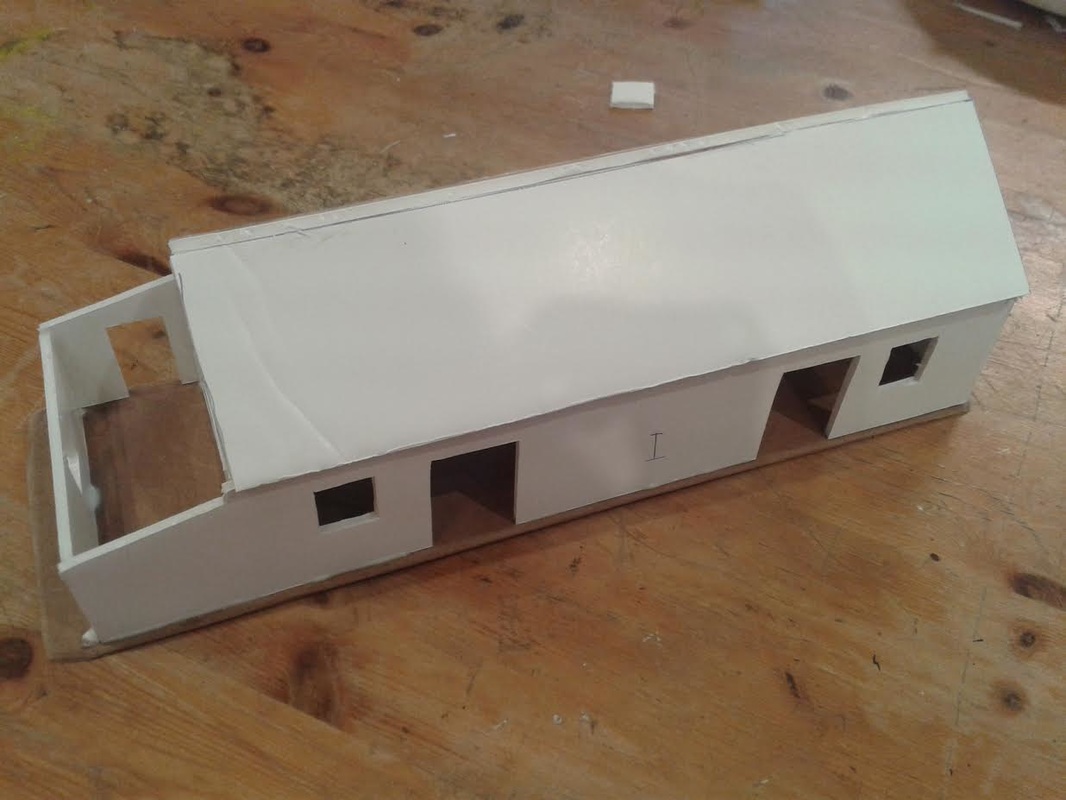 Backyard side of buildings: 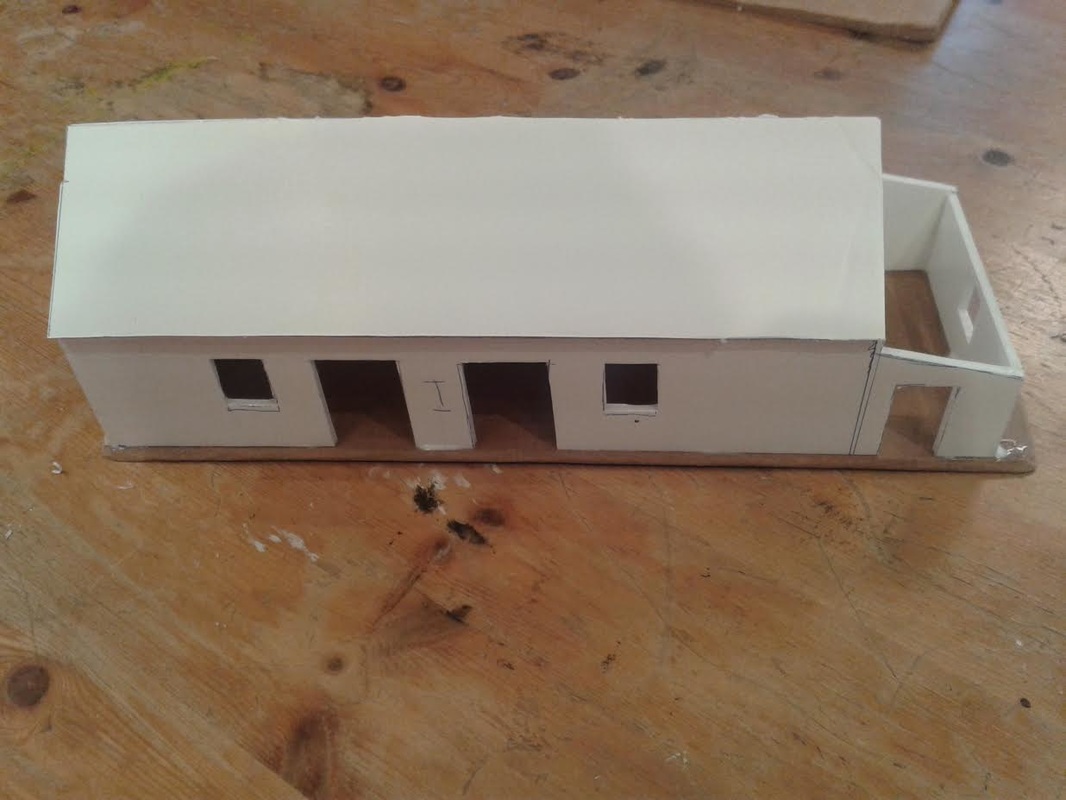 Next building session will see chimneys and hopefully some work on walls, doors and windows. Cheers! /Shirty |
WW2 Campaign BlogThis blog follows the second Chain of Command club campaign, set in the intense fighting over Stalino in October 1941. Archives
January 2018
Categories |


 RSS Feed
