|
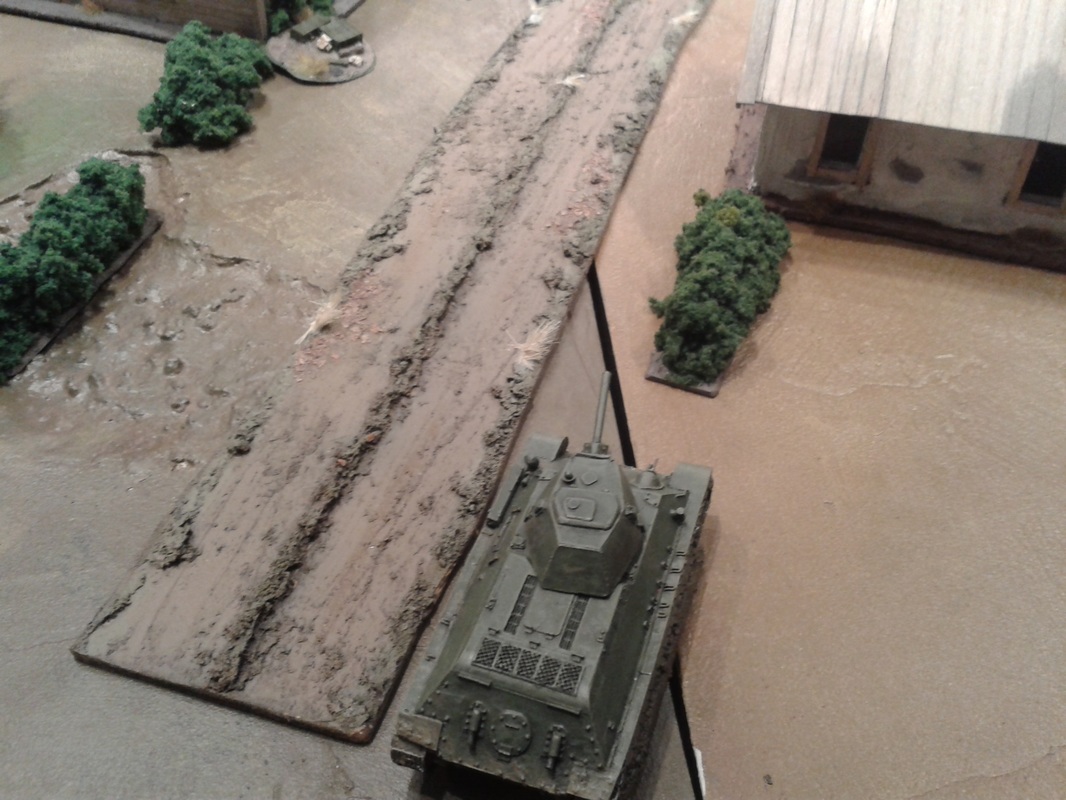
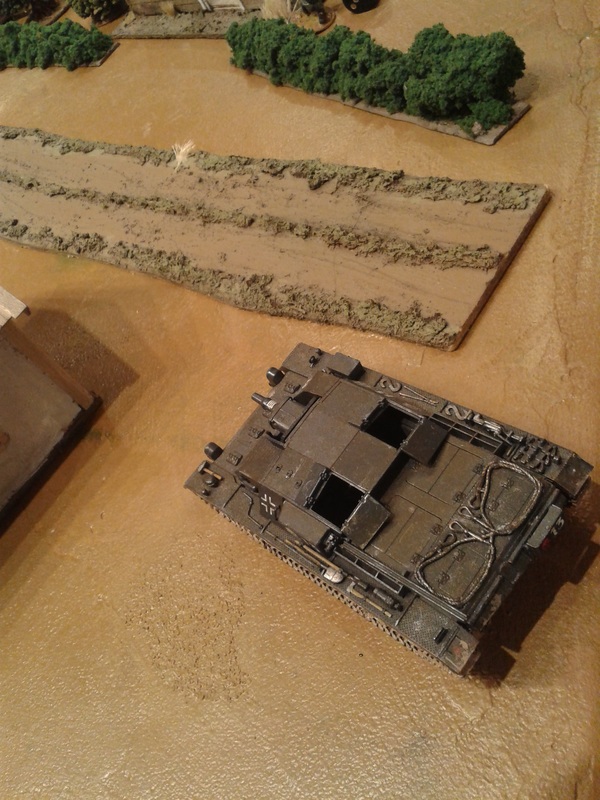
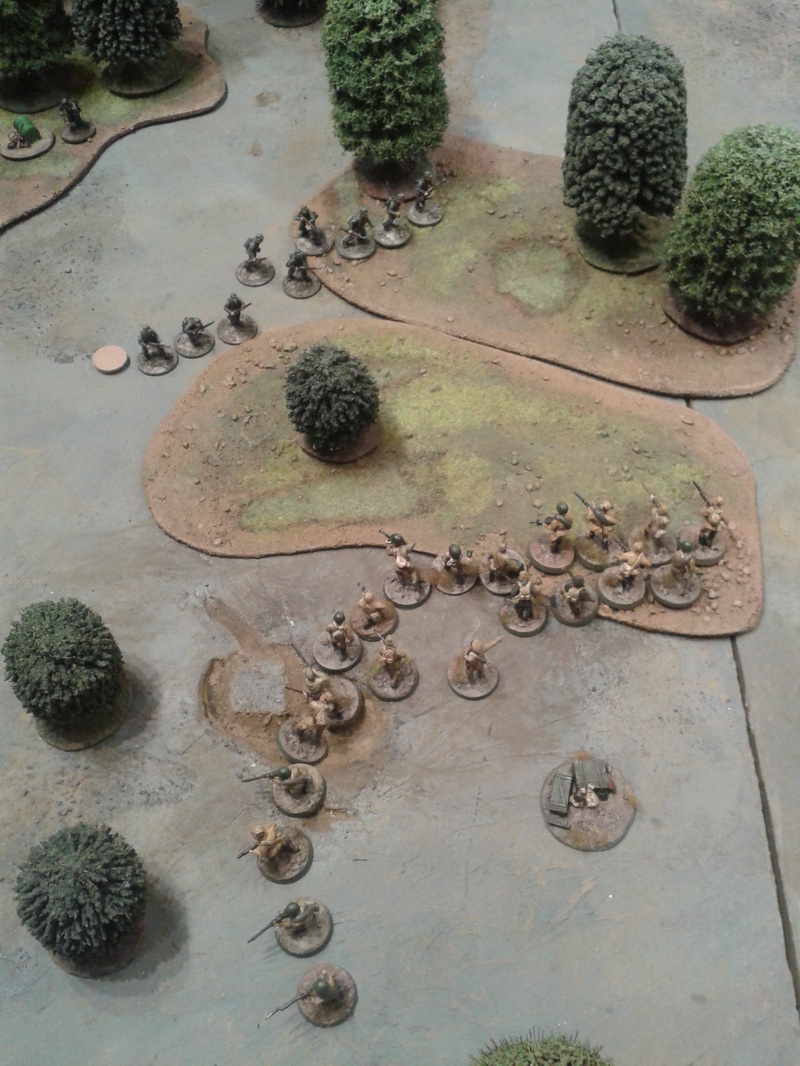
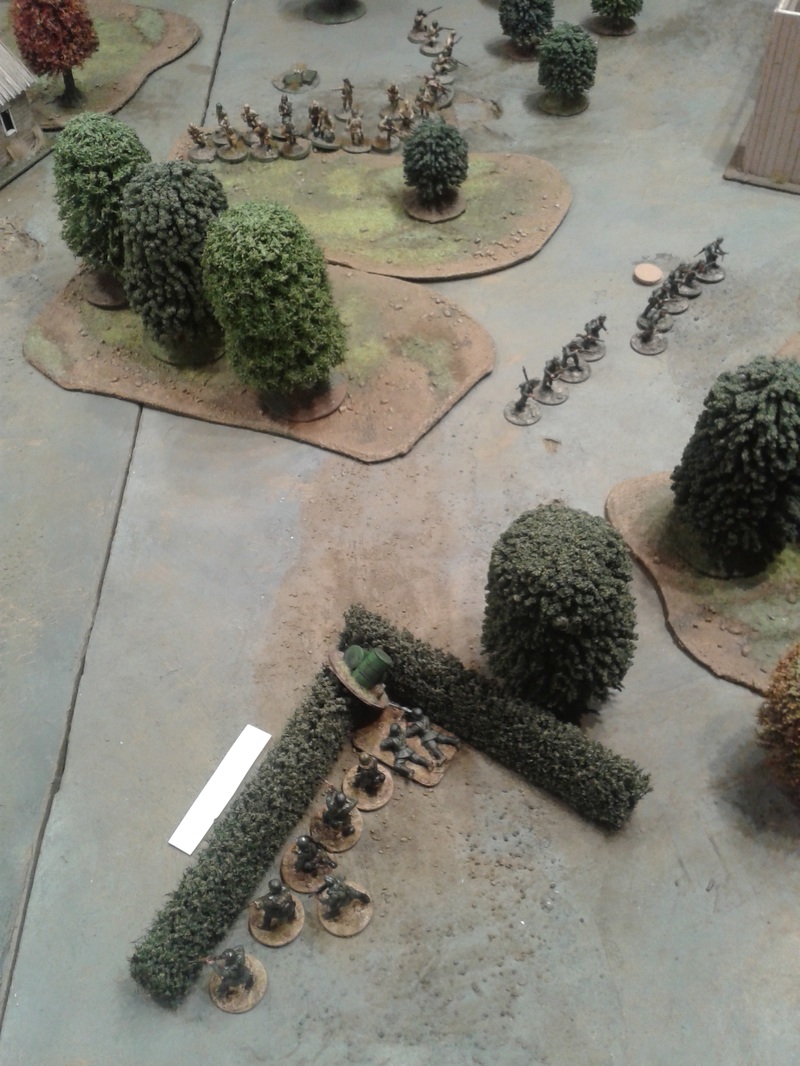
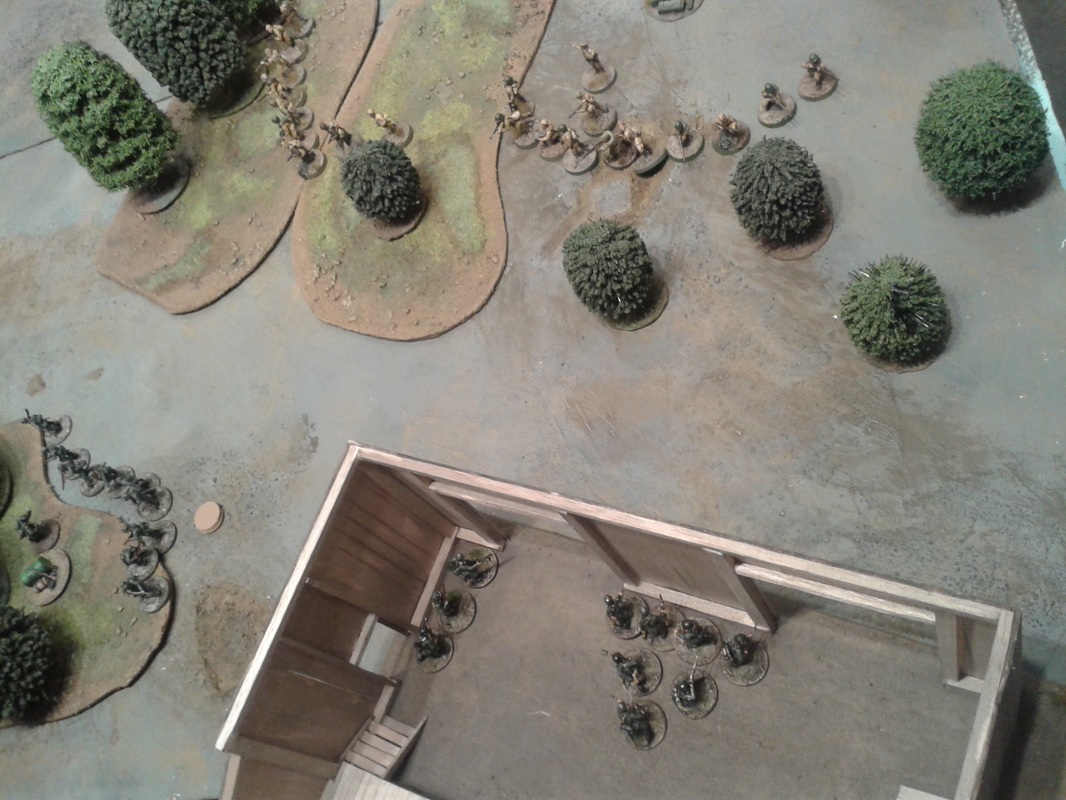
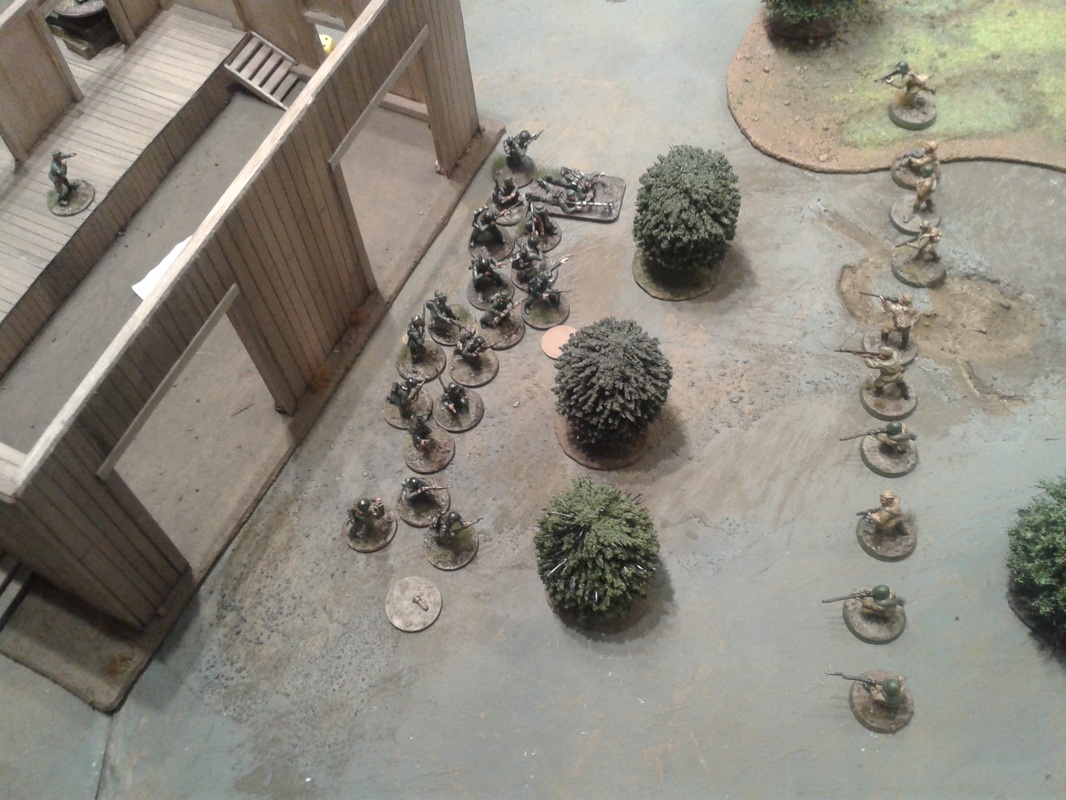
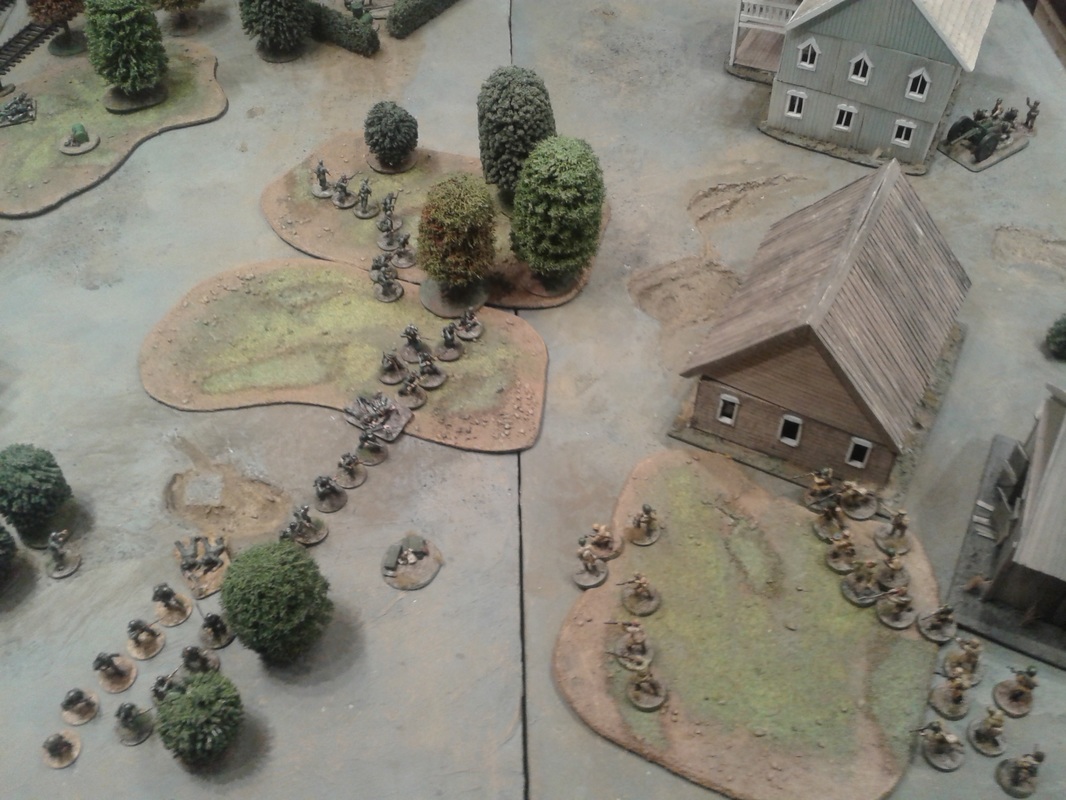
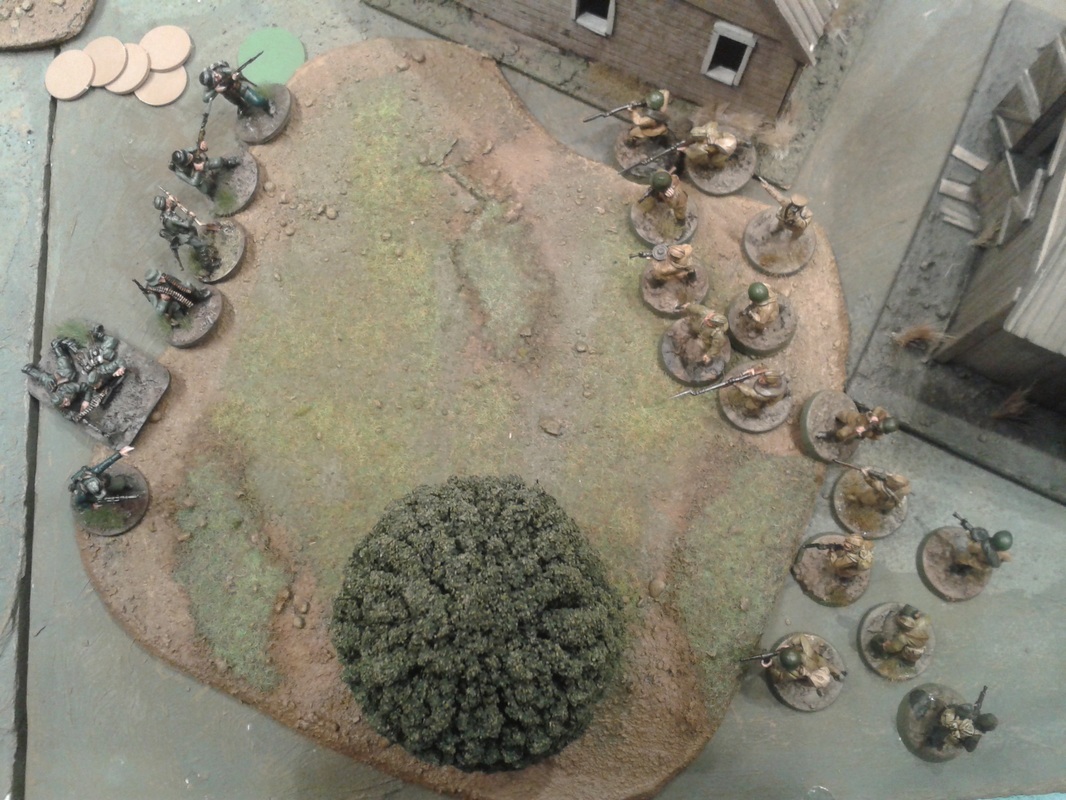
This game saw the Soviets attack by throwing a quite fresh platoon against a rather battered German one. Both platoons started the game with -1 on the Morale roll, due to the soldiers sharing a low opinion of their commanders. This was an awesome game that was not decided until the last phase of around 50 played! We had the campaign's first "heavy" armor duel between a T-34 and a StuG III. The T-34 got the better of it with the use of a CoC die and a double phase. The campaign ruleset for Chain of Command, At the Sharp End, tracks how appreciated (or reviled!) the platoon's officers are by the men. The men's opinion is affected by both securing victories and maintaining low casualty rates. Previous games had left both of these platoons with -1 on the roll to decide starting Morale. Some cleverly placed mines made the Soviet advance perilous, and a Soviet rush for a Jump Off Point (JOP) was about to end in disaster when the Germans opened fire with double MGs. In the end, after much enjoyment, the battle ended in a draw. As an extra fun feature for the future of the campaign, the StuG III was left abandoned and immobilized on the field of battle. Since the game was a draw, we'll decide its destiny in the next game! Casualties were heavy on the Soviet side, and it is rumored that the men in Faadevich's platoon has started to call their leader "The Butcherer" when he is not around… At each end of the road, a tense tank duel: Soviet T-34 vs. German StuG III. It was fun to see some armor manoeuvring and not just a shoot out from table edge to table edge. I think the Soviet player was anxious to ensure that his tank did not back out, like the BT-5 had done for him in the Turn 4 fight on the eastern column. Sorry about the minefields, but ours were not finished yet during this game, so we went with paper. Anyhow, here you can see the Soviet attack, hampered by the minefields which have cut off the easy path for moving up a JOP within 12" from the German table edge. Soviets attack from the left of the picture and have managed to get a JOP quite far across the table (seen in the foreground in front of the T-34). 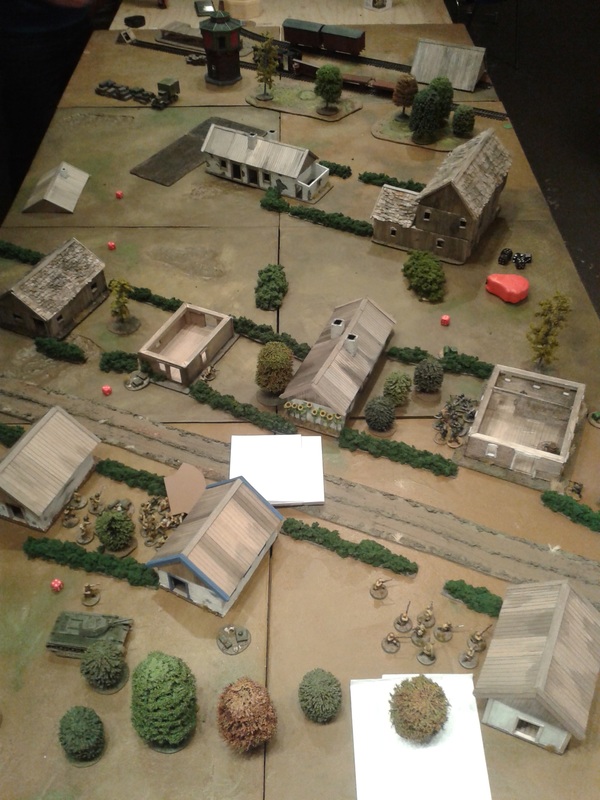 The closest Soviet squad can't get any further as there are no windows or doors on their side of the house in front of them, and they can't get around the far side of the house due to the minefield. The German StuG has deployed and the infantry decides to wait for their armored support. 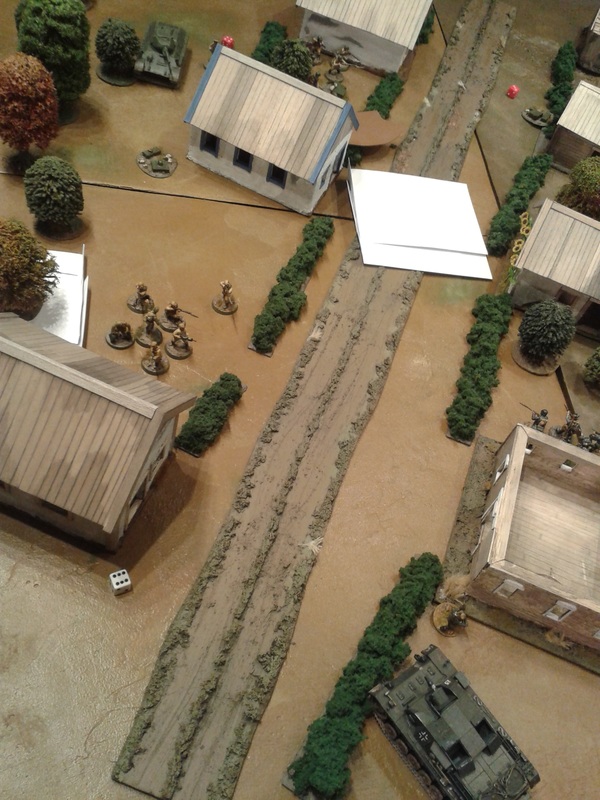 The infantry battle is cautious on both sides. The T-34 rolls forward to take on the fight with the StuG that has complicated the Soviet advance. 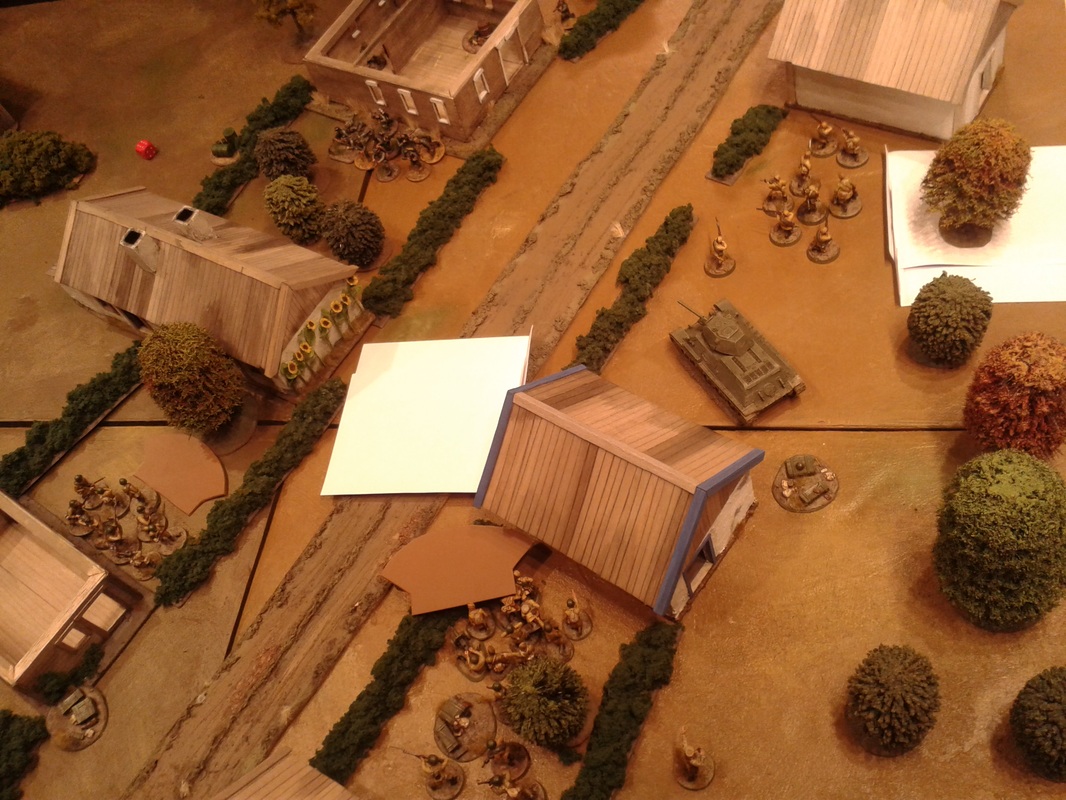 With luck and daring the T-34 immobilise the StuG with one shot and makes their crew bail out with a second. The infantry squad tries to run for the German JOP in the house, but fails to get close enough to affect it. The Germans deploy a squad from the very JOP the Soviets tried to capture, and blast away with two MG 34s. The Soviets try to save themselves by running forward and get out of the arc of fire from the front of the building. They are very close to get pinned here! The hunters are now the hunted. 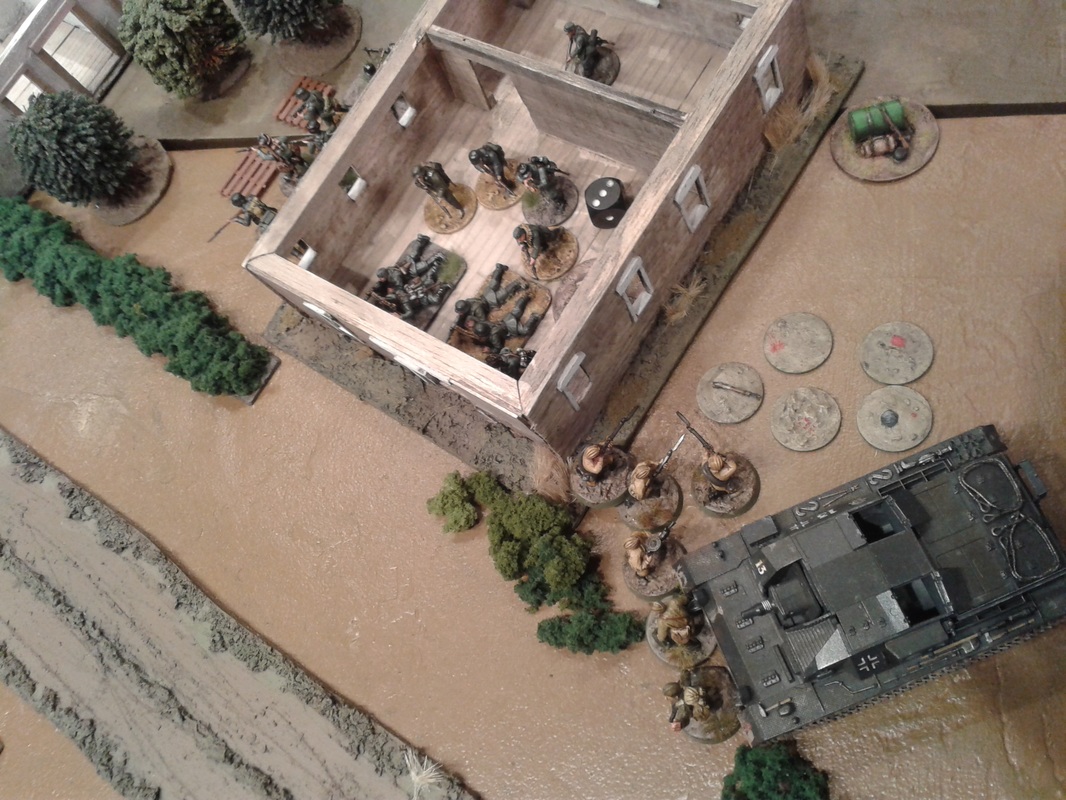 The T-34 tries to save the remnants of the squad as more Germans have run to save the JOP at the corner of the house. Here you can se the difference between a 1:56 (T-34) and 1:48 (StuG III) vehicle. In my opinion the 1:48 is much better in scale with 28mm miniatures, I think it is due to the bulkiness of the miniatures. 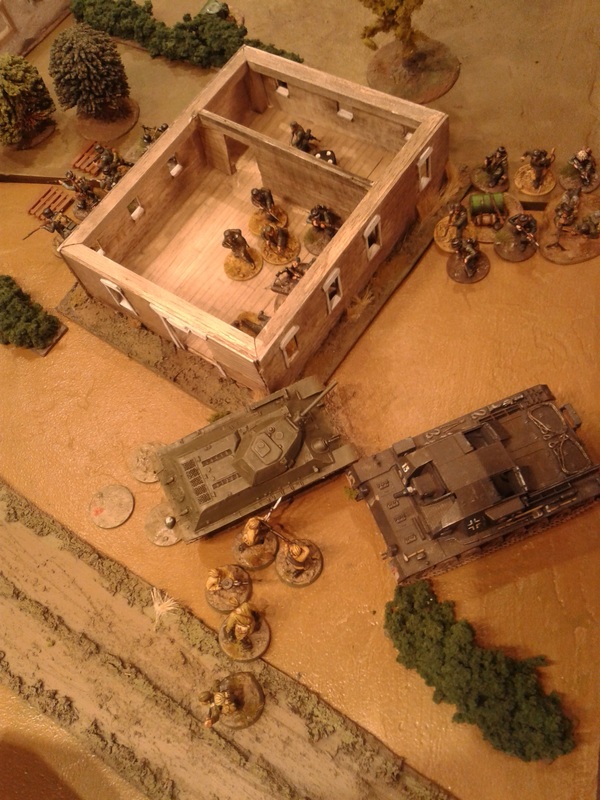 The T-34 tried to smash the house (and the Germans in there), but got stuck in the process! The Germans evacuate towards the enemy, but at this point both sides has so low morale that neither is able to actually win. This was a truly nerve-wrecking game which I appreciated despite only being a on-looker. It was also fun as the German player, who was beaten by the same Soviet player the game before, managed to both stop the Soviets and cause some heavy casualties in return. It is always great when a new player gets to grips with the rules and can give a more experienced one a bloody nose for the first time! Good for the campaign. 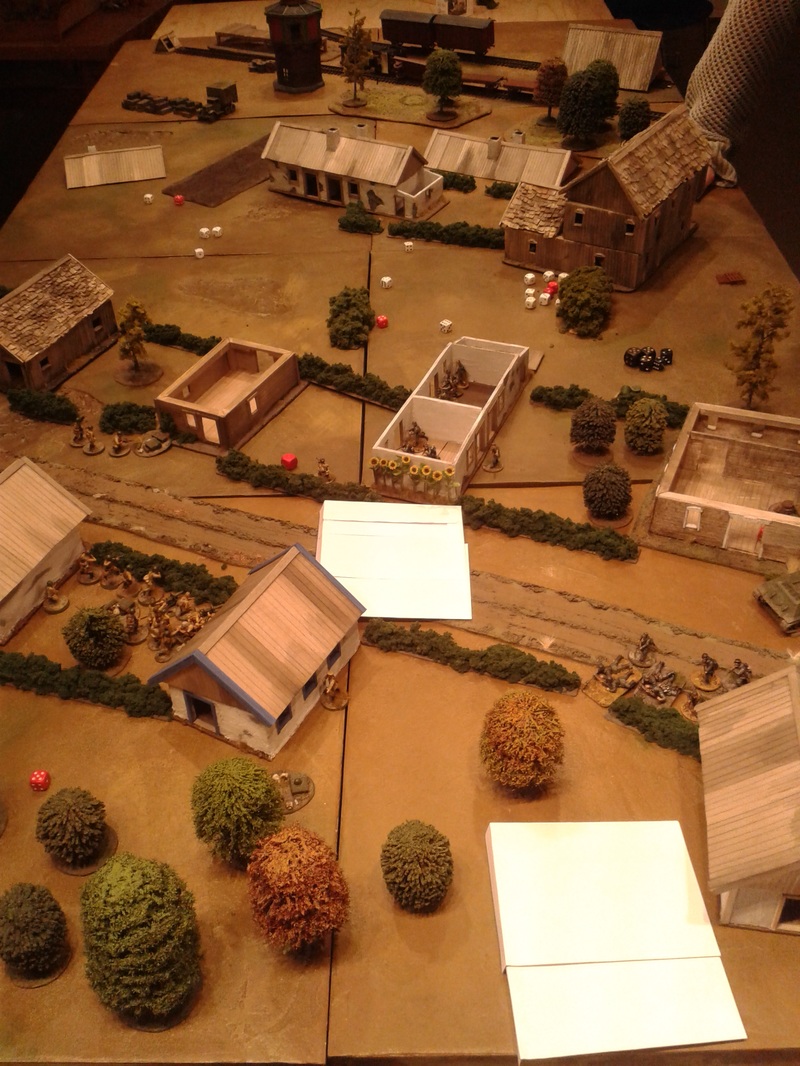 Cheers! /Shirty
0 Comments
 The table seen from the west. The German counter-attack comes from the right of the picture. 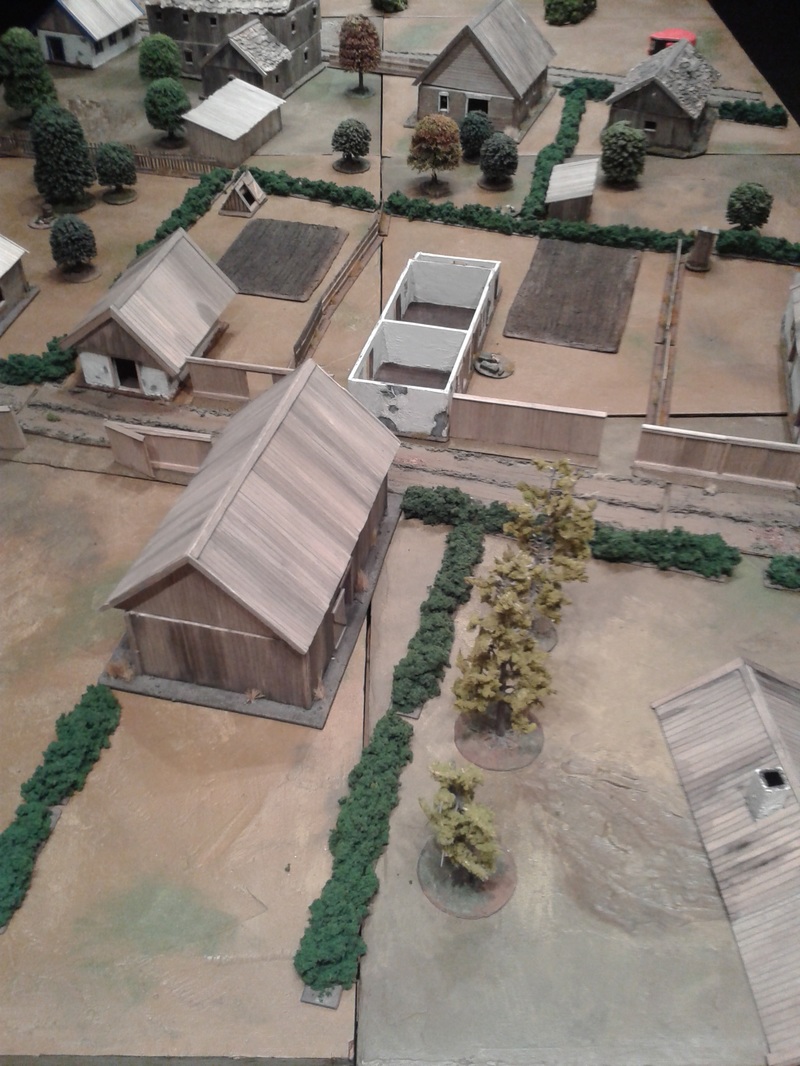 The table from the east. This terrain has already seen a bloody encounter, the Germans are counter-attacking from the left of this picture. The Axis player used his "Counterattack" for this column, to halt the recent Soviet progress. The counter-attack re-takes the initiative and let the Germans be attackers against the enemy platoon that won the last game. That means that the Soviet platoon didn´t get their "miss one turn" casualties from Campaign Turn 3 back until after this game was resolved. The counterattacking player also may choose the outcome of the "armour dice" that we use to decide which types of armoured vehicles (if any) are available. The Axis player decided to go for "light armour", which means that heavier tanks would not be allowed as support options. This flank has seen lots of back-and-forth attacks, and the Soviets used up their counterattack on this column to win with the KV-1 in Campaign Turn 2. Like many of the games we have played on these boards, this started out with a MMG vs. MMG shoot-out in the centre. This time the Germans brought 2 MMGs and prevailed in the fight. But when a German heavy armoured car showed up, the Soviets deployed an 45mm ATG section and knocked it out. The ATGs then had to retire because of incoming MMG fire. We treat the gardens as orchards with 18" sight range so the fire-fights starts at longer distances than in a wood. 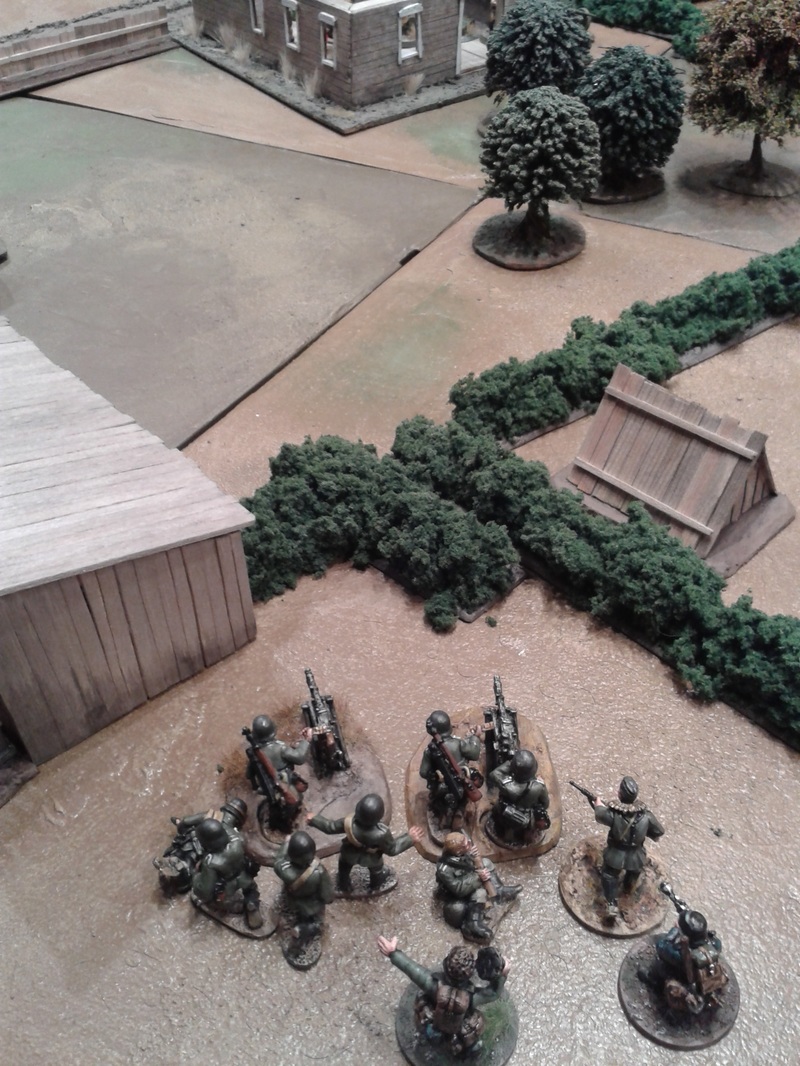 The German fire base - two tripod mounted MG-34. This section first drew away two Maxim guns from the orchard and then two 45mm anti-tank guns. Some impressive fire-power that chased away many Soviet defenders. At the eastern road a Panzer II began a duel with a BT-5. The Soviet tank took a hit and promptly withdrew (the dreaded 5-6 result on List Zero for a newly arrived tank! We show no mercy as this sometimes is more or less the only way to get rid of enemy armor - for example with MG fire). 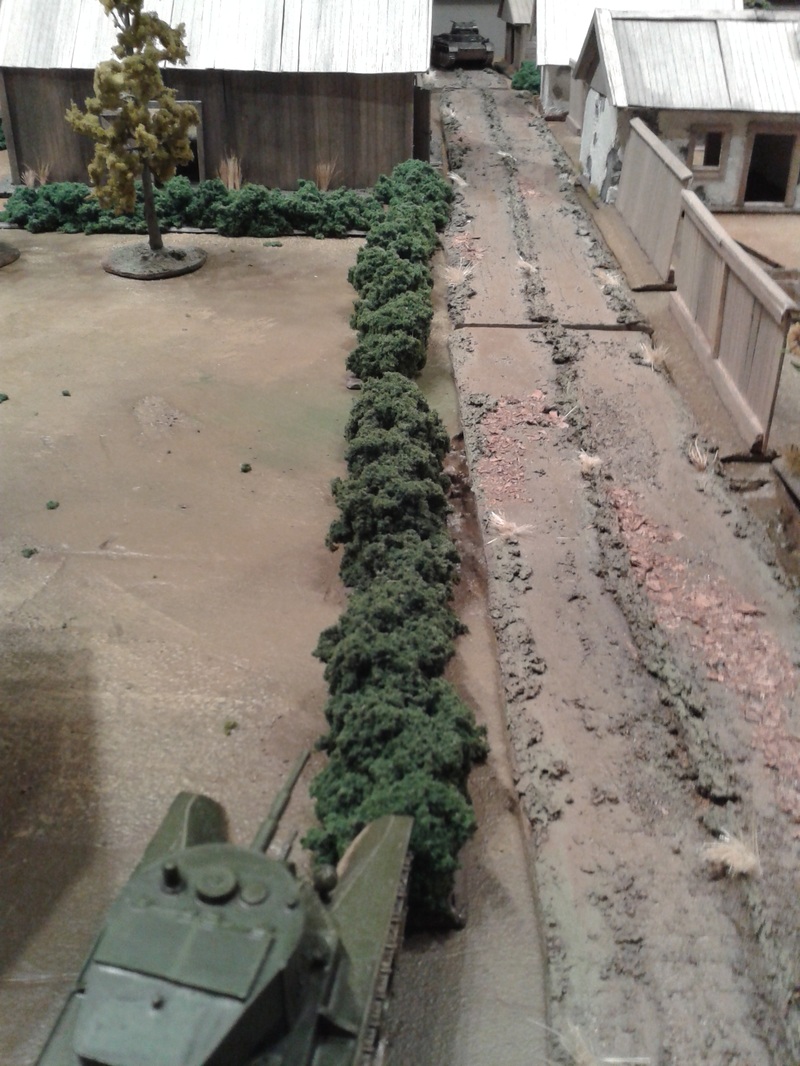 "Someone is shooting at us. Reverse! Reverse! Reverse!" The BT-tank is out of the game. 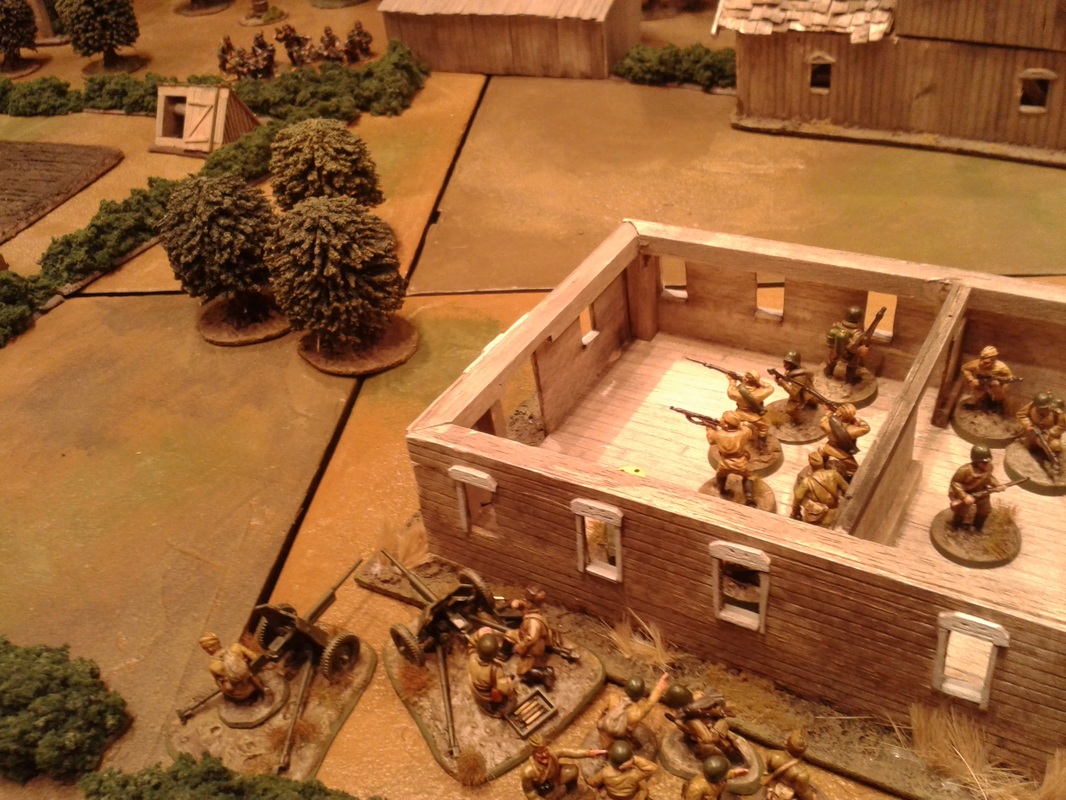 The cornerstone in the Soviet defense. A anti-tank gun section has deployed and taken out a German armoured car, but are met by a hailstorm of bullets from the german MG-34s, seen in the top left corner of the picture. The infantry in the house have some distance to the windows to not engage in this fire-fight. 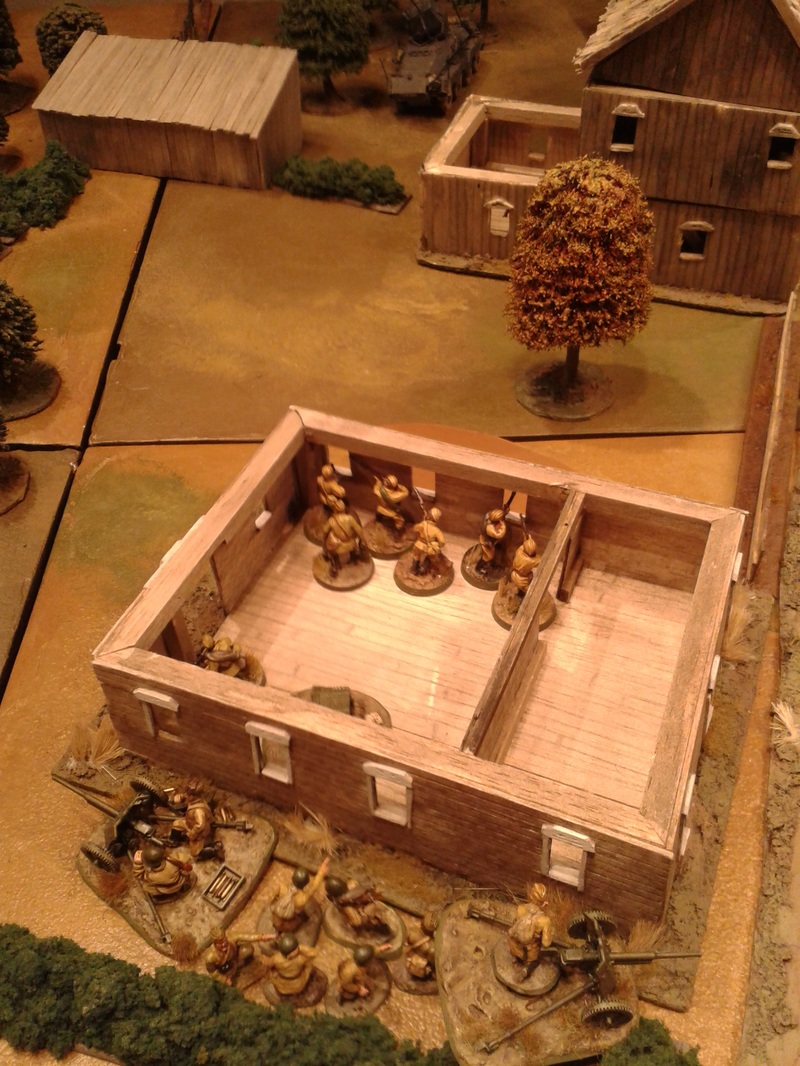 The anti-tank guns has withdrawn behind the house. The infantry has moved up into position to cover this move, losing men in the process. At the top of the picture is the knocked-out German armoured car, possibly the same that bested Ponomarenko in his BA-10. But time ran out for the German attack to fully develop and the fight ended a Soviet victory. After this game we adjusted our time-limit for winning as defender (from three Turn Ends to five Turn Ends) so we must admit it was some kind of a trial and that the Germans got the worst of it. More time could have let the Germans to use their MMG section and Panzer II against the defenders (or maybe move up a JOP at their right flank) but we were not to see this happen.
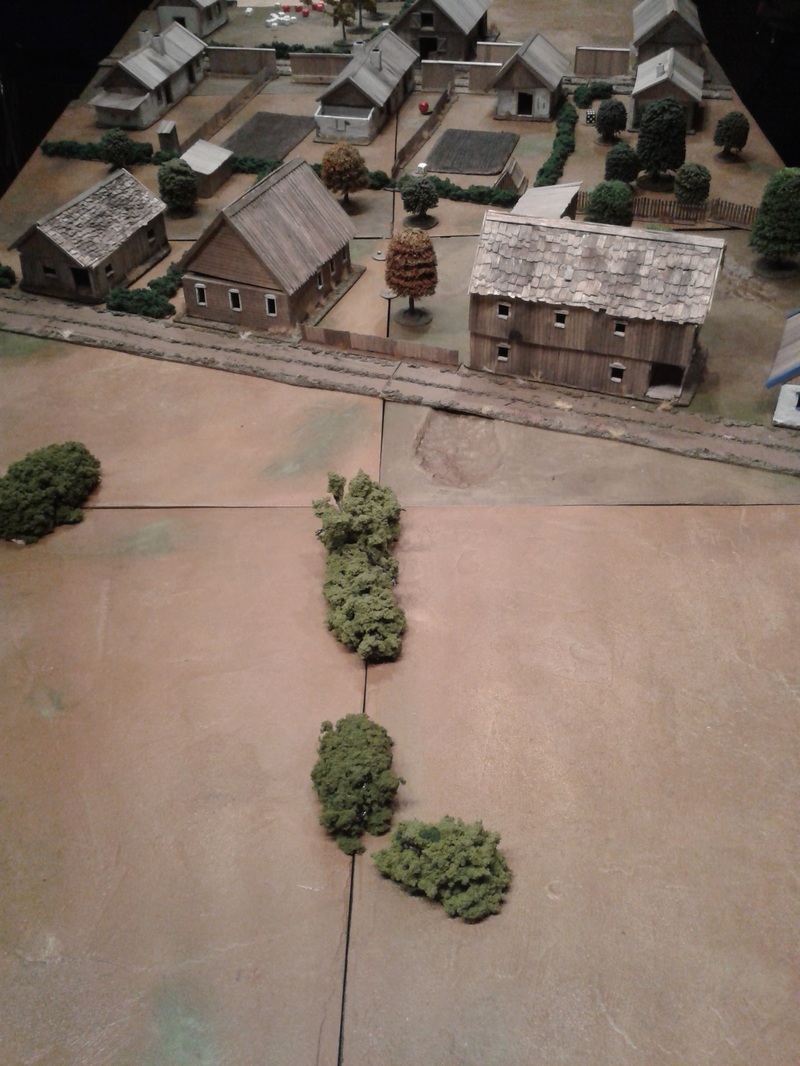
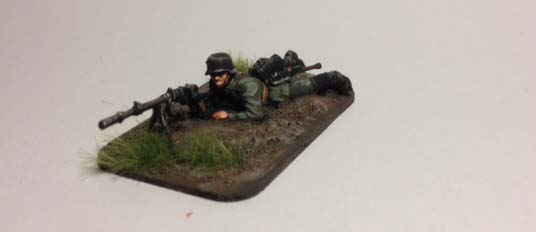
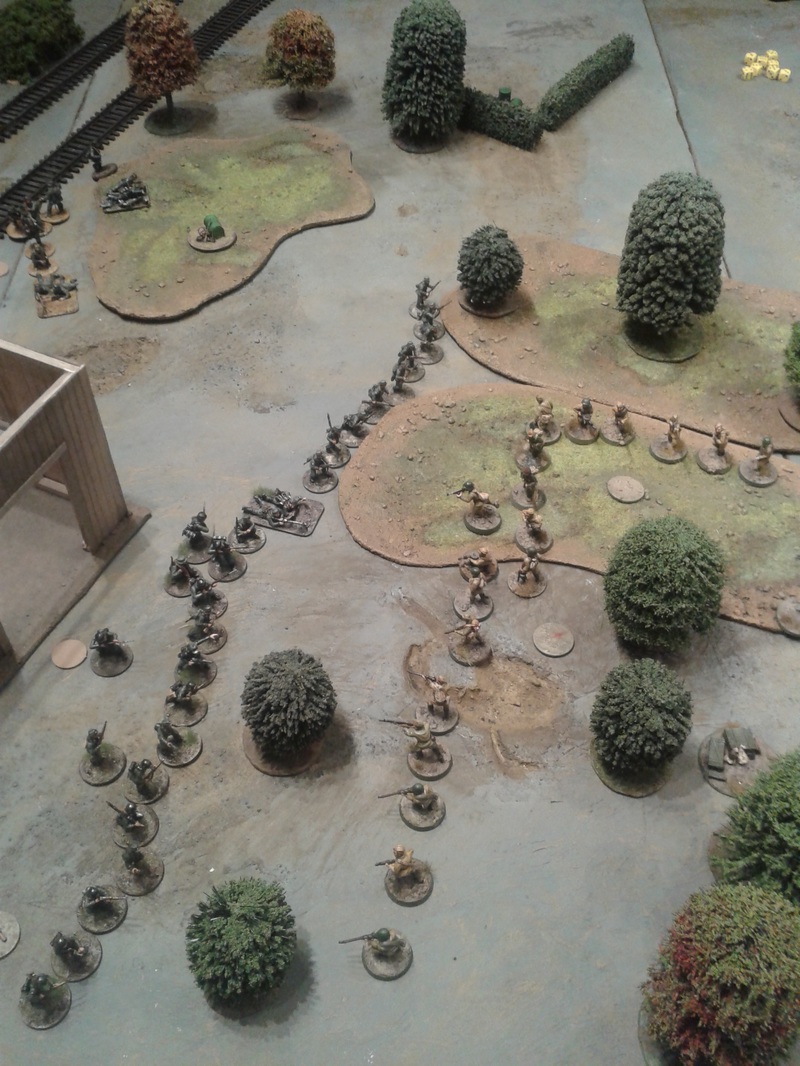
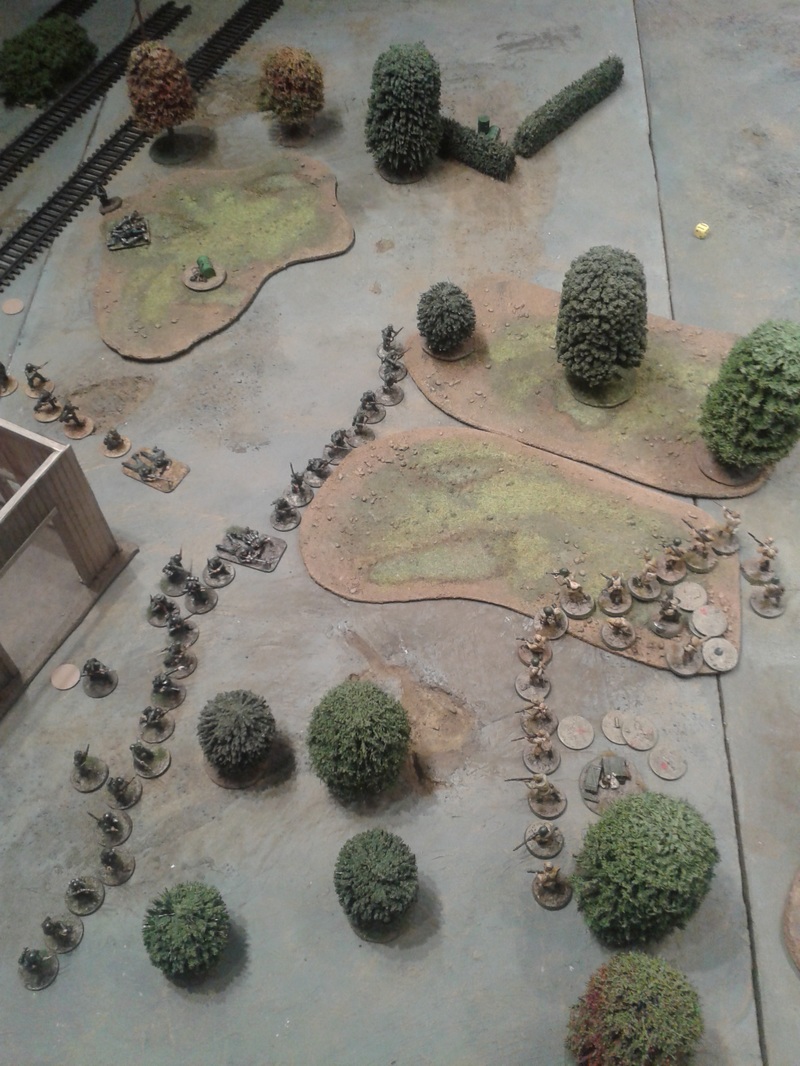
/Shirty 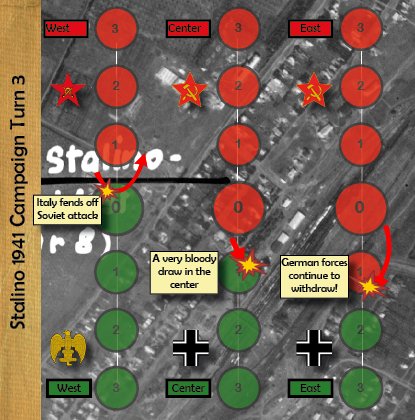 The third campaign turn could be summaried in one phrase: full scale Soviet attack! The Soviet players pushed hard after winning their games in turn 2, with mixed effects. The attack on the western front was pushed back completely, with the Italians retaking the initiative for round 4. The center saw a draw, with the Soviets unable to dislodge the Germans, but ready to give it a new shot as soon as they can re-organize for a new attack. Meanwhile, the eastern flank is starting to become a Soviet playground, as their troops steamroller the motorized German troops. Will they be able to continue their progress, as the victory condition is becoming visible? We'll see in the next couple of rounds! /Jonas 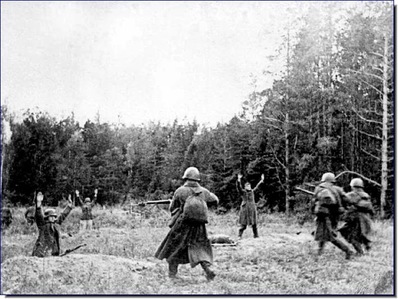 Worrisome images for the Germans on the east flank! 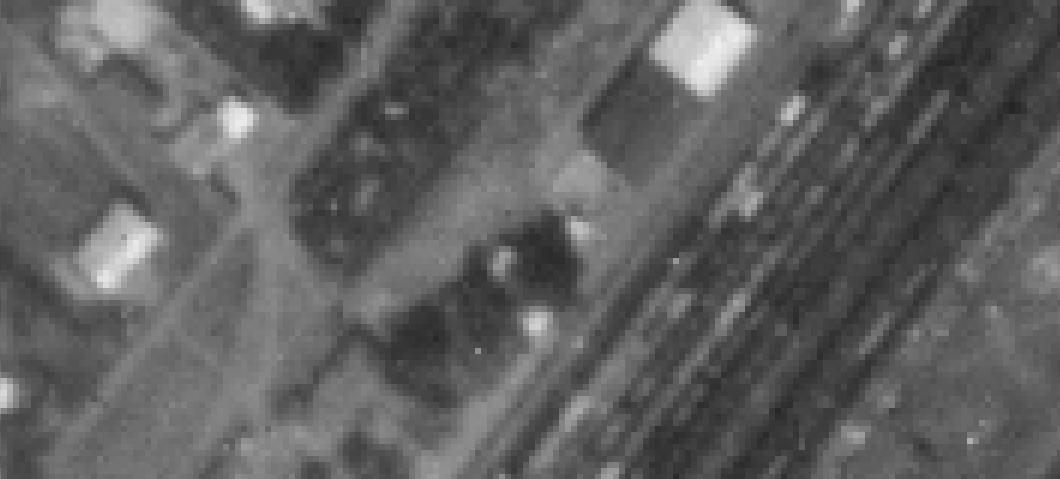 Aerial photo we used to set up the terrain south of the railway station. Capitan Kolomiets was back into the fray after spending a short time at the first aid station getting a new, non-sooty uniform and attention from the companies combat medic Vera. Lightly burned from his encounter with a German flame-thrower in the station house, he was set for revenge. In the shadow of a stable he had an inquiry with Lieutenant Fadeevich, who just came back from fighting. Fadeevich´s platoon had driven back the Germans from the station with the help of the reckless Gorodniansky, commander of a BT tank. Gorodniansky had then pursued the Germans down the railroad tracks but swiftly retired when they came under fire from an anti-tank rifle, which fortunately had failed to do any harm. 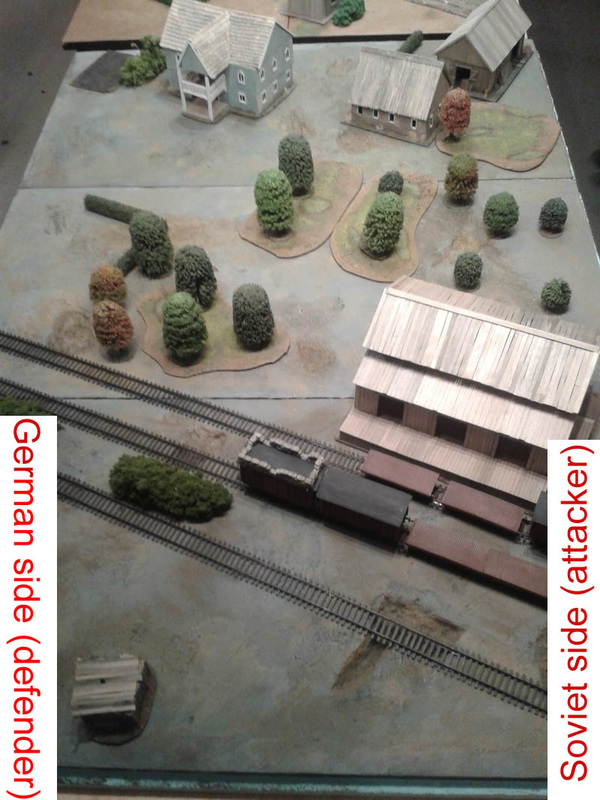 The battlefield viewed from the east side. Captain Kolomiets promptly set out to organize an attack to exploit Fadeevich´s success. He called up the infantry gun assigned to his command and two Maxim machine guns led by sergeants Parkhomenko and Kriuchenkin. The were called "The Volodyas" for the sake of simplicity, or Vovo and Volodya when referring to them one by one, as both were named Vladimir. Along with these heavy weapons he took with him Vera, as always, as he liked her company and needed someone to look after his burns if the battle would be a long one. 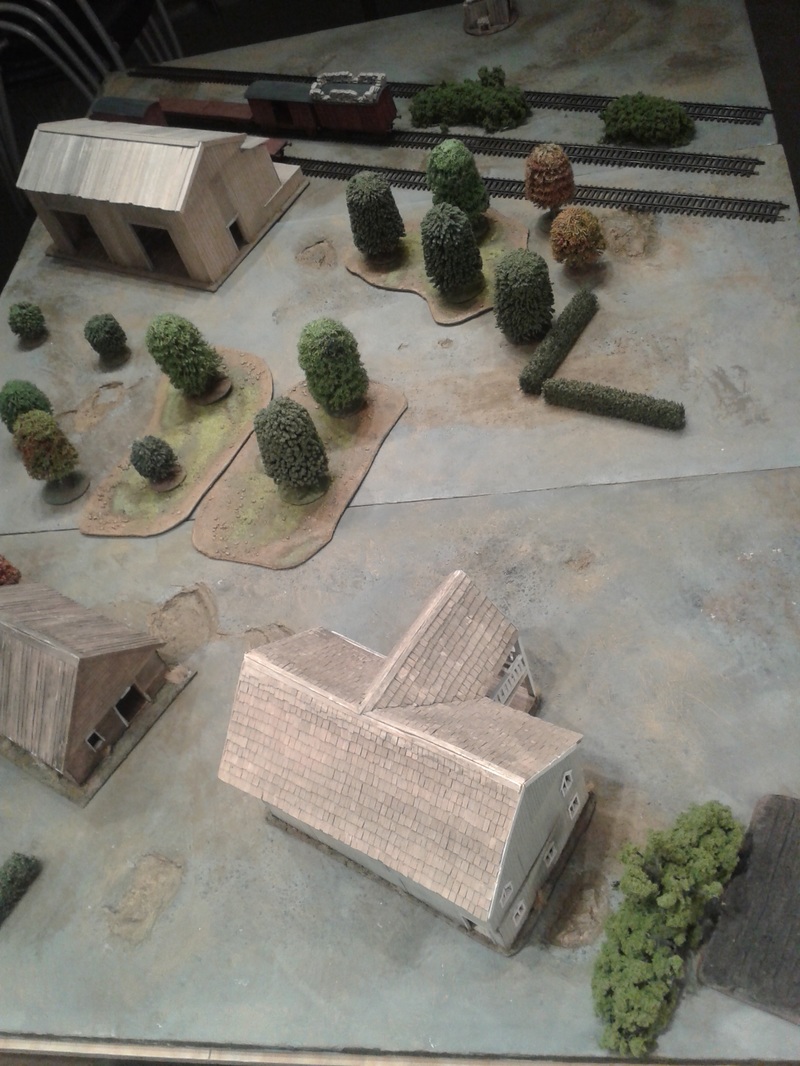 The battlefield viewed from the west. Down in the right corner is the thicket were the Soviets will try to place a JOP to win the scenario. 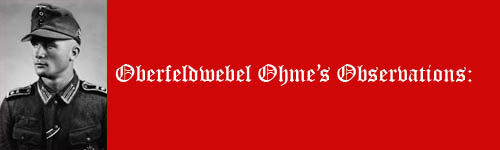 Jonas (German player) here. The patrol phase made it quite clear that my job as defender would be tricky. I expected the Soviets to take in several heavy weapon teams, as their low force rating gives them a lot of support. Maxim's and infantry guns have taken their toll on my German platoons before, and there was no doubt they'd be used again. The houses and woods meant that there would be several safe places for them to operate in cover, and there was a definite possibility that there would be tanks coming in as well. So I settled on buying a Pak36 and hope that I could cause some damage before pulling out, with as few losses as possible. Fingers crossed!  Kolomiets set up all the heavy weapons and Vera in position in a big blue house inside no mans land south of the railroad warehouse. He then called up the infantry squad under Olegovich to lead the way deeper into Fascist occupied territory. That move should suffice to make the Germans retreat. To guard his left flank he had positioned Leytenat Yakovlevich with two squads in the wood that dominated the area between the railyard and the quarters at his right. He knew that the Red Cavalry should attack on his right hand and therefore left that flank practically unguarded. The patrols he sent out confirmed his suspicion that most German activity was happening on his left flank. They may call him at hot-spur, but he was an calculating hot-spur! We have changed the attack/defense-scenario so that the attacker can either win on depleting the defender's morale, or by moving a JOP within 12" of the enemy baseline. This makes a "sudden death" possible and hopefully encourage the attacker to actually move his troops forward! This was my plan as I had a JOP very far forward on the right flank after the patrol phase. Soon some Germans showed themselves and all the Soviet guns opened up. The Fritzes immediately withdrew in face of this impressive firepower! All went silent for a moment. Kolomiets, according to his plan, ordered Olegovich to outflank the enemy. Olegovich moved up behind the blue house and sent forward two scouts to find a secure position ahead of them. After a short lull in the fighting he heard a lot of gunfire from the wood occupied by Yakovlevich. At first he felt secure: the two full squads in the woods would stop any attack for the time it should take to secure the forward position. After that it would be simple to push in Yezhov's platoon, and the Germans would be forced to withdraw - or face destruction! But he did not get any word from Olegovich and the furious firefight in the woods continued. He could hear that the most of the gunfire came from MG-34s and he started to get a little worried. Shortly after this he saw Yakovlevichs men retreating over a road behind him. He repositioned his Maxim guns to cover their perilous withdrawal, but all he saw were wounded and falling men.  As expected, the Soviet position in the building was incredibly strong: infantry, even in cover, can't expect to have a chance in a prolonged firefight against two medium machine gun teams and an infantry gun, especially when it is backed up by infantrymen that can pile in fire as well as soak up hits! It was simply a battle that I would lose, and quickly. It was also an open road to the alternative victory condition of moving a JOP, which meant that I started turn 1 feeling like this game was a given loss already. However, Shirty had left his flank quite open, as he quickly deployed two relatively small sections and angled the first one towards my table edge. Since I had a JOP in the house on that flank, I drew up a new plan: deploy two sections on that side, protected from line of sight from their heavy guns, and have everyone else run as fast as they can to support them. Ideally this would mean that none of my men could be mowed down by the Soviet heavy support, and I could make the victory cost them a lot! It worked out well, and you can see that I got two sections into the woods Before Shirty could get more than one of his sections into a fire line, and my superior firepower could damage them heavily. Then, I could pile in on the other section afterwards. The only thing that halted my assault for a while was that I had to cross a road, which the heavy Soviet guns could cover with overwatch. In the end I spent a turn or two, agonizing about the casualties I would take while crossing, Before eventually doing it. In hindsight, I should have just kept charging in, as I might have been able to rout them completely!  Here comes a few great photos of the counterattack. The Gebirgsjägers really used the mobility that JOPs and 3D6 moves may give you (they had a JOP in the warehouse, as we "traded" flanks in the patrol phase) to mount a very serious attack on my left flank. I thought I would have no problem delaying him and moving my JOP, thus ending the game in my favor. However, I ended up having problems with that... 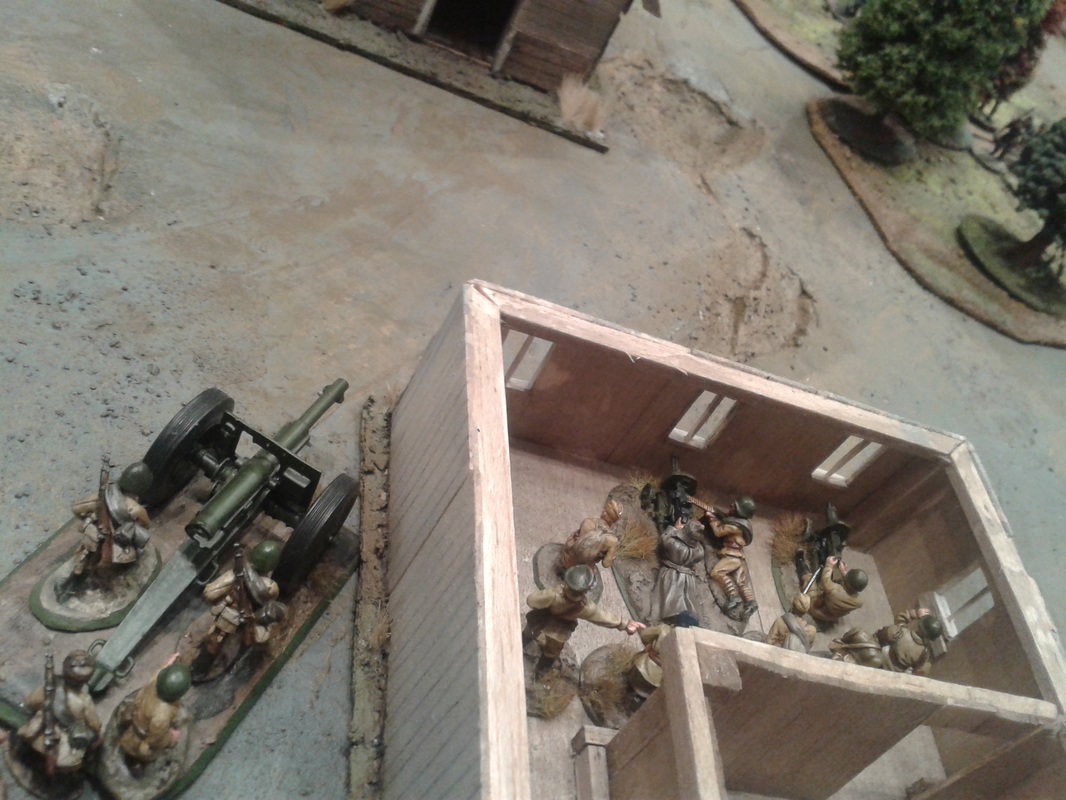 The heavy weapons is turned around to save Leytenant Yakolevich and his men. Damn! Kolomiets ordered Olegovich back to help shore up the situation. As the deadly struggle continued down the road (behind him!) a light AT-gun began shelling the house.  A PaK36 firing H.E makes life miserable in Kolomiet's bastion. The infantry gun could not see this new adversary so he, Vera and the Volodyas had to endure (he was very content to have Vera there, as always, if he should be hit by a splinter or two). Several of the machine-gunners were wounded. At that critical moment Gena, one of Olegovichs scouts, showed up (the other scout was Cheburashk, now left alone in the most forward position of the attack). Gena spoke without permission "The advance is secure, no enemies in front". Kolomiets looked down the road. The Maxims were playing, but so were the German guns, and in this deadly crossfire, Yakovlevich's decimated platoon got the worst of it. With Yakovlevich's platoon almost routed he had no other choice but to evacuate his heavy weapons instead of inserting Yezhov into the breach. In a flood of curses they got to work. 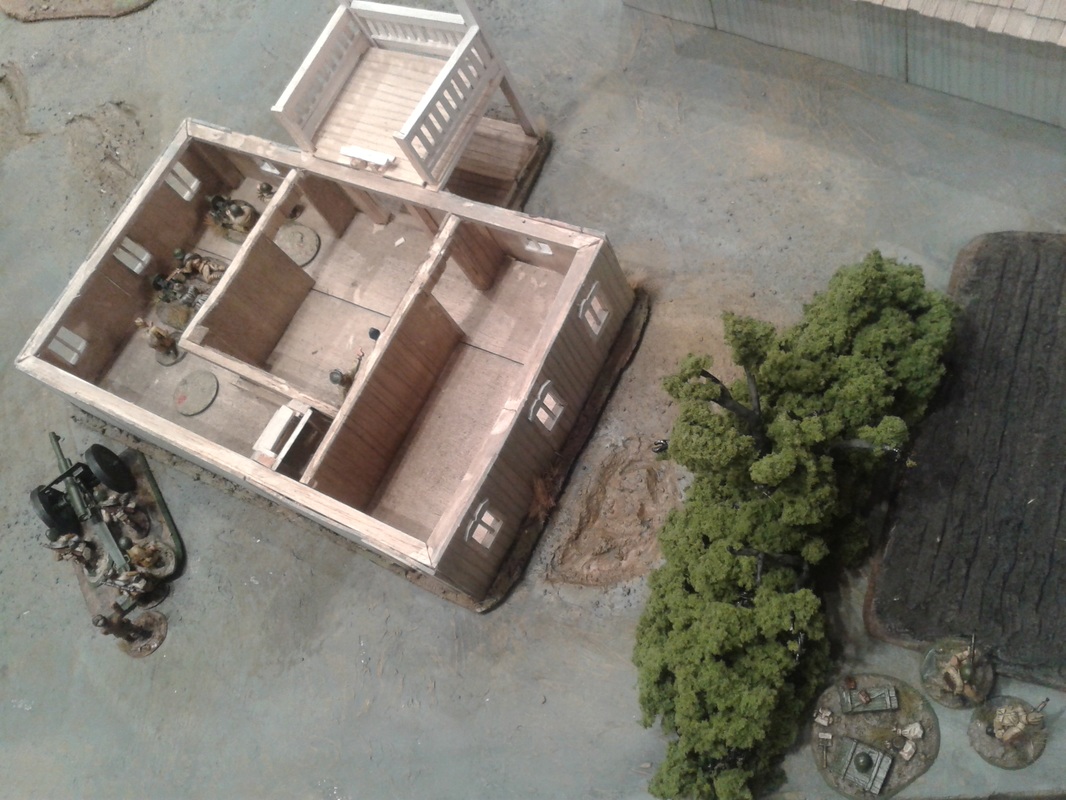 Gena and Cheburashk has established the new JOP. But they will not be able to reap the seeds of victory. The withdrawal of the heavy weapons went surprisingly smooth. Afterwards, they discovered that the Germans had withdrew themselves, probably out of fear of being cut of… damn! Kolomiets swore and cursed until his voice disappeared. Then Vera gave him at bottle of water and a "shut up and do something instead of this not-so constructive swearing"-glance. Kolomiets wheezed "Yezhov, take your platoon, the second machine gun squad and the sub-machine gunners, and go secure the area before the Germans do. Move now". The battle of the Stalino Station was about to continue, but Kapitan Kolomiets needed a short rest, more because of his hurt pride than he would ever confess. The last phases were a terrible nail-biter, as the Soviet moral pummeled down due to what turned out as a small massacre in the central wood. At the same time I only needed a few 5s on my command dice to get the CoC-dice that would move a JOP and win the game for me. I lost another morale... gained another 5´... phase after phase! At the end I got my last 5 and then lost a JOP. So I "won" the game and lost my last morale in the same phase! We decided that it was a draw, anyhow it was an incredible tight game! Jonas put up an really nice counter-attack through the woods that defied our gaming groups consensus about what can be done in CoC! Thats very fun to see! Cheers! /Shirty  This was a great game, and it was one of my most tense CoC games ever. I think I have a reputation at the club of being a bit of a cautious player, and one of my weak sides is definitely that I often play a static defence and don't do so much movements. That might have been a reason why Shirty didn't expect me to just pile in my troops on the flank, run across the field, and fighting in spitting distance within the woods! You never know what to expect. And even though Shirty got his JOP across the table, I managed to get his morale to 0 on the last turn while losing almost none myself, I consider this a bit of a moral victory for the battered Gebirgsjägers. /Jonas   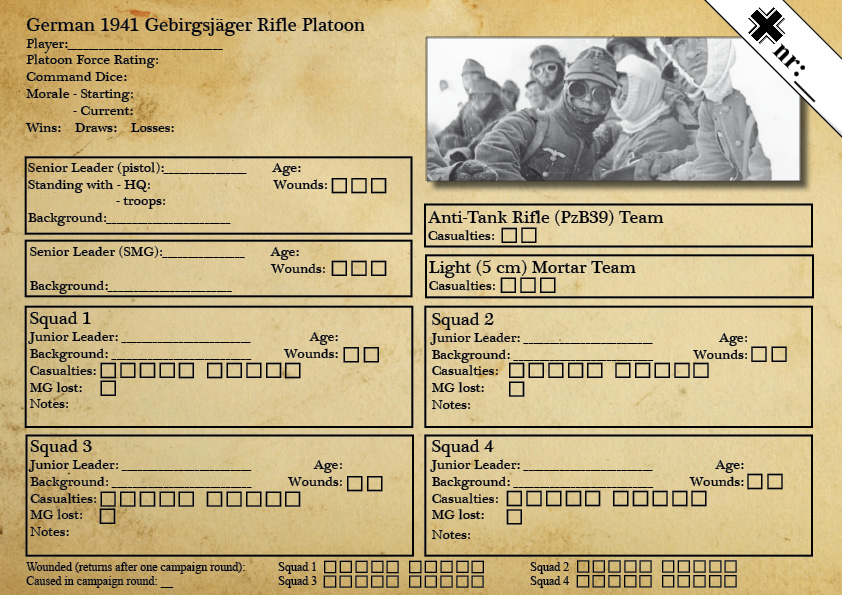 The Stalino campaign is approaching at a break-neck speed, at least that what it feels like. To be able to track all the platoons and support options that will move around, we're making a very basic map to place chits on. As the platoons go back and forth, we can just move the chits instead of writing everything down on paper. I also got a list over the June-Dec 1941 ToE of the 4th Mountain Division from Micro Mark Army Lists through Wargame Vault. We plan for the division to be part of the Axis forces in the campaign, but there's no CoC list for Mountain Rifle Platoons as far as I know. So I used the books I bought and the ToE list to try to figure out a reasonable platoon list for CoC. In the end it seemed to be basically the same as the Barbarossa German Rifle Platoon, but with a seemingly obligatory anti-tank rifle (the PzB39). 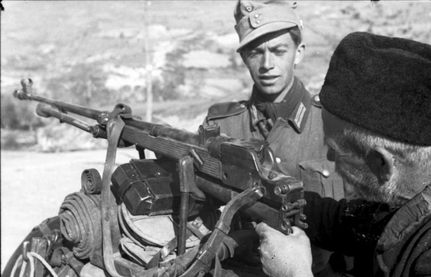 A Gebirgsjäger shows an old man a PzB39 - Greece 1941 I've never used anti-tank rifles in CoC, so I'm honestly not sure if it will be worth it. At least it gave me a reason to start converting up a Gebirgsjäger Panzerbüchse 39 team. Will it be finished in time?
-Jonas There are quite a few things to keep track of when playing a campaign: the rise and fall of leaders, the casualties in your troops, and the damages on your tanks. For our Stalino campaign we use the Chain of Command campaign handbook as a basis for the campaign rules, and it requires a bit of documentation. Wounded soldiers come back later on and leaders gain or lose standing with the brass and the troops depending on how ready they are to sacrifice lives to gain battlefield objectives. In our previous campaign we kept track with just pen and paper, but during that campaign we only had six platoons in total, one for each player. There were also no way to move units betweend different fronts and keep track of who is where, at what time. Since the Stalino campaign is going to feature several platoons, it will require a little bit of extra organisation, so I started to make platoon cards, which are meant to track all relevant information for the individual platoons. Each card can then be represented on a map with a single chit of cardboard, and hopefully this will prevent too much chaos as we get going. The first platoon reference card I made was for the German Barbarossa 1941 Rifle platoon: 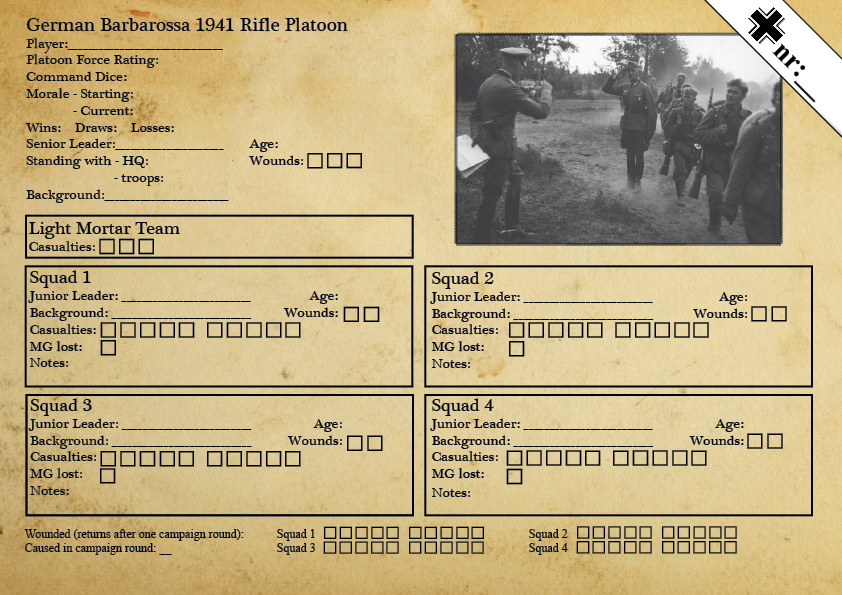 I will put up full sized PDF and JPG versions of the cards in the Rules section, free to use in your own CoC campaigns. I put in data that are useful for our version of the campaign, but if you have feedback on the cards (of if you'd like a similar card for a platoon that isn't featured in our campaign), feel free to get in touch!
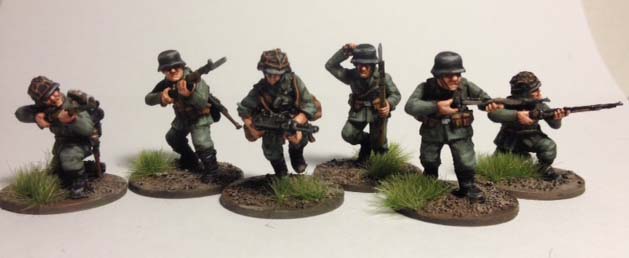
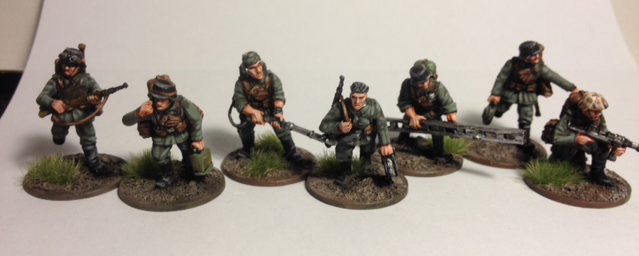
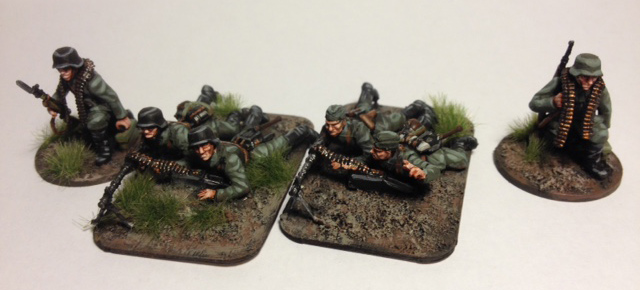
-Jonas 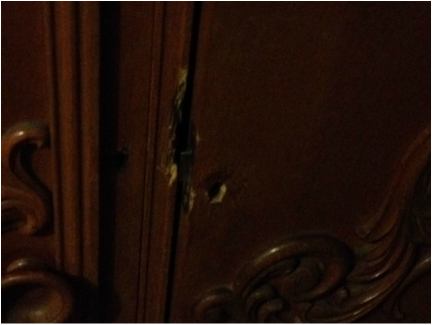 Oh no! An old tabletop gaming friend came by today to try out Chain of Command. But someone had locked the old cabinet where we keep miniatures without telling anyone, and apparently thrown away the key! After looking everywhere we decided to deal with it as we usually solve subtle tactical problems on the battlefield: with brute force. A few whacks with a chisel, and the game was on again. I took the opportunity to take a quick snapshot of our German and Soviet armies, to give an idea of where we are in the preparation for the campaign. 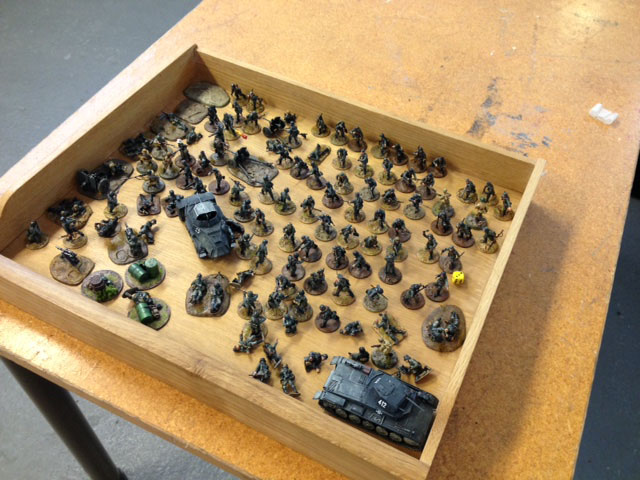 Quite a lot of the German vehicles are at various players' homes, but most of the painted infantry was there. At the end of last campaign we only had enough infantry to field two weakened platoons, with three squads of ten infantrymen in each. Since then I've been busy painting more infantry, and by now we have enough to field two full platoons with four squads in each. The end goal is to be able to field a full company at the same time, which means three platoons with four squads in each. After that, I can not see any reason to get any more German infantry. Oh who am I kidding, I'll probably be painting press-ganged Kriegsmarine infantry squads after that. In the picture you can also see some of the support options, some mortars, MMGs and anti-tank cannons. We have most of the options in the army list covered. The vehicles are the tiny Panzer II and Sd. Kfz. 222, they are cute as a button.  These are not all the Soviet miniatures, but most of the infantry. Hopefully Shirty will expand about his cavalry platoon later! Soviet platoons are 30% larger than German platoons, so I don't even think that these cover two full platoons. A full company would take up an immense amount of space. There are also a bunch of support options such as anti-tank and anti-infantry guns, mortars, and enough SMG troops to make separate SMG squads, the terror of close combat.
So, on the to-do list are to expand the German and Soviet forces to top off the platoons for two-player games. We're also planning to field light tank platoons, which means that we need some extra light tanks for the German forces. Which means I should be painting, not blogging! -Jonas After we took the decision to make quite a few new buildings for our Stalino campaign (it's going to be city fighting after all!), I got feeling and started to make two houses. They are inspired on the type of building you can se in the middle block of this photo, closest to the viewer, probably a several family dwelling. The photo should be from Stalino 1941: 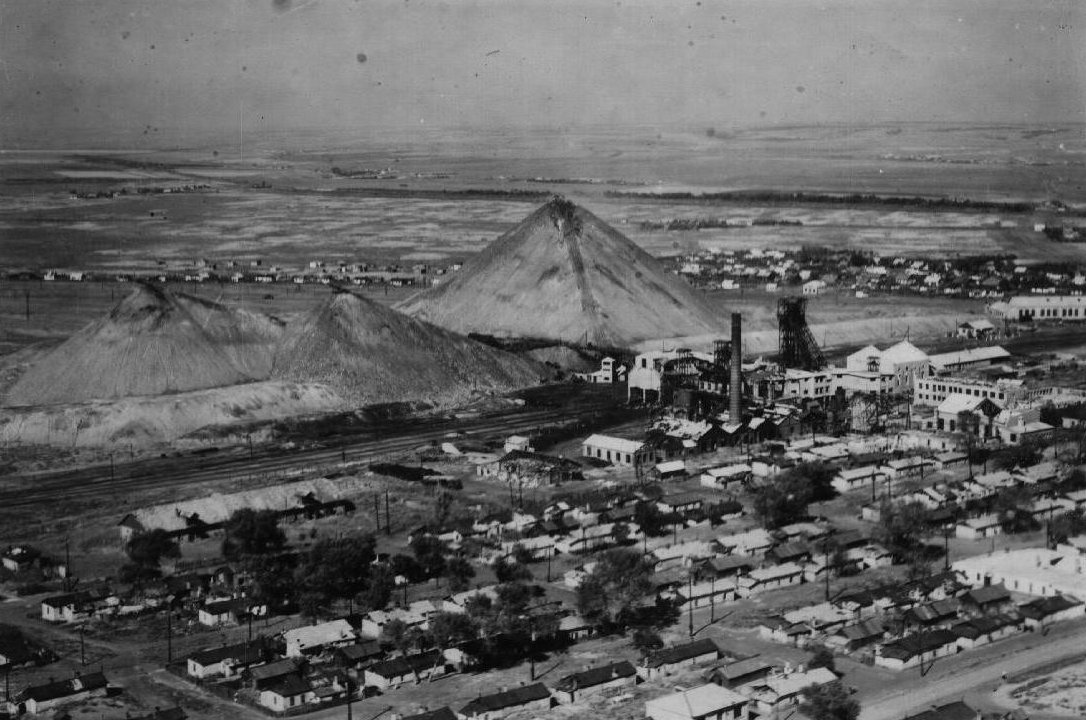 The industrial town of Stalino: railroads, worker houses and huge piles of dirt. Said and done, I took two MDF bases of proper size (4x12 inches) and then cut out the walls with this in mind. I used white foamboard for the structure. Then I easily copied the walls once to get the second house. I just put them on another sheet of foamboard and let the hobby knife do the work. I made doors and windows out to the backyard to make them more interesting for gaming purposes (the houses on the photo did not have this, but the campaign is about another train-station than the one above so I did not feel that I needed exact copies). 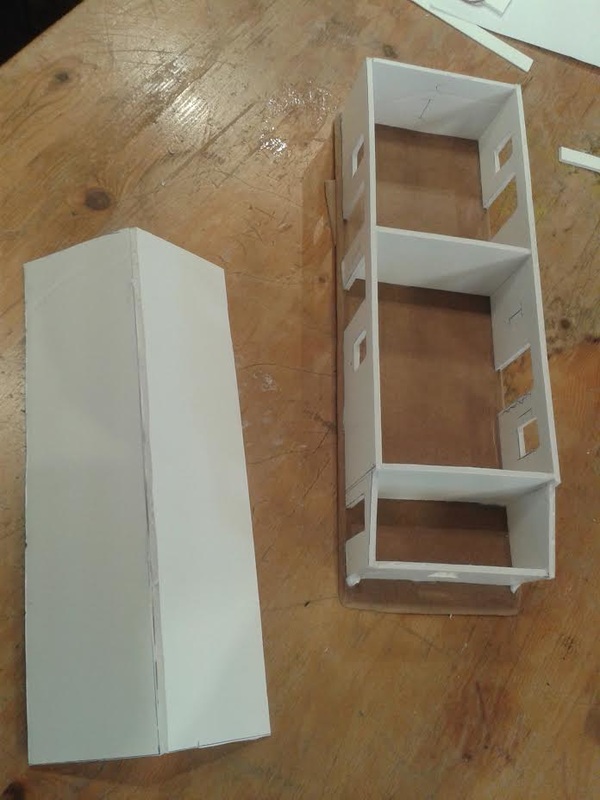 Each house has two apartments with no door between so I hope that one Soviet and one Fascist section will end up in each end of the house during play! Hopefully a interesting situation. We always have the roofs detachable so you can move around and fight in the houses. Front side of buildings: 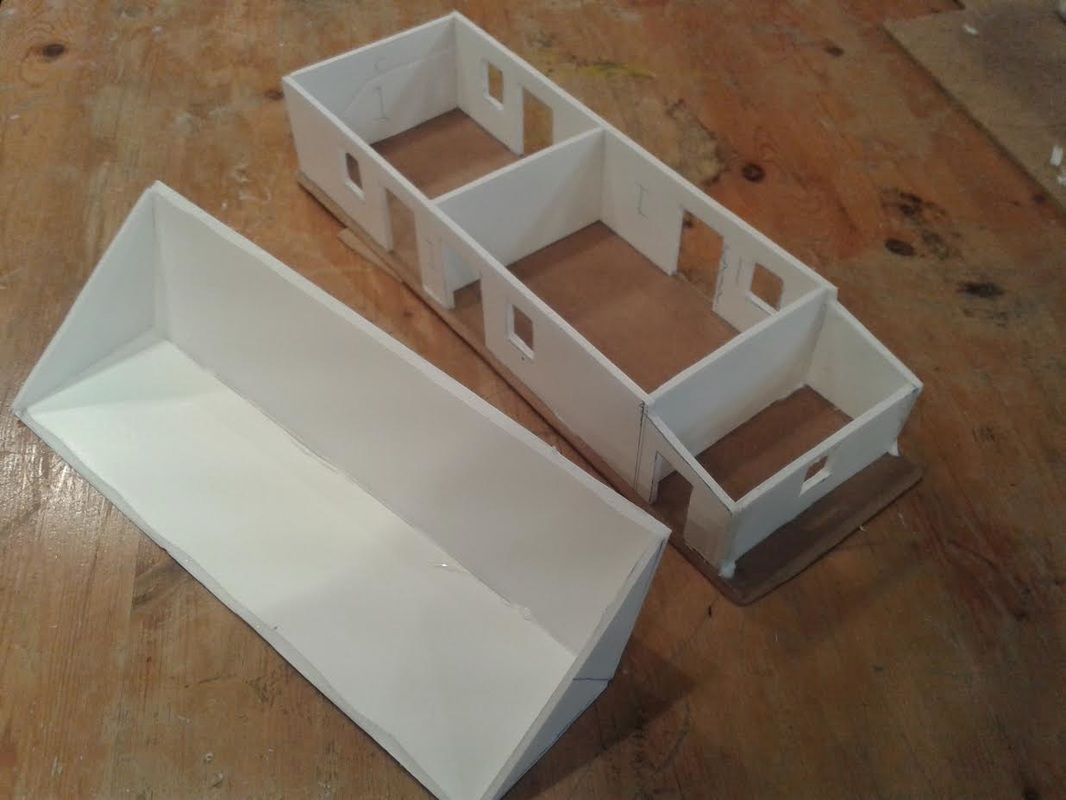 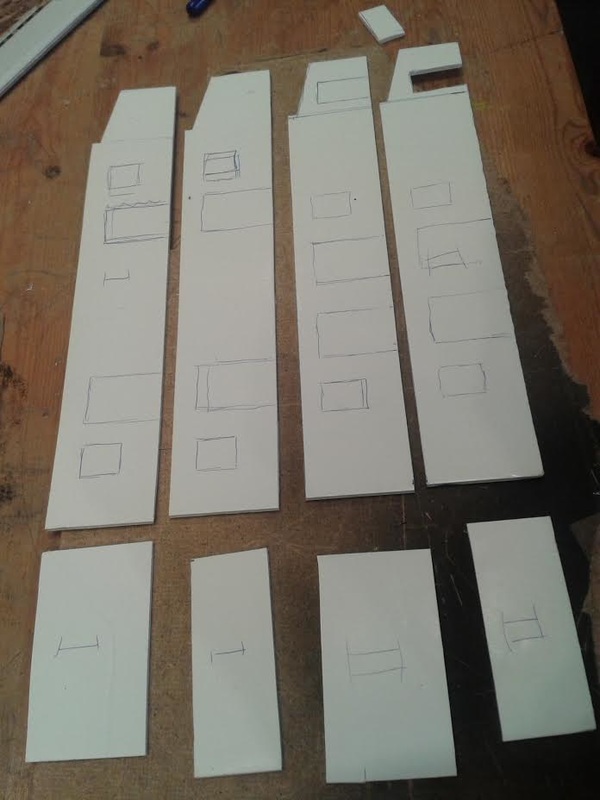 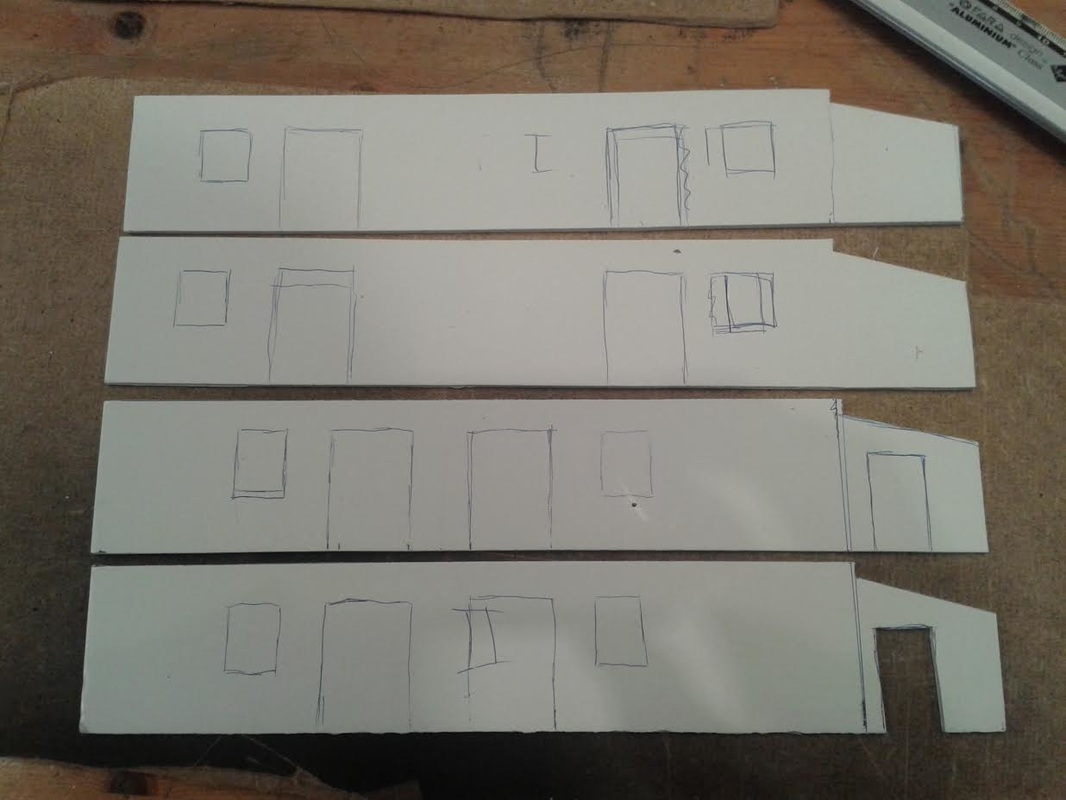 I glued parts together with PVA glue. After this I made the base for the roof in a similar way as the walls. 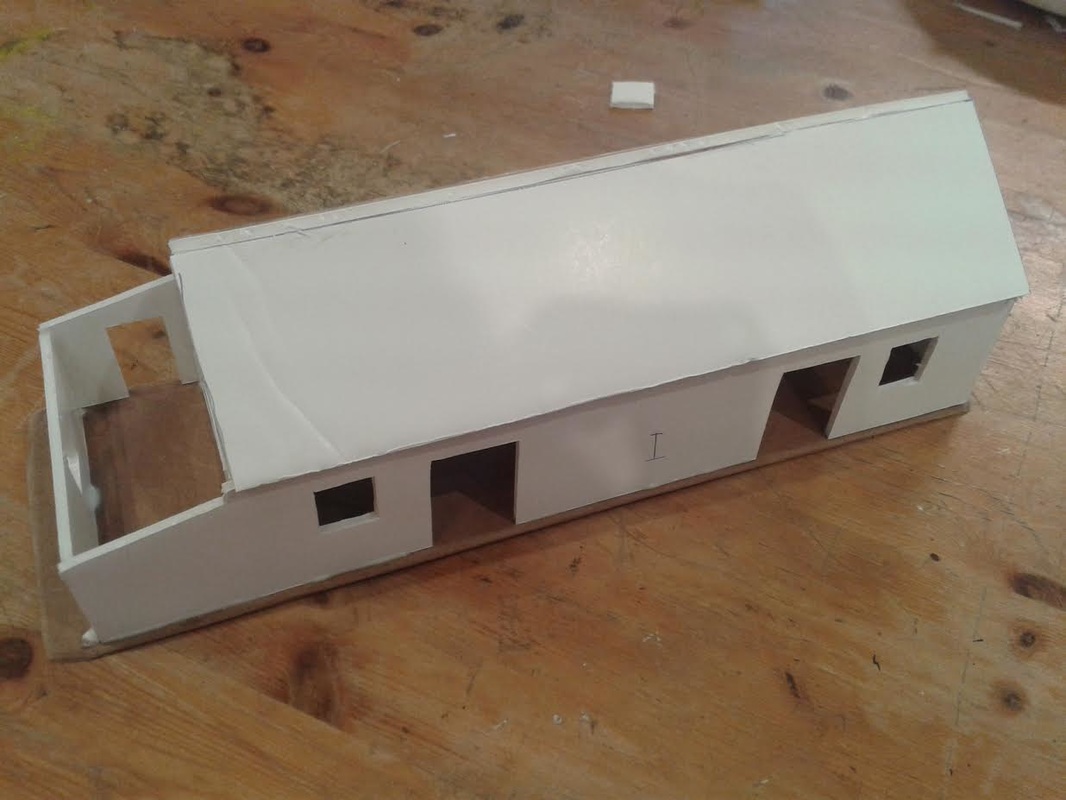 Backyard side of buildings: 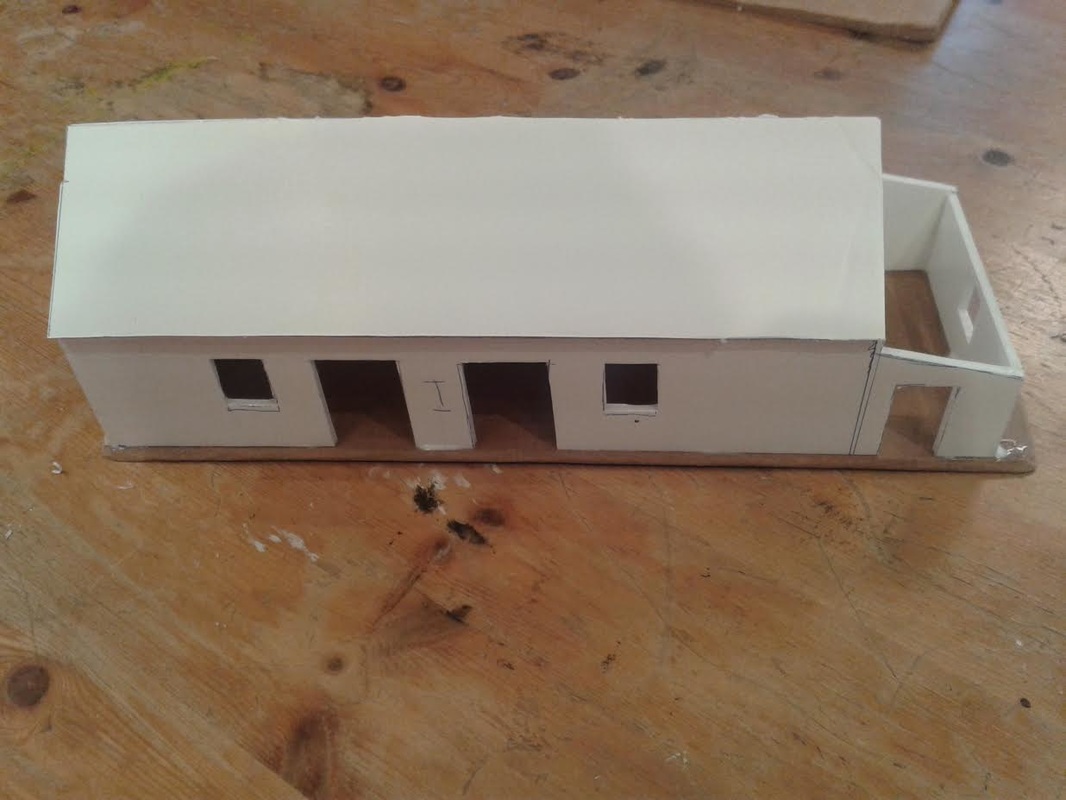 Next building session will see chimneys and hopefully some work on walls, doors and windows. Cheers! /Shirty
    |
WW2 Campaign BlogThis blog follows the second Chain of Command club campaign, set in the intense fighting over Stalino in October 1941. Archives
January 2018
Categories |
 RSS Feed
