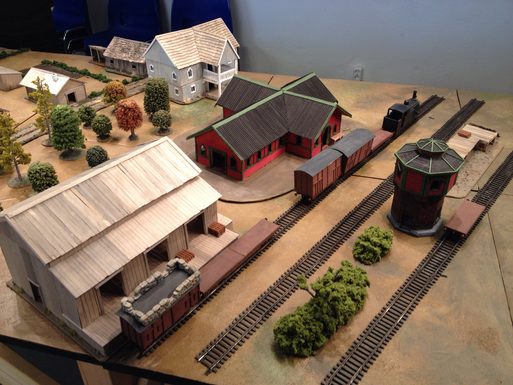
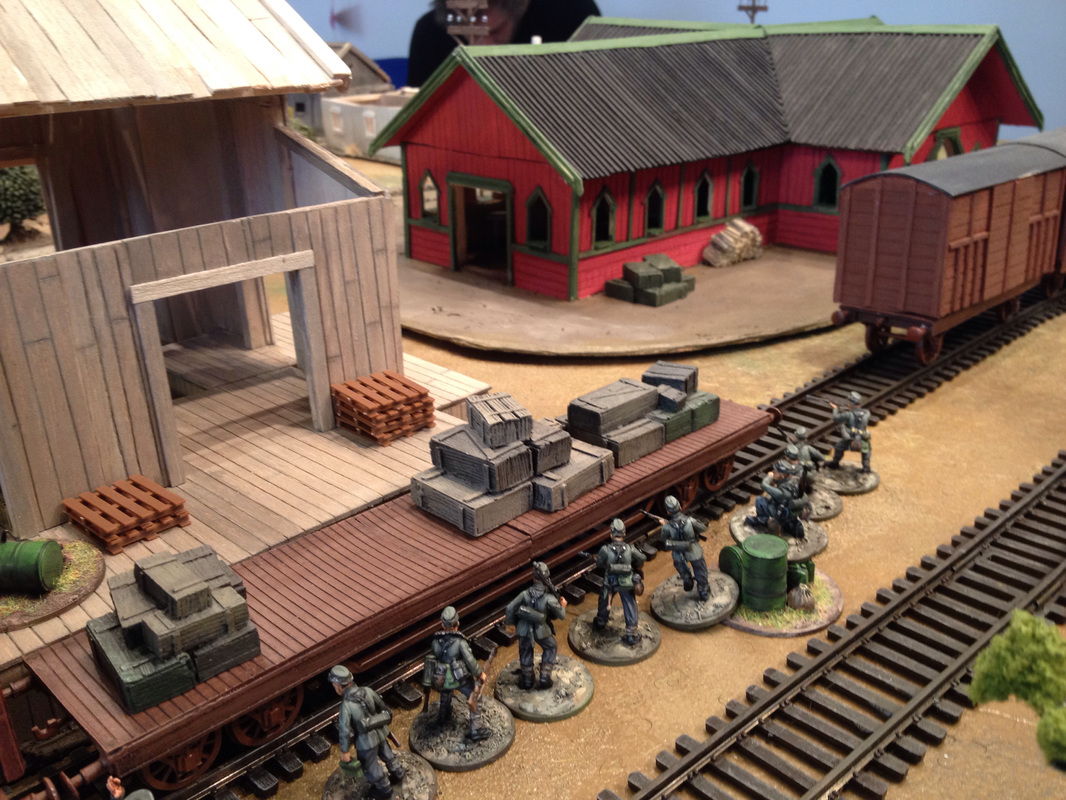
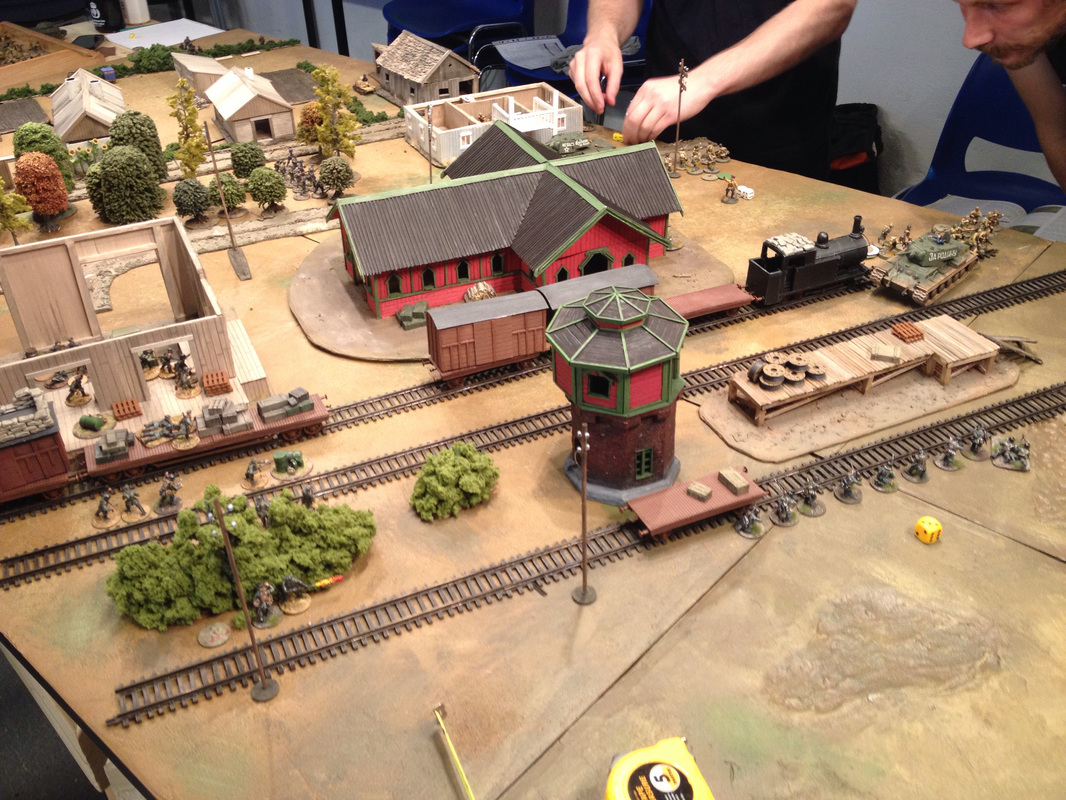
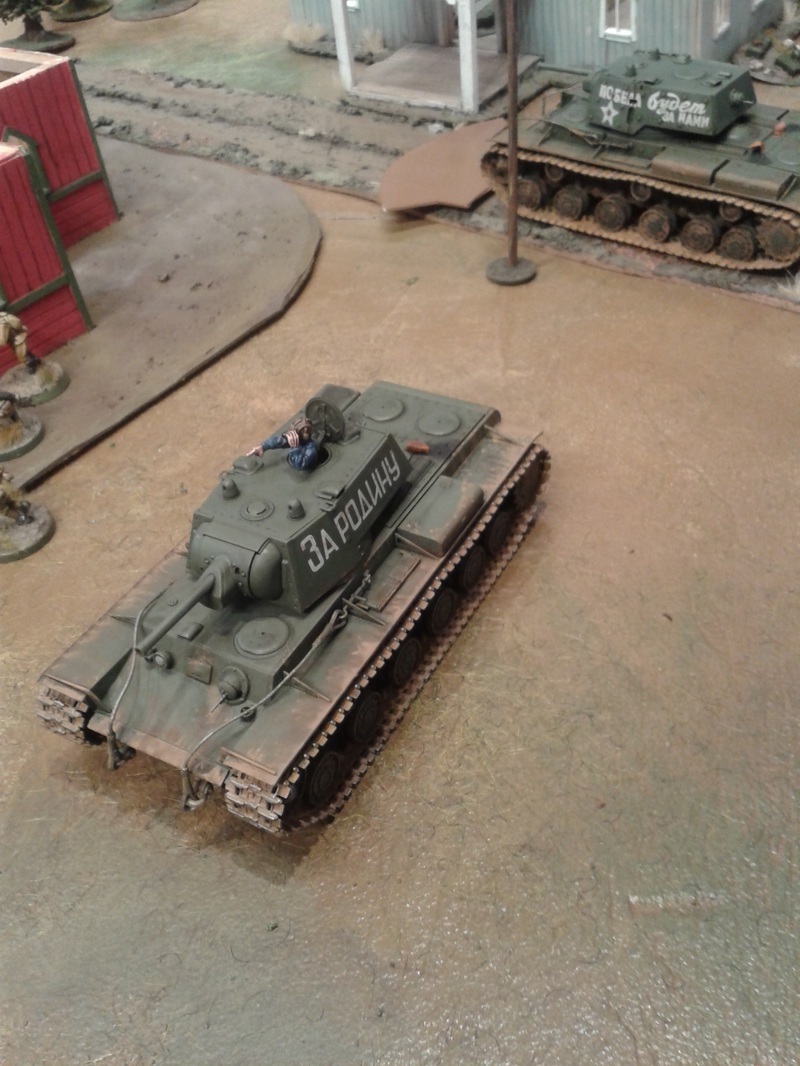
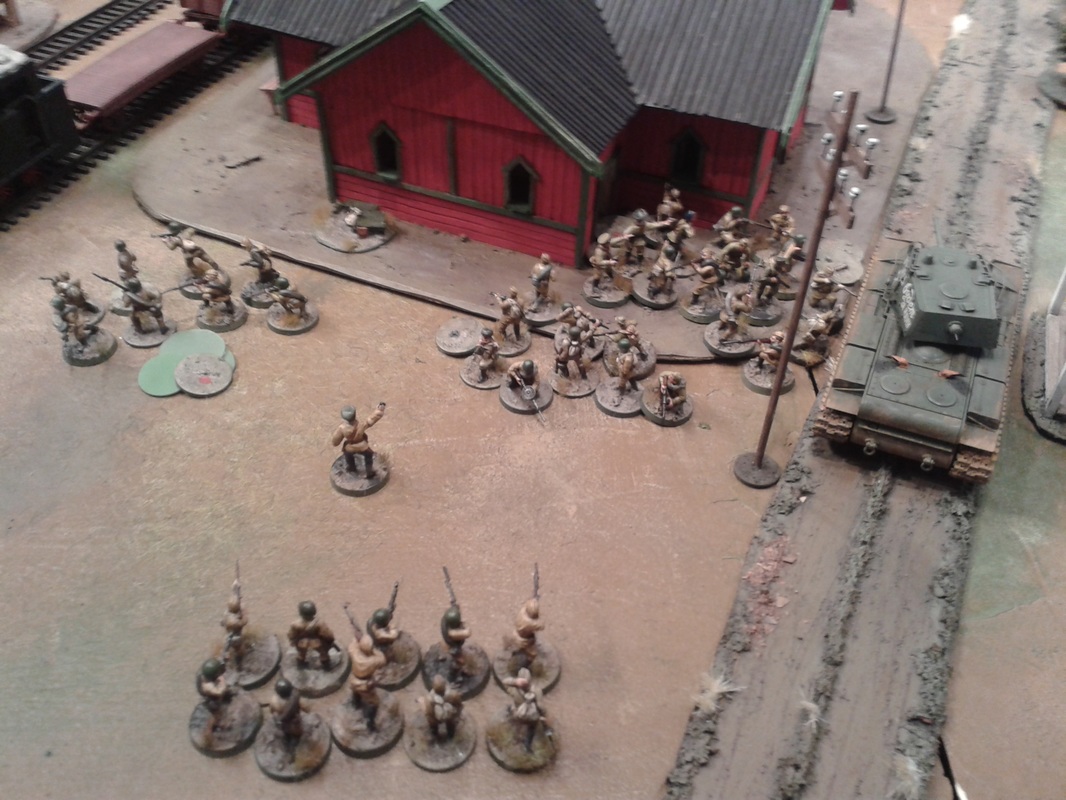
 Centre of the table. We naturally spent way too much time just playing with the trains before the battle. Jonas (Germans): We started up the campaign in the centre of our map, starring the train station with a paint that was barely dry: I had just got the basic coat done that very morning! As we were playing a Big Chain of Command, we'd see two Soviet platoons entering from the side with the blue house, sort of "north, north-east" on the real map of Stalino. We would field one Italian rifle platoon and one German Mountain Infantry (Gebirgsjäger) platoon, and enter from the south corner, with the large loading dock warehouse. Once we were done with the terrain, the Soviet side dropped a proverbial bomb: they would field a tank platoon against us! Clearly this called for an Axis time-out and some coffee. Big Chain of Command is a ruleset for playing with more than one platoon in Chain of Command. If you field a tank platoon you have to warn your opponents, before you do the patrol phase and select your support, so that they have a reasonable chance to defend against your onslaught of several metal beasts.  Left side of the table, where the Italians will end up. The patrol phase that decides where your units will enter play in CoC went pretty well for us. A tank platoon doesn't scout, it just enters the table edge from any available road. This meant that the Italian force was able to infiltrate far up the left side, with a Jump Off Point pretty much where the hands are in the picture above. My Jump Off Points were bunched up around the warehouse with the two huge doors. They were more concentrated than I'd want, but it would have to do. Since we knew that we'd be fighting tanks, we focused our support on anti-tank stuff. A high roll for support points meant that I'd be fielding a set of two PAK 36 anti-tank guns, a team of engineers with a flame thrower, and a couple of satchel charges (literally handheld mines or bundles of grenades used by infantrymen against tanks!) The Italians would field, amongst other things, a tankette and an Elephantino anti-tank gun. Here's a house rule for our campaign: gun sections. Heavy machine guns, anti-tank guns and infantry guns often operated in groups, and we feel that these teams are already pretty weak in comparison to vehicles in CoC. So in an attempt to beef them up so that they will be fielded, we decreased their cost in general, and introduced the option to buy two identical gun teams as a section. In practical terms it means that they will be easier to activate simultaneously, as you don't have to activate each team separately, though you have to deploy them at the same place.  Italians and their little elephant gun. After a customary burek break we got started, and our forces started to deploy. The Italians set up their anti-tank gun on the flank, looking over the two roads in the middle of the board, where tanks were likely to advance. My Germans deployed around the warehouse and train tracks, ready to contain any Soviet advance into the train station. Then, disaster struck. The Soviet players dug out something that they had built and painted in secret for the campaign: a KV-1 tank! 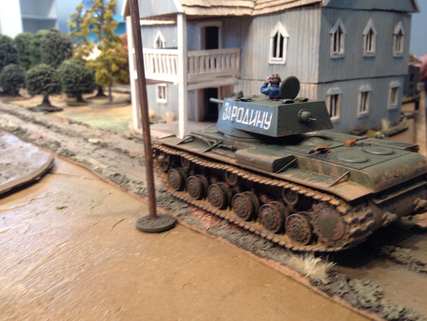 Dread on threads! We had prepared for a T-34 platoon as a worst case scenario, so this caught us completely flatfooted. However, this being the first game, we didn't want to withdraw without making an attempt at it, and a damaged KV-1 in the first battle would make a great trophy! So full steam ahead, and damn the torpedos. We went all in. My Pak 36s deployed and started a shooting duel with the KV-1, which didn't dare to get into closer range as that would expose it to the Elephantino gun as well. But in the end the German guns revealed why they got the name "doorknockers" in real life after facing these monsters on the Eastern front - after dealing several hits that simply bounced off, the section had nothing but one blown up gun and several dead and shocked crewmembers to show for it. Needlessly to say, the remaining gun retreated back into the house to save itself. Then, disaster struck again! A second KV-1 hit the table! This one advanced slowly around the station, clearly showing that it was planning to protect the rapidly deploying Soviets as they rushed into the station building. There was just one thing to do: send in my flamethrower and burn down the house (the very same house that I spent the previous days painting! *sob*) 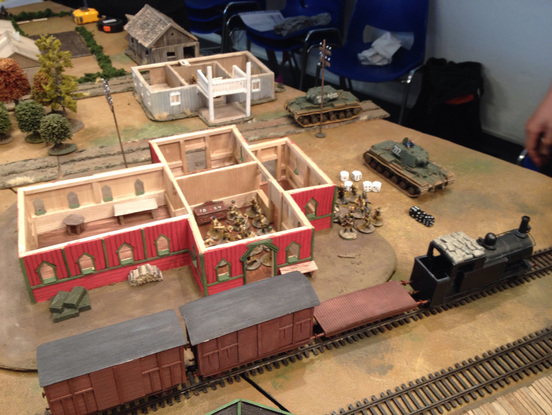 The Soviets flee out the back as we regret neglecting to build some proper smoke or fire markers. The burning station put an end to the immediate Soviet attack, and the rest of the game pretty much consisted of a stand-off between the Italians and the left-most KV-1, while my troops begun a slow crawl along the tracks supported by machine guns: The Italian forces occupied the left flank uncontested: 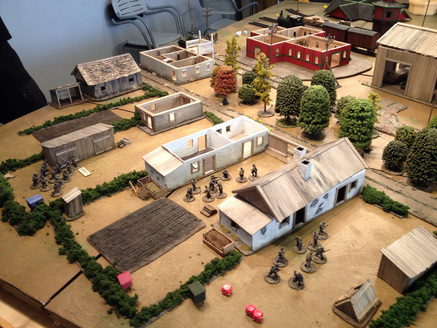 The attack gave the Soviets a few casualties, but once the KV-1 was in place by the train, it was answering with a deadly hail of machine guns and heavy exposives. As time dragged on and I had to leave, we called it a draw. Learning points from this game was that man, a KV-1 is pretty much impossible to even nudge if you don't have the right gear. It's simply not reasonable to expect a Pak 36 to deal with it: I'd need to roll five dice and get three results of 5+, while the KV-1 rolls eight dice and removes a success for each 5+ it rolls. In the end we did what we could, and tried to hurt the infantrymen slogging along with the tanks. Thinking back, it would probably have been better to this even more, instead of spending most of our resources on trying to hurt the tanks. We also spent a lot of time talking about rules and the campaign, which is probably good for the overall campaign, but meant that we spent less time playing. Since Big CoC tends to take a significantly larger amount of time than a normal battle, we'll have to be more careful about this in the future. Another result that I've seen in several of our Big CoC battles is that one, or even two, of the players/platoons sees a lot less action than the rest. In this case, one of the big tanks were effectively stuck in a stand-off with the entire Italian force, while my Germans took on one of the tanks and most of the Soviet infantry. It's often a good idea tactically for one side to get local numerical superiority, but it is less fun to be the player who gets to see less action. So keep in mind if you try Big CoC battles that it can get a bit of an uneven experience for the various players, and schedule in plenty of time! But in the end, it was very nice to see all the new painted terrain and miniatures, and I could not stay mad at the KV-1s for too long, as they were so beautifully painted. And since it was a tie, we'll get to see the station again! I promise to try to paint a suitable sign for the station until then. Oh, and study this video a few times:
1 Comment
Campaign start from the Soviet perspective Now we had out first campaign battle after building terrain, painting figures and most of all, talked about how we wanted to do it for... nine months or something! So we decided to have somewhat of an extravaganza, a Big Chain of Command about the centre of the struggle - the western train station in Stalino! Two platoons on each side and a whole day of gaming! We played a scenario we named "Encounter Battle", which is more or less the same as the "Patrol" scenario, but you roll 2d6 for support instead of 1d3. The Soviets - thats me and my comrade Willi, took the following forces (or, that's what hit the table, the support we did not deploy have to stay secret to our enemies so we can´t give it away here): Motorized Rifle Platoon 1941 Ranking Officer Medic Molotov Cocktails 8 extra SMGs (and eight support that never made it to the table) Green Tank Platoon - 2 KV-1, the Senior Leader is a Tank Ace Two Infantry Squads Senior Leader (and two support that never made it to the table) We faced one platoon each of German Gebirgsjägers and Italians. Here is the aerial photo we used to set it up and our table: 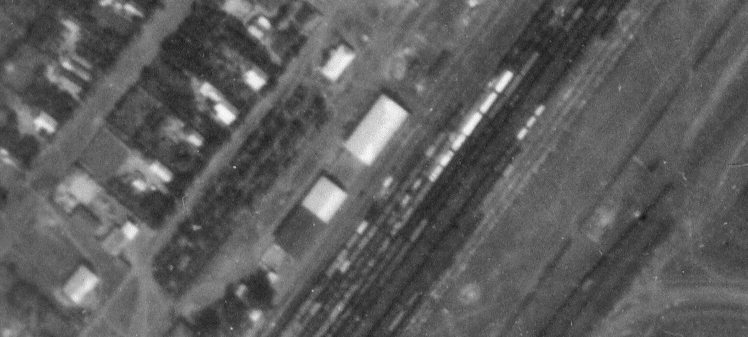 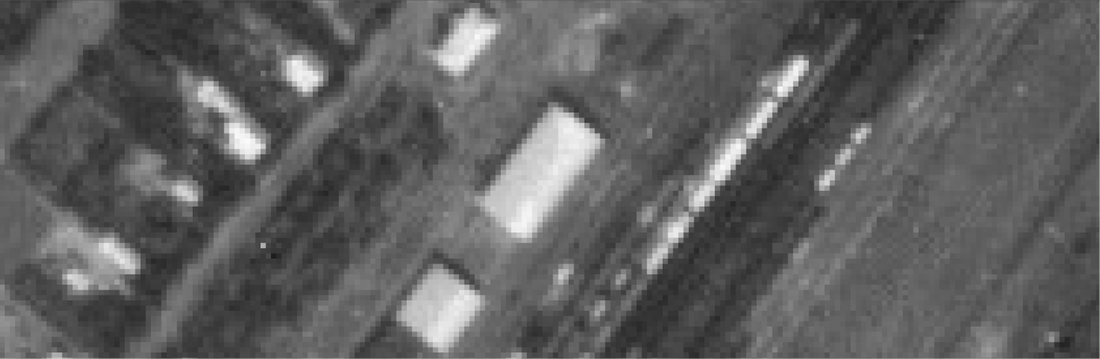  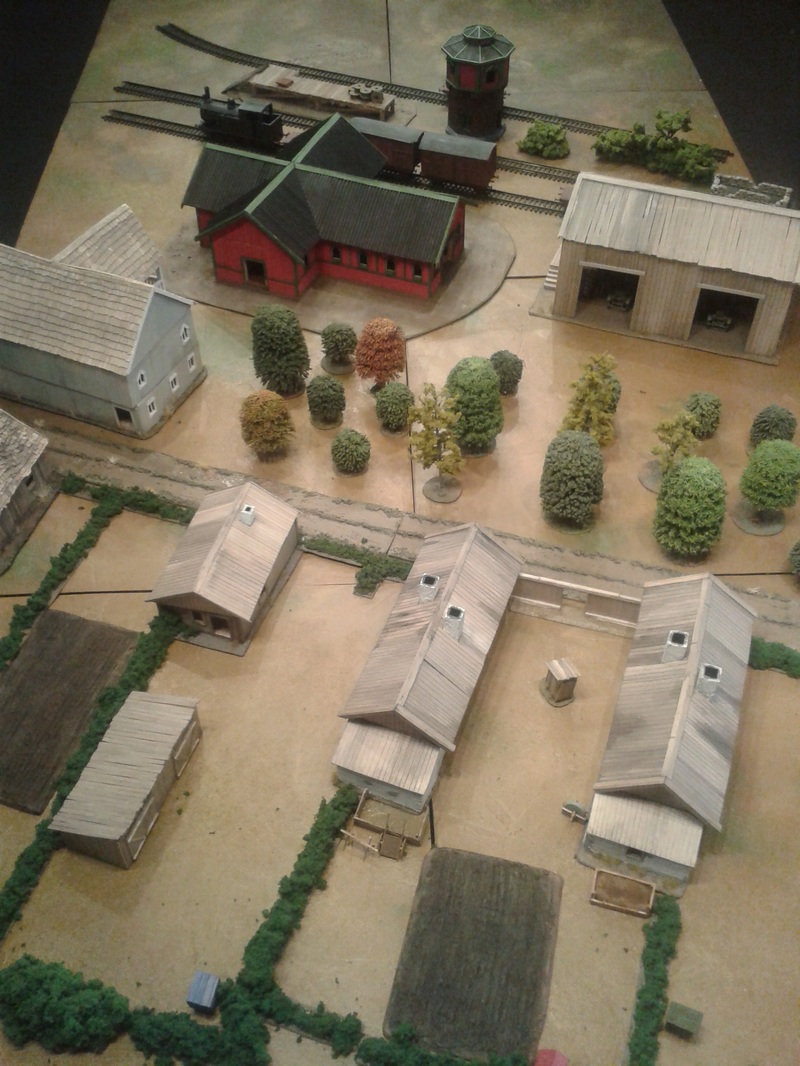 With only one platoon for the patrol phase we deployed to a central position and got badly flanked by the Italians on our right. We decided to try to stall the Italians and crush the Germans with our tanks and the majority of our forces. The game began cautiously and as a surprise we deployed not one but two KV-1. We built them this Spring and have kept them out of sight from our opponents for the campaing! The German and Italian players were a little puzzled, but thought that the models were nice. We occupied the rail station (the big red building) with two squads, and the two officers tied to the infantry platoon. One KV-1 started a duel with two PAK-36 in the railroad warehouse, the tank getting the better of it.  The other tank turned left and started attacking the Germans. Then disaster struck, a German flame-thrower torched the railstation and we were forced to evacuate. The captain was badly hurt in the attack and could not move out of the burning building! But our opponents were very chivalrous and let us take him out after being attacked by the flame-thrower once more, an attack he survived. The medic could then patch him up. This evacuation left the Soviets in disarray. We started to anchor up the defense against the Italians with one more squad and the other evacuated infantry followed the KV-1 that attacked the Germans. This was an hazardous run through MG-34 fire from the rail-yard but after some chaotic manouvering the were in place to engage the Germans who tried to extend their flank over the rail-yard, probably in an attempt to get away from the punishing tank fire. After this we had to wrap up long before the game had come to a conclusion. So we agreed to a draw as both forces were high in morale and it was more down to the lack of time than one force needing to withdraw. Something of a anti-climax, but I think thats what you get when you make this much preparations! But we got to test our new tanks (their armour was thick enough!) and look at all the nice terrain we built. And since the game ended in a draw we'll get to play on the table again, nice! After much preparation we are now ready to begin the Stalino campaign! But how will it work? Basically we are playing a home-brew expansion of the published campaign rules for Chain of Command, At the Sharp End. We used the official rules pretty much straight out of the box for our first attempt at a multi-player campaign. That campaign took place in Glykhova two months earlier than the Stalino campaign, in August 1941. We quickly noticed a few quirks of the campaign system that we were not completely happy with.
 How to do campaigns with friends (many friends), in CoCThe Stalino campaign is pretty much a playtest of these campaign rules, and we're far from finished. Even before setting up the first battle we were already discussing the ramifications of some of the rules, and after the battle we ended up re-thinking even more! But that's what playtests are for. The "beta" rules will be published on this site once we have ironed out some more issues, but a short explanation is in order for you to be able to follow the campaign once it gets started. 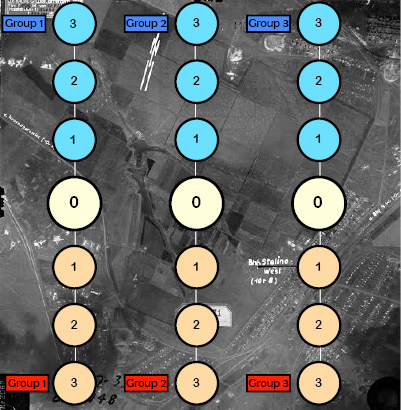 Campaign Tracker The first step was to divide the campaign into three "columns" - left, centre and right. Imagine it as a cut-out of a battle frontline, with about 2-3 platoons operating in the area of each "column". Each such column works like a standard At the Sharp End campaign in themselves, with both sides meeting at the neutral middle "0" point at the start of the campaign. A win means that the victor moves the battle one step along the column towards the opposing side, and the campaign is won when one group on one column has pushed the opposing forces off their edge. Campaign Rounds and Support PoolsThe first big difference is that for each "campaign round", you will fight one battle on each column. This opens up for a situation where one team could be winning on one front, but get pushed back on another. This is important because of the second major change: you now buy and manage your entire force, including the support available to you. This kind of army management is meant to remove the issue of disposable support options, and also add a level of overall campaign logistics and management. Each Group in the example above gets a number of points to buy platoons and support options with. Platoons are priced according to a table, and the support options are bought for the normal cost listed in your army list. For example, we gave the German players 88 points to spend on each group. A +3 platoon, such as a normal rifle infantry platoon in 1941, costs 23 points. If the Germans buy two such platoons for their Group 1, they can spend the other 42 points on a pair of StuGs, some anti-tank guns, a HMG team, etc. These all go into Group 1's Support Pool. ... or they could buy three platoons, and have plenty of warm bodies to soak up losses, but be strapped for beefier guns from the get-go. As you see, you're already making tough decisions before the first game even starts! 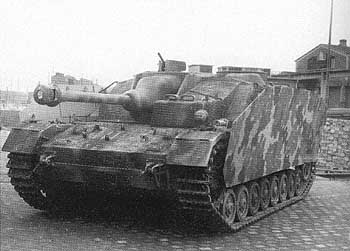 "I'll take three of these!" Now, once you have bought your groups, that's what you'll get. For the rest of the campaign. Your fancy StuGs get blown up in the first game because you got careless? Now you'll have to work around it. There are still some ways to get around bad losses: you can transfer platoons and support options between columns inbetween campaign rounds for a small cost, and some options (extra SMGs, satchel charges, fortifications etc.) are "free" in that you don't need to buy them for your Support Pool to be able to use them. But overall, we think that this alteration will mean that you fear losing your support options as much, or maybe even more, than your "normal" infantrymen. Sharing Campaign ControlAnd did you notice that I mentioned "group 1", not "player 1"? The idea is that you play each side together, so that you can jump in to play a platoon for any column as the campaign turn dictates. The idea behind this is to avoid a common problem with multi-player campaigns - player availability. If your campaign relies on Dave and Ben being able to find a day to play next week, and then for June and Andy to be available the weekend after that, your campaign is bound to get bog down sooner or later. By making everyone take collective decisions and manage the campaign, you also take some of the bad feelings of someone else jumping in and playing "your" platoon for a battle or two. It's also a lot of fun to discuss how to design the various groups and support pools, and how to juggle the available resources once you have started to take some substantial losses. 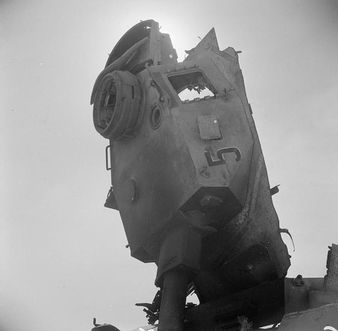 "You did WHAT with our Pz. IVs?!" This is just a brief description to give you an idea of how the campaign will work. There's also event cards, purchasable tactical bonuses, and all heaps of fun stuff. Hopefully we'll be able to get the rules out soon, and make the necessary changes as we run into bumps in the road along the campaign. But for now, sit back and relax, and watch us sweat blood over the mounting casualties as we're likely to run out of our favourite support options real soon!
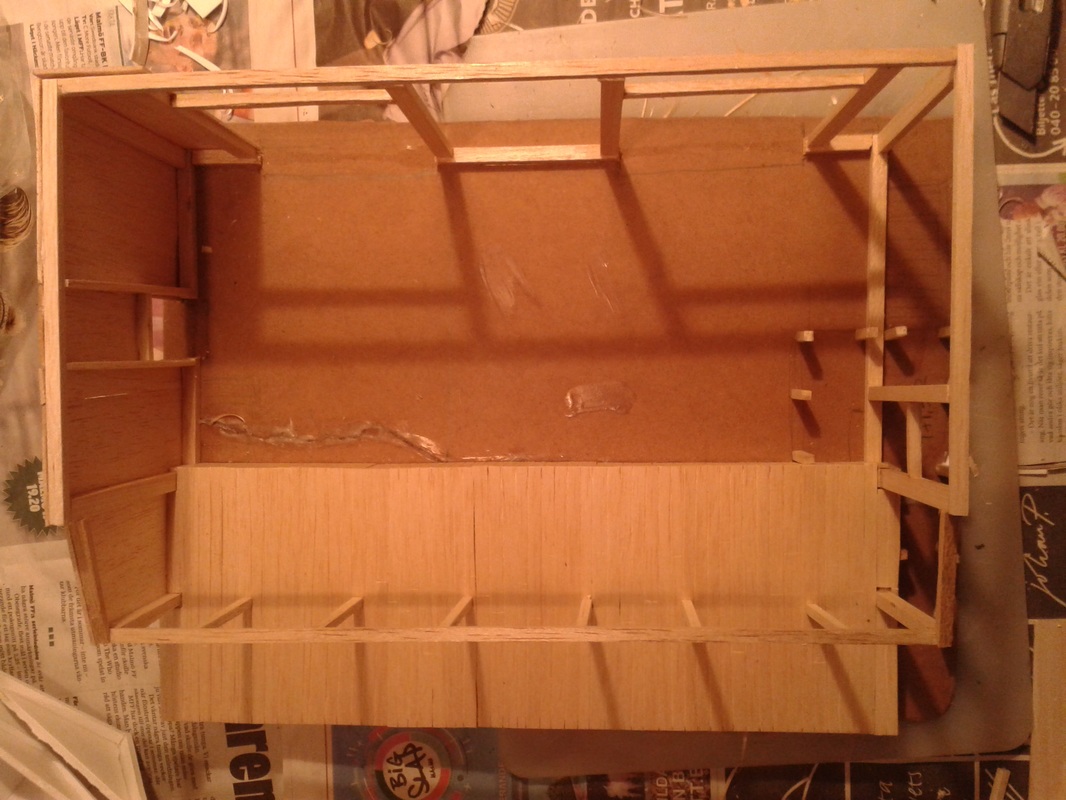
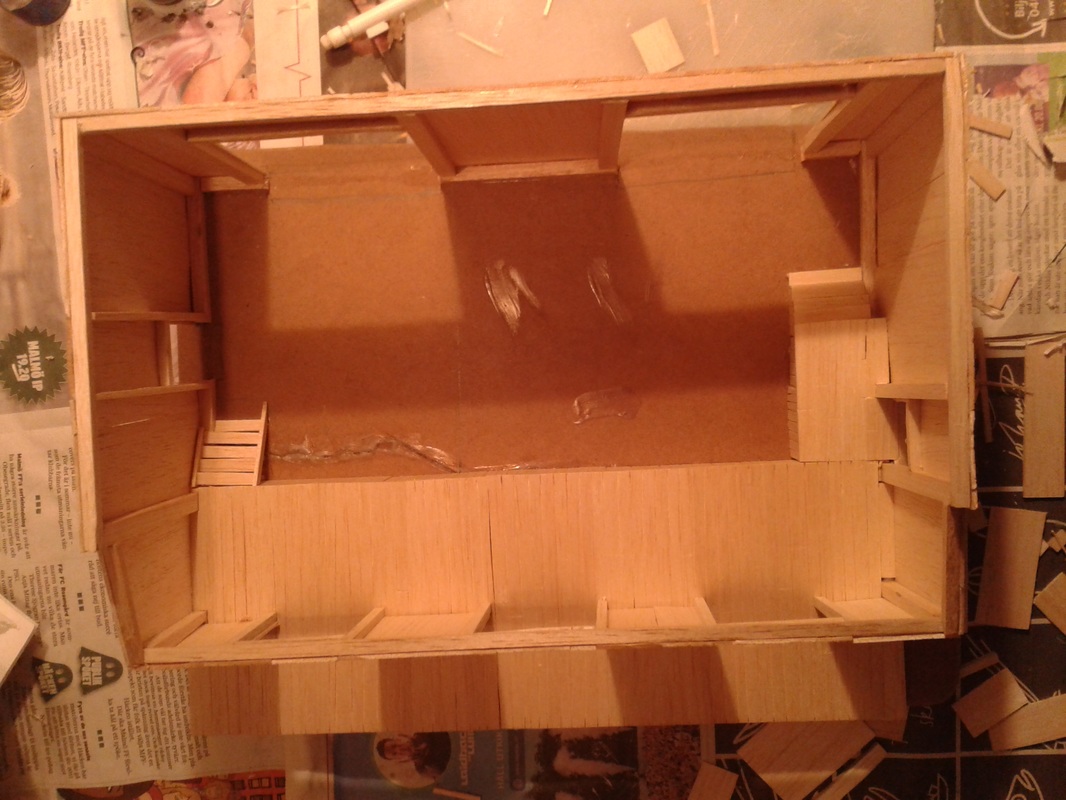
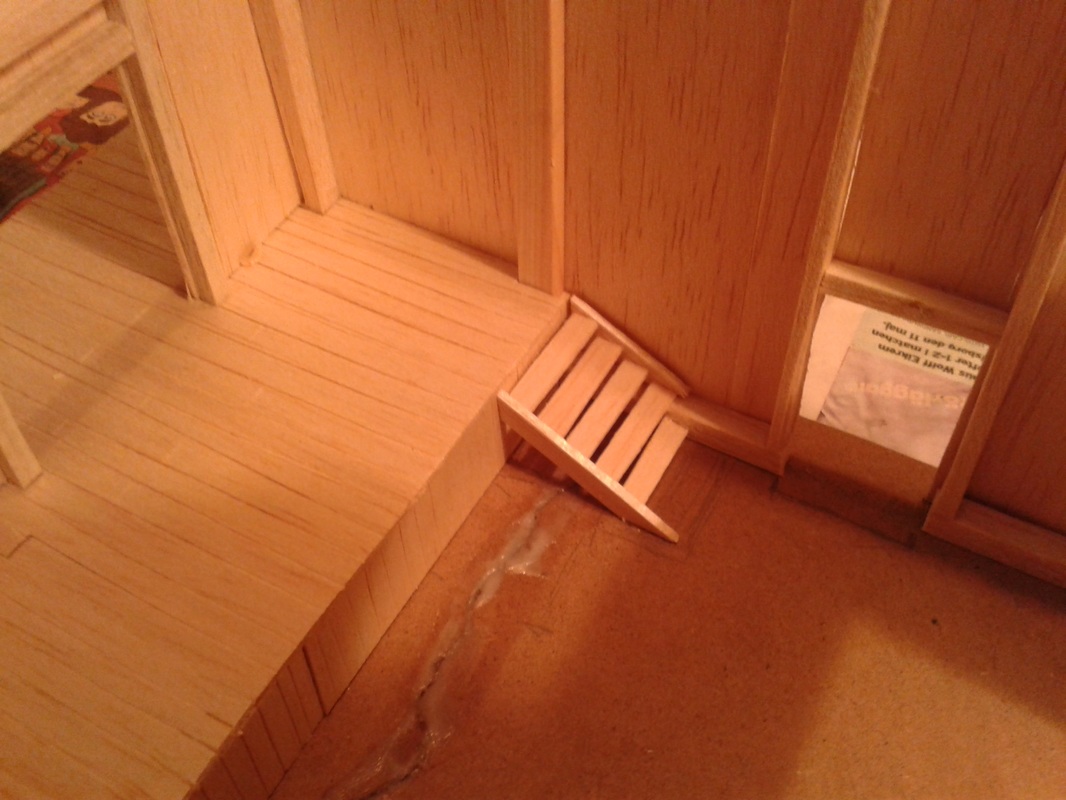
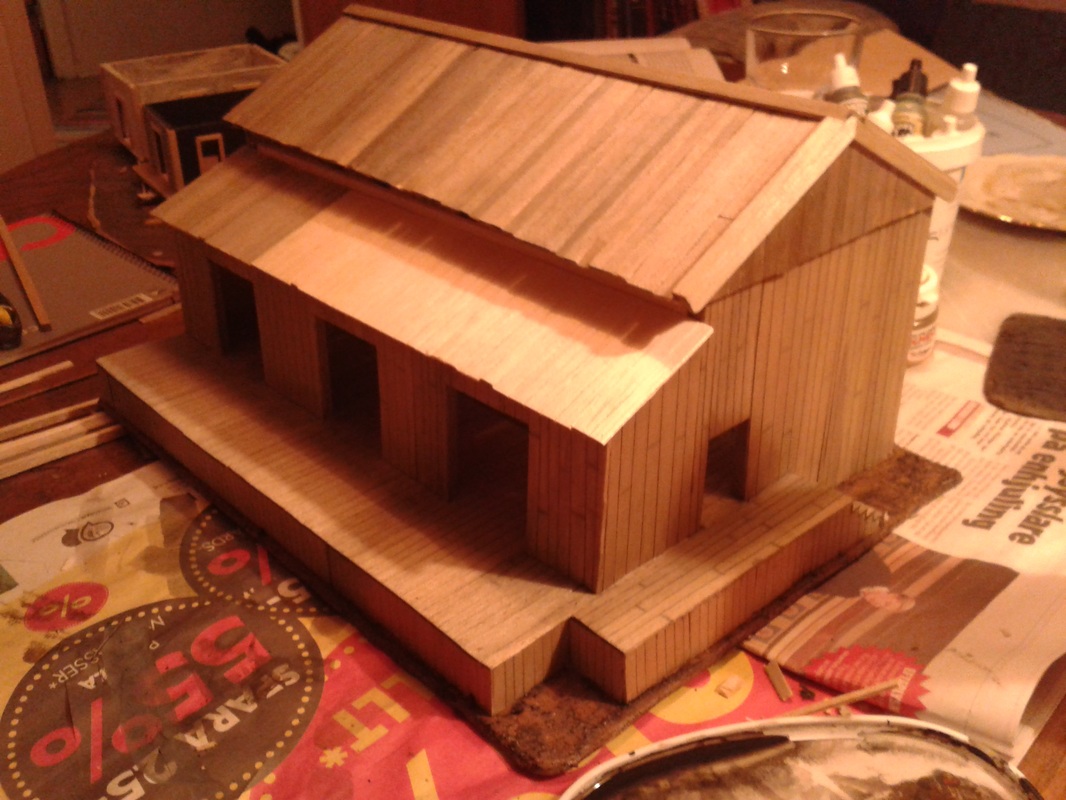
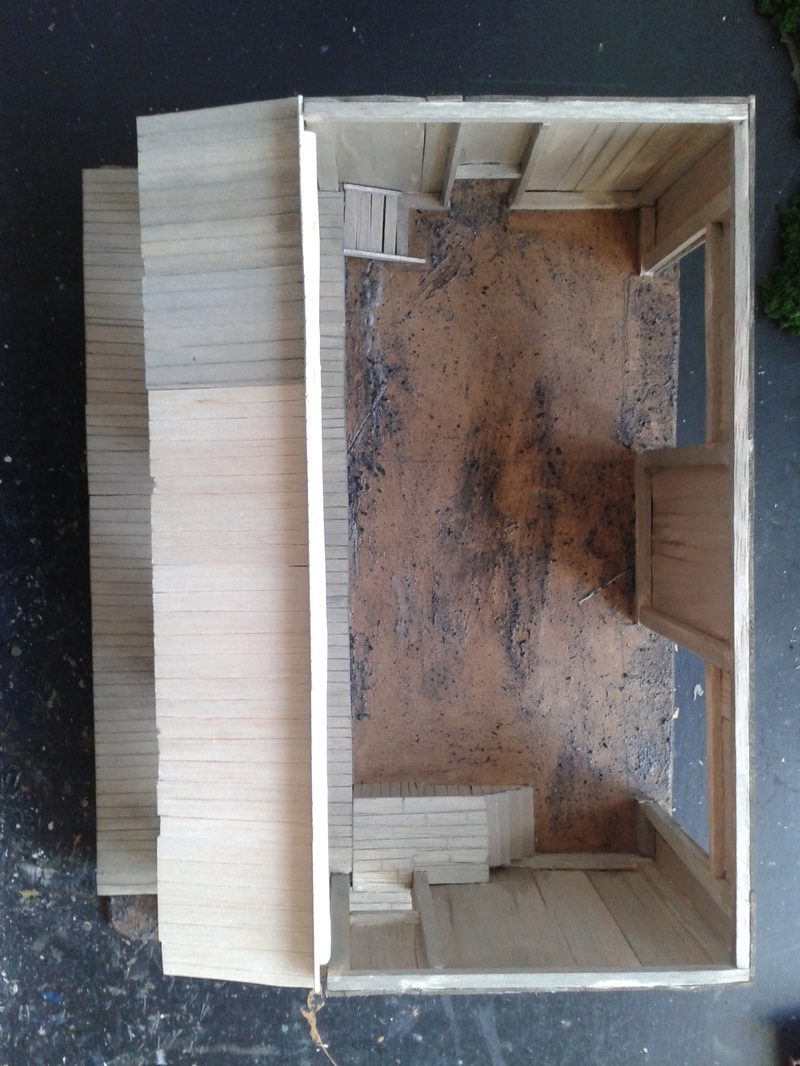
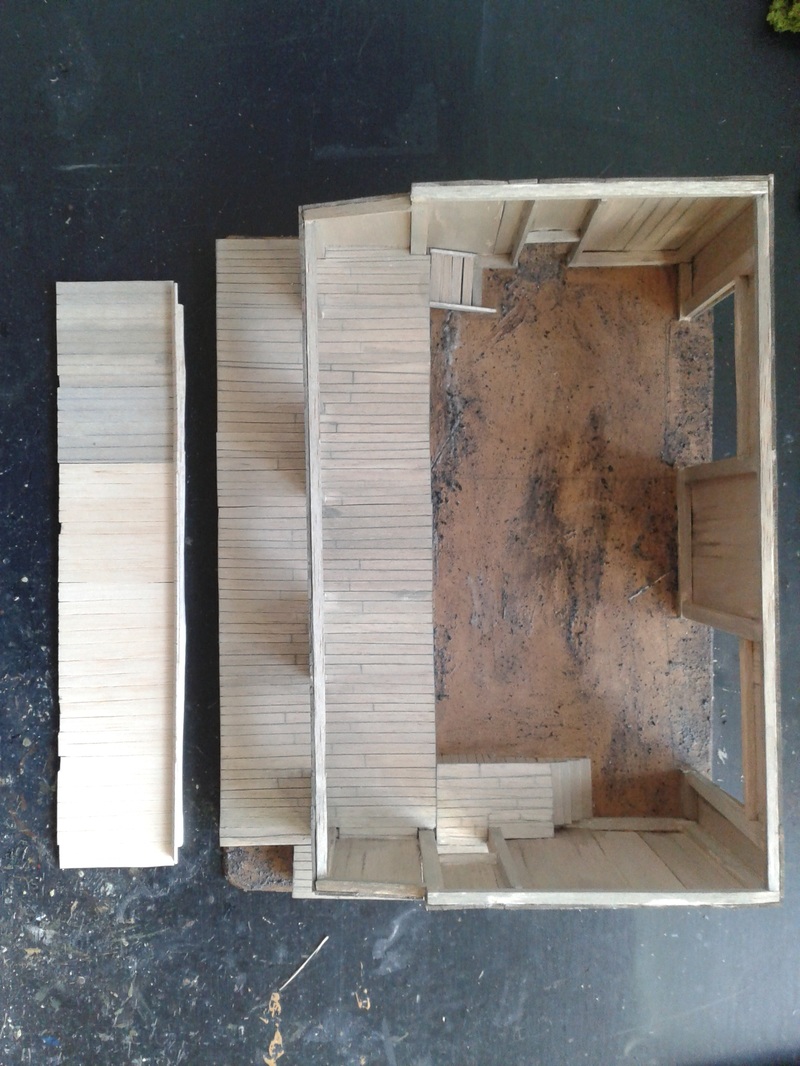
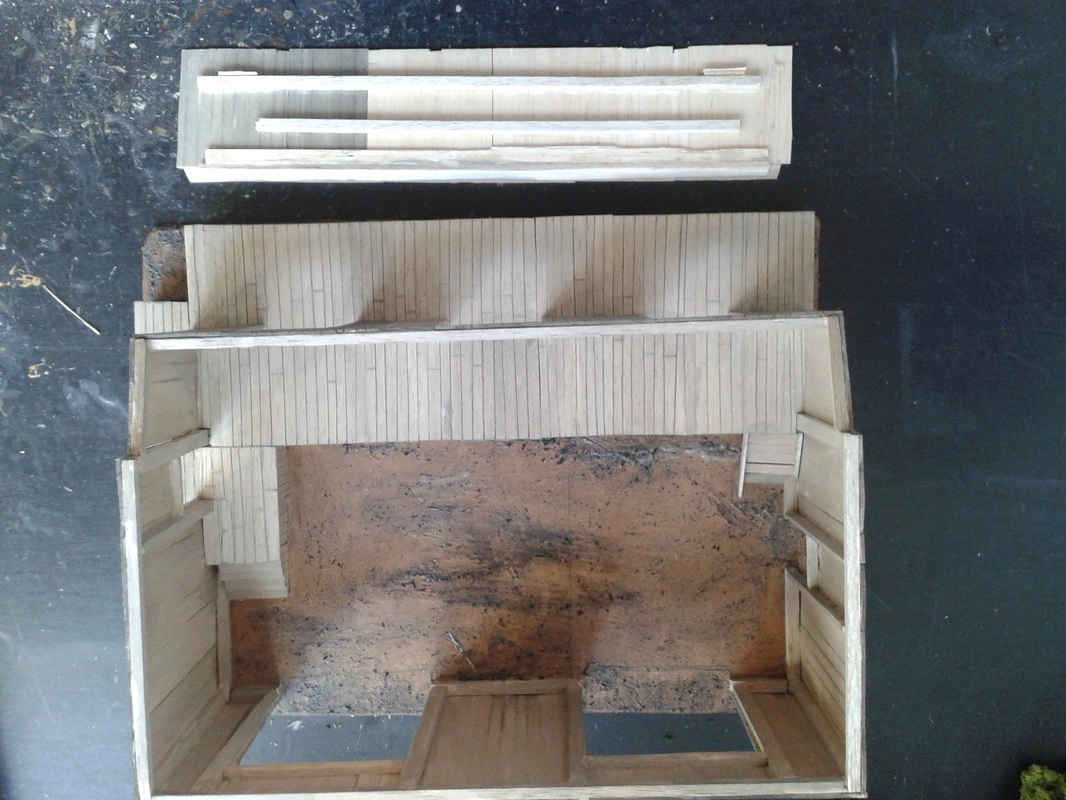
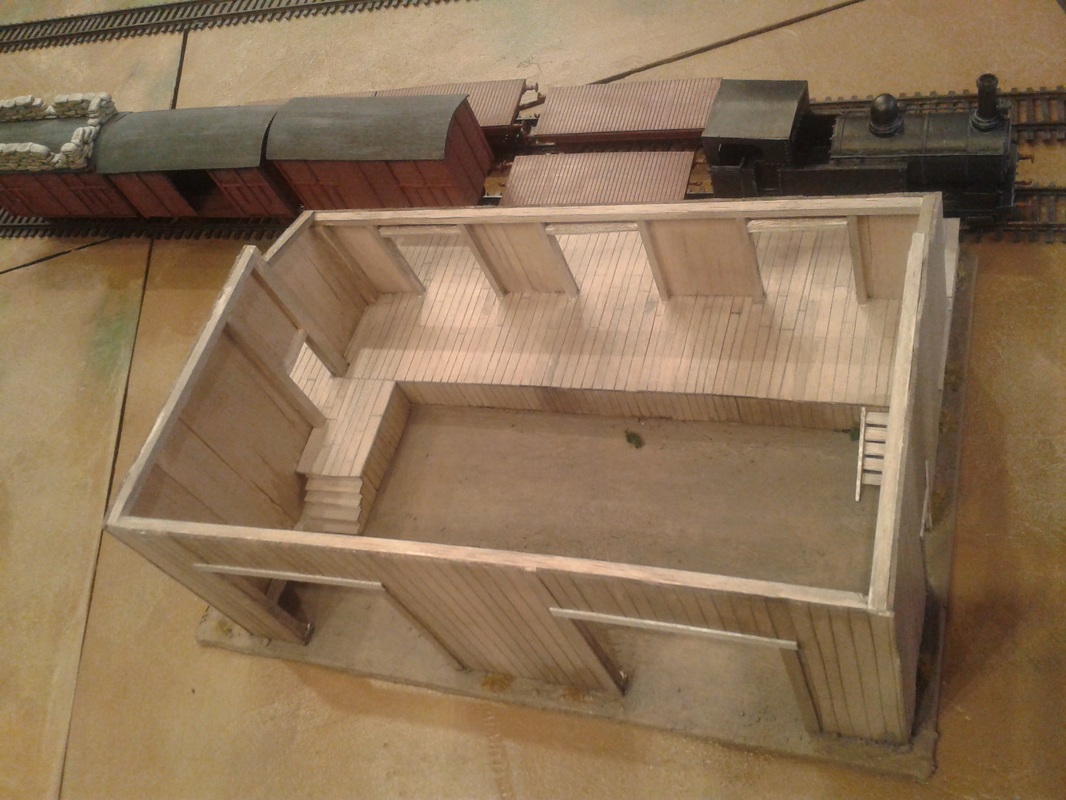
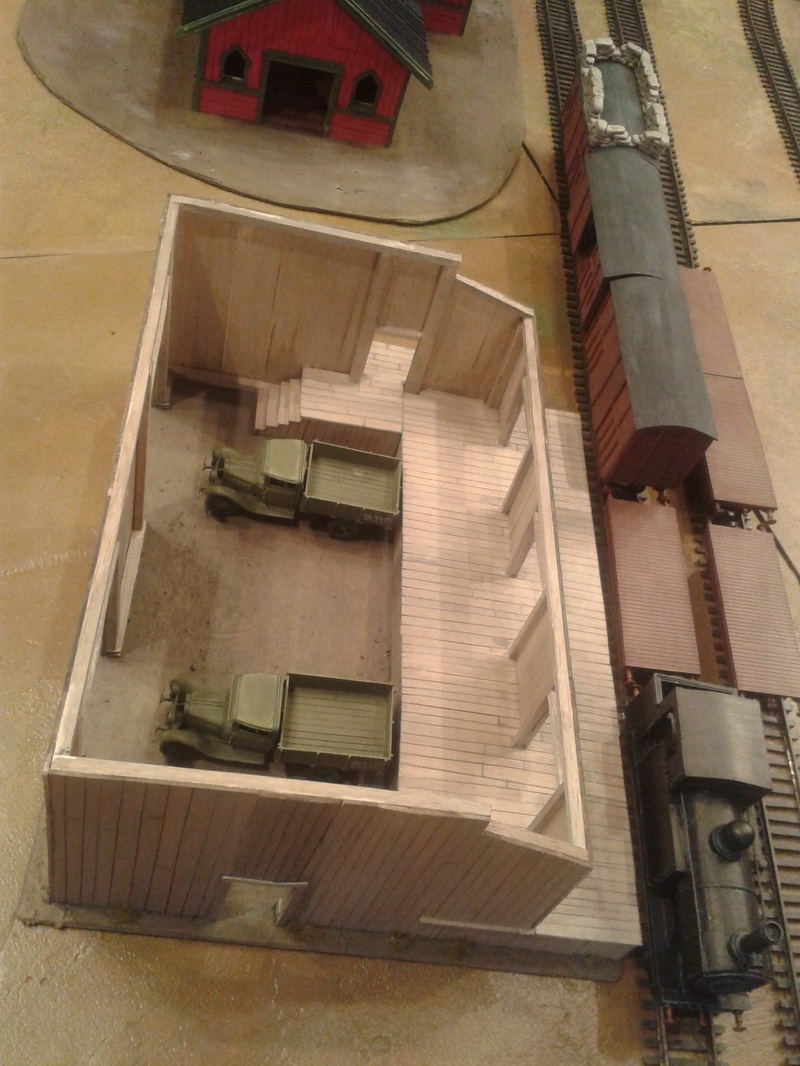
Cheers, Jonas I think more gamers should try to build terrain (particulary houses) in balsa wood! It´s surprisingly durable, easy to work with, looks very nice (in my opinion at least!) and is very fun as well. This building took me 15 hours to complete (I already had the roof from an old building we never used). The only things I used were:
I hope someone gets inspired! Cheers! /The balsa-building Shirty
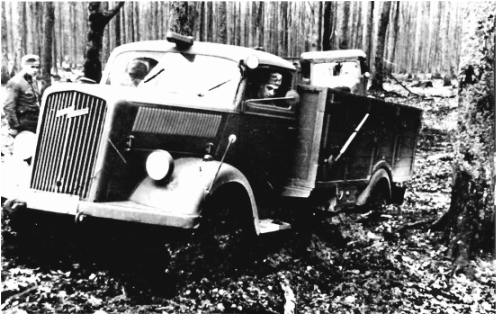 An Opel Blitz truck struggling through muddy roads. The Opel Blitz served in every theater of the war as a workhorse for German logistics, On a tactical level it was both used as an infantry carrier and as a platform for heavy weapons such as flak guns, which could be fitted to the truck bed. As I painted up my Italeri 1/48 scale kit, I thought it was time to dirty it up to represent the harsh conditions of the Russian roads. What better way than to try to weather a windshield?  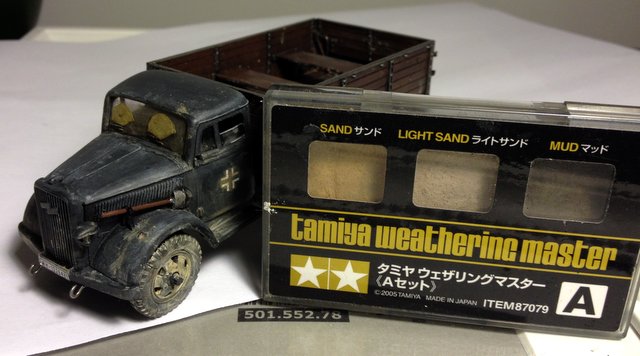  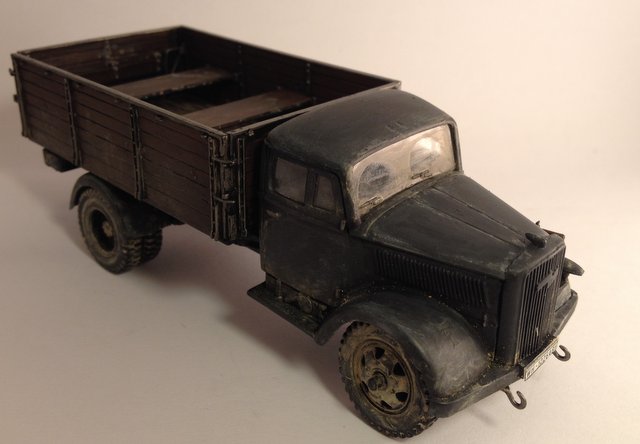 Again, I did the mud and sand with Tamiya's weathering powders. I wanted to try to dirty up the windshield to look like mud and dirt had kicked up all over it. For starters, I gave the windshields a coat of matte varnish. Then I cut out a bit of Tamiya's masking tape, to fit where the windshield wipers would have kept the windshield clear. Then, I took the darker mud-coloured pigments, and painted the windshield with a wet brush. The masking tape kept the pigment from covering the entire windshield. Before the pigments had time to completely dry, I pulled off the masking tape with a pair of pincers, and used a brush with just water to tidy up the windshield, and even out the pigments a bit. In the end I like that the truck look dirtied up, and I prefer this to just leaving the windshields all clear. After that I cleaned up the grey parts of the truck a bit, and now it's ready to deliver some Gebirgsjäger or Panzergrenadier squads to the battlefields of Stalino. 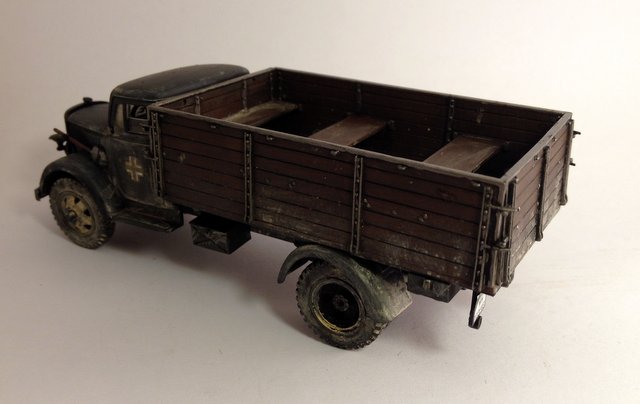 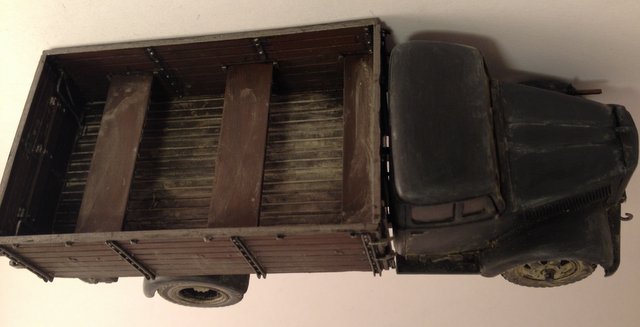 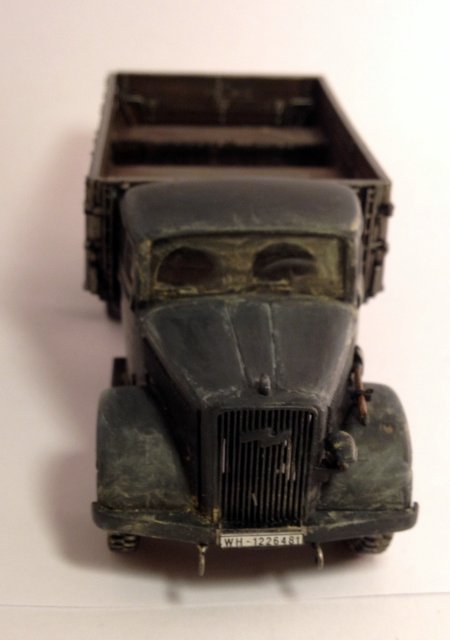 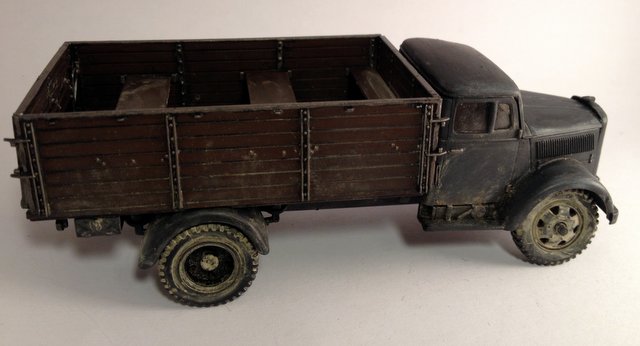 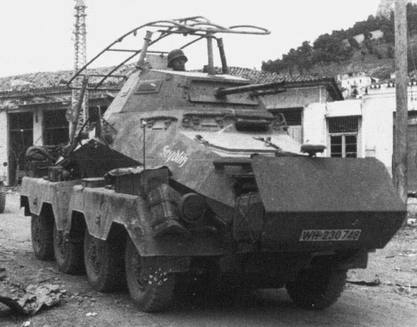 The German armoured cars were often used for recon duty, and the schwerer Panzerspähwagen (Fu) Sonderkraftfahrzeug 232 (8-rad) (quite a mouthful), was equipped with a medium range radio with a large unusually shaped antennae to report their findings. It had a driver seat in both directions, and each pair of wheels could be steered independently. This was a development of the previous design with six wheels, and the extra wheels were added to improve off-road capabilities. The turret was armed with a 2cm automatic cannon and a MG 34 machine gun, to deter infantry and to defeat weaker enemy recon troops that it might run into. The "plow" in the front was a later addition to increase front armour. The German Aufklärungsabteilung, or recon detachment, often included armoured cars. Panzer divisions would field heavy armoured car companies that consisted of a mix of these 232 as well as the 231 (which didn't have the radio antennae), and the smaller 222 armoured cars. Since we'll be fielding panzergrenadiers in the Stalino campaign, it's only fitting that these recon vehicles get stuck in at some point.   The kit is a 1/48 scale Tamiya plastic model kit. The build was pretty fun, and the vehicle itself is unusual enough to just grab your attention. As you might notice, the decals included are representing the tank in the picture at the top, with the same name and everything! IAs usual, Tamiya included decals for other fronts and time periods as well.
Just like with the 251, I had troubles with the brush-on gloss varnish. I'm starting to think that it's just a plain bad idea to use brush-on varnish for such large, flat areas: no matter the brand, it tends to clog up and dry up into uneven blobs on the surface. But a second layer of matte varnish again managed to salvage the results a little bit. The weathering was done with Tamiya pigments. I tried a new technique of adding water to the pigments afterwards, and then smudge the watery mix into crevices and such. It's not perfect, but it sure looks it's been through a bit of mud. If I were to build another one I'd probably add some more stowage, as the pictures I've seen of the car in action has everything from helmets tied to the sides to bags of food, water buckets and tents. After all, these vehicles were moving out in front of the main forces, and would have to be more independent with their baggage as well. Finally, here's a short documentary about the 231/232 if you want to see them on the move. /Jonas |
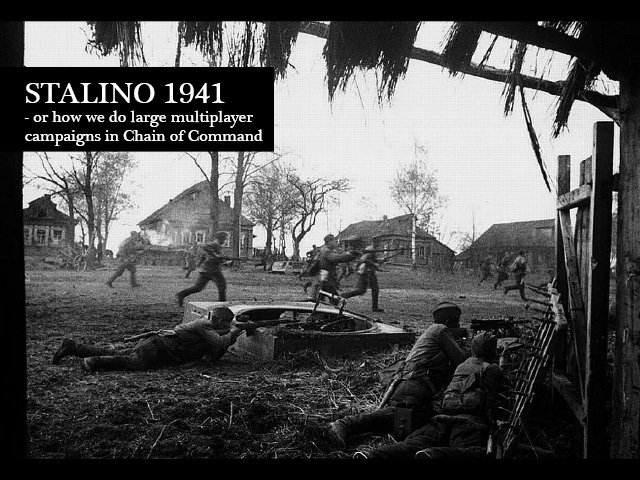
WW2 Campaign BlogThis blog follows the second Chain of Command club campaign, set in the intense fighting over Stalino in October 1941. Archives
January 2018
Categories |


 RSS Feed
