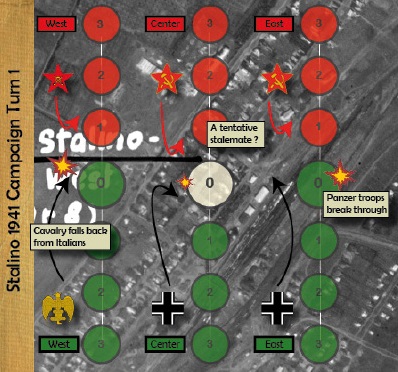
 The Axis forces started the campaign strong: they won the patrols on both flanks, while the centre saw a stalemate with neither side gaining the upper hand. However, they have also taken slightly more casualties if I'm not mistaken, and those are costly in this campaign ruleset.
Will the Soviet forces manage to turn the tide in the next campaign turn, or will their hold over Stalino start to slip? Rumour has it that we'll see both new players on both sides as well as new in-game officers enter the fray. And for those who prefer to look at conversions, painted miniatures and terrain, let's just say that there'll definitely be more of those as well! /Jonas
0 Comments
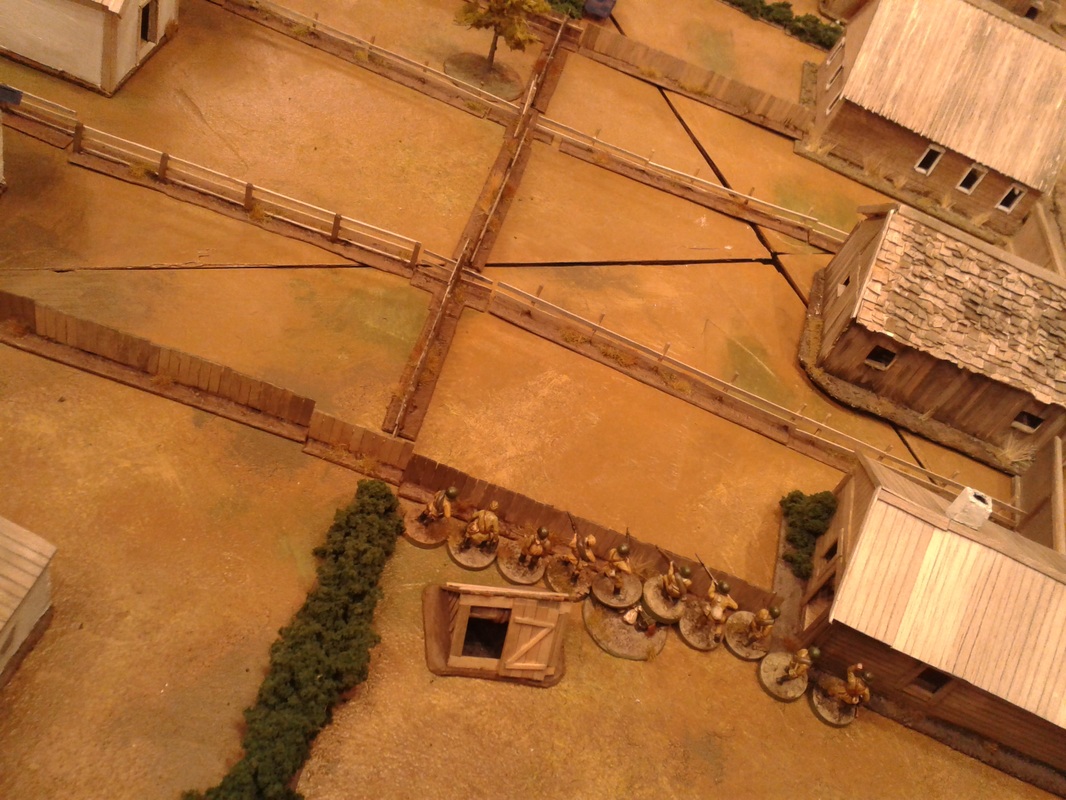
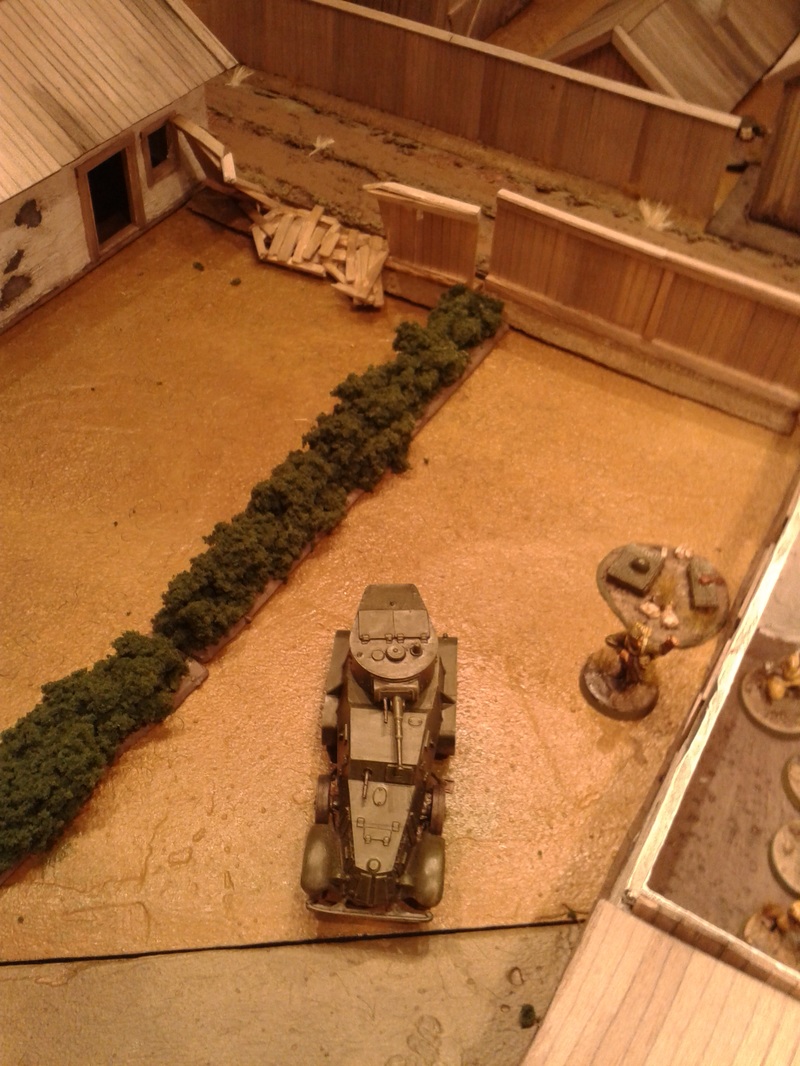
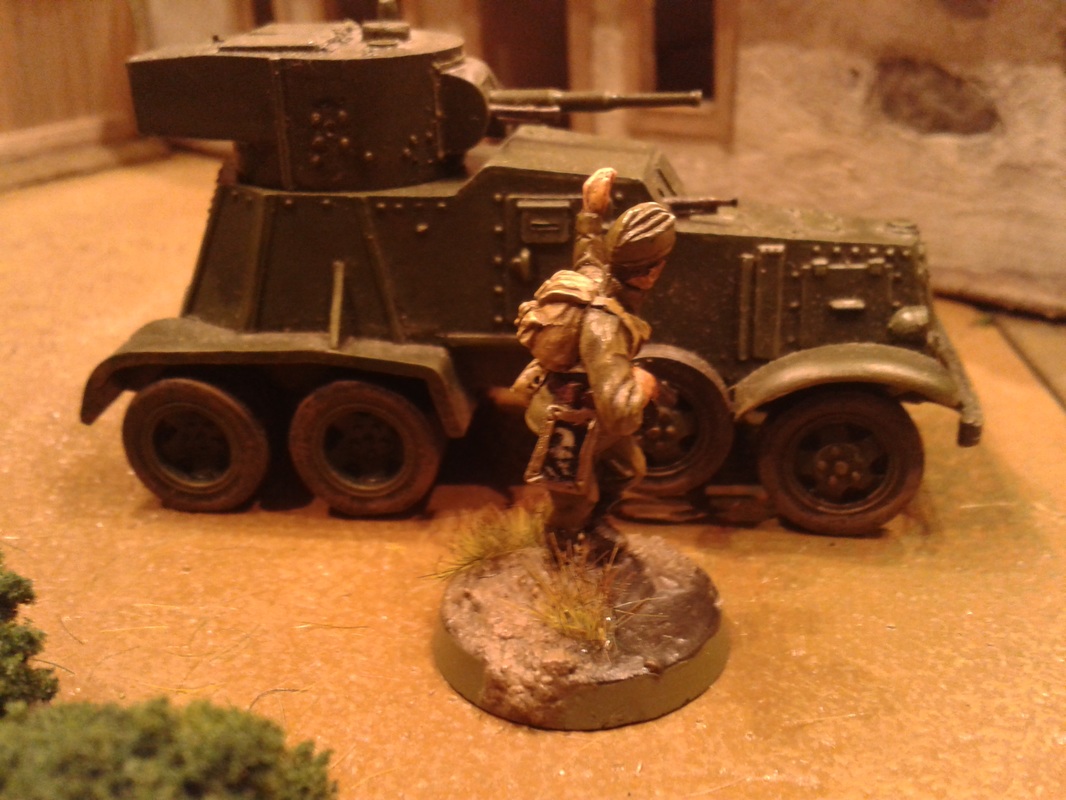
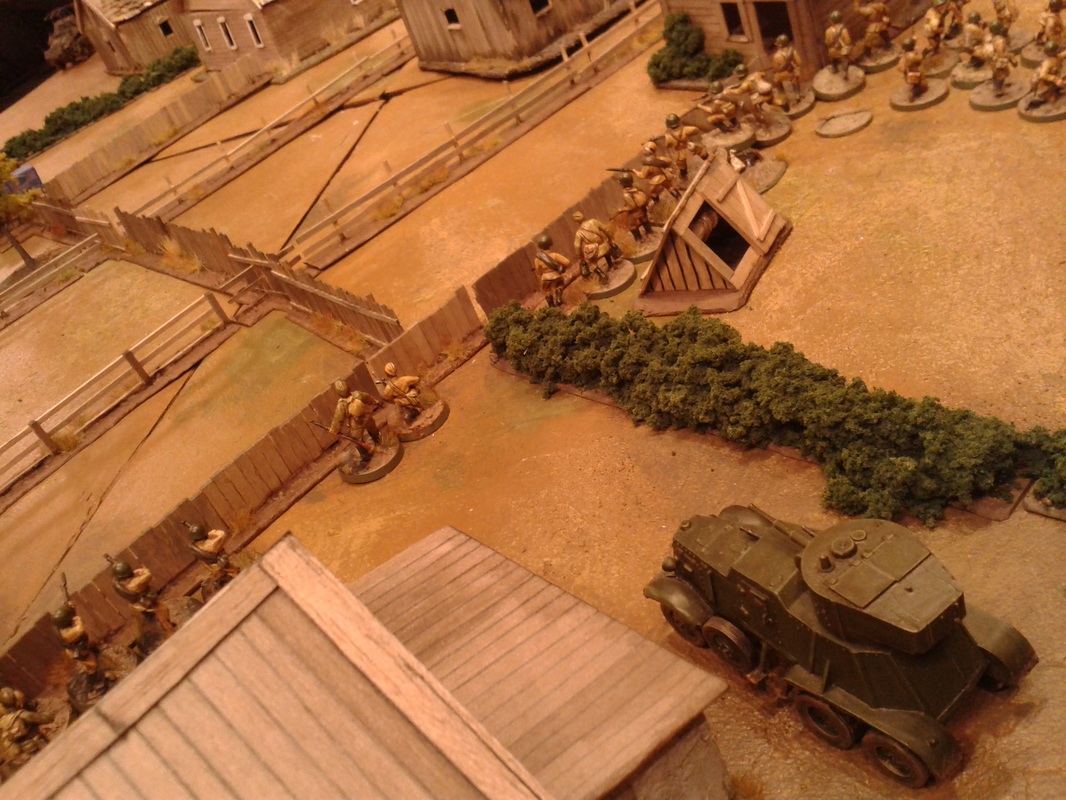
On the left flank, orders were handed down from Kapitan Koltjugin to his subordinate, the popular Leytenant Gapanovich. The platoon waited attentively in an cherry orchard, as everyone knew that the Germans were approaching from the south. "Carry out reconnaissance down the roads east of the railway. Overcome any enemy resistance and then report instantly back to me, and the rest of the company and armor will follow. Ponomarenko in his Broneavtomobil will follow you and take on any armor you encounter until the tanks move up". Gapanovich had a quick chat with the smiling, black-leather clad figure of Ponomarenko. He knew Ponomarenko was a reckless driver with a crew that was well-oiled, both as a fighting machine and in their personal appearances. The harshness of war had yet not done anything to Ponomarenko's high spirits. Men and machine went off down the yards between the southbound roads. The Broneavtomobil was taking the left-hand road and the men were climbing hedges and fences between the yards. The squads of Nemtsevitch and Melesjko covered each other as they moved forward, with Sezhant Tjikurin and his men with their home-made anti-tank device in reserve. Gapanovich swore over the fact that he had not gotten any more of the factory-new sub-maching guns that had arrived to the brigade a couple of days ago. As a factory worker supervisor he new good steel when he saw it. All of a sudden Melesjenko's machinegunner opened fire to the right. If he did not mistake himself he saw two Fritzes, one with the chevrons of an NCO dissapering behind a corner when hit by the short burst of fire. This was a good start! To get two kills, including an Junoíor Leader when firering six dice at veterans in hard cover at long (effective) range, is certainly good luck! To the left Nemtsevitch's squad rushed to take up position in a house. Gapanovich went over to the road, yelling to Ponomarenko, who's head was looking up behind the turret hatches - "Grisha (Ponomarenkos first name was Grigory), into the yard, the Germans are in front of us. Kill them all!". The massive armored car worked up its speed and crushed the high fence separating the road from the yard. Gapanovich hoped his men was out of the way. By now the Germans had showed up at the left flank as well, Ponomarenko's machine and the squads in the yards started to spray the German positions with fire. Then something hit the armored car with a bang: apparently an anti tank rifle had taken up position in a house at the far right, and was now engaging the Broneavtomobil. All guns blazing, the deployed squads and the armored car opened up on the anti-tank team, which disappeared under the hail of fire. The Leytenat took position in the house Nemtsevich's men just left, and then called up the remaining squad to make a flanking move to the right, now that the Fritzes were engaged frontally. In the Broneavtomobil, the gunner Nosov reported to his commander - "Grisha, something hit the gun-sight, it´s damaged". Ponomarenko responded - "fire without it, set the gun on overwatch covering the yards. Sasha (who's birthname was Alexander Korol, and who was the bow machine-gunner), continue fire on the Fritzes". A moment later something big and dark slowly emerged from behind the house were the anti-tank rifle had been. A German armored car, the size of a house! Nosov took aim and fired, but the shell hit the house corner in front of the car, a very close call. Nosov and his commander cursed simultaneously. The German car returned fire, missing its target as well. Nosov let off another round, but this also missed the taget. Nosov and his commander cursed yet again. Another set of shells hit their vehicle, in the front of the turret. Nosov was hit in his head and chest by rivets and splinters and collapsed in his position with a moan. There he blocked the gun, and his heavy body would not be easy to get out of the away. As the battle would be a little one-sided without his main gun operational, Ponomarenko ordered Utkin, the driver, to reverse into the cover of the house so that they could get Nosov's limp limbs out of the way and continue the fight. One of the things I like with CoC is that I think it has an entertaining level of detail without being too complex. Here the German antitank rifle hit the main gun sight. This gave further shots -1 to hit, and the free round I let off due to being on overwatch missed when I rolled 7 instead of 8 (on 2D6)! So even if I took out the anti-tank rifle, that engagement maybe made me loose the battle with the German armored car later on. In the same moment an extremely unlucky burst of bullets hit Melesenko's squad, leaving five killed and wounded. They crept into cover behind the well on their yard to take care of the wounded and put themselves into order until the Broneavtomobil had sorted out the problem in front of them. Private Petrov took the orders to literally and took refuge inside the well. Now Melesjenko's squad opted for a safer place, knowing that the cannon of the German armored car would be a tough match for their wooden shelter. They tried to follow Tjikurin's squad in their flank move, but were caught in the open by cannon and machine-gun fire and firmly pinned to the ground, losing even more men in the process. The German armored car then turned its attention to the house where Gapanovich was positioned and showered it with cannon fire. Behind the unfortunate Leytenant a shell exploded close to a samovar and sent the tea-brewing device into his buttocks. Gapanovich did not feel the pain but fell paralyzed to the floor. He then screamed for assistance, and Nemtsevich showed up. Gapanovish had to give an direct order to have the devout communist initiate the retreat. He could have continued to give orders laying on the stomach at the floor, but with so many men killed, wounded or pinned down, and the Broneavtomobil withdrawing, he saw no other reasonable action than to break off. The men carried their wounded comrades and commander away but were forced to leave the dead behind. Private Petrov, who was still hiding in the well, was later found by the Fritzes and captured, probably having an cruel fate bestowed upon him. Kapitan Koltjugin would not be pleased by the report. This was a fun and action-packed game. We should really have more terrain in our yards - now everyone had hard cover (three light covers inbetween units counts as hard cover), and then the shooting began like an "stonewall vs. stonewall" type of game. The roads should maybe have some lower fences to more easily allow for flanking maneuvers as well. Cheers! /Shirty
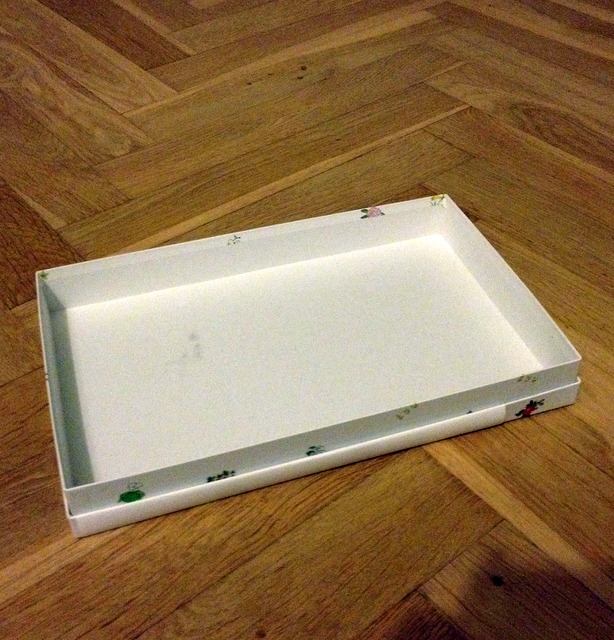
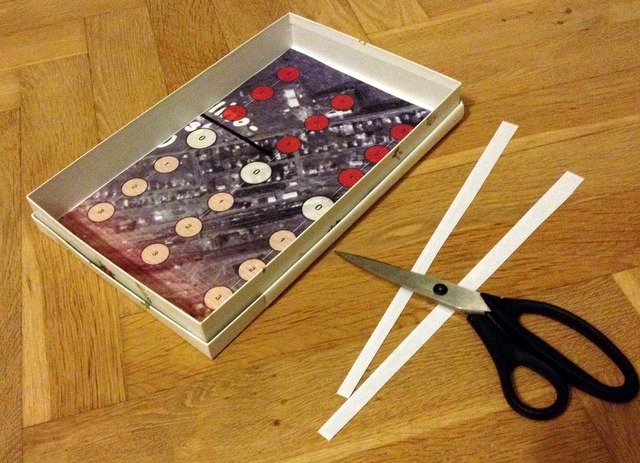
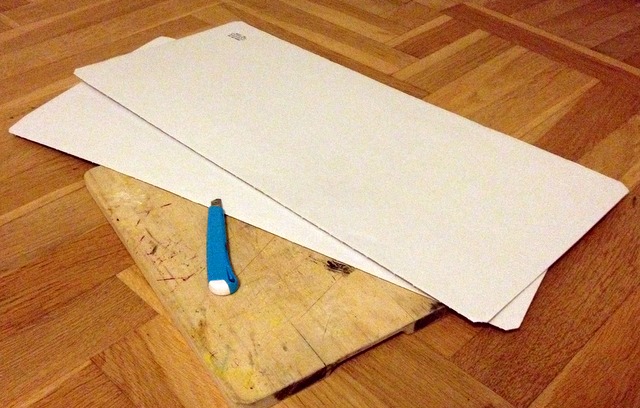
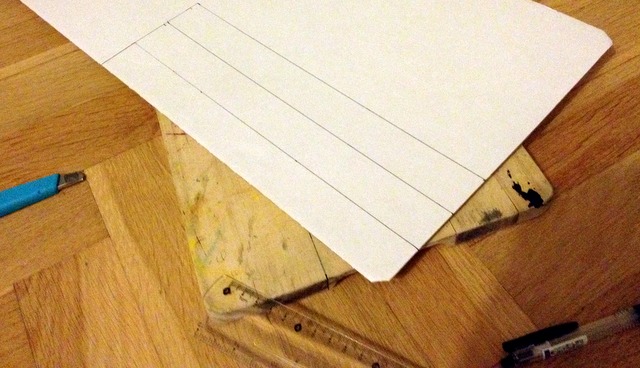
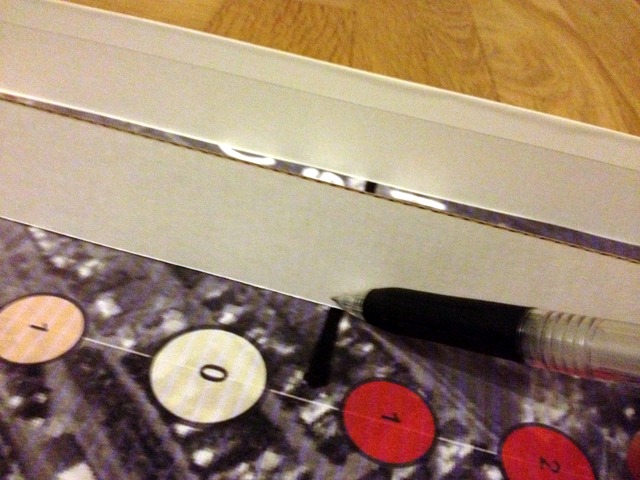
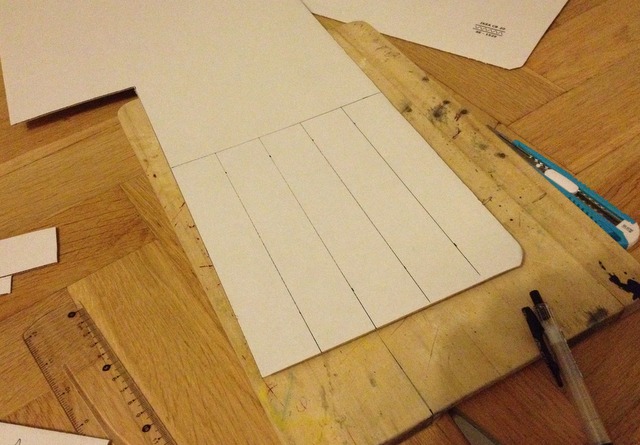
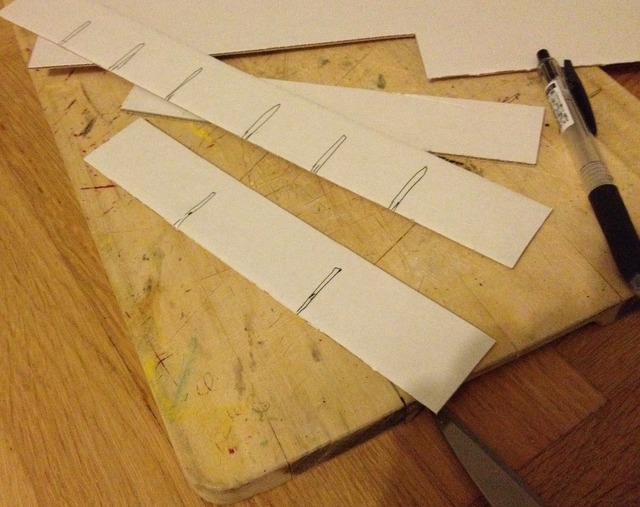
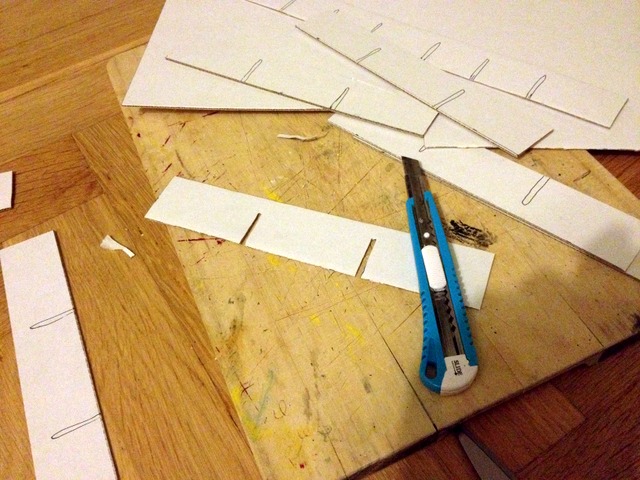
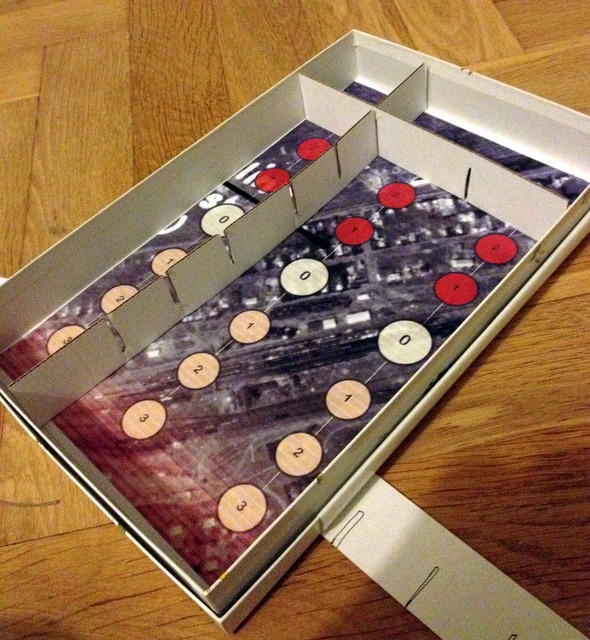
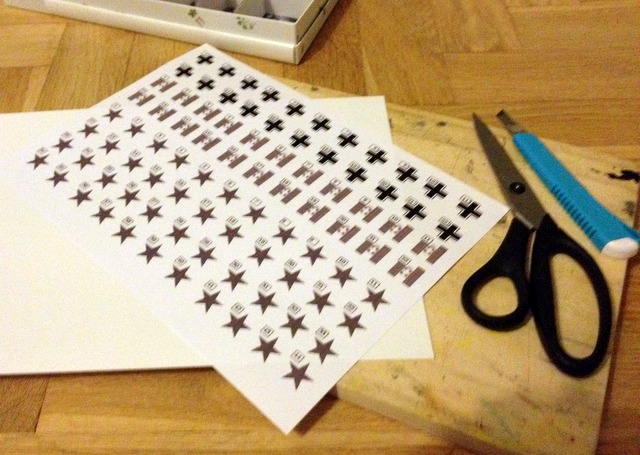
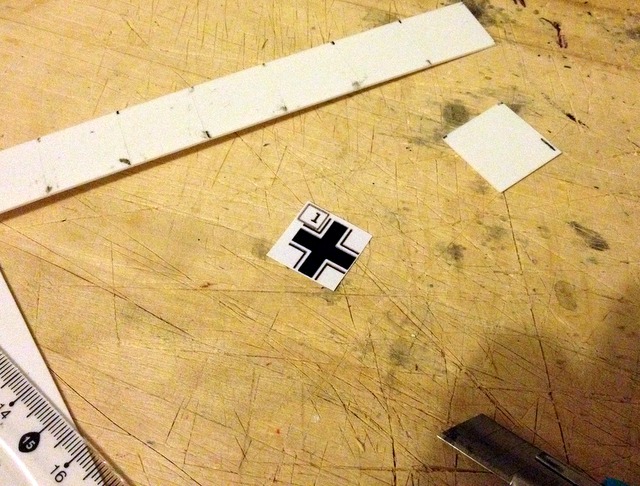
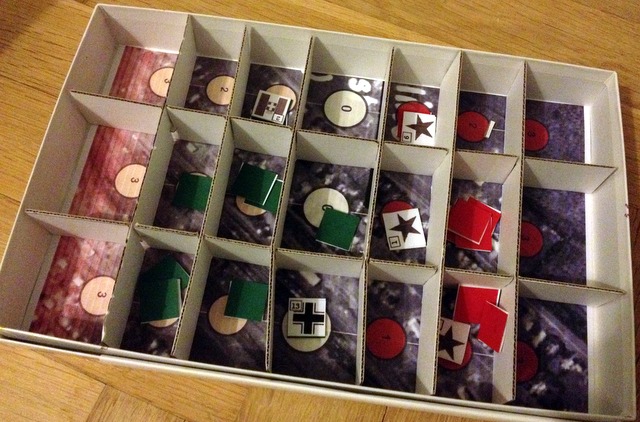
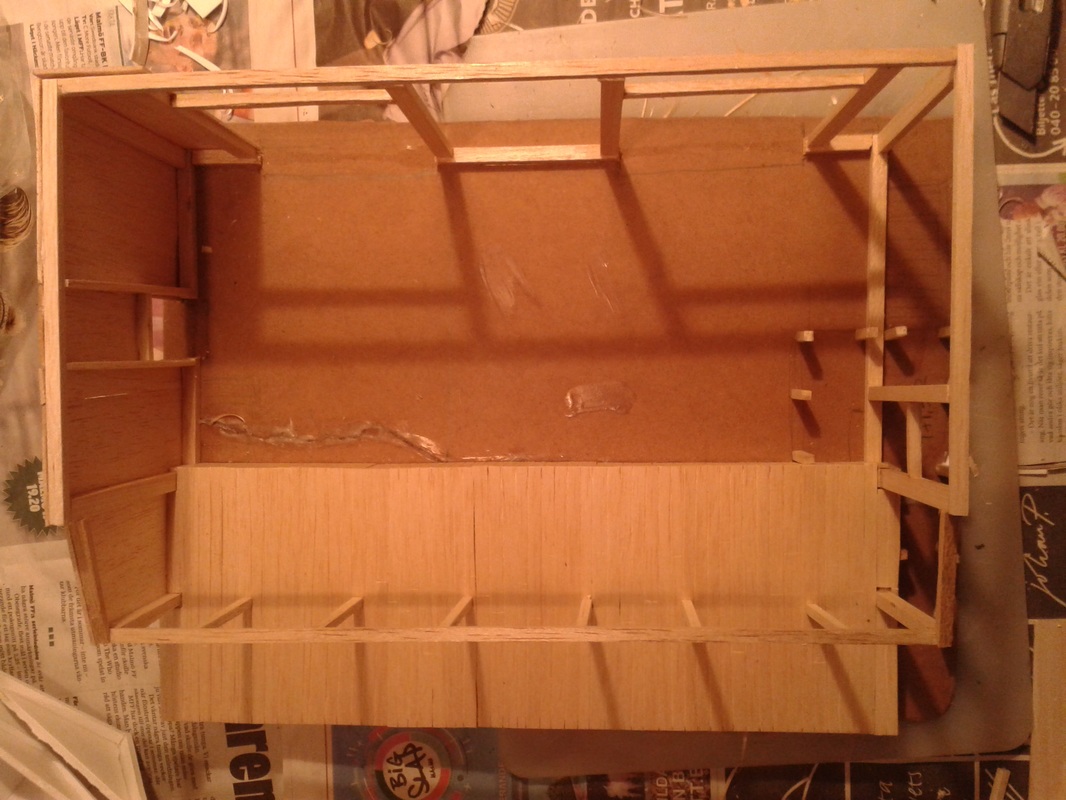
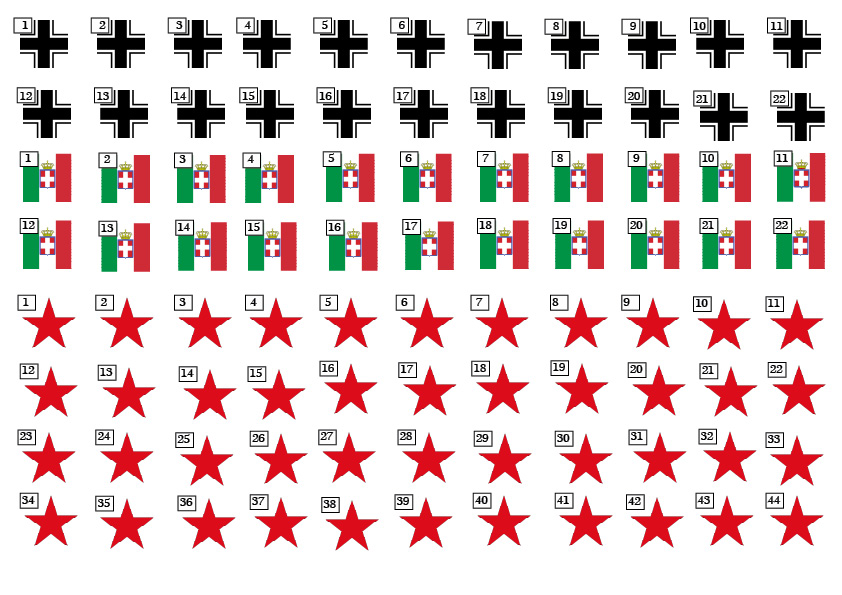
Once you start playing a campaign, it can be a bit tricky to keep track of everything. Especially for a campaign like this, where there are multiple players, platoons, support weaponry and such involved. Writing things down on a piece of paper could be enough, but pads of paper has a habit of disappearing, and can you even be sure that everyone keep their platoons updated? Were those German troops really in that spot on the campaign map? It's likely that you will find yourself needing some tools to help you keep everything in order. Here is how we're going to use a simple homebuilt system to track multiple platoons played by multiple players in the Stalino campaign. First of all, we want a campaign map that we can leave in a club area that are used by several other people. So we don't want just chits on a map, as a simple bumb can send the troops flying. We also want it to be easily accessible by several people, while still leaving a "fog of war", where players can move platoons around without the opponent knowing exactly where they are. So we're going to build a boxed map, some thick chips, and some reference cards. There are probably much better ways to do these, but I used the materials that I had readily available. I started out with a cardboard box that is roughly A4 sized. I made the campaign map in Adobe Indesign, with a circle for each "position" on the campaign map. Once printed out, I cut the paper sheet to fit snugly in the box. If you don't glue it in place you can easily replace it if you want to re-use it for future campaigns. I then took some normal corrugated cardboard for the inner walls of the box, and took some measurements: you want the inner dividing walls to be slightly lower than the box is deep. I started out with measuring the long walls, and cut them out. In this case, you only need two of them. I cut out the long walls, and cut it until the fit into the box. Measure where you want to have the shorter walls, You don't need to be exact, just put down the wall and make some marks with a pen. The important thing is that you then use the marks on your first wall to make the cuts in the second wall match the first wall.. After this it's time to make the short walls. Measure the length of the short side inside the box, and cut out the walls. Then make two cuts to divide them to make three sections that are exactly the same length. Once you have made all the walls, all that's left is to lay down the long sides, and then attach the short walls. There's no need to glue them in place, and if some piece doesn't fit, you can usually just cut it down in size with a pair of scissors. Voilá! A box with clearly divided slots, that you can close and put away inbetwen games, safe from most accidents. Next up, I'll make the chits to put on the map. Each chit will represent a platoon or a support option, as we will be able to move these around inbetween campaign rounds. So each chit will have a number which will show which platoon, weapon team etc. that it represents, and casualties and other important notes will be kept on a reference card. I was out of colour for the printer, so I will temporary use black and white face pictures until I can replace them. It would probably be enough to just glue them on a piece of cardboard, but since I wanted the chits to have some heft, I decided to glue the paper to plasticard first, and then glue on the cardboard. The coloured cardboard is mostly there to make sure that we don't mix up chits from the two sides: you could just as well simply paint the backsides of the chits if you decide to use plasticard. I cut out the unit symbols, and cut out squares of plasticard in the same size (2cm x 2cm). I then glued on a similar sized cardboard square on the back. As you can see, we can put the chits face down to hide the units. Even if your opponent would get a peek, they would only see a number, which doesn't really tell them that much unless they have access to the platoon reference cards. Next time we'll make the reference cards, and we're all set to keep track of the forces involved in the campaign. Cheers! /Jonas
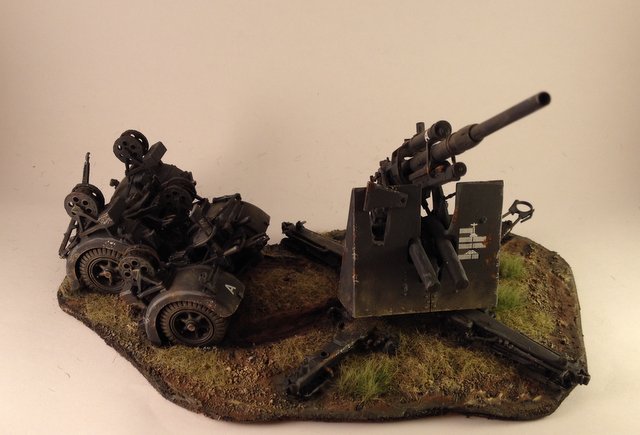
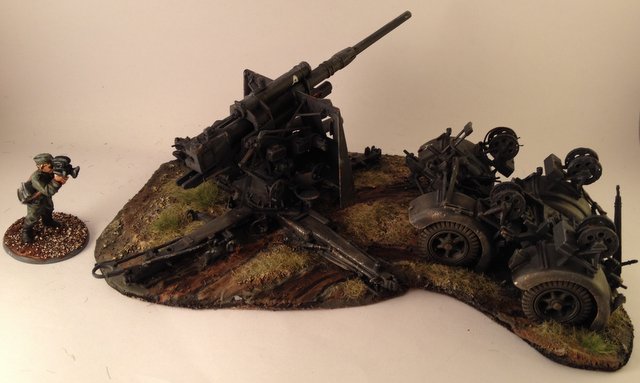
 Yesterday I finished my 8.8cm Flak 36. It's an Italeri kit in 1/48, and it was both quick and pretty simple to build. The cannon can even rotate and you can change the elevation of the barrel, as well as move it back and forth. It's built to be an objective or terrain piece, and I just put it on an old bit of MDF board that I had left from an old project. If you wanted to base it to look like it has been hastily deployed, the wheel pairs would most likely disconnected with one on each side of the cannon, not rolled together like this. That way it would be quicker to load it up again and tow it away. 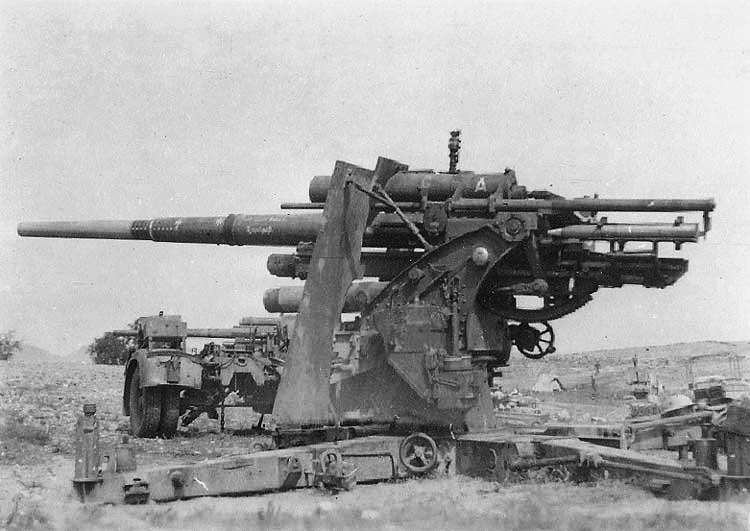 Notice the single pair of wheels in the back. The paint job was simple, I just covered everything with Panzer grey, and gave it a dark wash. Then I did a rough highlighting job with grey pigments. The chipping was done with a torn off piece of "blister sponge", first dabbing reddish brown and then a bright metal over it. I added some tiny specks of bright orange in the middle of some of the brown parts, to create a little bit of rust. Then I went over parts of the gun that would have seen the most dirt, such as the gunshield and the wheel pairs, with some mud-colored pigment and then some sand-colored pigments. Finally I put some static grass and a few bits of grass tufts on the base, and called it a day. I was a bit distracted since I was following the Sweden-Denmark European Championship qualifier, so the weathering is not always in the most realistic spots, but rather according to whim. If you are more careful with the application you can get a better result, but I like this way of weathering for wargaming models, as it takes very little time. Maybe just an hour or two of painting once the panzer grey was done and dry. But watching this movie, it's clear that the guns could get quite banged up with use, so you can add quite a bit of scratched in the paint without feeling guilty of overindulging: If you want to build your own Flak 8.8cm artillery, this movie shows some good examples of the variety in deployment: on wheels, on the ground, with or without gunshield, and sometimes covered with camouflage. The Italeri kit is great in that you can build it in all these variations. Cheers!
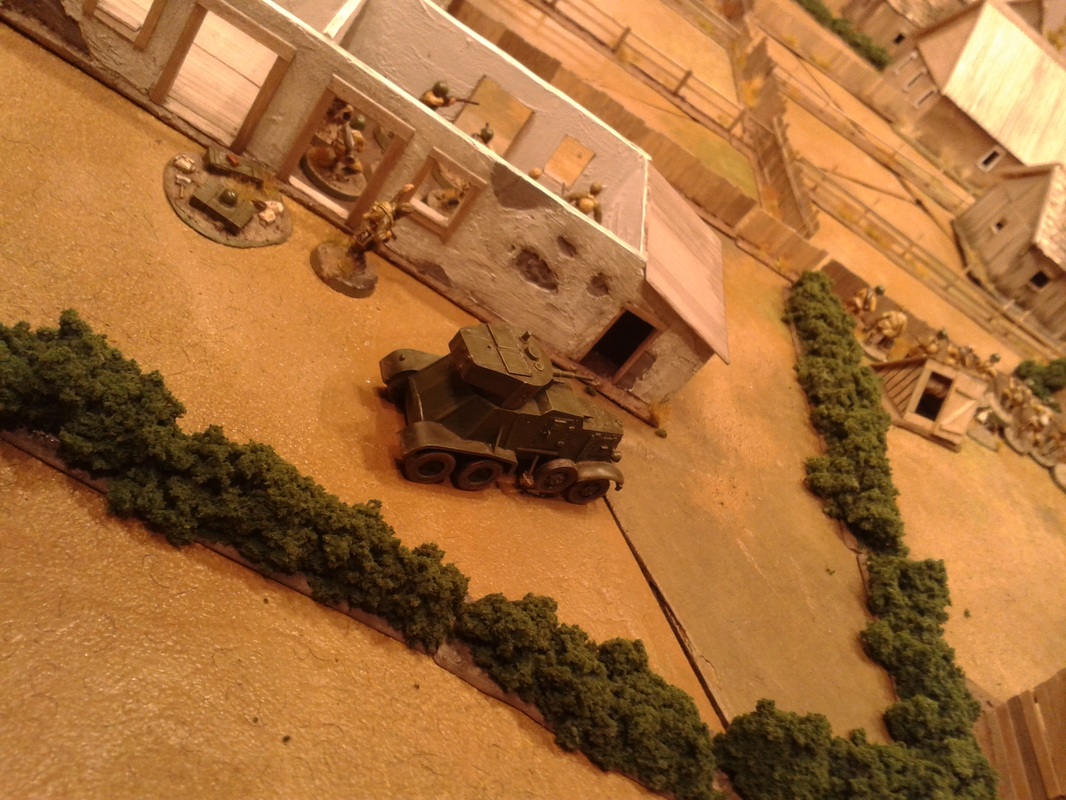
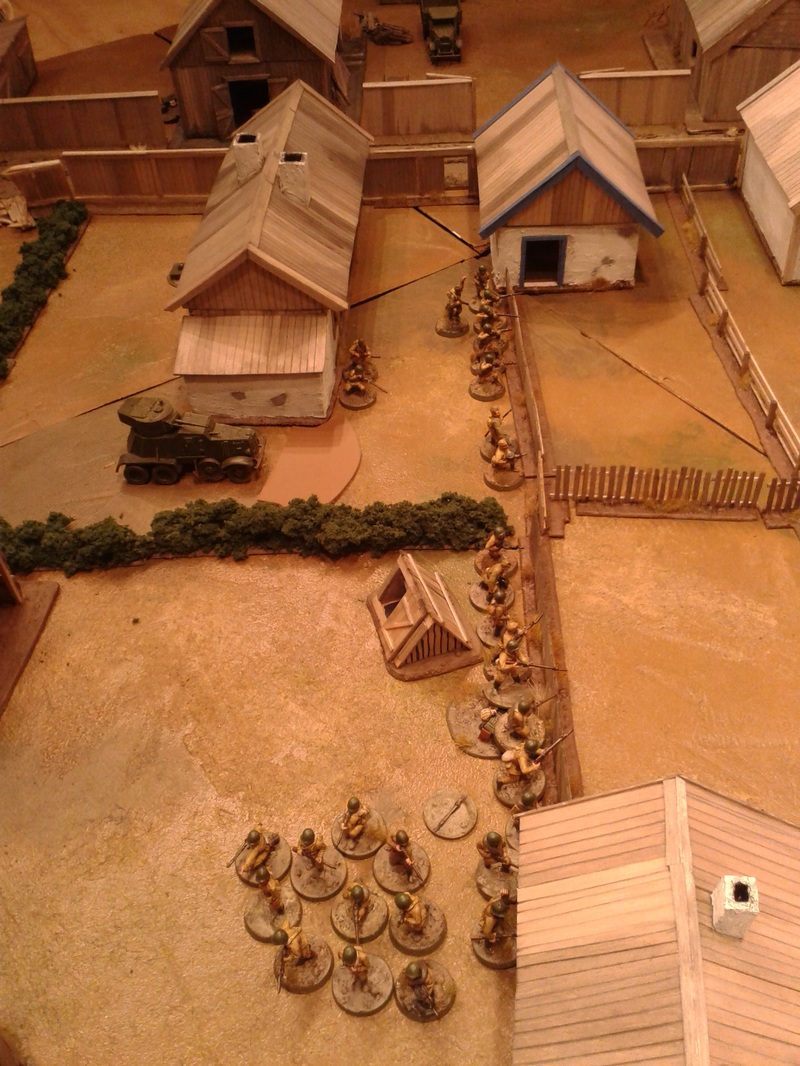
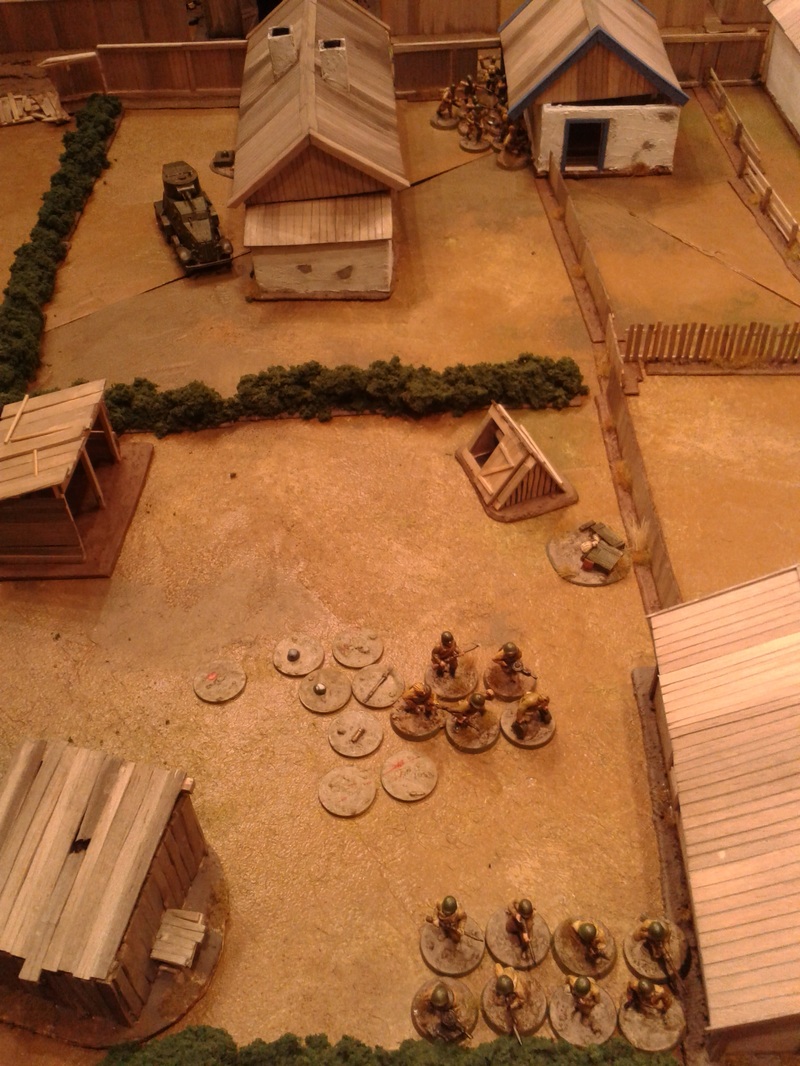
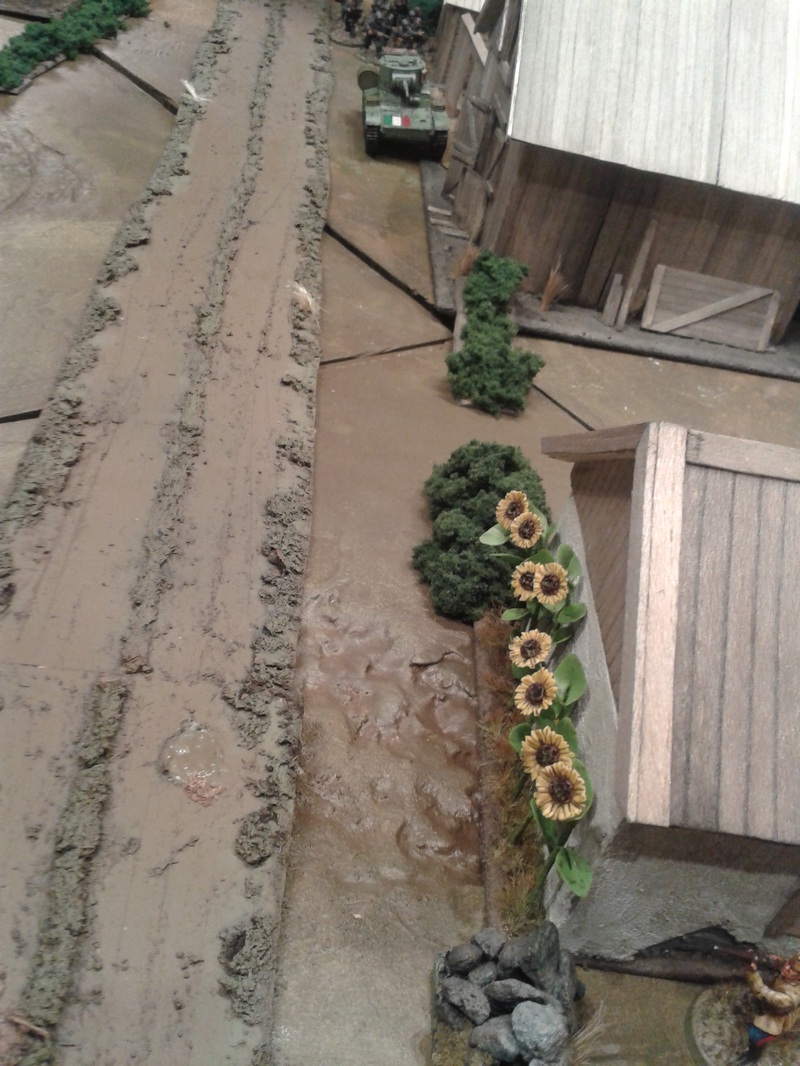
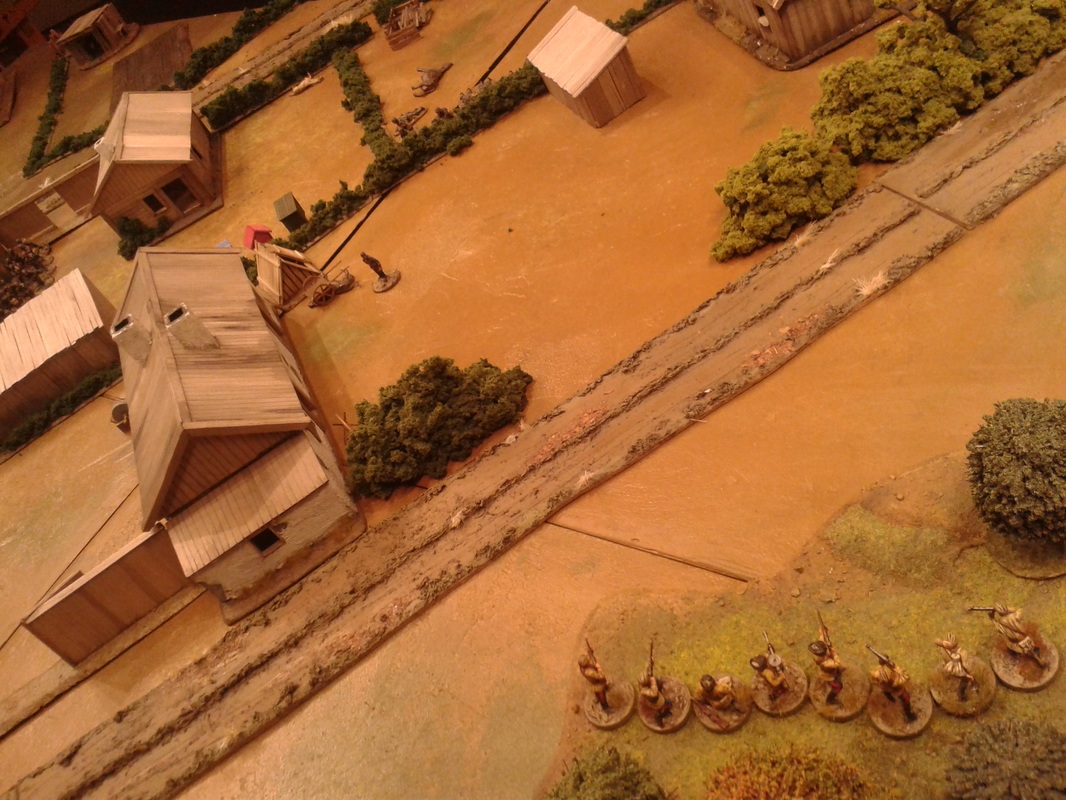
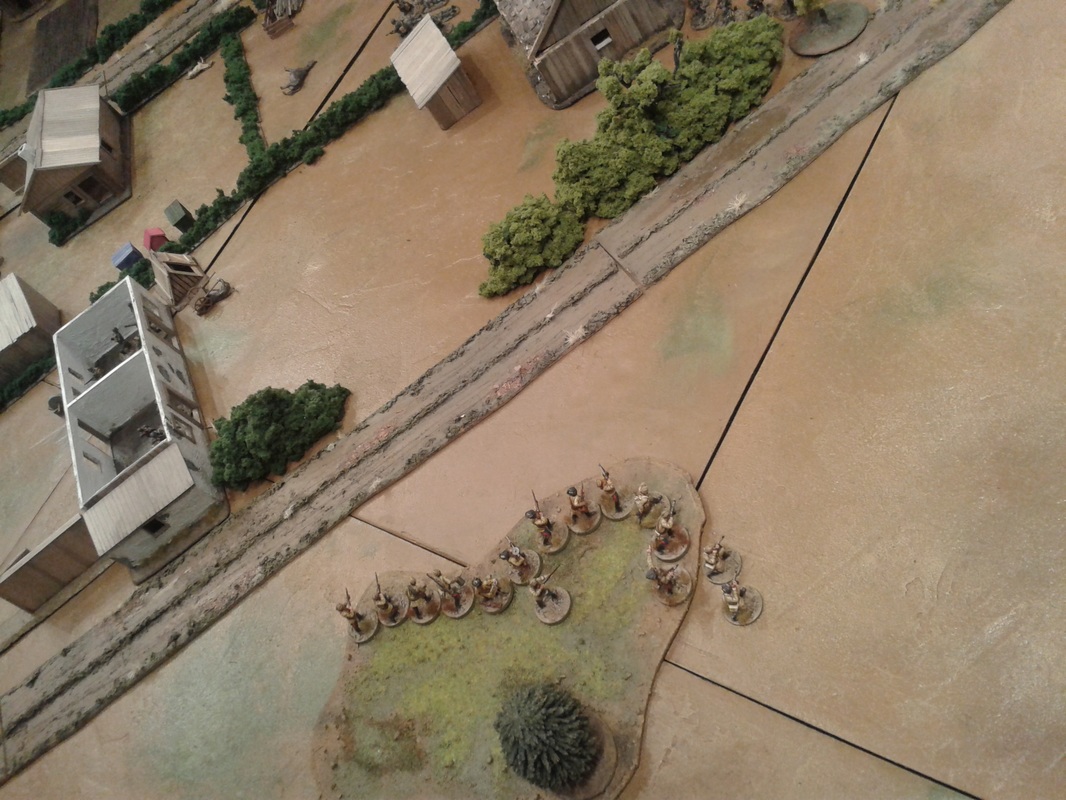
-Jonas It was time for the 30th Cavalry Division's 138th Regiment to probe down the outskirts of Stalino's West rail station. The mission was given to Lieutenant Morduchivitch and his platoon, as they had shown themselves to be the best scouts in the the Squadron on many occasions during the fighting retreat from the Black Sea coast. Now it was time to counterattack, and the Fascists should be driven out of Stalino! Morduchivitch took with him a squad from Sjljapin's platoon to guard his left flank and the Maxim that was often attached to his platoon. He also wrangled a couple of SMGs from his comrades in the squadron, who were happy enough to not be sent on the reconnaissance and knew that Morduvitch's men would take down more Fascists by wielding them. 'Embarking on their mission, Sjljapins squad was stationed to the left as Morduchivitch surveyed the scene. To his utmost amazement the gardens in front of him were already overcrowded with enemies, aligned in firing position in houses and behind hedges. The few words he caught from the enemy were not German - this must be the Italians! A short thought flew through his head - if the Fascists could show international solidarity in their wars and mass murders they should know that in his platoon there were Belarussians, Ukrainians, a Tzadijk, a Chechen, a Jew from Smolensk and even a Karelian! A true solidarity between the peoples of the Soviet Union, united in the struggle for peace and Socialism! A engine roar abruply ended his speculations. What was this? Did the Italians field tanks? He went over to the left flank to observe, and yes, a T-26 painted with a italian flag came rumbling down the street. Morduchivitch swore, what kind of patrol was this? The gardens full of Italians, and tanks captured from his own land being used against him! Having no AT gun to back up the mission or even a couple of molotovs, this was going to be a patrol from Hell! If you have played CoC before, this probably looks like some kind of rule abuse. A T-26, which is on Support List 4, in the "Patrol" scenario? You can´t normally take anything more than from Support List 3 if you have a higher platoon force rating than your opponent in the patrol scenario. Now, Morduchivitch had to think fast and not about international solidarity. He detached one of the men of Sjljapins squad to peek around to corner and badly conceal a firewood log that could be mistaken for a couple of stick grenades. This ruse worked for a while, as the T-26 lowered its speed as it drove down the street. He then deployed Serzhant Borisov's Maxim to take the house with Italians under fire. The Italians withdrew into the building and, at least according to Borisov, several of them were hit by his well-aimed hail of bullets. Morduchivitch went on to execute the second part of his (quite hastily made up) plan. Now, with the Italians in the house silenced, he sent in Serzhant Akselrod and his squad to take the grove at the right side of the built up area. Akselrods squad sprinted for the grove, and as they went forward they saw some Italians withdrawing into the gardens, unwilling to fight the cavalrymen. When Akselrods squad had established themselves in the grove, Morduchvitchs himself and the second squad under the command of Serzhant Jezijev (the Chechen) quickly followed. With the Lieutenat in position, the flank attack enveloped. Morduchivitch's men pressed the Italians who fell back from both their positions after at hot but brief firefight. The men were reorganized for the final push aimed to force the Italians from their hidings. At this moment the platoon heard the characteristic sounds of 45mm shells hitting a house from a short distance. It was obvious that Sjljapin, Borisov and their men had come under fire from the Italian T-26. As they had no anti-tank weapons they could not hold out for long. Morduchivitch had to make the bitter decision to call off the attack and retire, as the gardens still were full of Italians and it would take some time to dislodge them from there despite his platoon's favorable flank position. The men withdrew from their positions. After a brief meeting with Sjljapin and Borisov they could determine that the decision was right, as the situation was untenable and Sjljapin himself was lightly wounded in the left thigh from an shell frament. The only wounded soldier in Morduchivitchs platoon was the quite bloodstained cavalryman Ivanovitj, who had been hit by an falling branch in the firefight in the grove (presumable the Italians had aimed high and shot it down). The wound was superficial and he should be back in the ranks as soon as he had a new uniform tunic. Then it was certainly time to find Kapitan Jegorov to call in some anti-tank support on their flank.
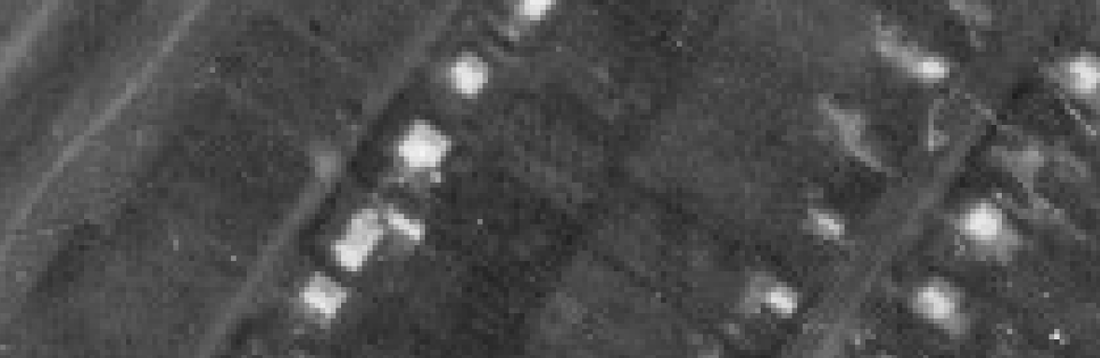
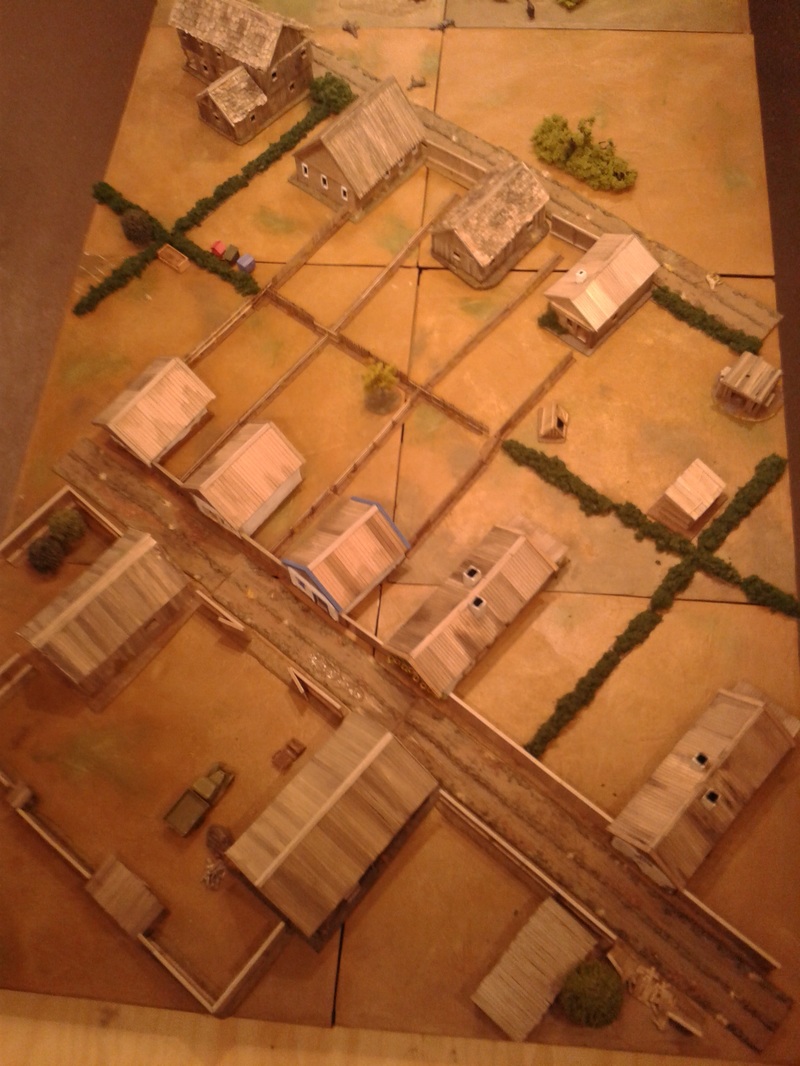
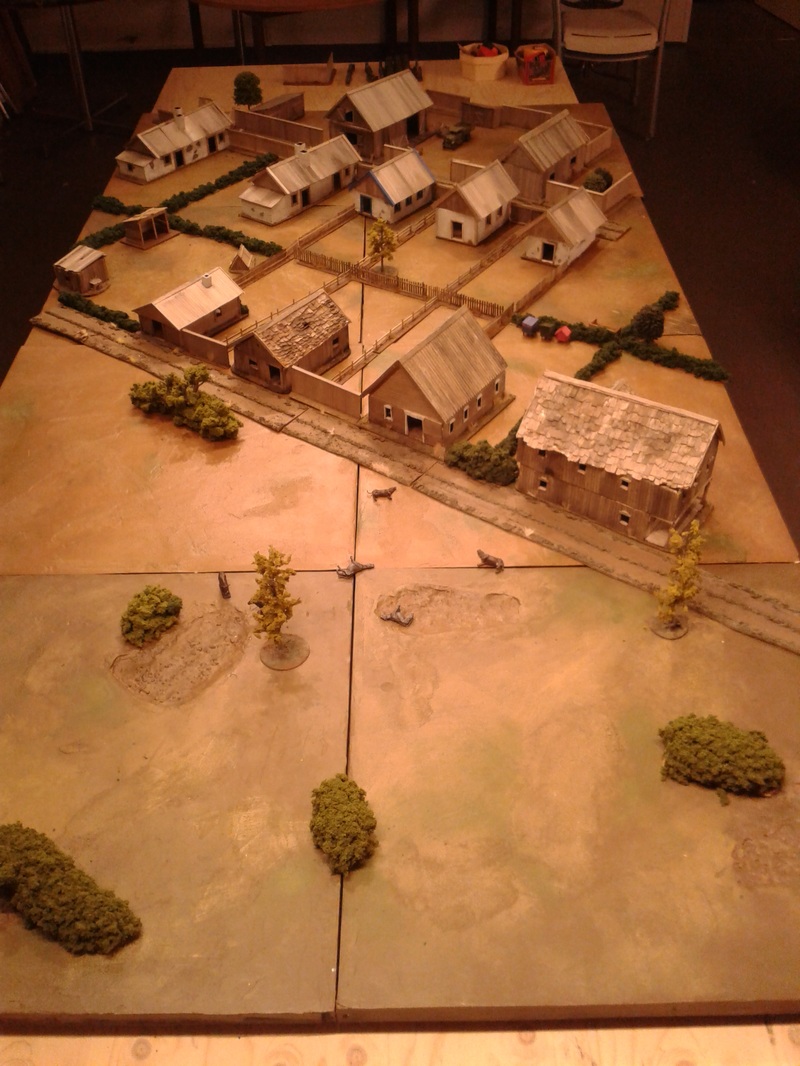
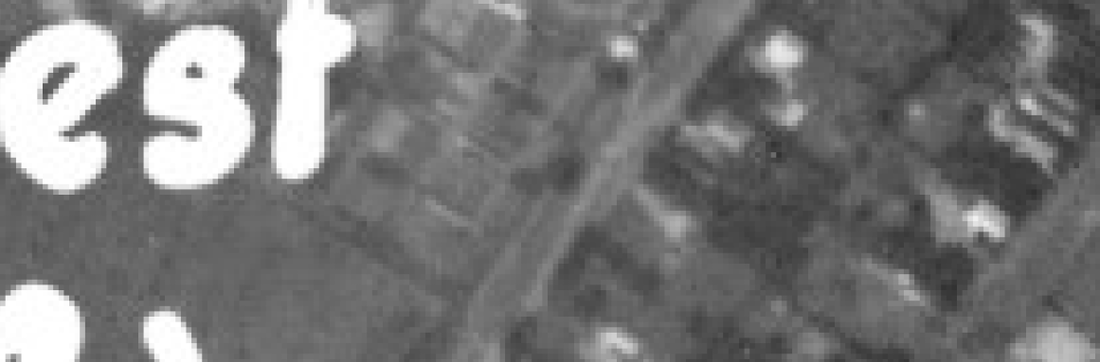
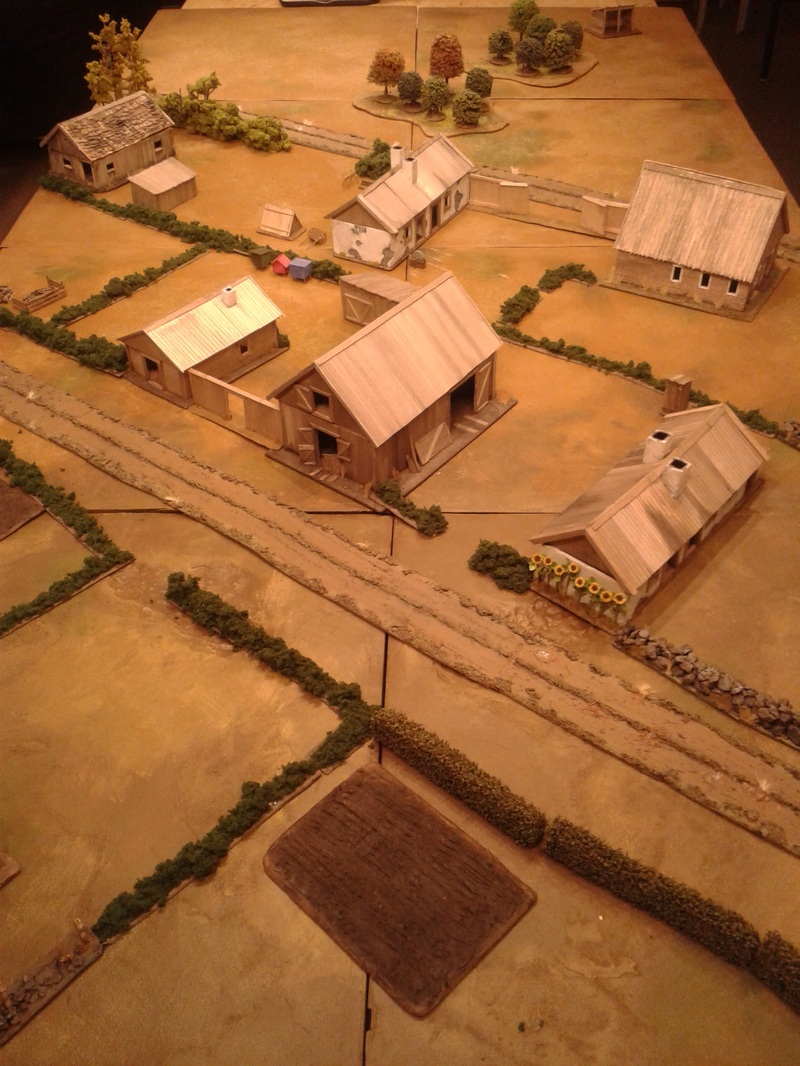
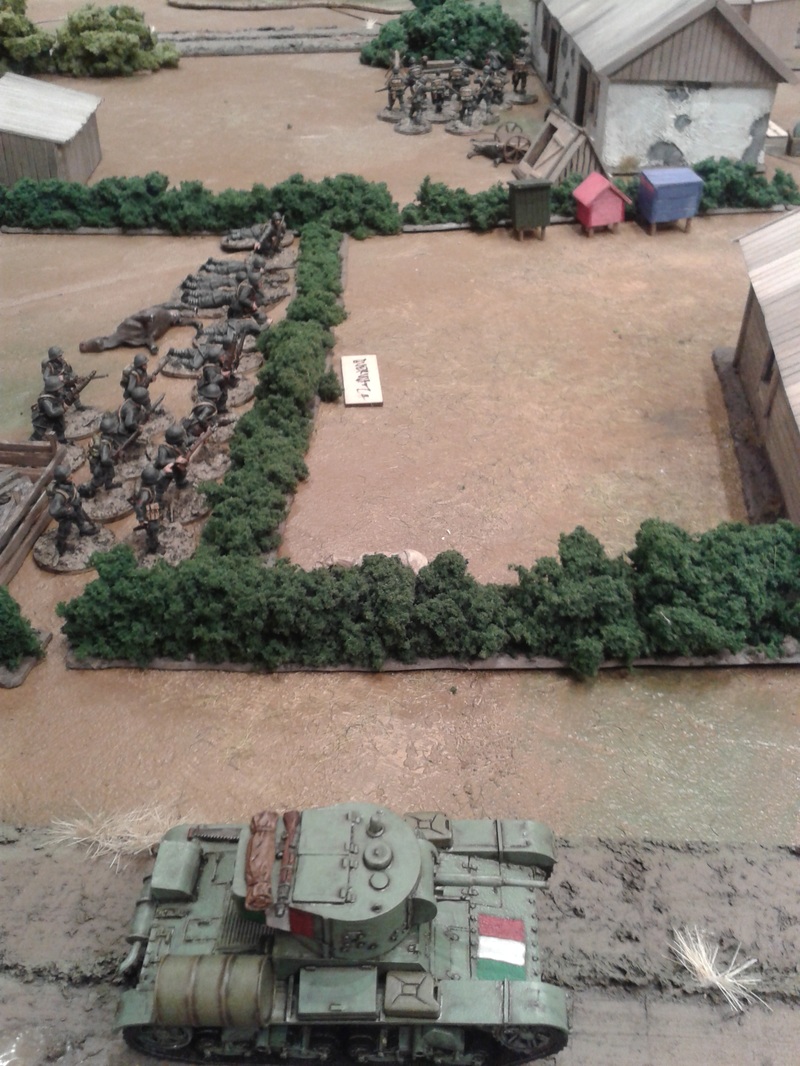
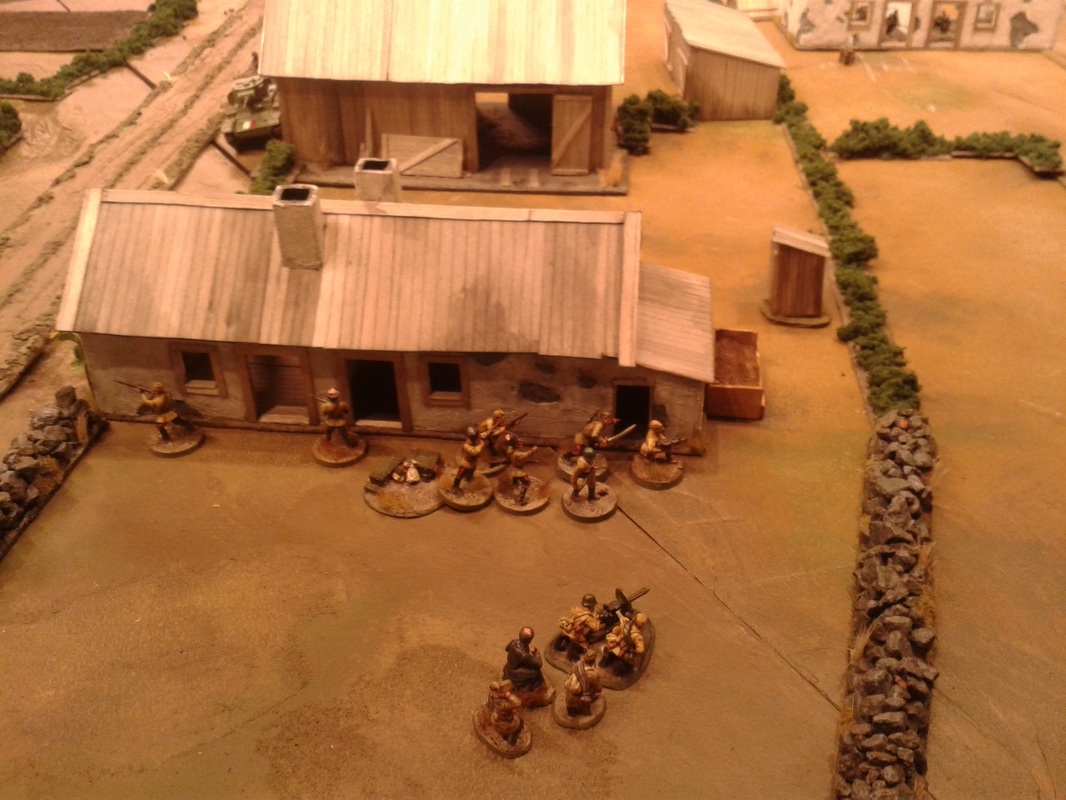
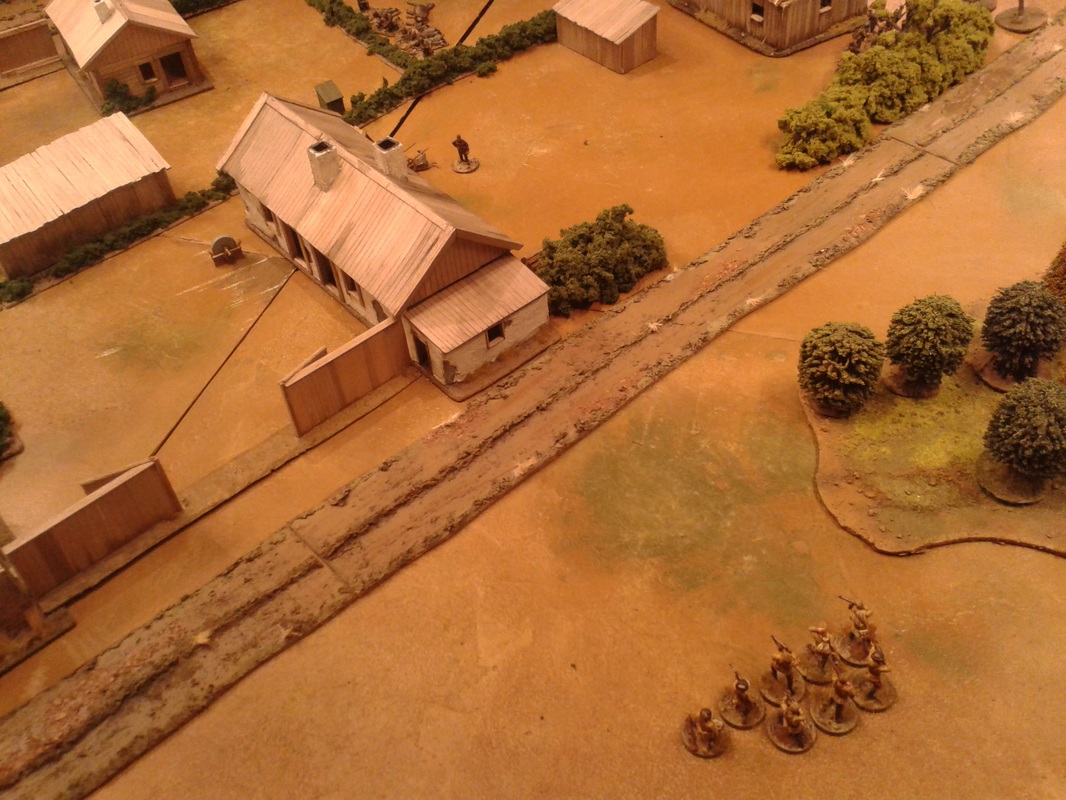
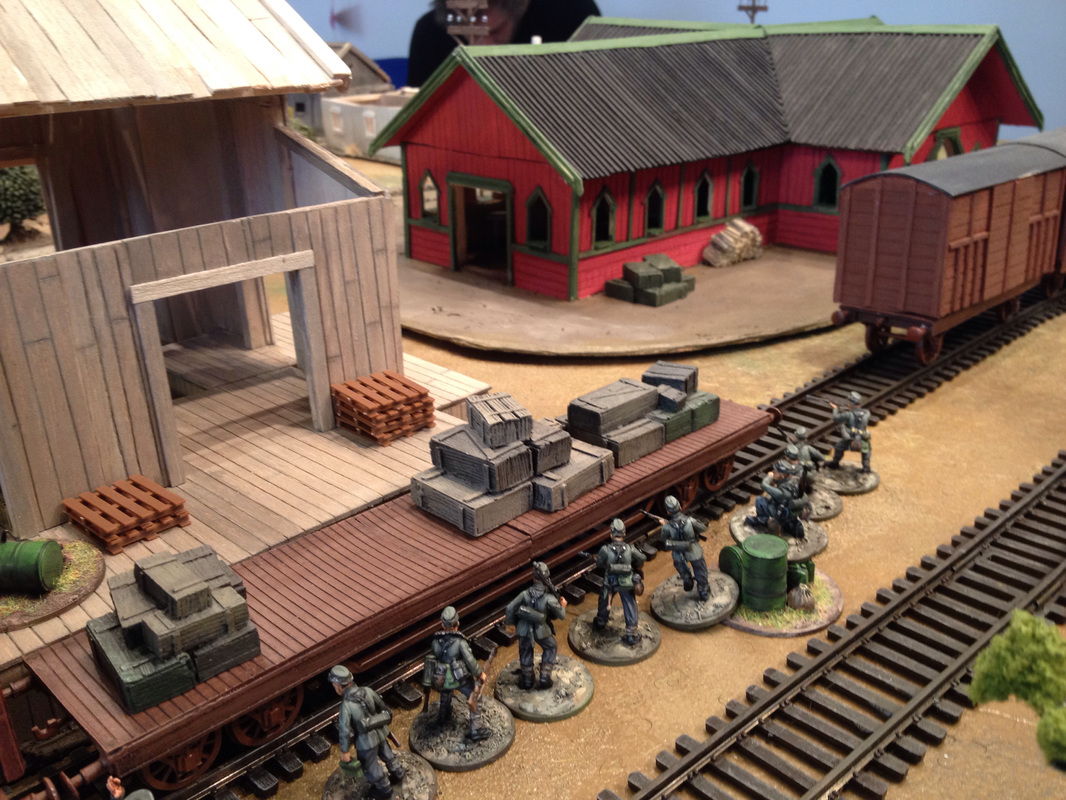
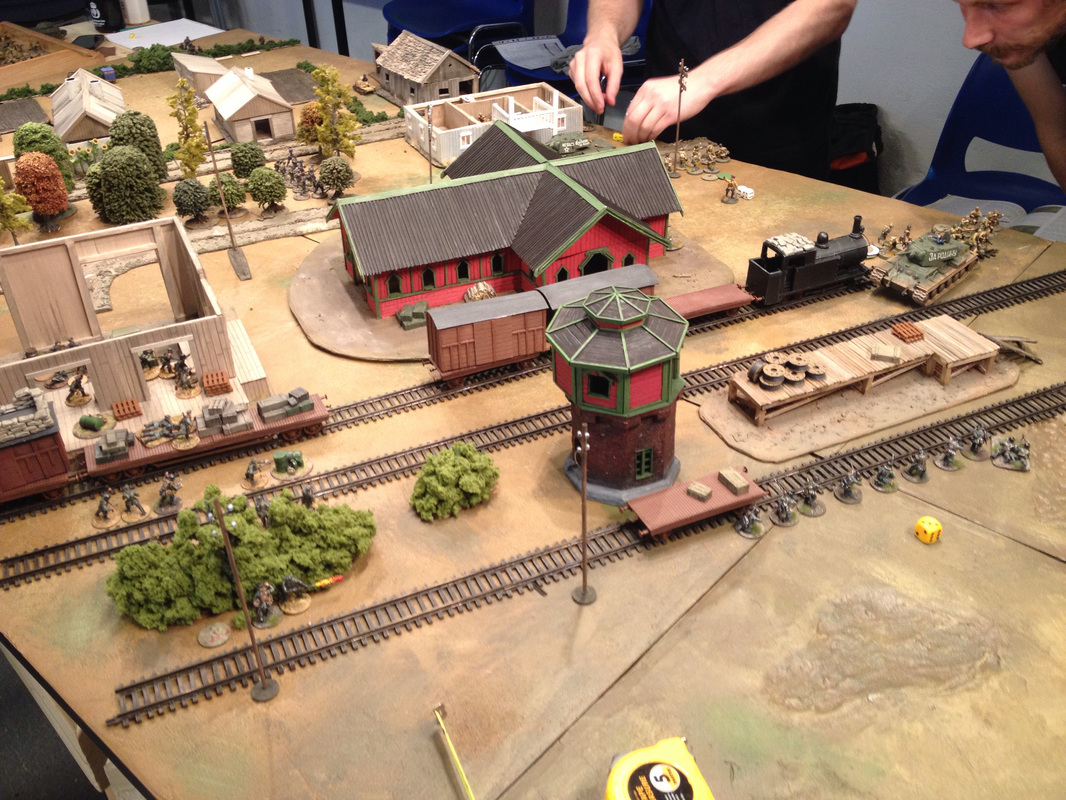
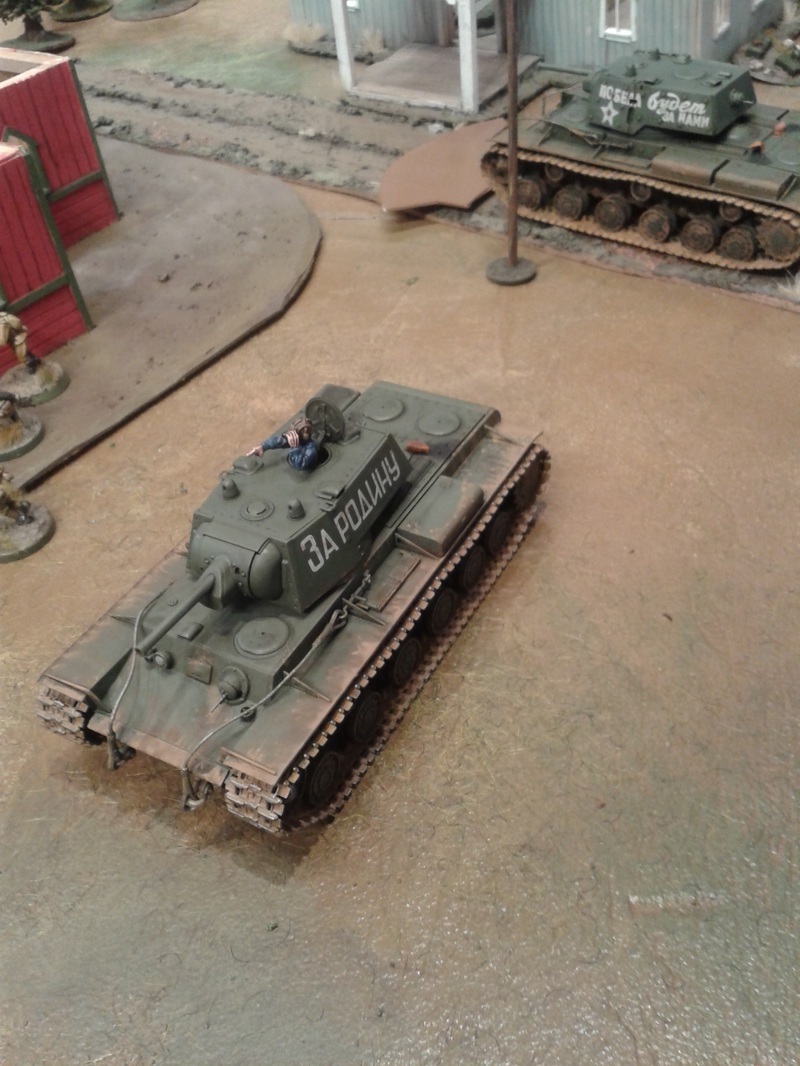
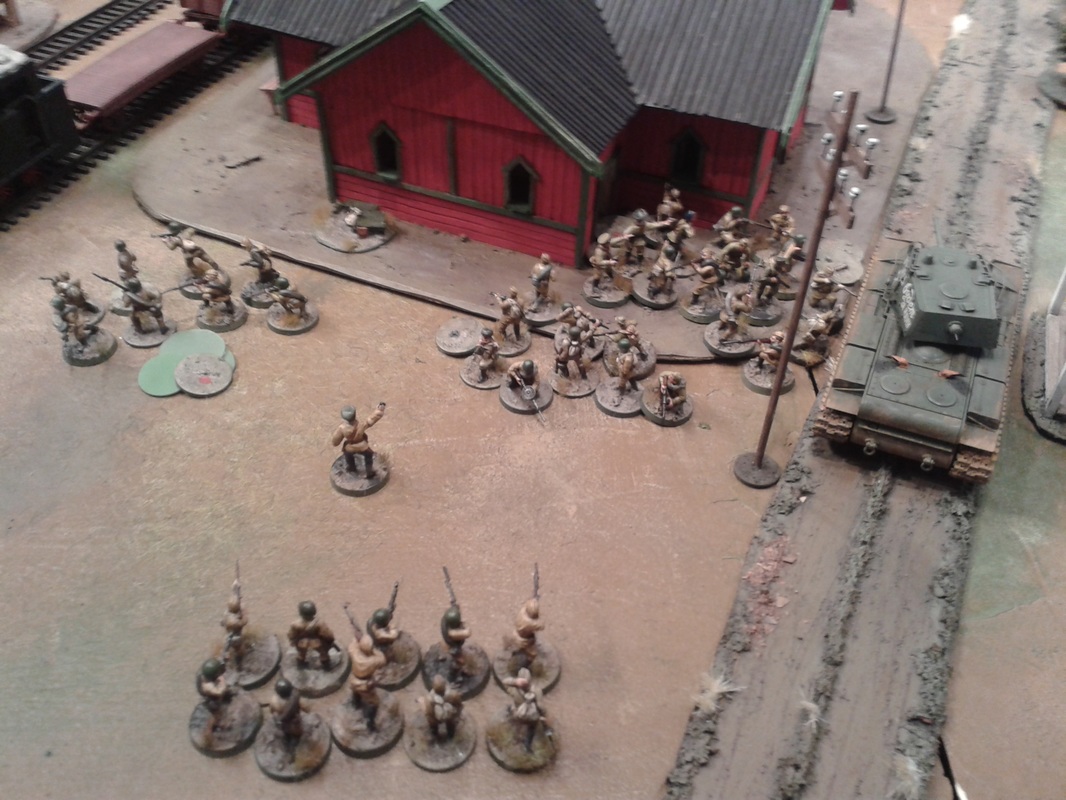
Cheers! /Shirty 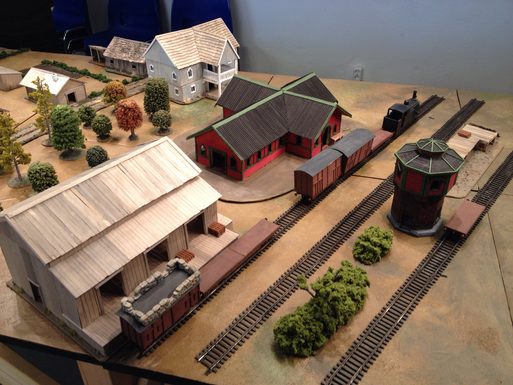 Centre of the table. We naturally spent way too much time just playing with the trains before the battle. Jonas (Germans): We started up the campaign in the centre of our map, starring the train station with a paint that was barely dry: I had just got the basic coat done that very morning! As we were playing a Big Chain of Command, we'd see two Soviet platoons entering from the side with the blue house, sort of "north, north-east" on the real map of Stalino. We would field one Italian rifle platoon and one German Mountain Infantry (Gebirgsjäger) platoon, and enter from the south corner, with the large loading dock warehouse. Once we were done with the terrain, the Soviet side dropped a proverbial bomb: they would field a tank platoon against us! Clearly this called for an Axis time-out and some coffee. Big Chain of Command is a ruleset for playing with more than one platoon in Chain of Command. If you field a tank platoon you have to warn your opponents, before you do the patrol phase and select your support, so that they have a reasonable chance to defend against your onslaught of several metal beasts.  Left side of the table, where the Italians will end up. The patrol phase that decides where your units will enter play in CoC went pretty well for us. A tank platoon doesn't scout, it just enters the table edge from any available road. This meant that the Italian force was able to infiltrate far up the left side, with a Jump Off Point pretty much where the hands are in the picture above. My Jump Off Points were bunched up around the warehouse with the two huge doors. They were more concentrated than I'd want, but it would have to do. Since we knew that we'd be fighting tanks, we focused our support on anti-tank stuff. A high roll for support points meant that I'd be fielding a set of two PAK 36 anti-tank guns, a team of engineers with a flame thrower, and a couple of satchel charges (literally handheld mines or bundles of grenades used by infantrymen against tanks!) The Italians would field, amongst other things, a tankette and an Elephantino anti-tank gun. Here's a house rule for our campaign: gun sections. Heavy machine guns, anti-tank guns and infantry guns often operated in groups, and we feel that these teams are already pretty weak in comparison to vehicles in CoC. So in an attempt to beef them up so that they will be fielded, we decreased their cost in general, and introduced the option to buy two identical gun teams as a section. In practical terms it means that they will be easier to activate simultaneously, as you don't have to activate each team separately, though you have to deploy them at the same place.  Italians and their little elephant gun. After a customary burek break we got started, and our forces started to deploy. The Italians set up their anti-tank gun on the flank, looking over the two roads in the middle of the board, where tanks were likely to advance. My Germans deployed around the warehouse and train tracks, ready to contain any Soviet advance into the train station. Then, disaster struck. The Soviet players dug out something that they had built and painted in secret for the campaign: a KV-1 tank! 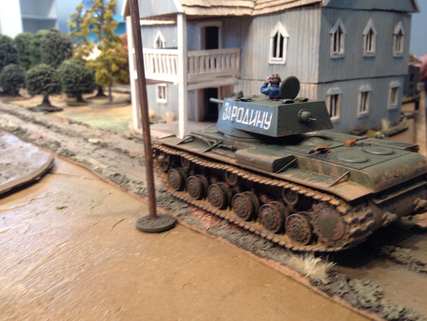 Dread on threads! We had prepared for a T-34 platoon as a worst case scenario, so this caught us completely flatfooted. However, this being the first game, we didn't want to withdraw without making an attempt at it, and a damaged KV-1 in the first battle would make a great trophy! So full steam ahead, and damn the torpedos. We went all in. My Pak 36s deployed and started a shooting duel with the KV-1, which didn't dare to get into closer range as that would expose it to the Elephantino gun as well. But in the end the German guns revealed why they got the name "doorknockers" in real life after facing these monsters on the Eastern front - after dealing several hits that simply bounced off, the section had nothing but one blown up gun and several dead and shocked crewmembers to show for it. Needlessly to say, the remaining gun retreated back into the house to save itself. Then, disaster struck again! A second KV-1 hit the table! This one advanced slowly around the station, clearly showing that it was planning to protect the rapidly deploying Soviets as they rushed into the station building. There was just one thing to do: send in my flamethrower and burn down the house (the very same house that I spent the previous days painting! *sob*) 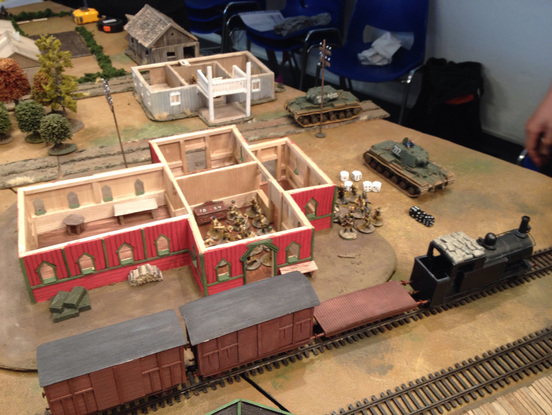 The Soviets flee out the back as we regret neglecting to build some proper smoke or fire markers. The burning station put an end to the immediate Soviet attack, and the rest of the game pretty much consisted of a stand-off between the Italians and the left-most KV-1, while my troops begun a slow crawl along the tracks supported by machine guns: The Italian forces occupied the left flank uncontested: 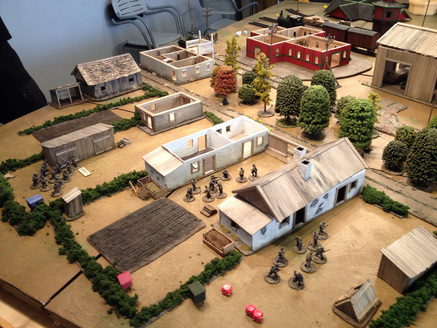 The attack gave the Soviets a few casualties, but once the KV-1 was in place by the train, it was answering with a deadly hail of machine guns and heavy exposives. As time dragged on and I had to leave, we called it a draw. Learning points from this game was that man, a KV-1 is pretty much impossible to even nudge if you don't have the right gear. It's simply not reasonable to expect a Pak 36 to deal with it: I'd need to roll five dice and get three results of 5+, while the KV-1 rolls eight dice and removes a success for each 5+ it rolls. In the end we did what we could, and tried to hurt the infantrymen slogging along with the tanks. Thinking back, it would probably have been better to this even more, instead of spending most of our resources on trying to hurt the tanks. We also spent a lot of time talking about rules and the campaign, which is probably good for the overall campaign, but meant that we spent less time playing. Since Big CoC tends to take a significantly larger amount of time than a normal battle, we'll have to be more careful about this in the future. Another result that I've seen in several of our Big CoC battles is that one, or even two, of the players/platoons sees a lot less action than the rest. In this case, one of the big tanks were effectively stuck in a stand-off with the entire Italian force, while my Germans took on one of the tanks and most of the Soviet infantry. It's often a good idea tactically for one side to get local numerical superiority, but it is less fun to be the player who gets to see less action. So keep in mind if you try Big CoC battles that it can get a bit of an uneven experience for the various players, and schedule in plenty of time! But in the end, it was very nice to see all the new painted terrain and miniatures, and I could not stay mad at the KV-1s for too long, as they were so beautifully painted. And since it was a tie, we'll get to see the station again! I promise to try to paint a suitable sign for the station until then. Oh, and study this video a few times: Campaign start from the Soviet perspective Now we had out first campaign battle after building terrain, painting figures and most of all, talked about how we wanted to do it for... nine months or something! So we decided to have somewhat of an extravaganza, a Big Chain of Command about the centre of the struggle - the western train station in Stalino! Two platoons on each side and a whole day of gaming! We played a scenario we named "Encounter Battle", which is more or less the same as the "Patrol" scenario, but you roll 2d6 for support instead of 1d3. The Soviets - thats me and my comrade Willi, took the following forces (or, that's what hit the table, the support we did not deploy have to stay secret to our enemies so we can´t give it away here): Motorized Rifle Platoon 1941 Ranking Officer Medic Molotov Cocktails 8 extra SMGs (and eight support that never made it to the table) Green Tank Platoon - 2 KV-1, the Senior Leader is a Tank Ace Two Infantry Squads Senior Leader (and two support that never made it to the table) We faced one platoon each of German Gebirgsjägers and Italians. Here is the aerial photo we used to set it up and our table: 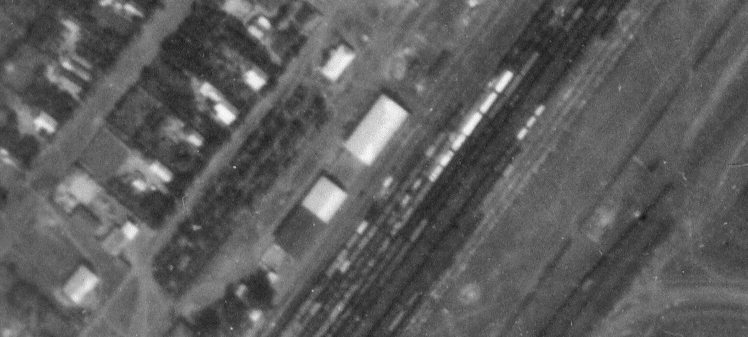 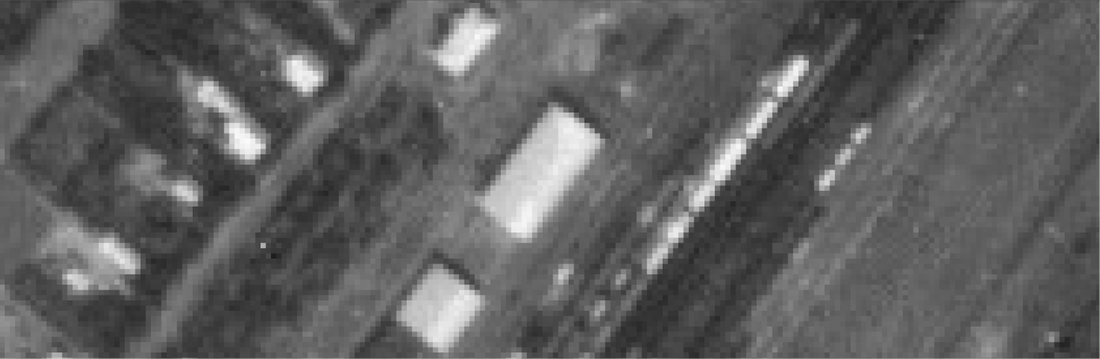  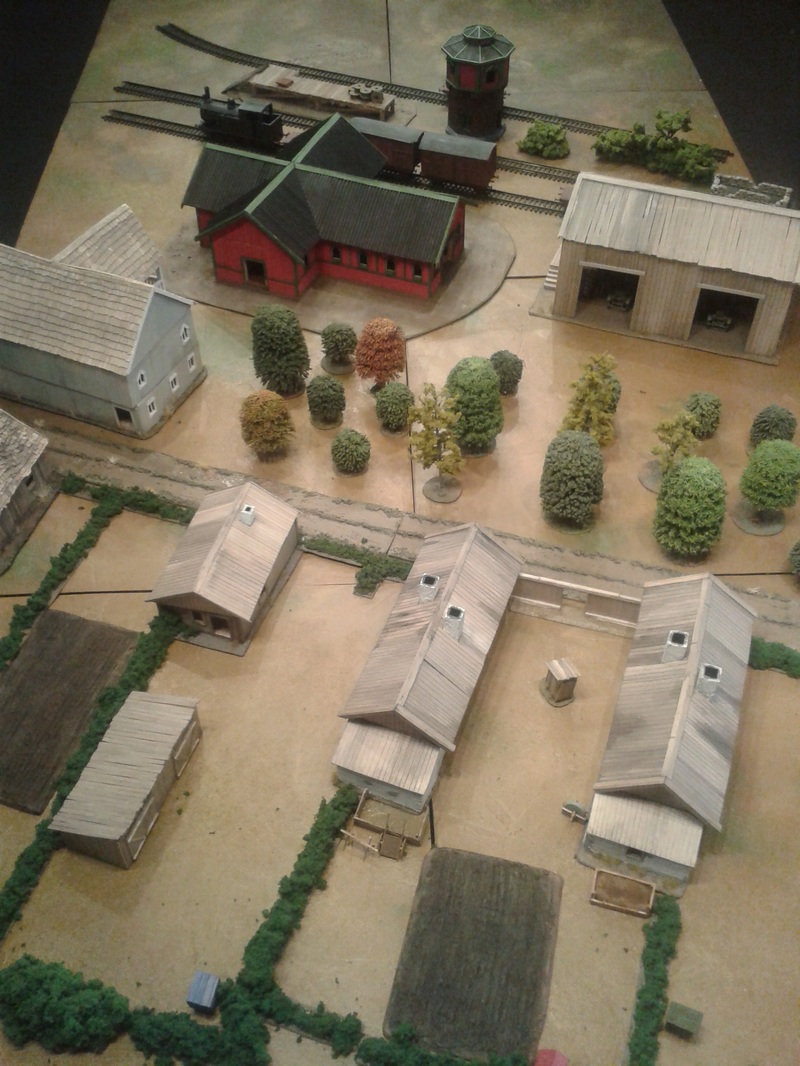 With only one platoon for the patrol phase we deployed to a central position and got badly flanked by the Italians on our right. We decided to try to stall the Italians and crush the Germans with our tanks and the majority of our forces. The game began cautiously and as a surprise we deployed not one but two KV-1. We built them this Spring and have kept them out of sight from our opponents for the campaing! The German and Italian players were a little puzzled, but thought that the models were nice. We occupied the rail station (the big red building) with two squads, and the two officers tied to the infantry platoon. One KV-1 started a duel with two PAK-36 in the railroad warehouse, the tank getting the better of it.  The other tank turned left and started attacking the Germans. Then disaster struck, a German flame-thrower torched the railstation and we were forced to evacuate. The captain was badly hurt in the attack and could not move out of the burning building! But our opponents were very chivalrous and let us take him out after being attacked by the flame-thrower once more, an attack he survived. The medic could then patch him up. This evacuation left the Soviets in disarray. We started to anchor up the defense against the Italians with one more squad and the other evacuated infantry followed the KV-1 that attacked the Germans. This was an hazardous run through MG-34 fire from the rail-yard but after some chaotic manouvering the were in place to engage the Germans who tried to extend their flank over the rail-yard, probably in an attempt to get away from the punishing tank fire. After this we had to wrap up long before the game had come to a conclusion. So we agreed to a draw as both forces were high in morale and it was more down to the lack of time than one force needing to withdraw. Something of a anti-climax, but I think thats what you get when you make this much preparations! But we got to test our new tanks (their armour was thick enough!) and look at all the nice terrain we built. And since the game ended in a draw we'll get to play on the table again, nice! After much preparation we are now ready to begin the Stalino campaign! But how will it work? Basically we are playing a home-brew expansion of the published campaign rules for Chain of Command, At the Sharp End. We used the official rules pretty much straight out of the box for our first attempt at a multi-player campaign. That campaign took place in Glykhova two months earlier than the Stalino campaign, in August 1941. We quickly noticed a few quirks of the campaign system that we were not completely happy with.
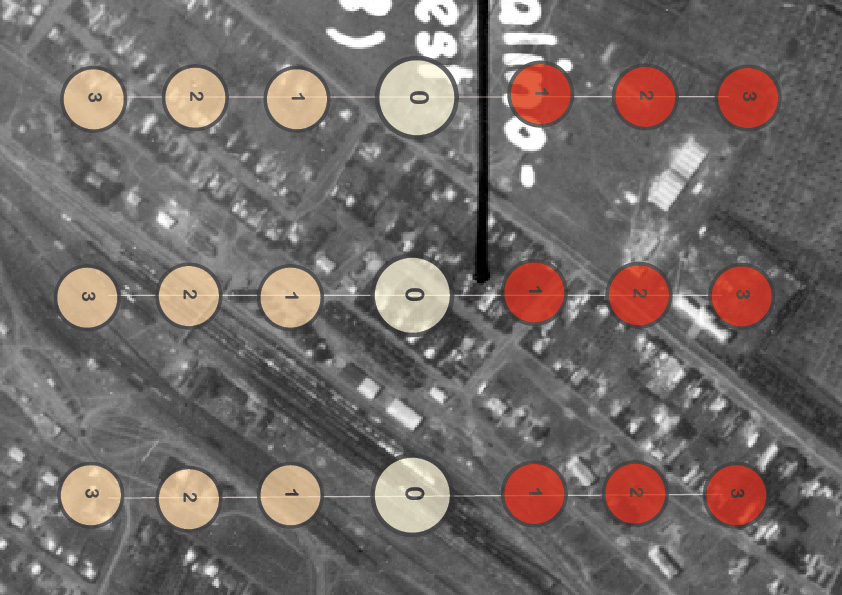
 How to do campaigns with friends (many friends), in CoCThe Stalino campaign is pretty much a playtest of these campaign rules, and we're far from finished. Even before setting up the first battle we were already discussing the ramifications of some of the rules, and after the battle we ended up re-thinking even more! But that's what playtests are for. The "beta" rules will be published on this site once we have ironed out some more issues, but a short explanation is in order for you to be able to follow the campaign once it gets started. 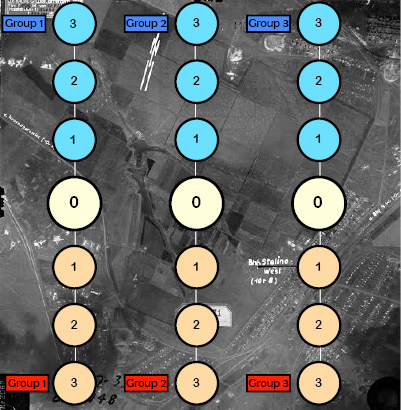 Campaign Tracker The first step was to divide the campaign into three "columns" - left, centre and right. Imagine it as a cut-out of a battle frontline, with about 2-3 platoons operating in the area of each "column". Each such column works like a standard At the Sharp End campaign in themselves, with both sides meeting at the neutral middle "0" point at the start of the campaign. A win means that the victor moves the battle one step along the column towards the opposing side, and the campaign is won when one group on one column has pushed the opposing forces off their edge. Campaign Rounds and Support PoolsThe first big difference is that for each "campaign round", you will fight one battle on each column. This opens up for a situation where one team could be winning on one front, but get pushed back on another. This is important because of the second major change: you now buy and manage your entire force, including the support available to you. This kind of army management is meant to remove the issue of disposable support options, and also add a level of overall campaign logistics and management. Each Group in the example above gets a number of points to buy platoons and support options with. Platoons are priced according to a table, and the support options are bought for the normal cost listed in your army list. For example, we gave the German players 88 points to spend on each group. A +3 platoon, such as a normal rifle infantry platoon in 1941, costs 23 points. If the Germans buy two such platoons for their Group 1, they can spend the other 42 points on a pair of StuGs, some anti-tank guns, a HMG team, etc. These all go into Group 1's Support Pool. ... or they could buy three platoons, and have plenty of warm bodies to soak up losses, but be strapped for beefier guns from the get-go. As you see, you're already making tough decisions before the first game even starts! 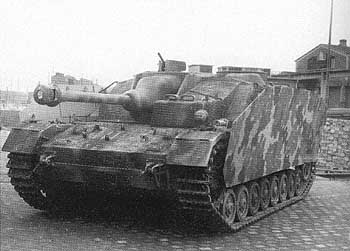 "I'll take three of these!" Now, once you have bought your groups, that's what you'll get. For the rest of the campaign. Your fancy StuGs get blown up in the first game because you got careless? Now you'll have to work around it. There are still some ways to get around bad losses: you can transfer platoons and support options between columns inbetween campaign rounds for a small cost, and some options (extra SMGs, satchel charges, fortifications etc.) are "free" in that you don't need to buy them for your Support Pool to be able to use them. But overall, we think that this alteration will mean that you fear losing your support options as much, or maybe even more, than your "normal" infantrymen. Sharing Campaign ControlAnd did you notice that I mentioned "group 1", not "player 1"? The idea is that you play each side together, so that you can jump in to play a platoon for any column as the campaign turn dictates. The idea behind this is to avoid a common problem with multi-player campaigns - player availability. If your campaign relies on Dave and Ben being able to find a day to play next week, and then for June and Andy to be available the weekend after that, your campaign is bound to get bog down sooner or later. By making everyone take collective decisions and manage the campaign, you also take some of the bad feelings of someone else jumping in and playing "your" platoon for a battle or two. It's also a lot of fun to discuss how to design the various groups and support pools, and how to juggle the available resources once you have started to take some substantial losses.  "You did WHAT with our Pz. IVs?!" This is just a brief description to give you an idea of how the campaign will work. There's also event cards, purchasable tactical bonuses, and all heaps of fun stuff. Hopefully we'll be able to get the rules out soon, and make the necessary changes as we run into bumps in the road along the campaign. But for now, sit back and relax, and watch us sweat blood over the mounting casualties as we're likely to run out of our favourite support options real soon!
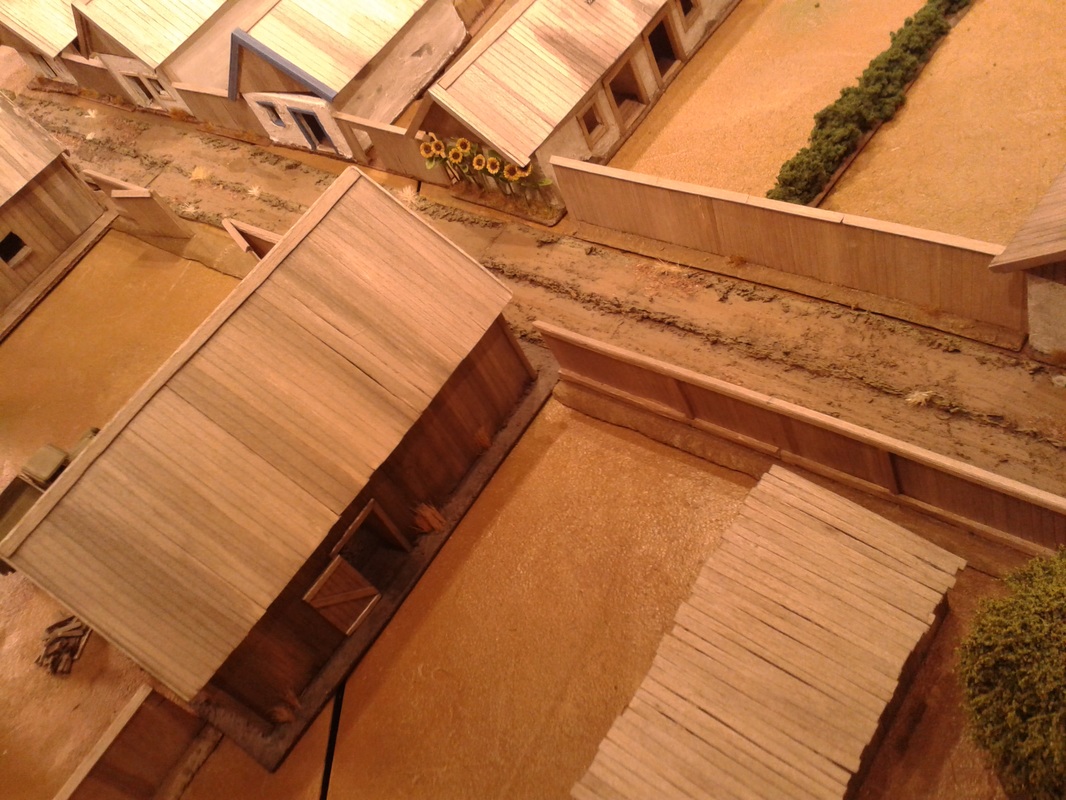
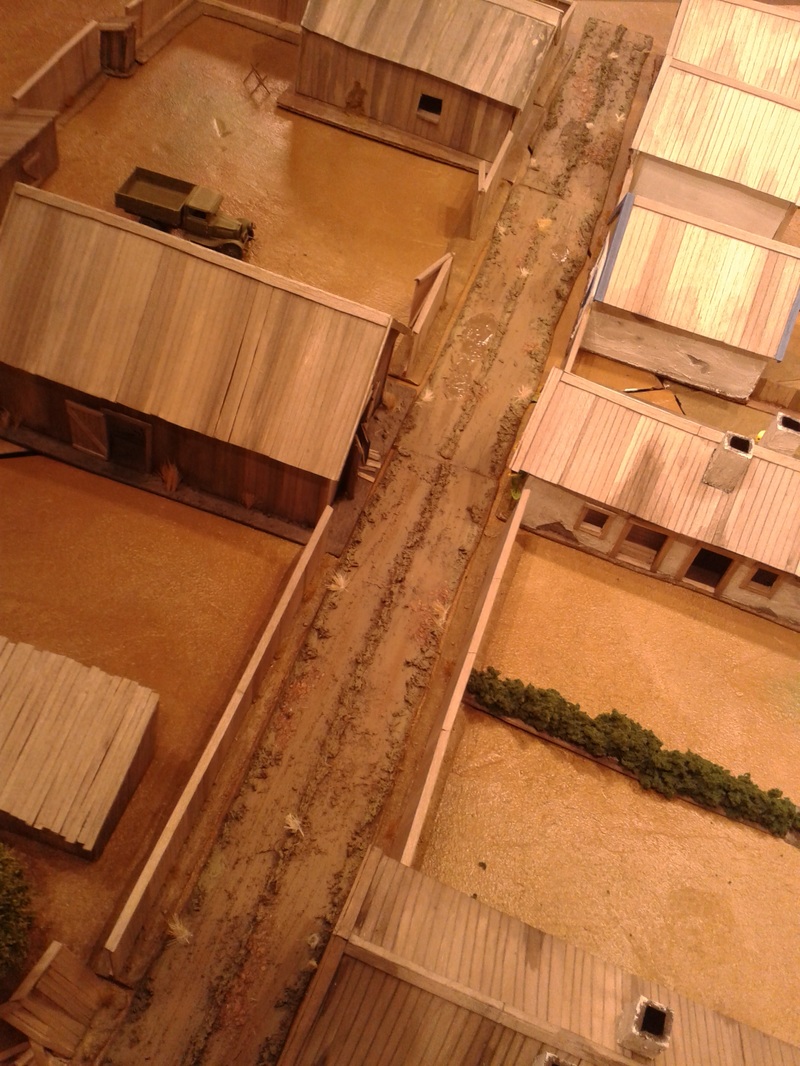
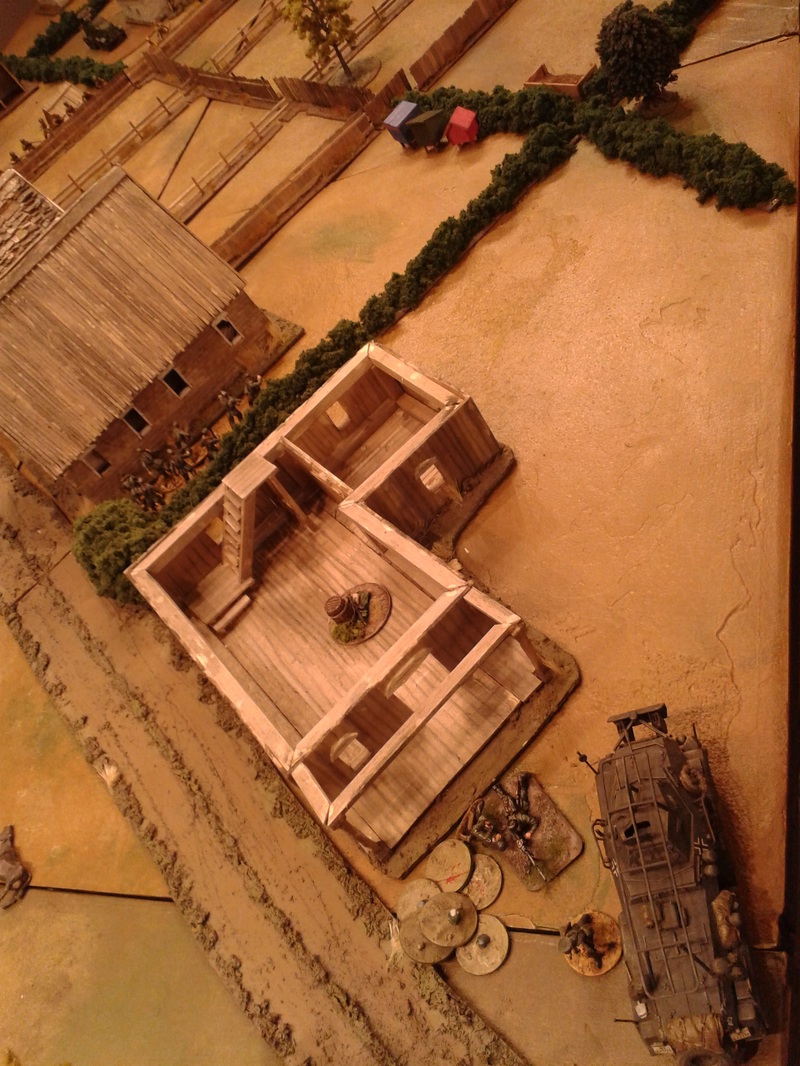
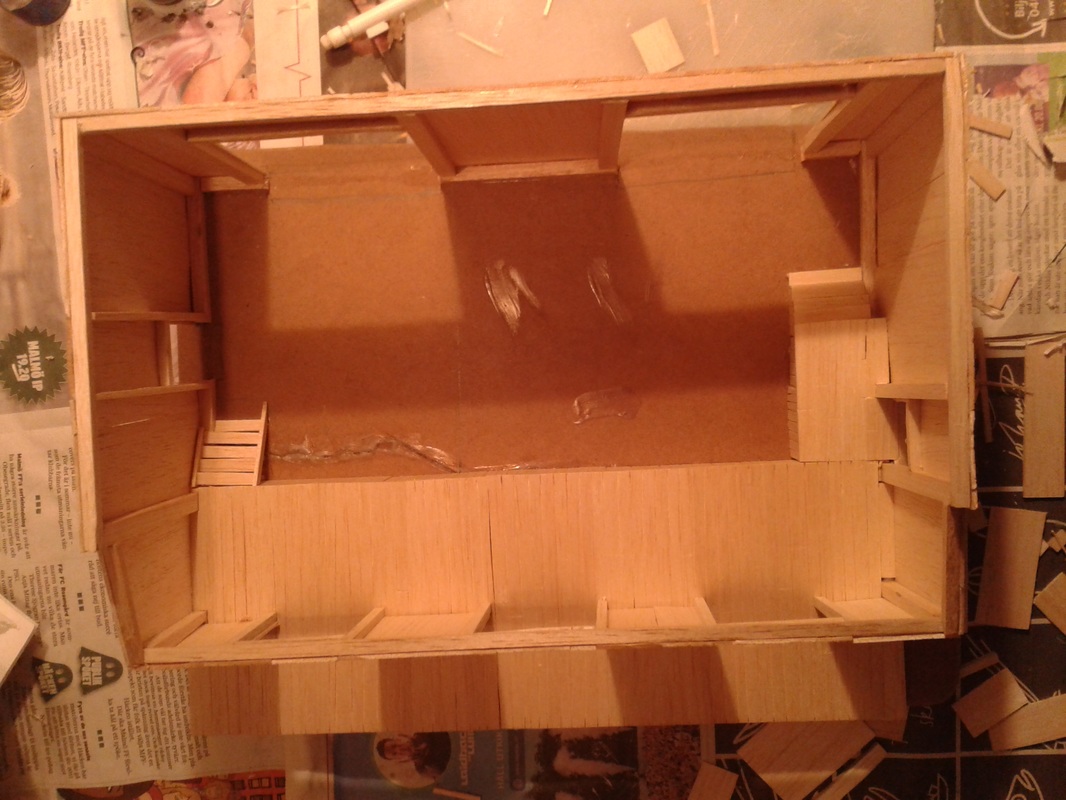
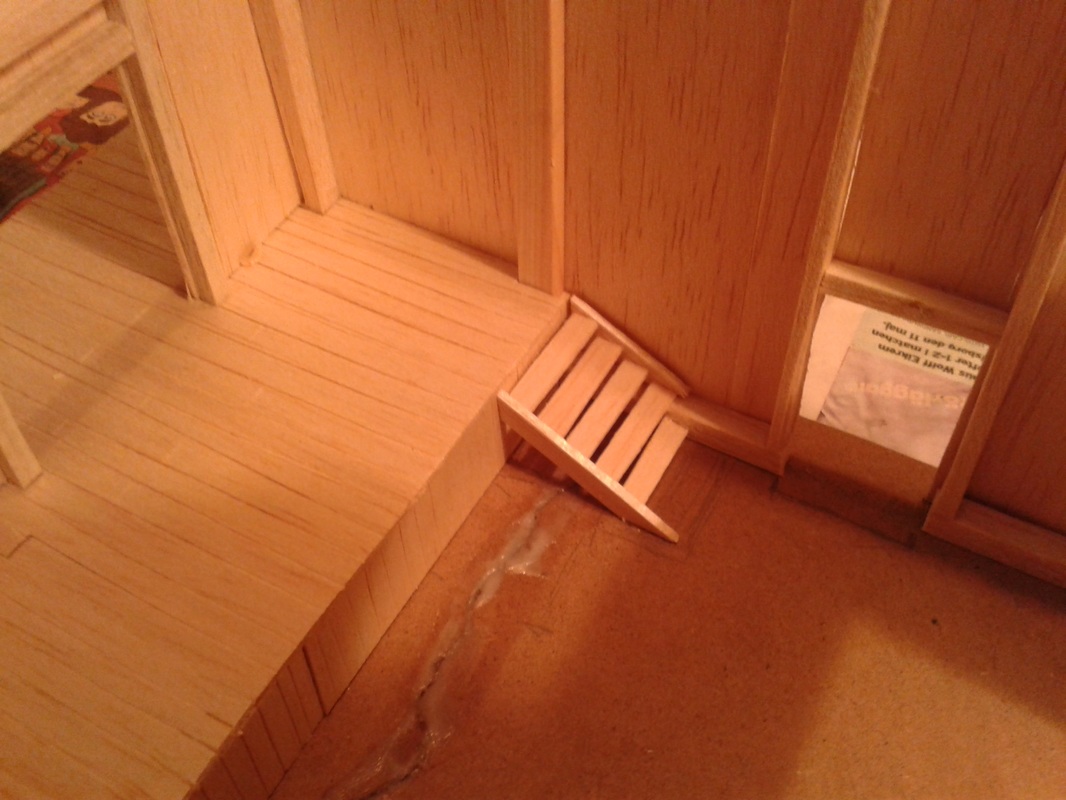
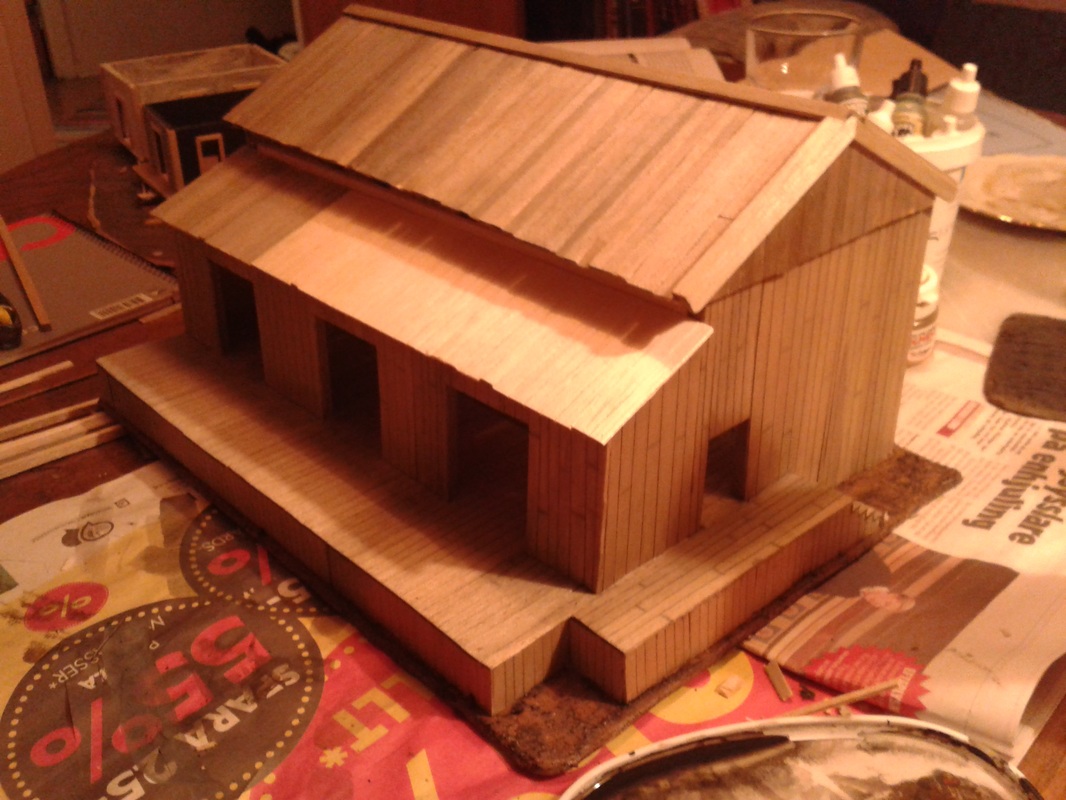
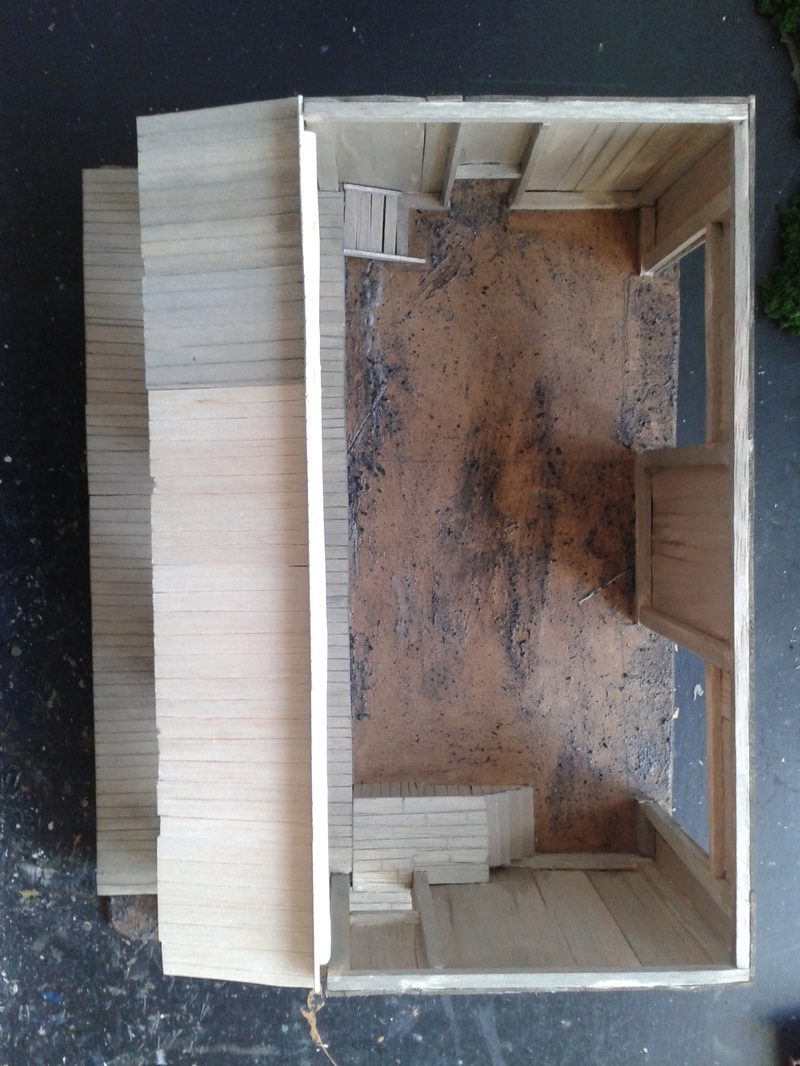
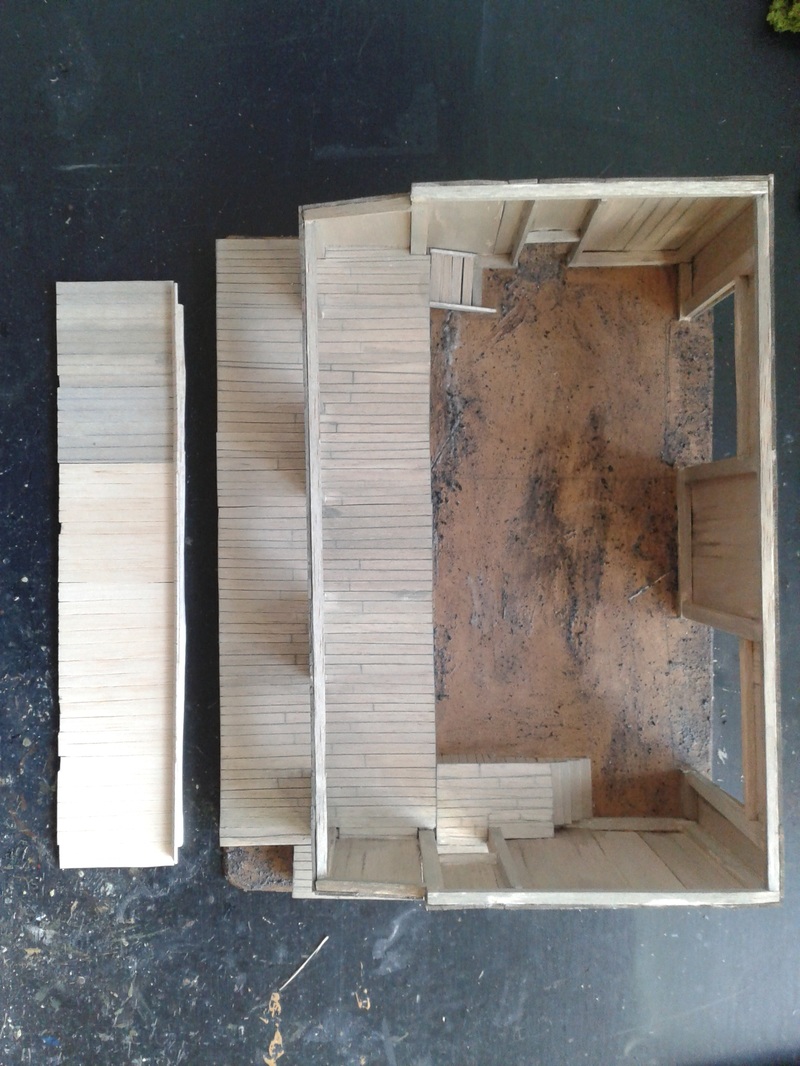
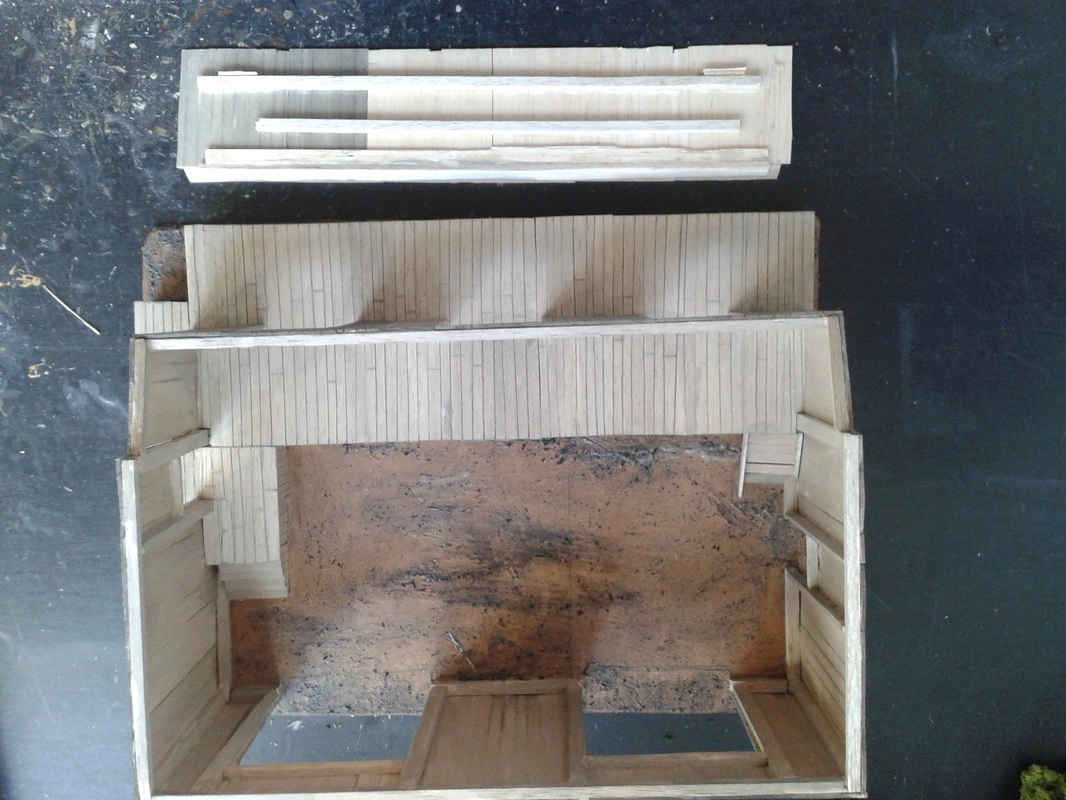
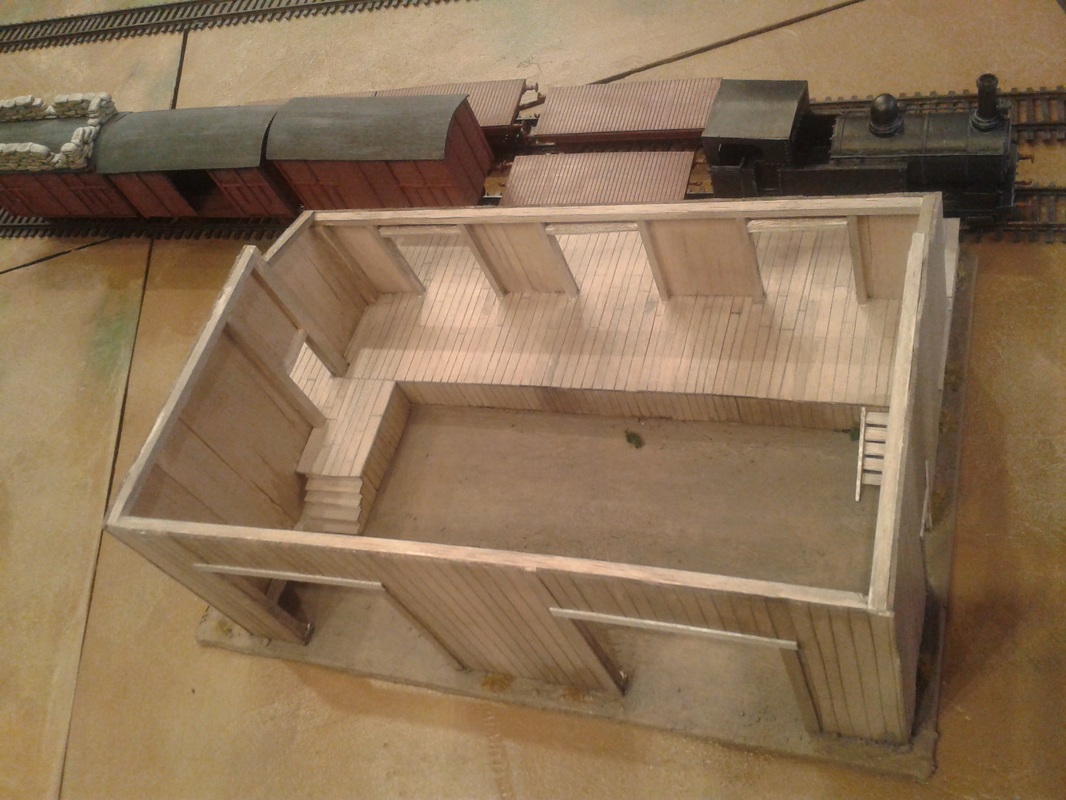
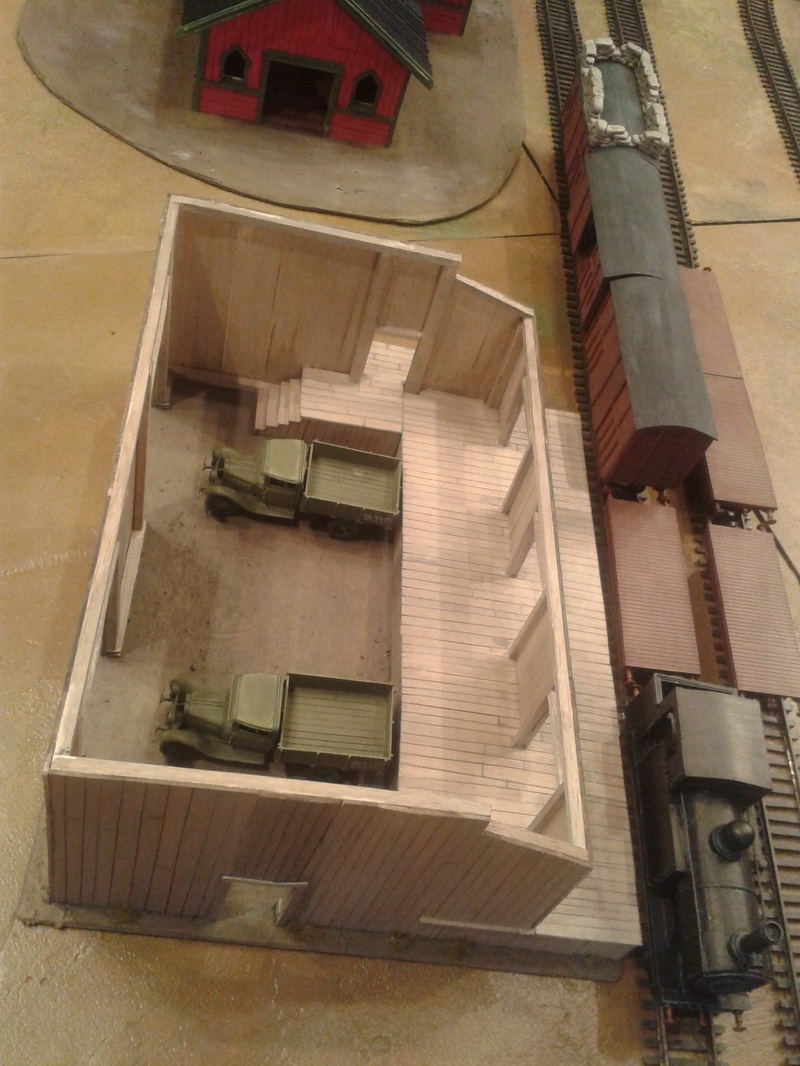
Cheers, Jonas I think more gamers should try to build terrain (particulary houses) in balsa wood! It´s surprisingly durable, easy to work with, looks very nice (in my opinion at least!) and is very fun as well. This building took me 15 hours to complete (I already had the roof from an old building we never used). The only things I used were:
I hope someone gets inspired! Cheers! /The balsa-building Shirty
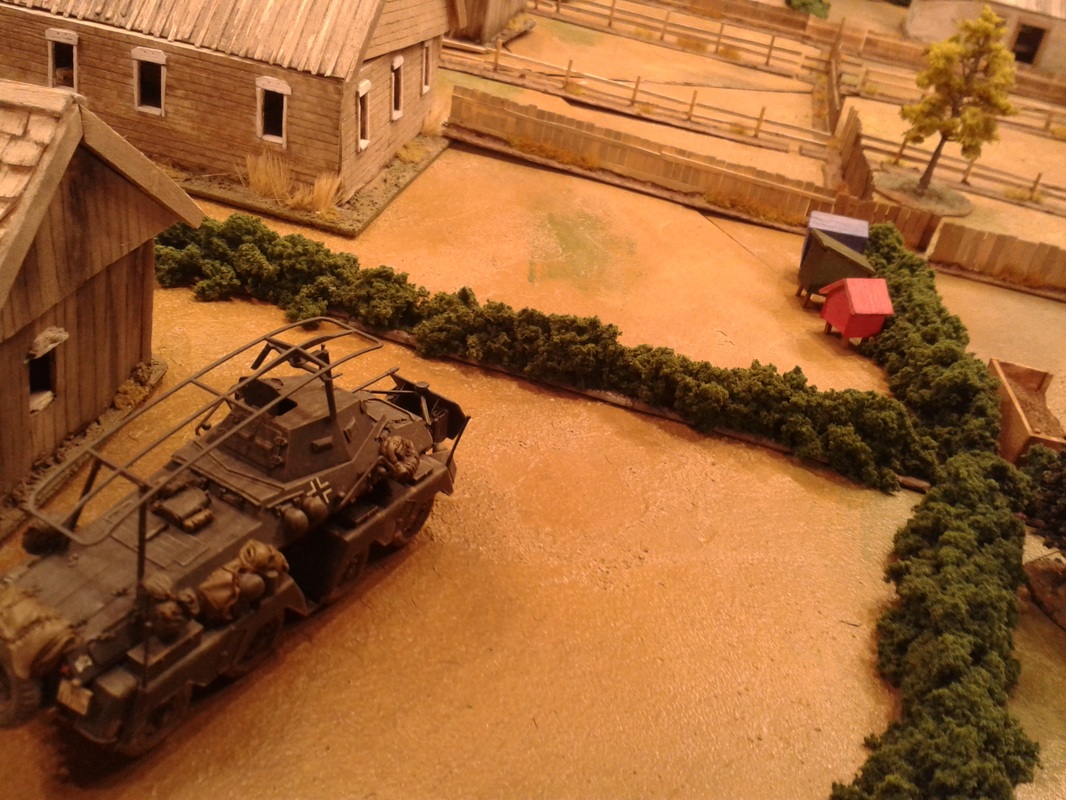
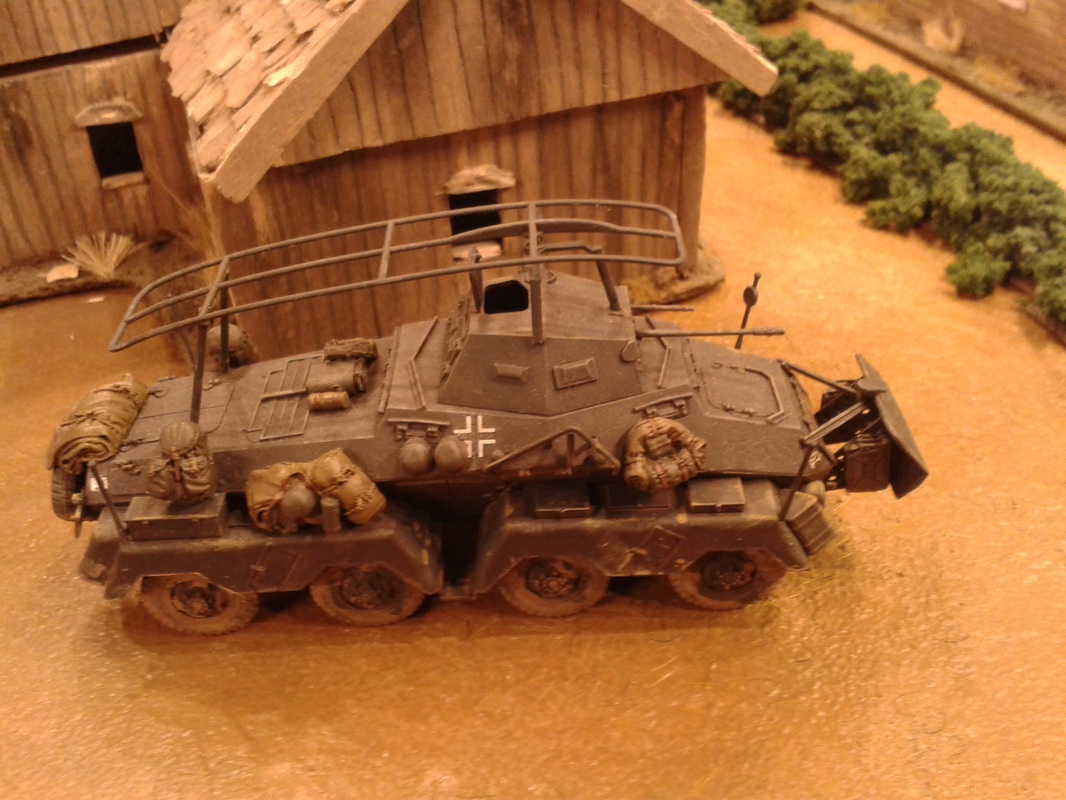
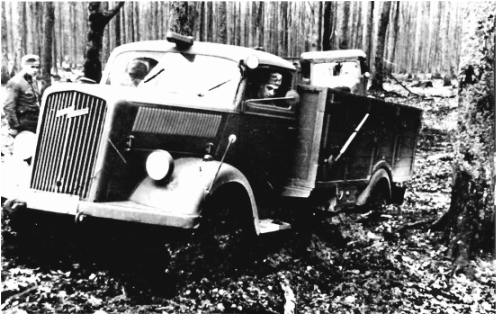 An Opel Blitz truck struggling through muddy roads. The Opel Blitz served in every theater of the war as a workhorse for German logistics, On a tactical level it was both used as an infantry carrier and as a platform for heavy weapons such as flak guns, which could be fitted to the truck bed. As I painted up my Italeri 1/48 scale kit, I thought it was time to dirty it up to represent the harsh conditions of the Russian roads. What better way than to try to weather a windshield?  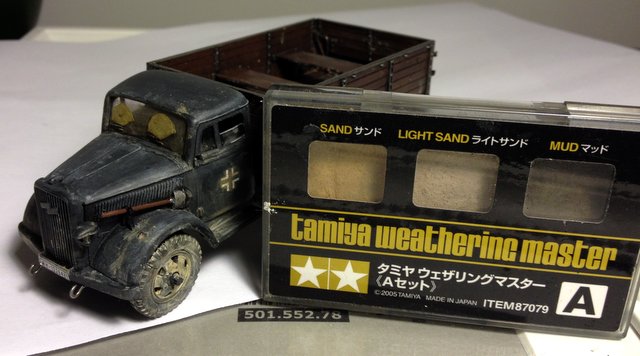  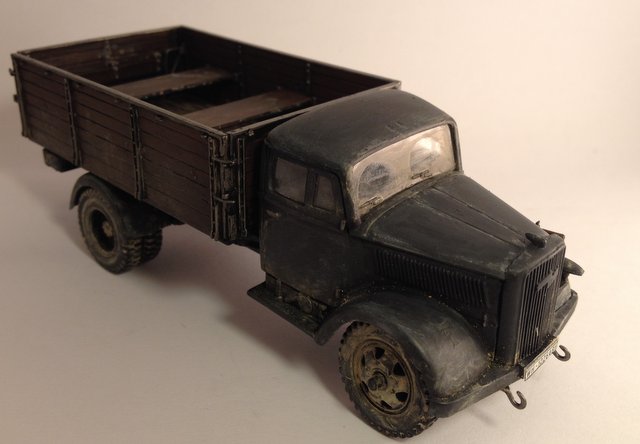 Again, I did the mud and sand with Tamiya's weathering powders. I wanted to try to dirty up the windshield to look like mud and dirt had kicked up all over it. For starters, I gave the windshields a coat of matte varnish. Then I cut out a bit of Tamiya's masking tape, to fit where the windshield wipers would have kept the windshield clear. Then, I took the darker mud-coloured pigments, and painted the windshield with a wet brush. The masking tape kept the pigment from covering the entire windshield. Before the pigments had time to completely dry, I pulled off the masking tape with a pair of pincers, and used a brush with just water to tidy up the windshield, and even out the pigments a bit. In the end I like that the truck look dirtied up, and I prefer this to just leaving the windshields all clear. After that I cleaned up the grey parts of the truck a bit, and now it's ready to deliver some Gebirgsjäger or Panzergrenadier squads to the battlefields of Stalino. 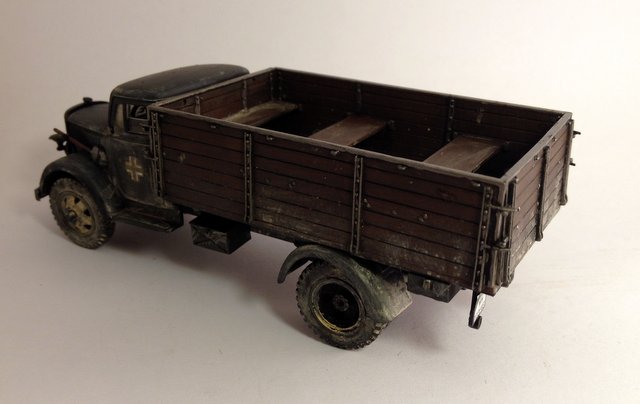 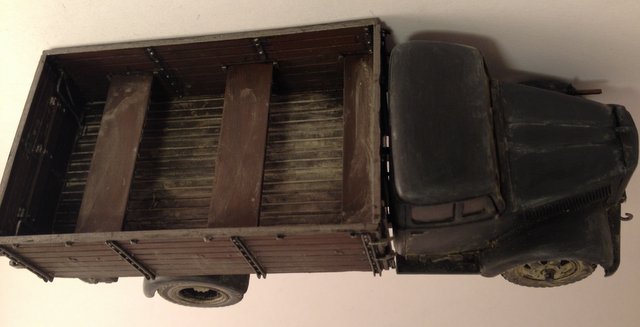 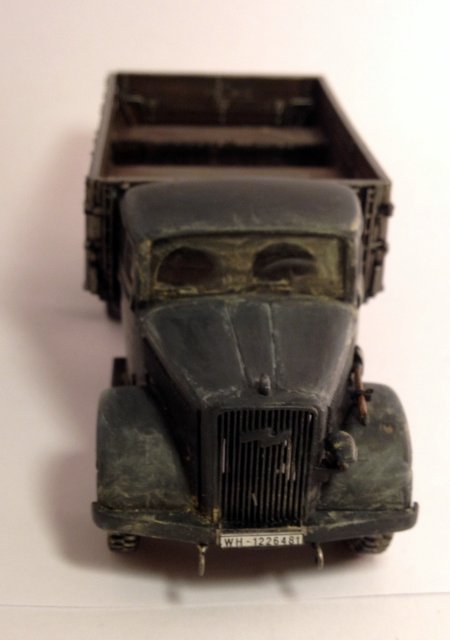 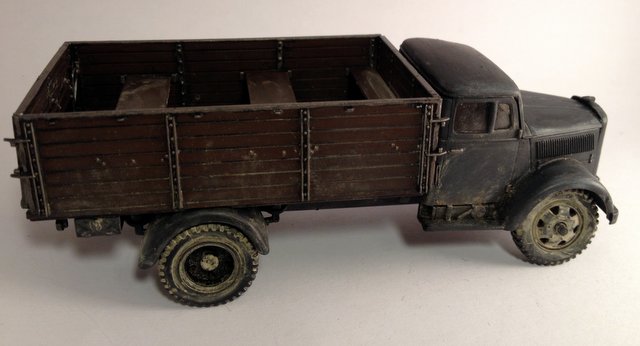 |
WW2 Campaign BlogThis blog follows the second Chain of Command club campaign, set in the intense fighting over Stalino in October 1941. Archives
January 2018
Categories |
||||


 RSS Feed
