|
Wagons are a great addition to any Napoleonics collection. For Sharp Practice they can be used as scenario objectives or as thematic deployment point markers, and some carts can even be fielded as support options to deliver water or ammunition to units in need. The French army made huge leaps in army logistics just before and during the Napoleonic wars, especially through standardizing wagons, carts and limbers. With centralized regulations for interchangable wheels, double files for the horses, and new practical designs, the French could move both artillery, ammunition and supplies better than their enemies could. Napoleon knew how to use this speed to his advantage, baffling his foes with quick and unsuspected marches. Jean-Baptiste-Vaquette de Gribeauval designed and worked on the first overhaul of the French logistics and artillery wagons during the mid 18th century, before the French revolution, but it took time to fully implement. While wildly successful once fully introduced, there was still room for improvement. Plans for those were made in 1803, with the System of Year XI, but again they took time to implement. However, by the time of the 1812 invasion, the French army were using these further streamlined and simplified vehicles and cannon. In 28mm you have the option of going for metal wagons, or the cheaper option of wooden (MDF) kits. So let's try both! I usually upload pictures of my finished models, but this time I'll post some WIP pictures. 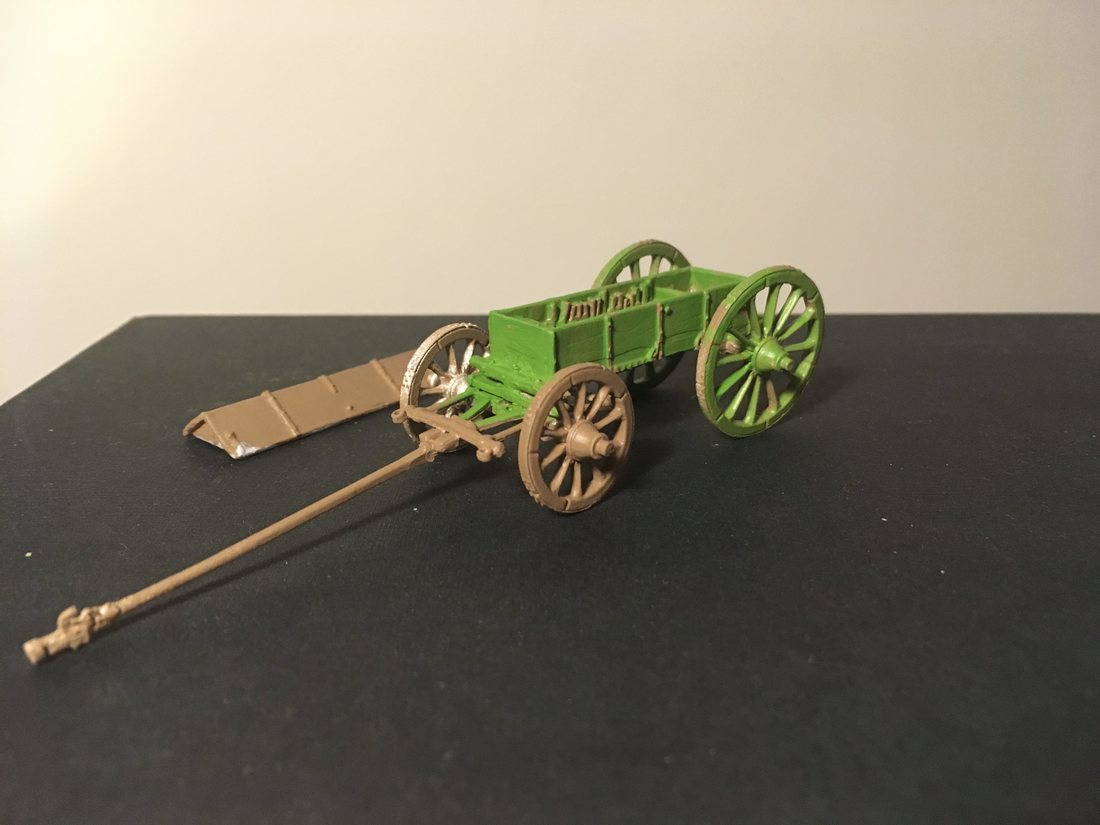 Engineer Cart This engineer cart is from Black Hussar Miniatures, and it'll be accompanied by some French engineers. I plan to use it as deployment point, as well as for scenarios where engineers have to do a specific task such as destroy or repair a bridge. I just noticed that the cart on the Black Hussar website is painted red, so I'll need to double check for sources, as the standard for caissons was a olive or pea green that they got through mixing a large amount of yellow ochre paint with a tiny bit of black. 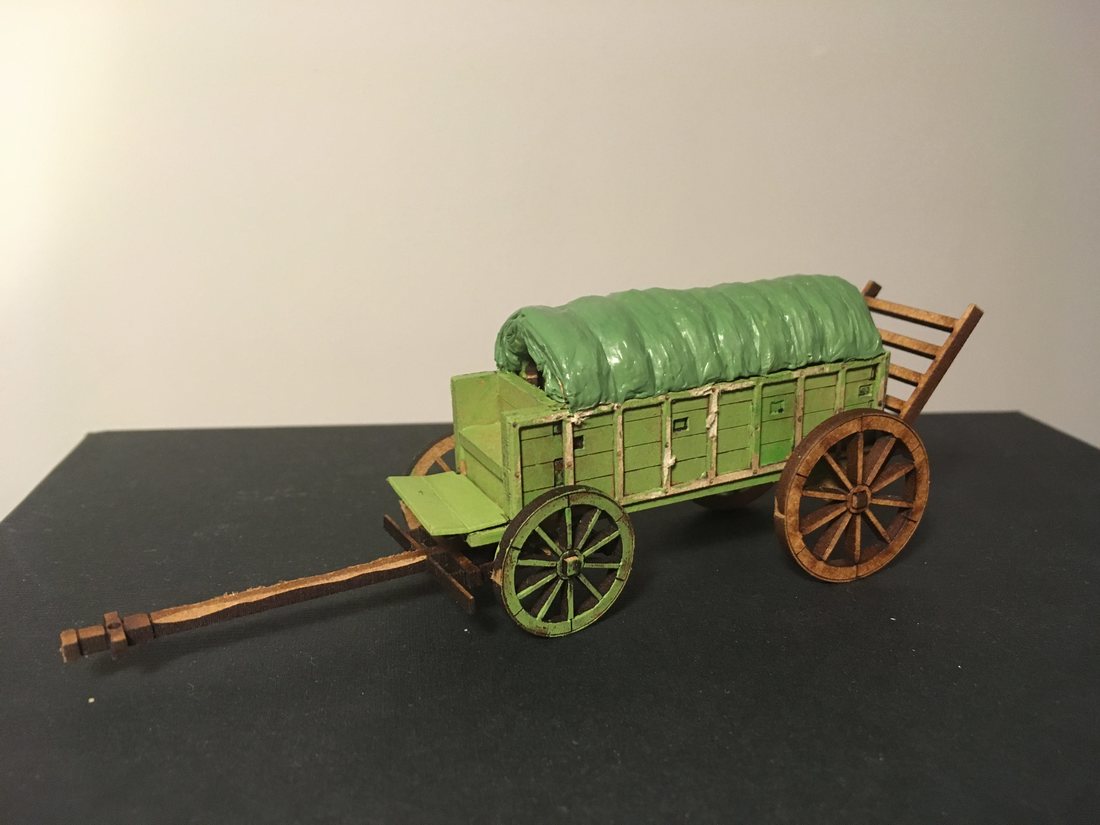 Supply WagonNext up is a MDF supply wagon from warbases.co.uk. I managed to botch the job of building the roof, which in the kit is made of cardboard. Not satisfied with my messed up cardboard roof, I took out some green stuff (kneadatite) and a dentistry tool, and made a basic canvas roof shape to cover up the scene of the crime. Overall I'm pretty happy with how it turned out, and I think it takes a bit of the "MDF look" out of it.
This supply wagon will get a pair of drivers and a pair of draft horses to pull it, also from warbases. I ended up with a bit of green stuff left over after the roof, so I made some sacks and bags that I plan to attach to the back of the cart, again to cover up the more sharply angled parts of the MDF kit. -Jonas
1 Comment
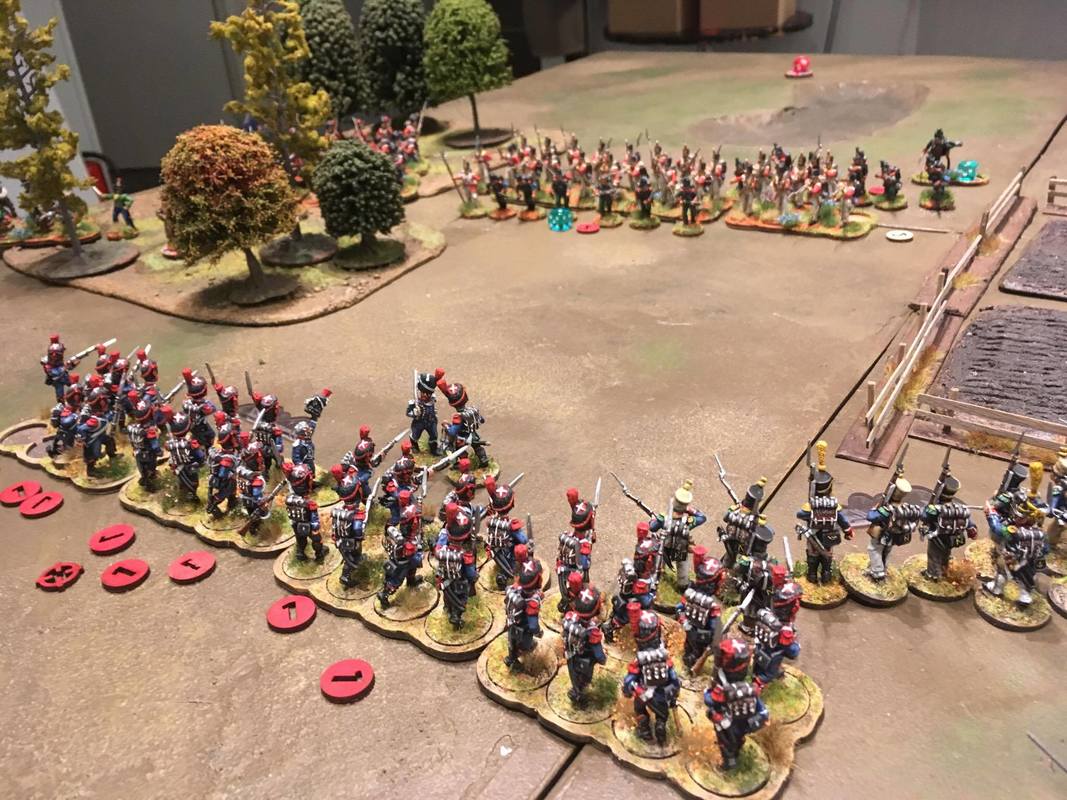
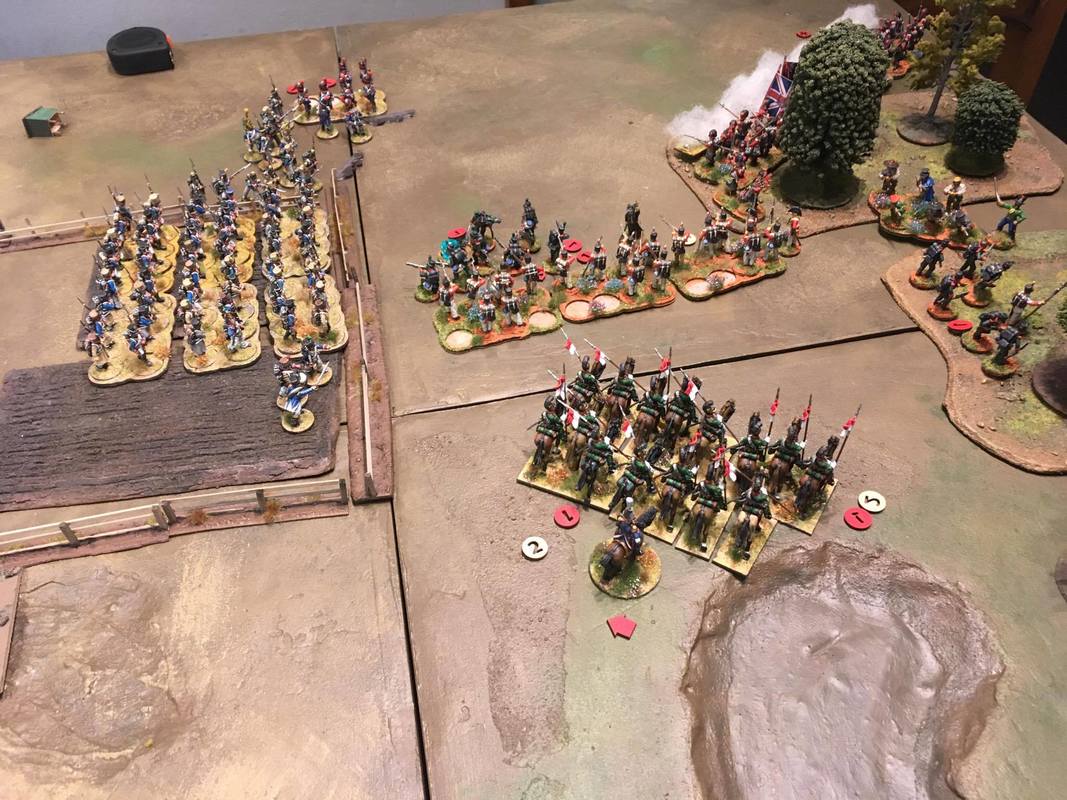
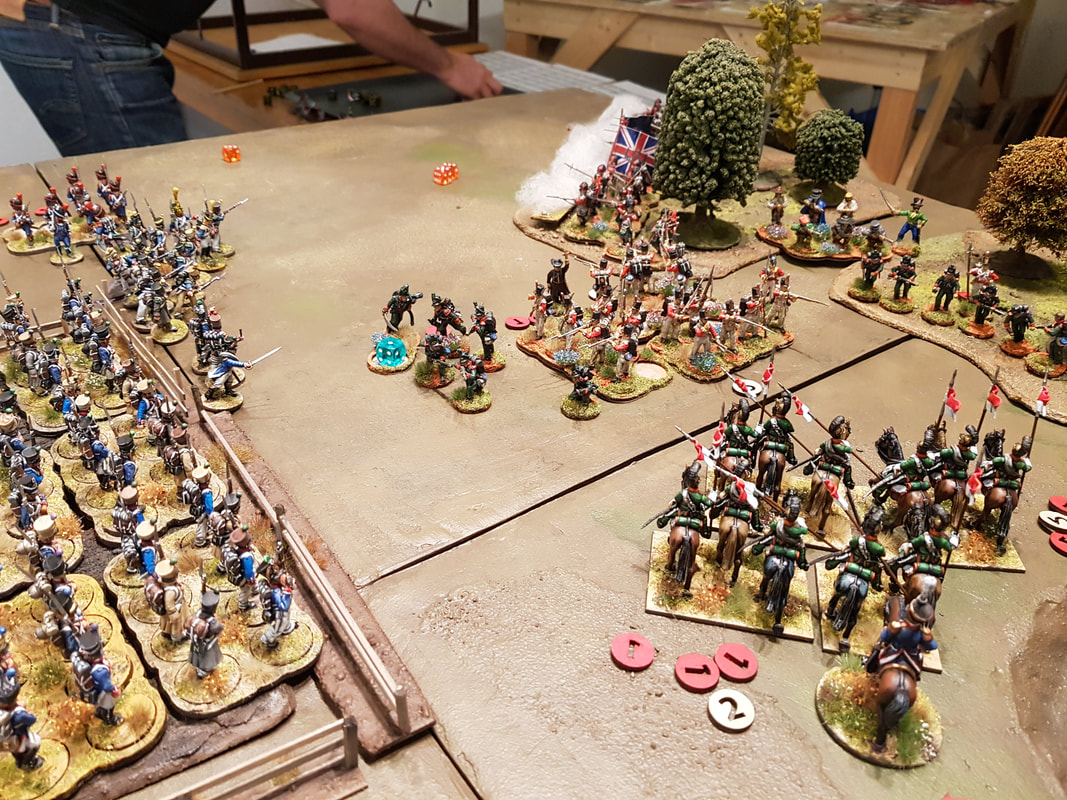
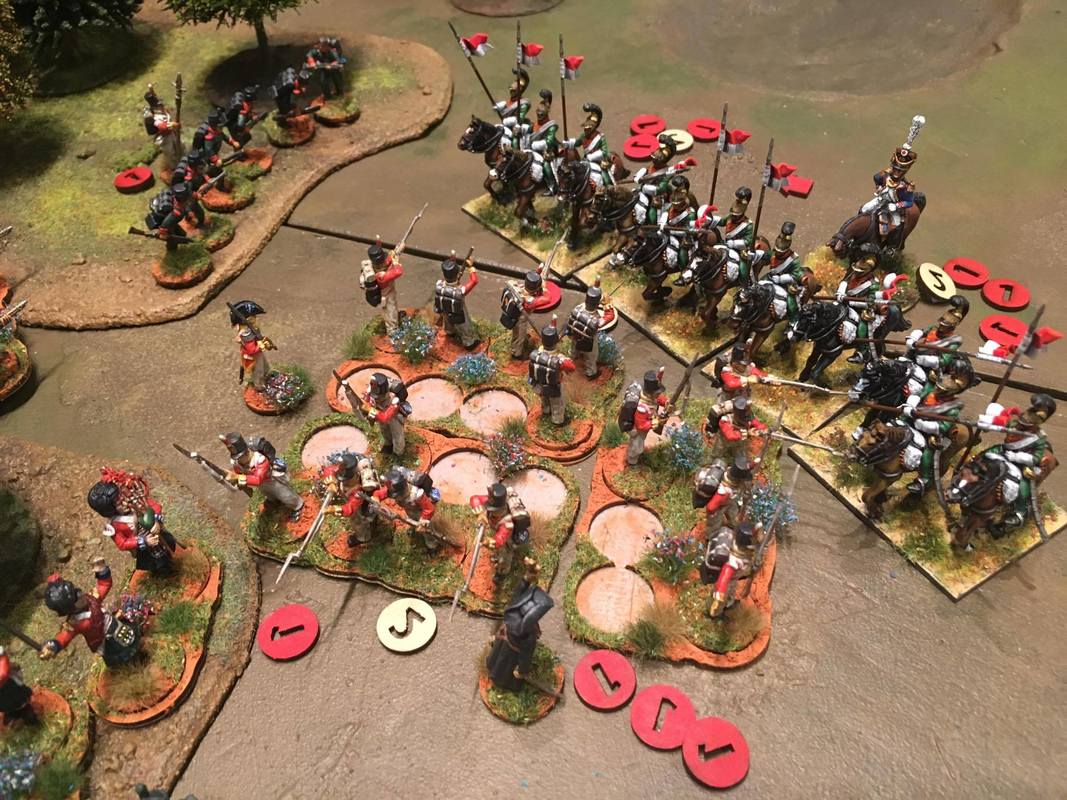
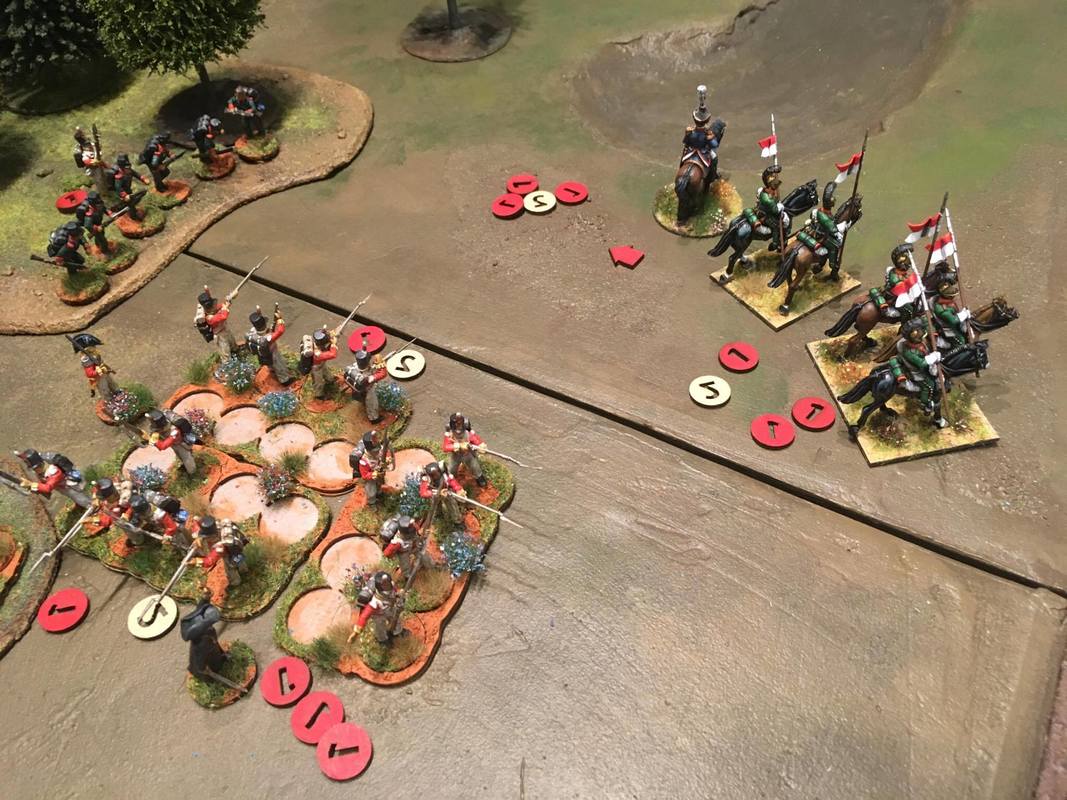
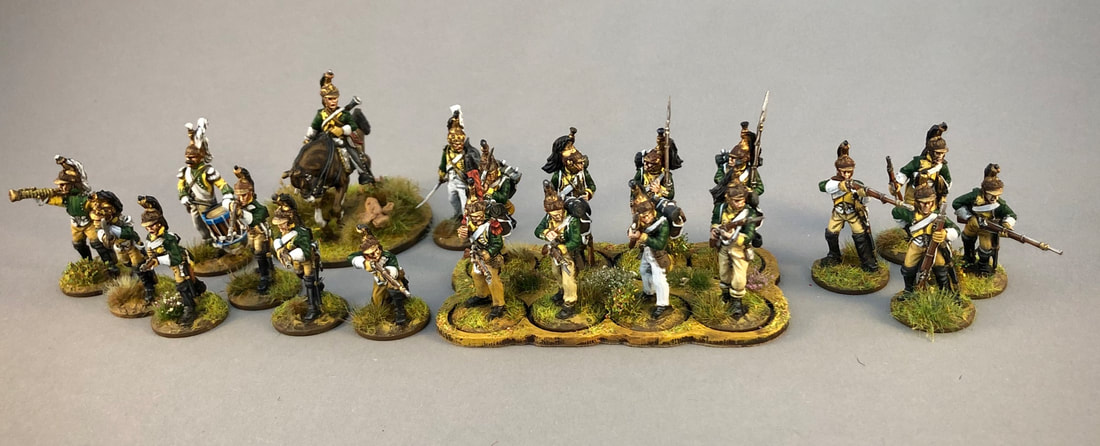
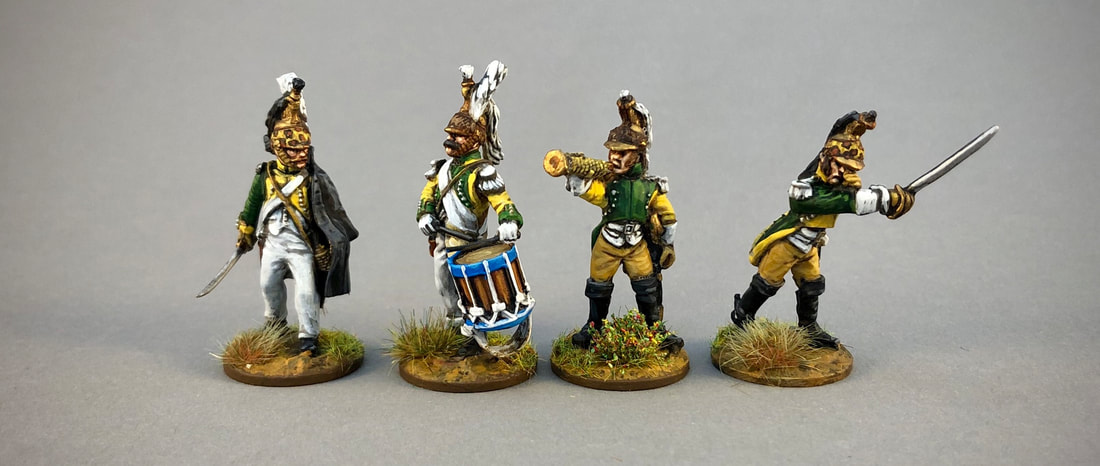
It was time to give Sharp Practice 2 another try, or more specifically, for me to try to win this bloody game against my club-mate Jonas! My Russians have had an bad habit of getting beaten up every time I field them. With a campaign coming up, I felt that it would be nice for my enjoyment of the coming battles if I could even out the score a bit. It's always good to know that you have a sporting chance, at least! I have always been a big fan of attack/defense scenarios, probably since I have read way too many books on military history. Most battles have this "one attacks when you have superior forces thing" dynamic to them, as otherwise attacks tend to turn out really bad. All the even match-ups you see in tabletop gaming make for some strange scenarios, and maybe most important - they don´t get the feel right. When I play the summer of 1812, I want to play many games including attacking French and defending Russians. So, this time we tried a home-brew attack/defense scenario. We kept it very simple: Jonas would attack with the French, with a 100 point force. He wins if he takes my Russians' Primary Deployment Point. The Russians get to field 80 points, as they have an easier task defending. The reason for why we just gave a relatively minor boost to the attacker is due to our feeling that you often don´t get that much of an advantage as the defender in most tabletop games. They are almost always designed for equal forces fighting it out, and the TFL games I played so far have been heavier on skillful tactics and adopting to the situation, than a proper simulation of grinding down your opponent with military science and superior numbers. Good so, but any good tabletop ruleset should be able to stand up for a fun attack/defense bash. Also, this was the first real test of using both our own lists for the invasion of 1812 (available here), so it was exciting to see how it would turn out! So off we went! The first troops to deploy was a Russian formation of four regular Jäger groups. They are led by my most senior leader, a level 3, and sits at the right hand of the Primary Deployment Point - the main objective of the game. 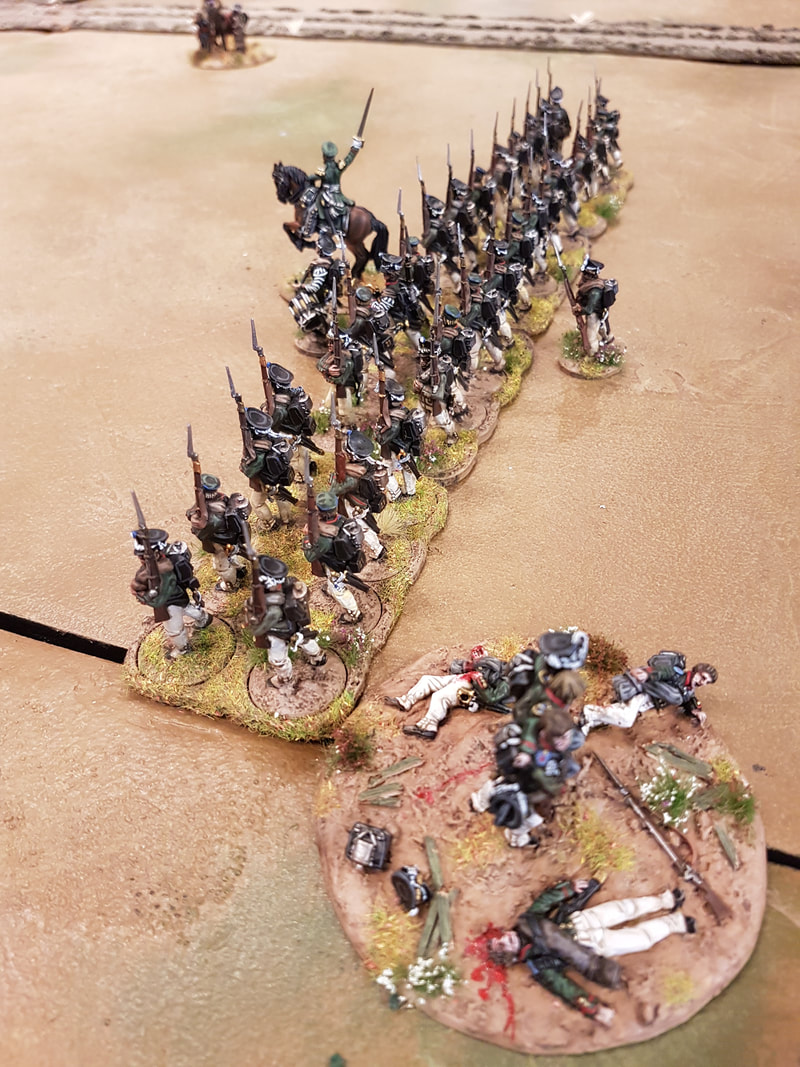 The French attack, and the bulk of the attackers show up: Two groups of Carabiniers (according to our army list both Elite and with the Sharp Practice special rule!) Two groups of skirmishing light infantry Voltigeurs (light infantry skirmishers, also with Sharp Practice) Three groups of line infantry Fusiliers. In the far distance you can see two more groups of skirmishing voltigeurs, this time slightly less trained line infantry Voltigeurs, at the curve of the road. The Fusiliers push forward, going "over the top" of the roadside to get into range of the Russian defenders. 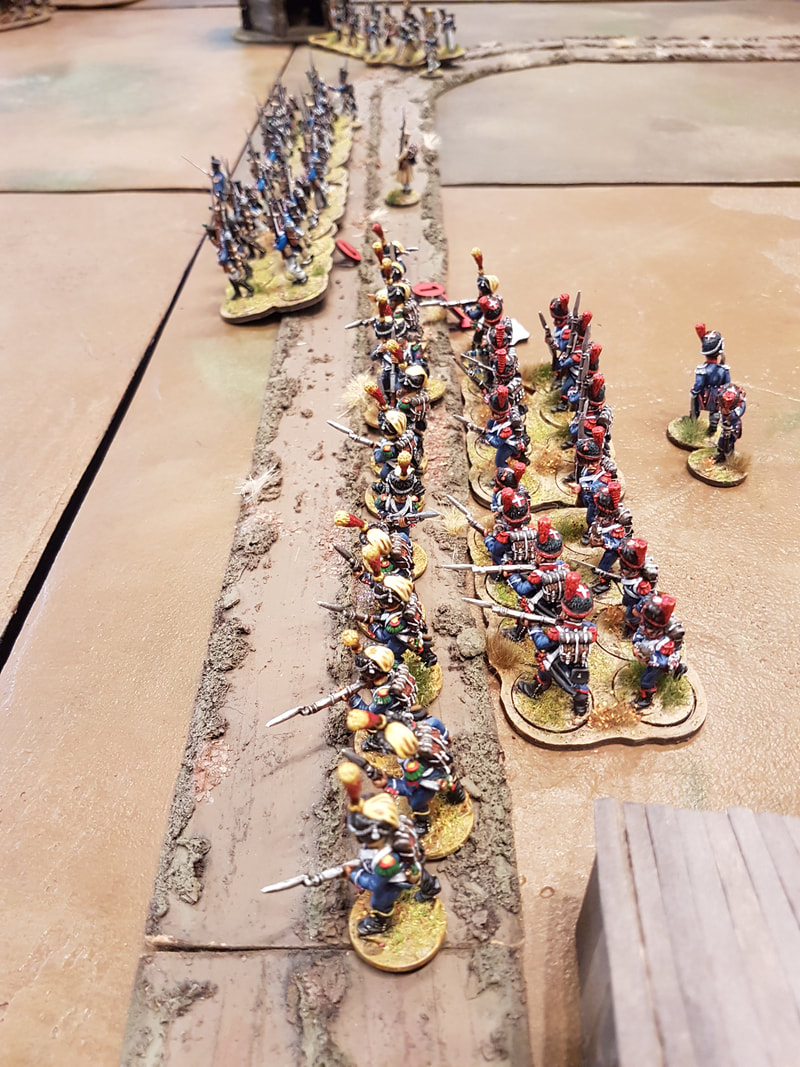 The Russian response: Strelski skirmishers fan out in front of the Jäger regulars. This for three reasons: 1) They exhanged fire with the voltigeurs, with surprisingly good effect (luck!), 2) they screened the Jägers behind them from the voltigeurs return fire (units behind a skirmish screen counts as in one higher level of cover), and 3) they got more units into the mix, making it less probable that my lvl 3 leader would be shot. With his ability to give orders to three formations at the same time, I needed him badly to organize the defense! 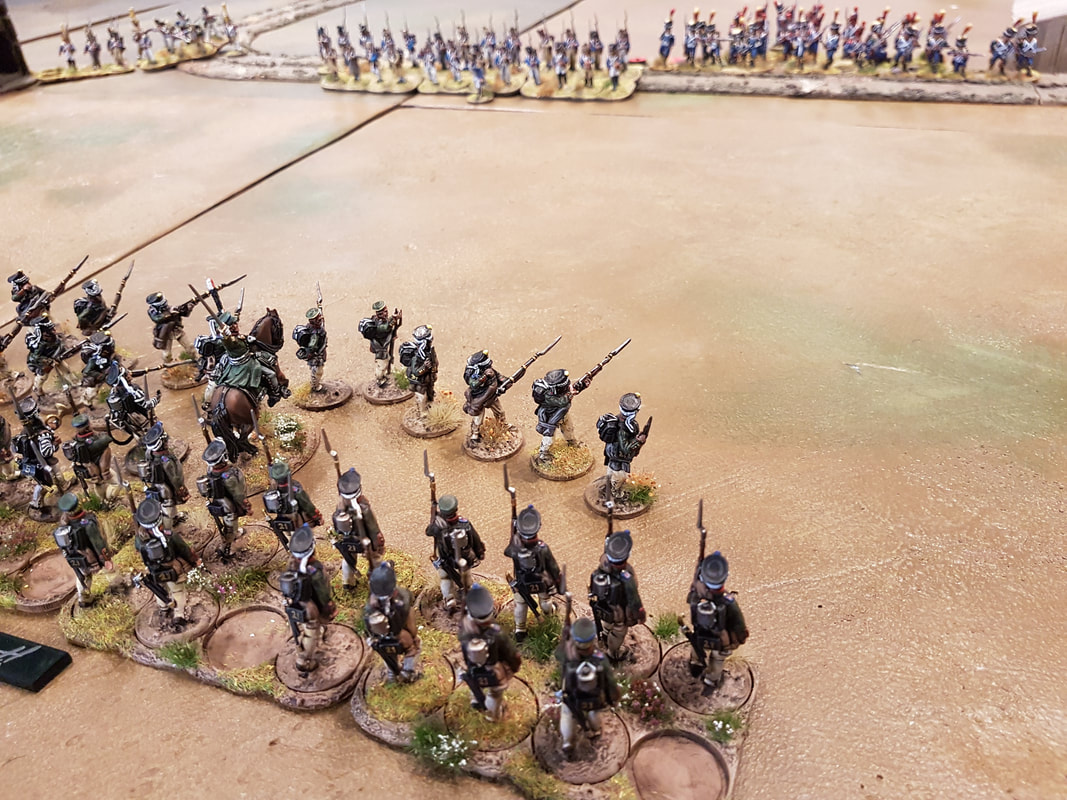 On my left flank, Cossack irregular skirmishers deploys in the woods. With their ability to shoot better from cover, they did a good job in pouring more fire into the attackers. My movable Deployment Points proved to be a disappointment, as I did not know my rules properly and thought I could move them within line of sight of the enemy, which you can´t. So they did not go far from where I put them in the first place. But as the French deployed a cannon and more infantry, I managed to push one of the movable Deployments Points even further to the left inside the woods. Now came the most nervous moments of the battle - I had two units of mounted Cossacks, ready make a sneak attack. Initially they were in potential range to ambush the cannon, but as the game progressed they were in range of both the cannon and the Voltigeurs. If I could activate them with the ambuscade rule (which would normally cost three command cards, but in this case only two since they have the "Tactical" special rule), I had the chance of hitting the Voltigeurs in the flank and then overrun into the cannon, leaving my Cossacks at the back of the French advance. Quite possibly, this move could halt the entire French attack with just a bunch of irregular Cossacks! What was needed here was to get two flags, and then the Cossack leader activation in the same turn, so I waited. And waited. And waited! These kinds of moments make this game so exiting. Would I ever be allowed to unleash my Cossacks? 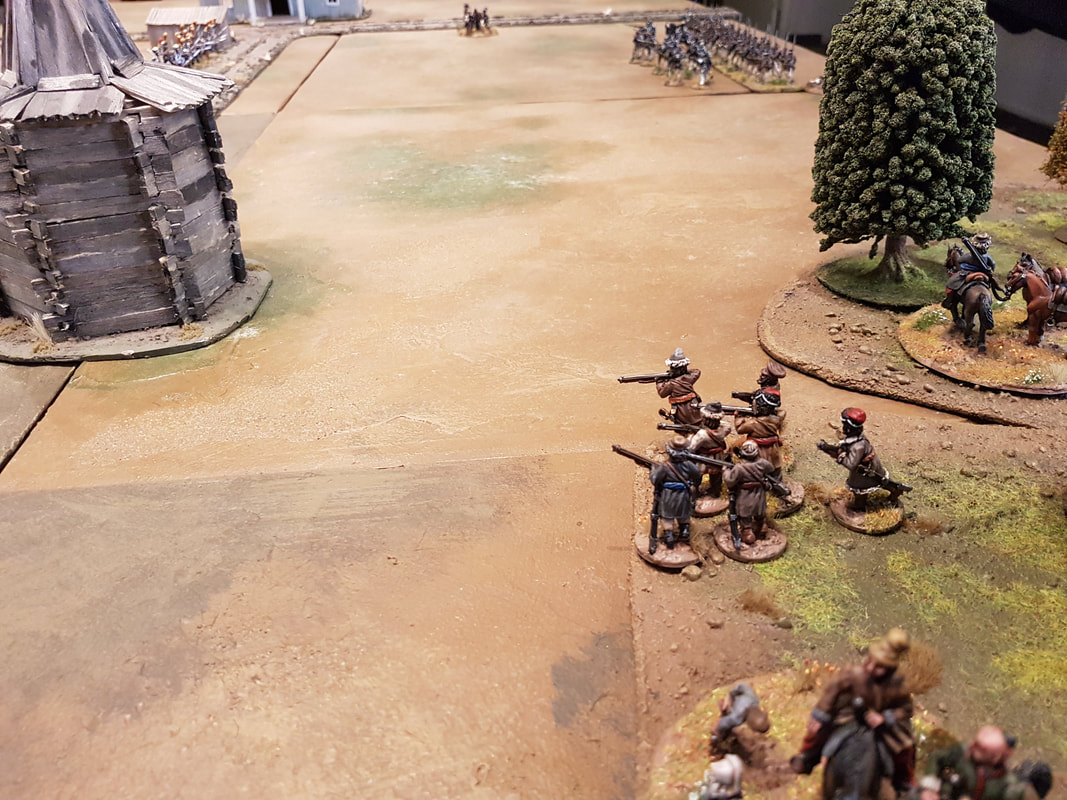 At last two flags and the Cossack leader showed up, but my most golden opportunity had already faded away. Now the Voltigeurs had advanced and were no longer in position where I could strike the cannon as well. Their new position meant that the Cossacks would be arriving in the midst of the French line. Not the best place for irregular cavalry to be! But, I had waited and now the time was here! Hurrah!!! 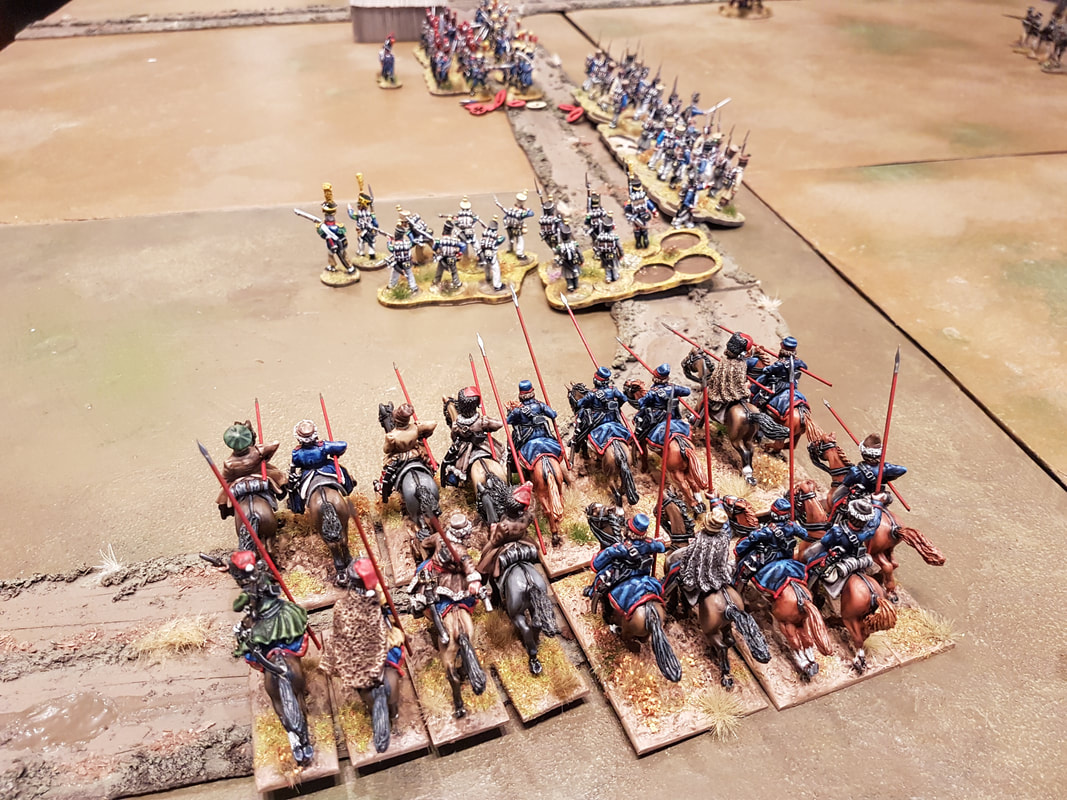 I also deployed my second Jäger formation, three units of conscripts, and these came with a barricade! Now my whole defense was in place. The second unit of Cossack skirmishers also took position in the woods. 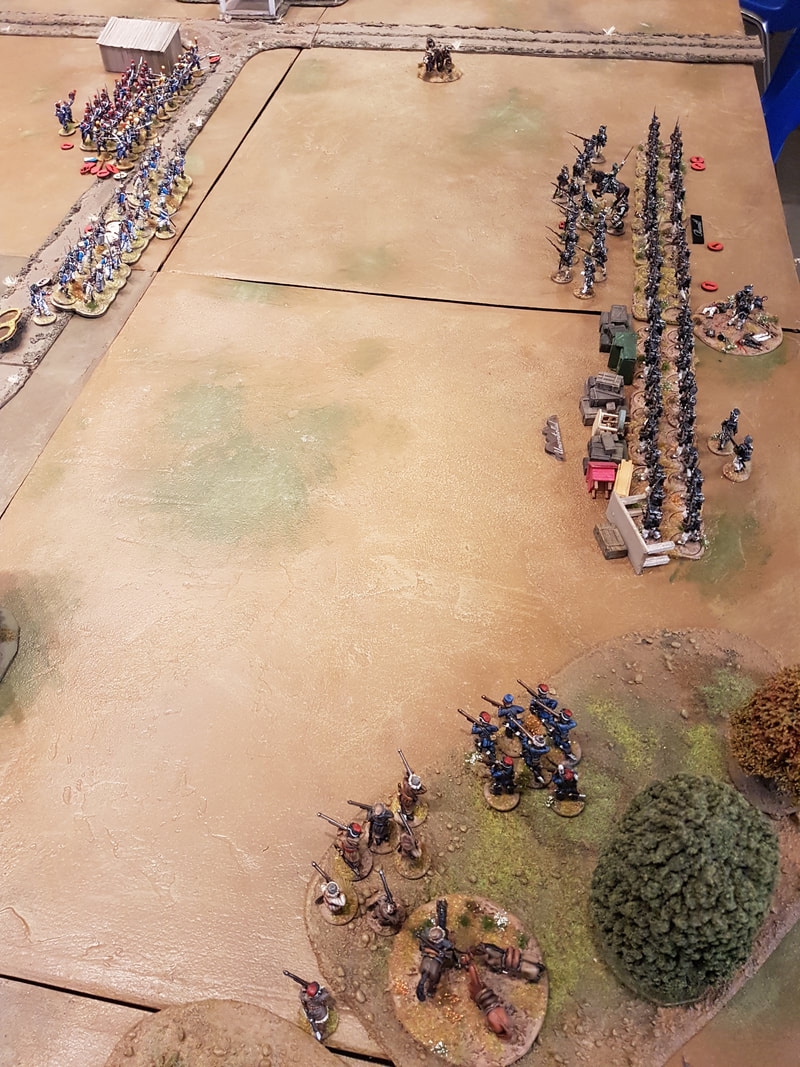 After some nervetingling dice rolling, the Voltigeurs managed to evade the Cossack ambuscade. And the Cossacks were now in grapeshot range from the French artillery. Ouch! Were they to survive this? 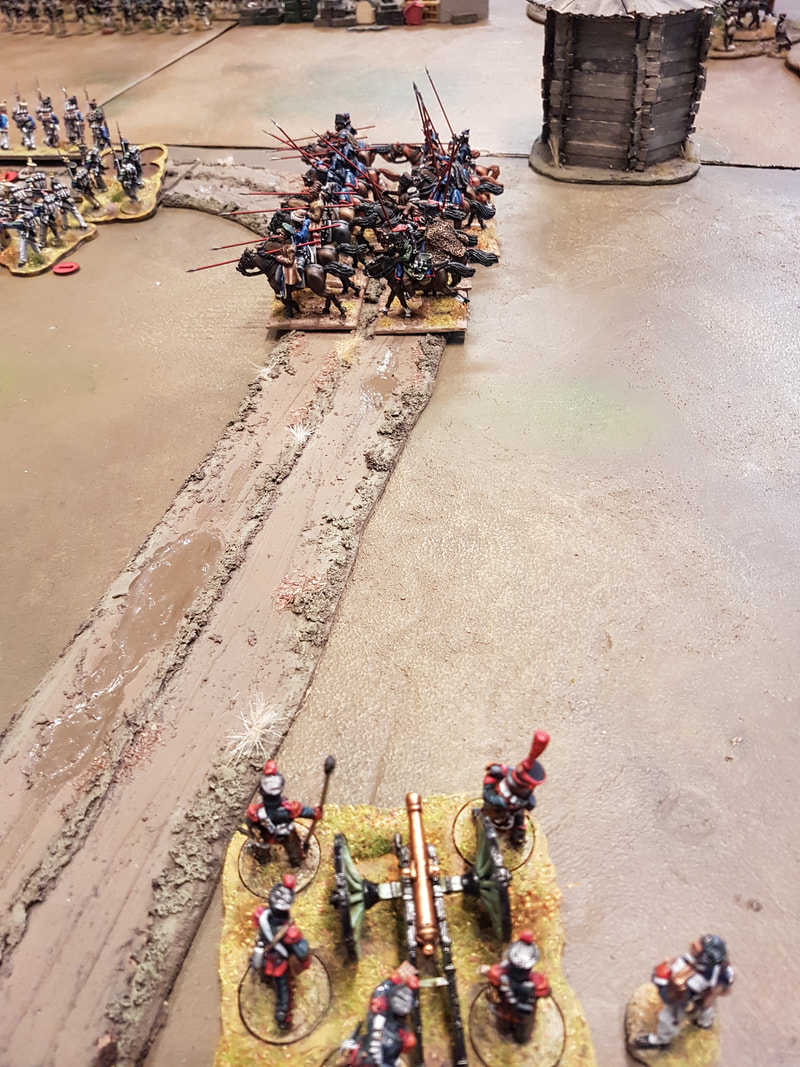 "Steady in the ranks"! The officer (lvl 2) commanding the Jäger conscripts behind the barricade strides up and dow the line to keep them in good order.  The Shock is mounting on the attackers. The Cossacks gets their fair share of canister, but they continue the headlong rush behind the French lines. The French infantry pushes closer to the objective. 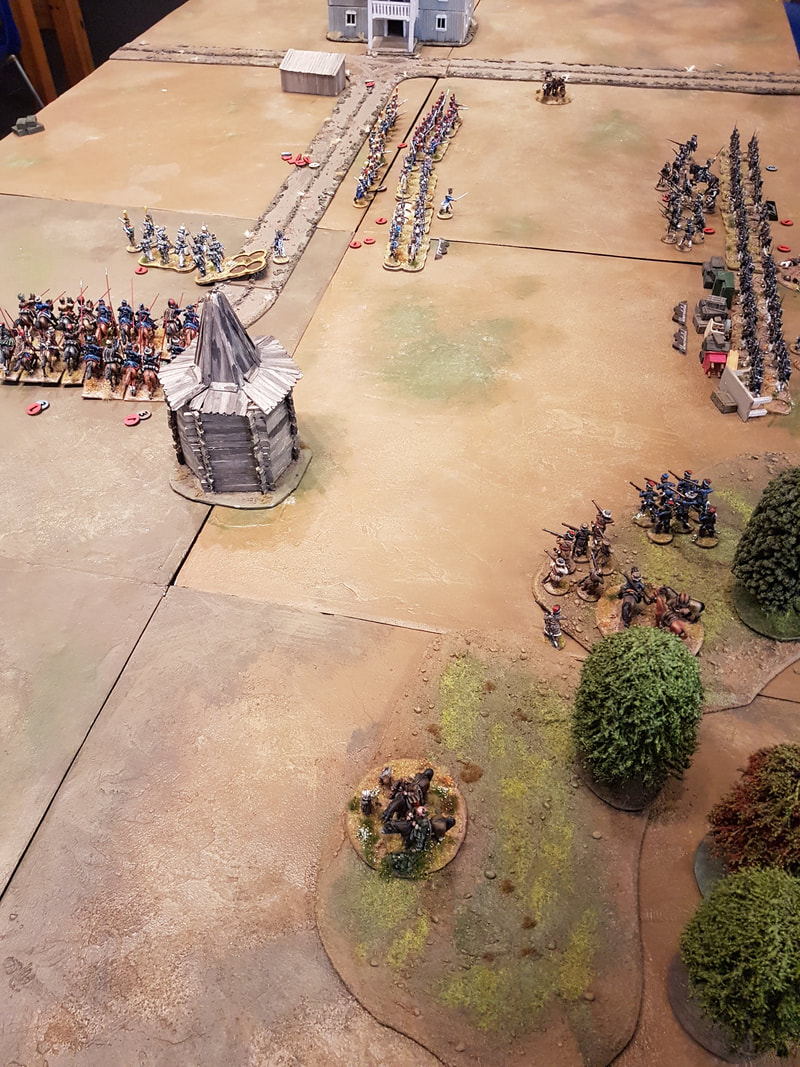 A moment later, the light infantry Voltigeurs have broken under fire. The Fusiliers casulties are mounting. The Jäger Strelski skirmish screen shuffles away to clear the field of fire for the Jäger regulars, already presenting their muskets, who join the firefight. 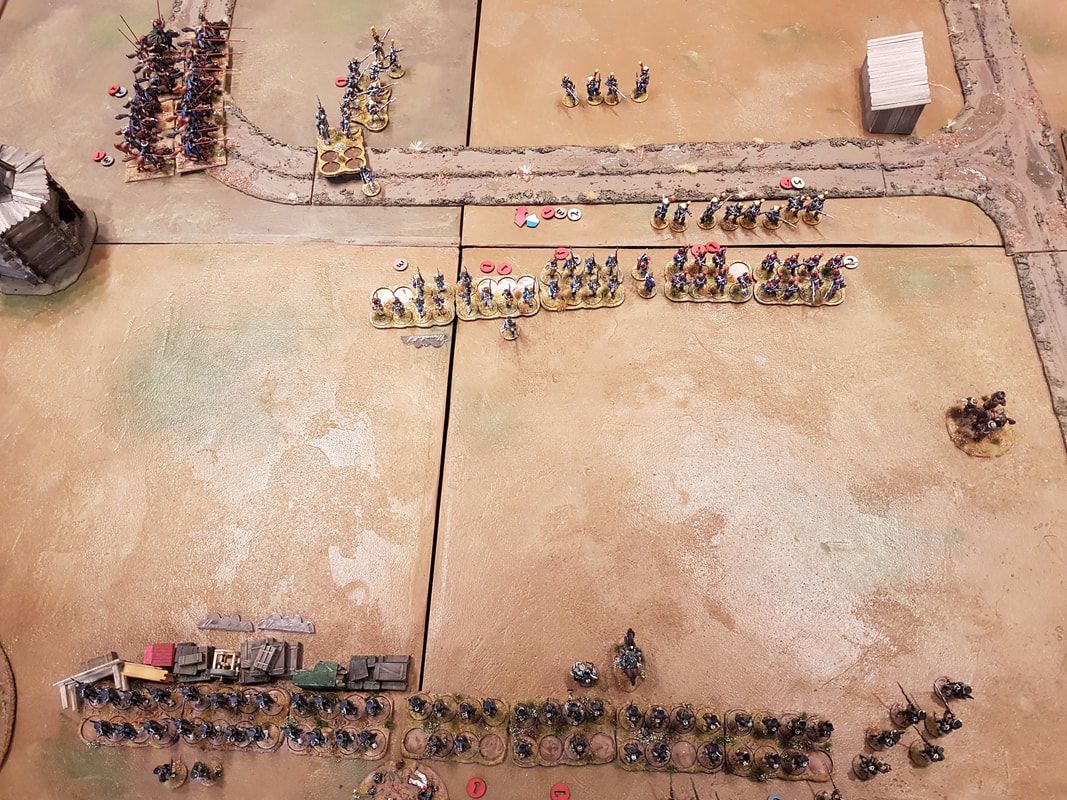 The Cossacks recive fire from the Voltigeurs they are pursuing, as well as a second round of canister. This is too much and one of the units break. But by now the French attack is called off. Due to collapsing morale and a great deal of Russian infantry still quite unshaken and in the game, they throw in the towel. Victory for Shirty with his Russians, at last! 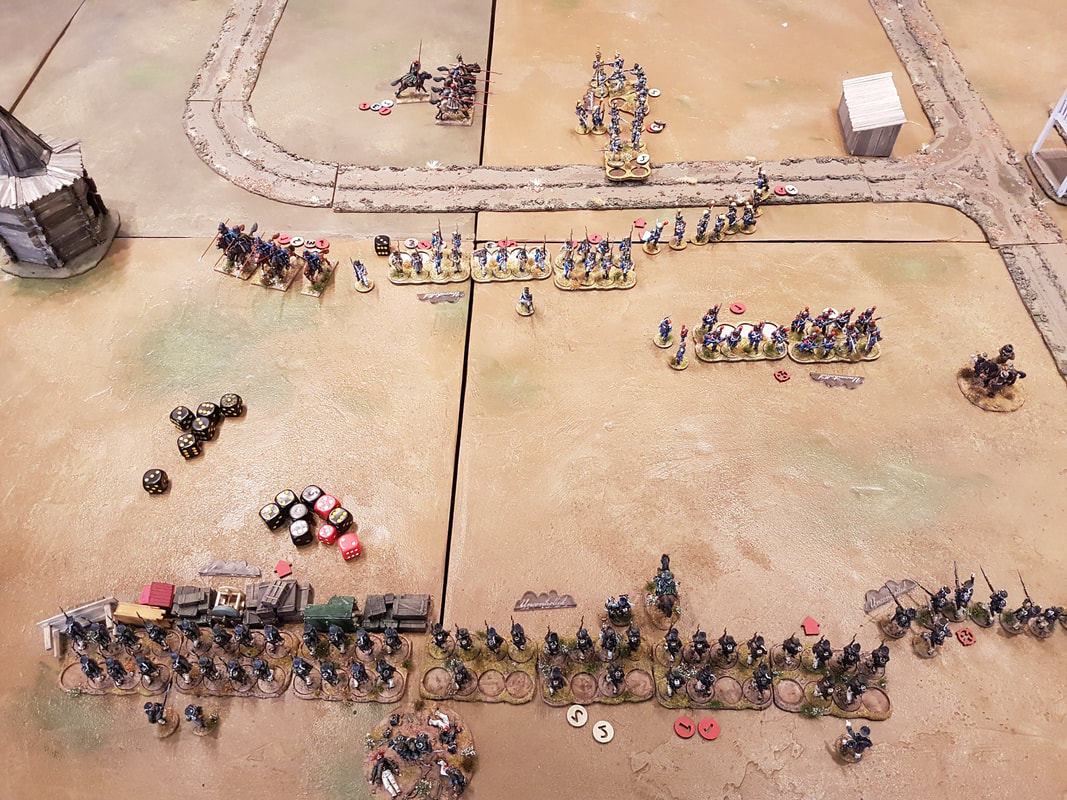 So, another great game of Sharp Practice 2, even if it was the least exiting I´ve had so far. Jonas put up a good fight, but I never felt as threatened as I should have in a attack/defense scenario.
Probably 100 vs. 80 points is too harsh to the attacker, they need at greater advantage to push home the attack. We discussed to test it with 120 vs. 80 points instead, but Jonas would like me to test being the attacker in a 100 vs. 80 game first, and I can´t disagree to accept the challenge. Despite this I was very pleased with my Russians. All troops did what they should, and I felt that my army composition was really solid for a defense scenario. Steady infantry in defensive position, with Cossacks both on horse and foot helping me make the attackers plans awry. That said, I think the barricade is way too powerful in this sort of game, so it should be restricted in some way to uphold playability! Next time it´s the Russians who will rush into the storm of lead and black-powder clouds! Hurrah!! /Shirty So, after sitting in a postal warehouse just a few miles from me for half a month, this little package arrived. Paint pot for size comparison: 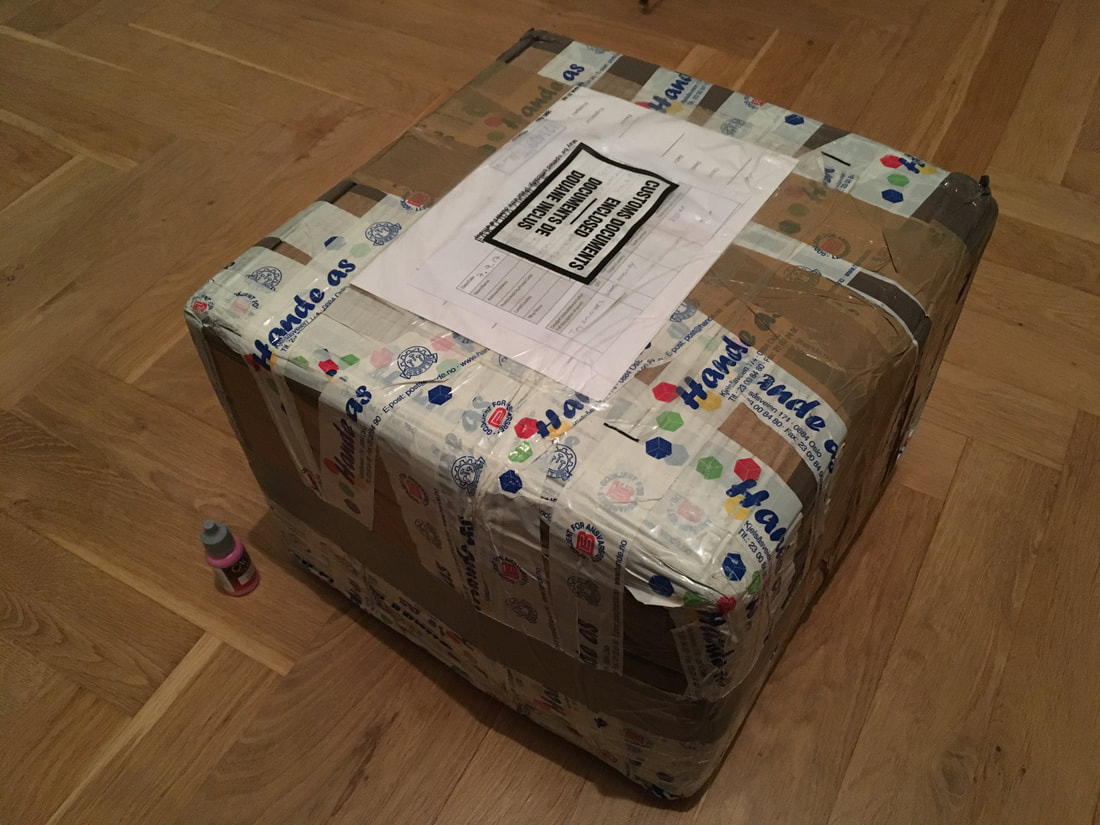 Earlier this month, I got in touch with a fellow Scandinavian, who was selling a rather large lot of French miniatures. He was very helpful, and he let me buy out about one third of the lot, as I there were far more than I would need for even a few years of painting. Buying a bunch of miniatures second hand can be nice way to begin a new project or expand your force, but it comes with some issues. For example, it's very likely that some of the miniatures are not exactly what you planned to buy. 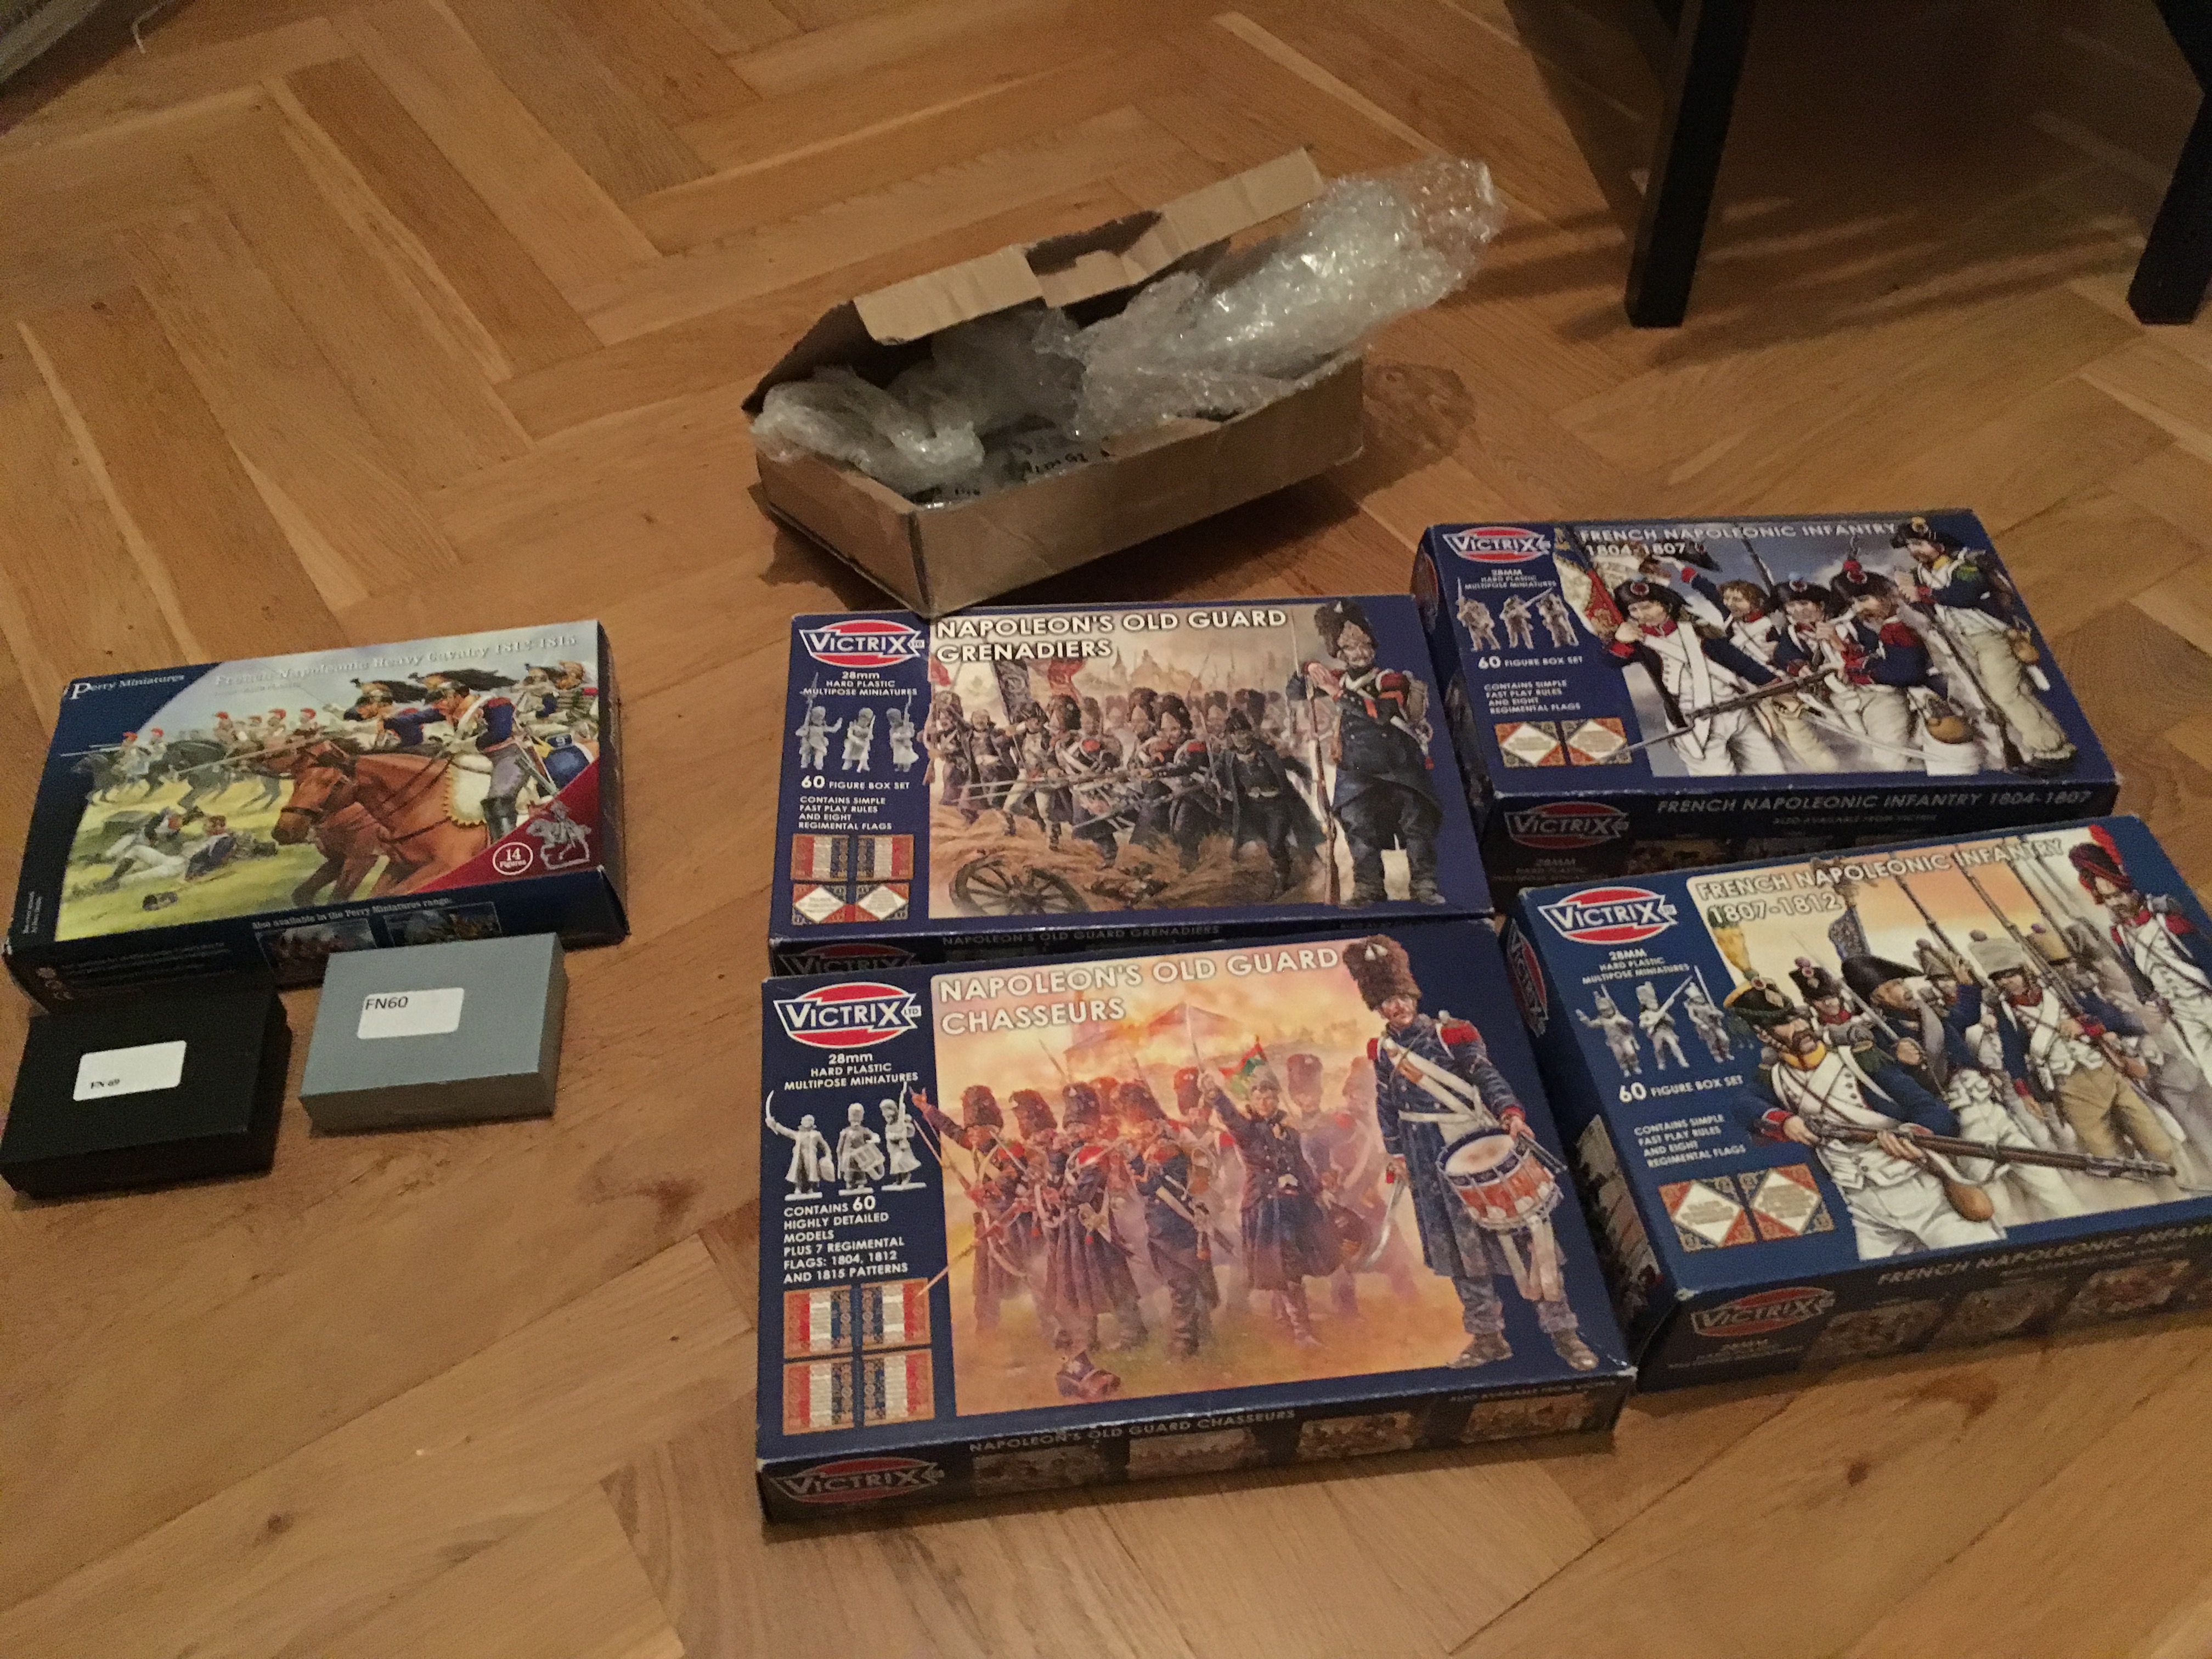 In this case, I got four boxes of Victrix infantry, a box of plastic cuirassiers, and a box of various metal miniatures, primarily from Gringo40's. Now, I already have a lot if plastic infantry waiting to be painted. A lot. So why did I go for these sets, except for a crippling miniature addiction? 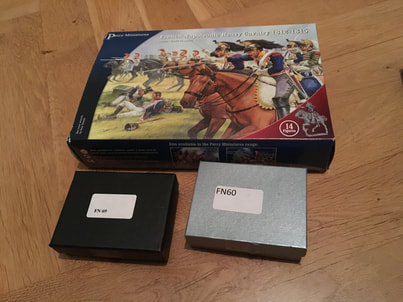 This first part is not so hard to figure out. The two small boxes are metal cuirassiers from Perry Miniatures, one of them with command figures. Together with the plastic box, I have 20 cuirassiers, which means two units of 8 plus full command and even an extra officer. Neat! 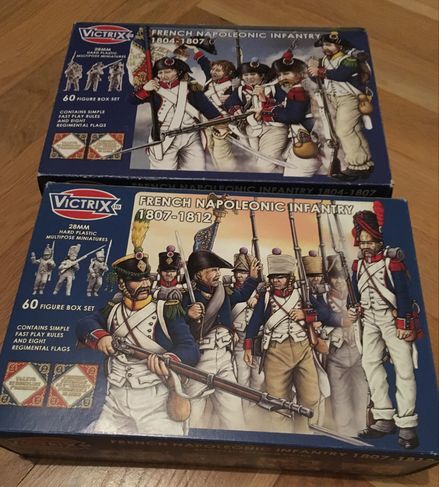 I plan to use these boxes for many different things. First of all, I have lots of extra dragoon heads left from my Perry dragoon boxes. I plan to use them to convert a bunch of these into foot dragoons, which will suit our Peninsular games great. I also plan to check if I can make some gendarmes out of the 1804-1807 box. It's hard to find good sources on the "normal" gendarmes (i.e. not the Gendarmes d'élite de la Garde Impériale), but AFAIK it seems that they were pretty busy in Spain, even if they had a miserable time escorting stuff back and forth and getting ambushed by angry Spaniards. I also have a bunch of metal heads for Polish troops, that I think would look better on these than on the Warlord boxes I have. If I get some additional heads, these could form the initial core of a Polish force. I'm also a bit interested in painting some as Italians and/or Croats. Finally, I'll probably make some more French skirmish voltigeurs, and maybe beef up my grenadiers that I'm painting at the moment. All in all, there should be plenty of fun stuff to make out of these.  Finally, there's these. I'm a bit less sure about what to do with them. Of course I could simply paint them up as what the box says, and at some point I know I'll end up building at least some guard units. But I could also use them to make some light infantry in greatcoats (by switching the heads), or even some Italians (like the Turin Velites) if I want to. I think I'll wait a bit before I decide.
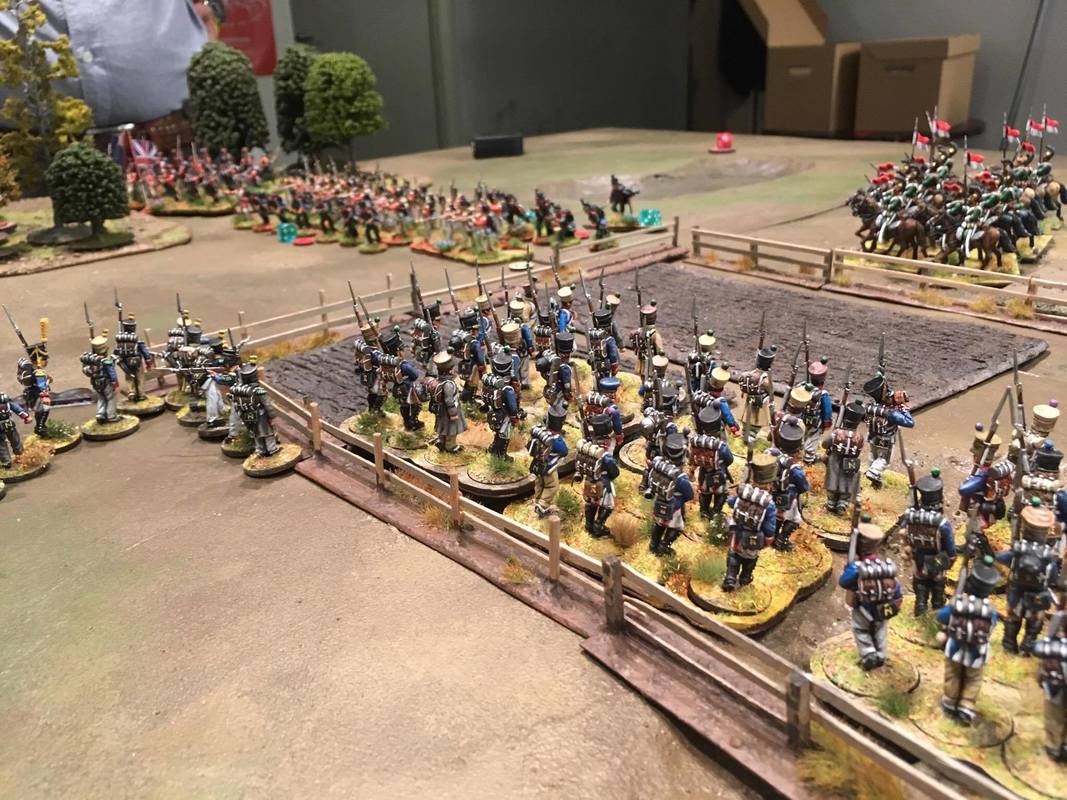
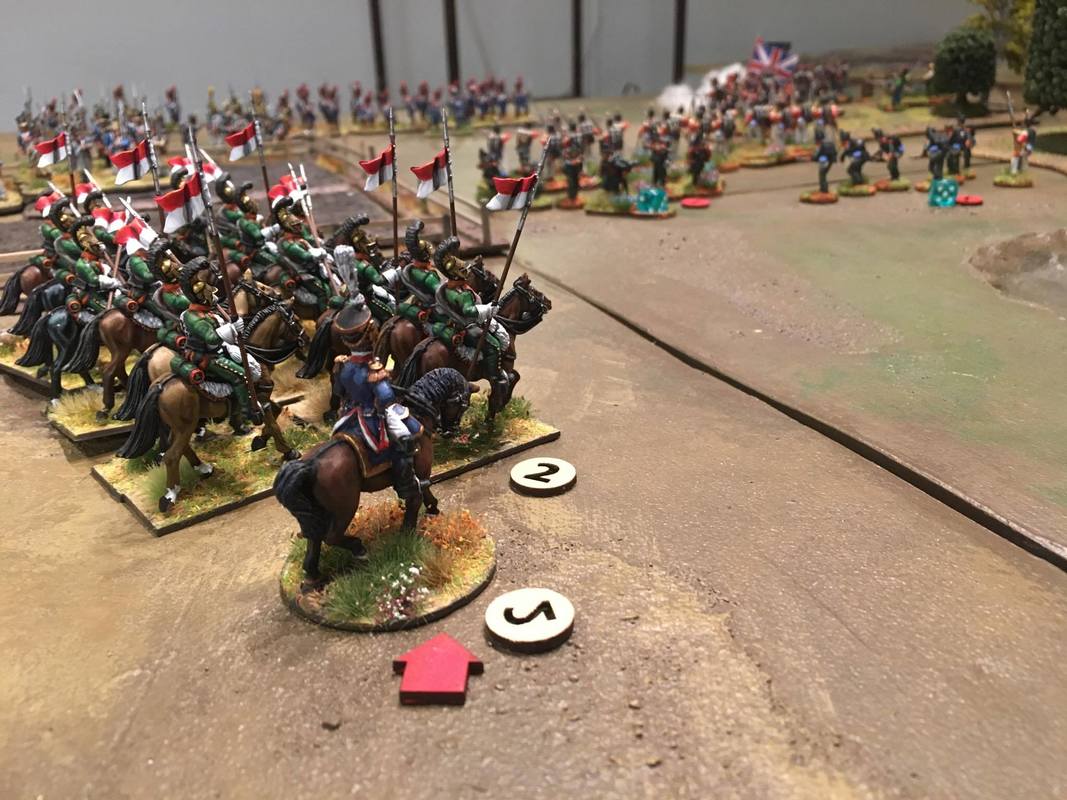
Those are my initial ideas, and I hope it shows the possibilities out there if you pick up a bunch of kits. And if you have other ideas for what I should do with any of these kits, I'd love to hear from you. Cheers! -Jonas, currently drowning in plastic  Return to the Lovely Russian CountrysideOne thing we want to add to our skirmish battles are new scenarios. This battle we tried out a scenario based on taking ground and holding it until the end of the game. On the rather barren table we put three objectives along the middle of the table, and each player got one objective that was sligthly more towards their own table edge. At the end of the seventh turn, the player controlling the most objectives (i.e. being closest to them) would win the scenario. 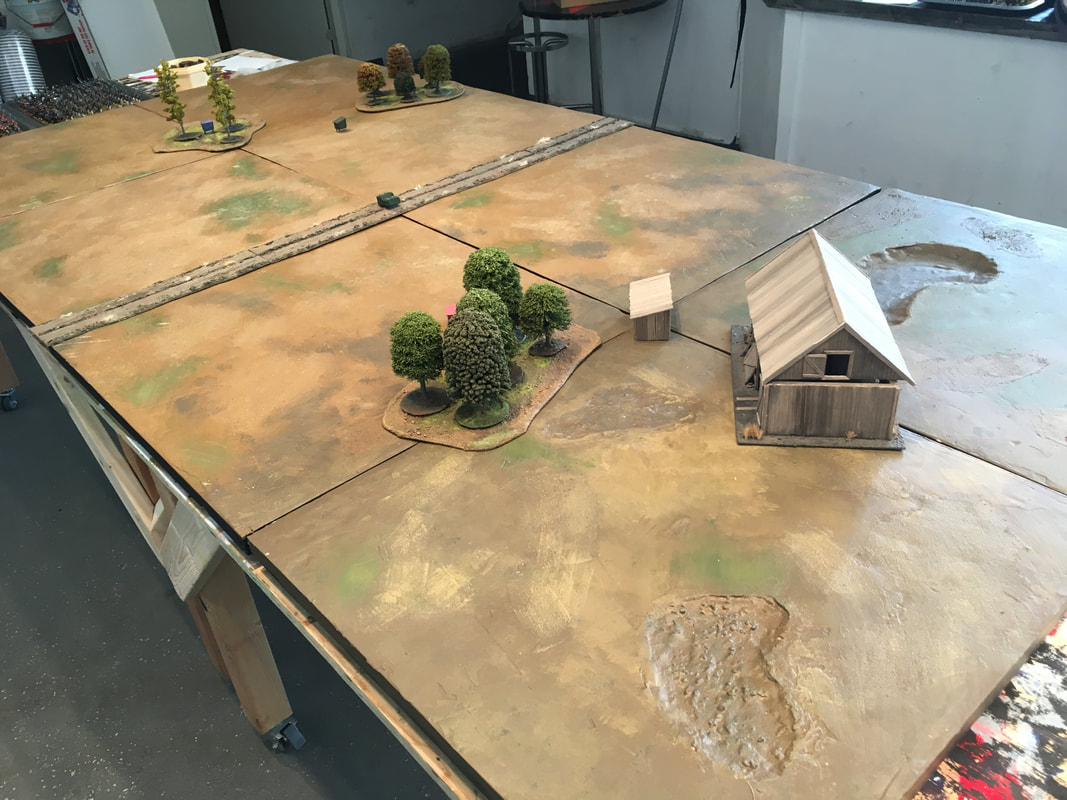 Shirty immediately put my French force to shame in the most efficient way: by plunking down his new deployment points on the table, depicting the horrors of the battlefield. With no nice looking deployment points to counter with, the French captain could merely stew at this Russian show of hobby supremacy. 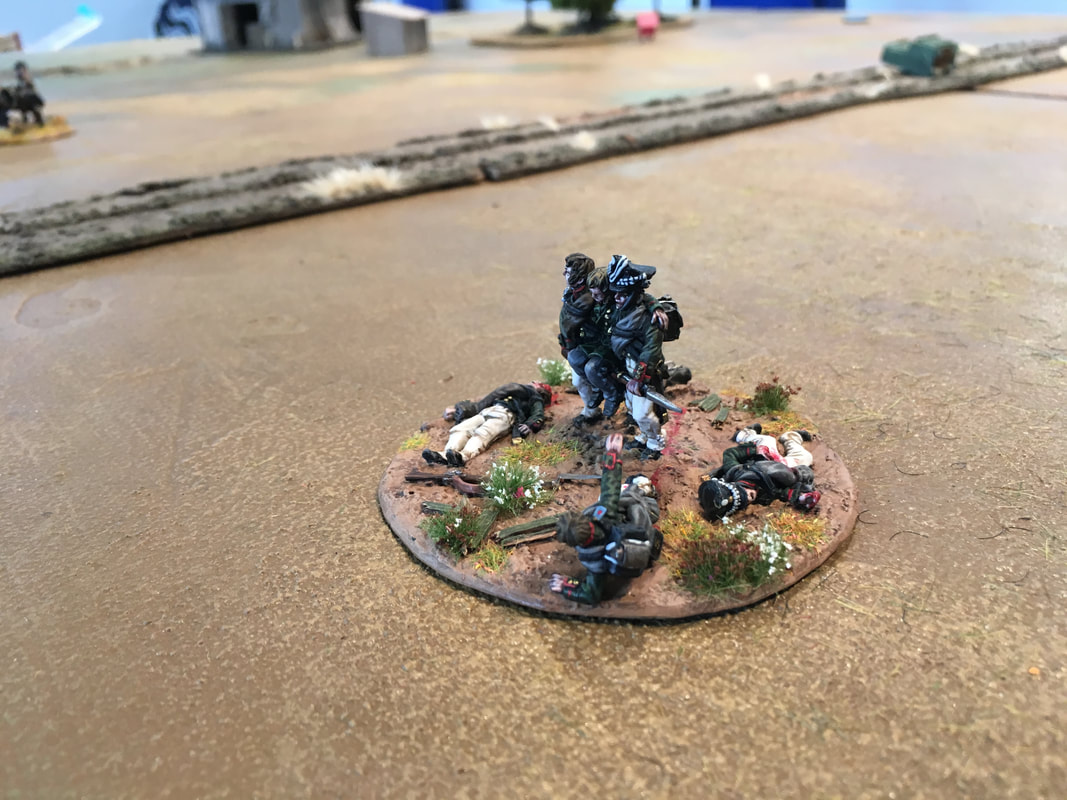 One of Shirty's new deployment point vignette As if to make his point even clearer, he also had a mobile deployment point vignette, depicting the horses left by his dismounted Cossacks! These he put down dangerously close to an objective point, and suitably enough just next to the lone stables. 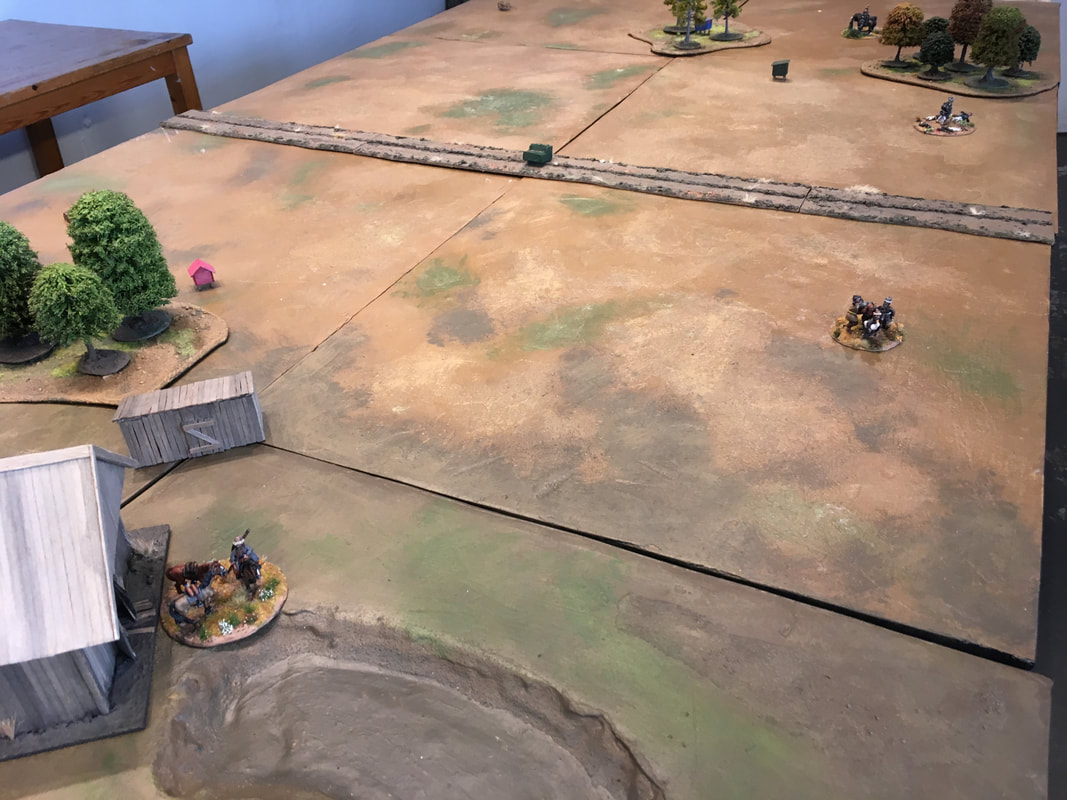 The game kicked off with both the Russians and the French deploying line infantry formations, staring each other down across the table. 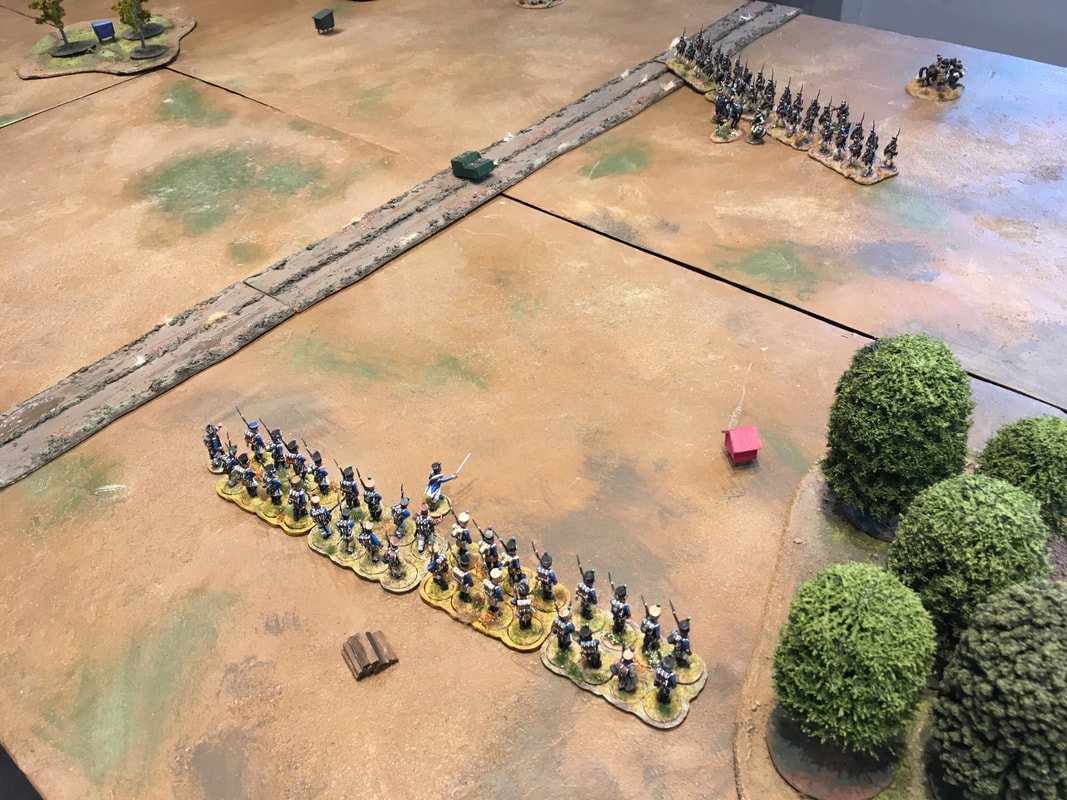 The Russian commander was more alert than his French counterpart. When he saw the French at the horizon, he quickly call for support. With the help of a good draw of cards, the French line infantrymen are soon staring down three Russian formations. The line infantrymen are flanked by a formation of veteran Carabinieris on the left a bunch of fresh recruits on their right: poor in quality, but ready to do their duty. 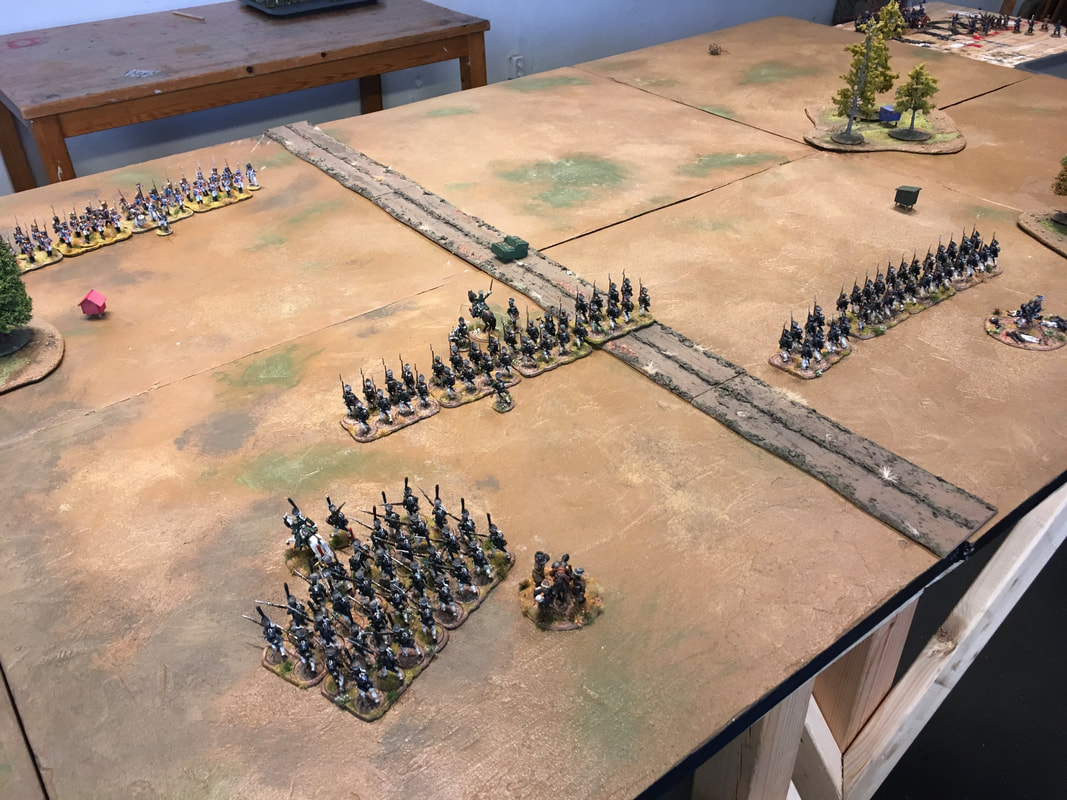 A French cannon opens fire on the approaching Russian lines. But the target is outside of canister range, and the bouncing roundshot is not disruptive enough to halt them. Cannon in Sharp Practice 2 requires two activations to reload, so it can't fire every turn. This is a medium cannon, and at long range it is about as deadly as 12 men firing with muskets. But if the Russians get close enough I can fire with canister, which doubles inflicted shock. So not so dangerous on the attack, but a powerful defensive tool. 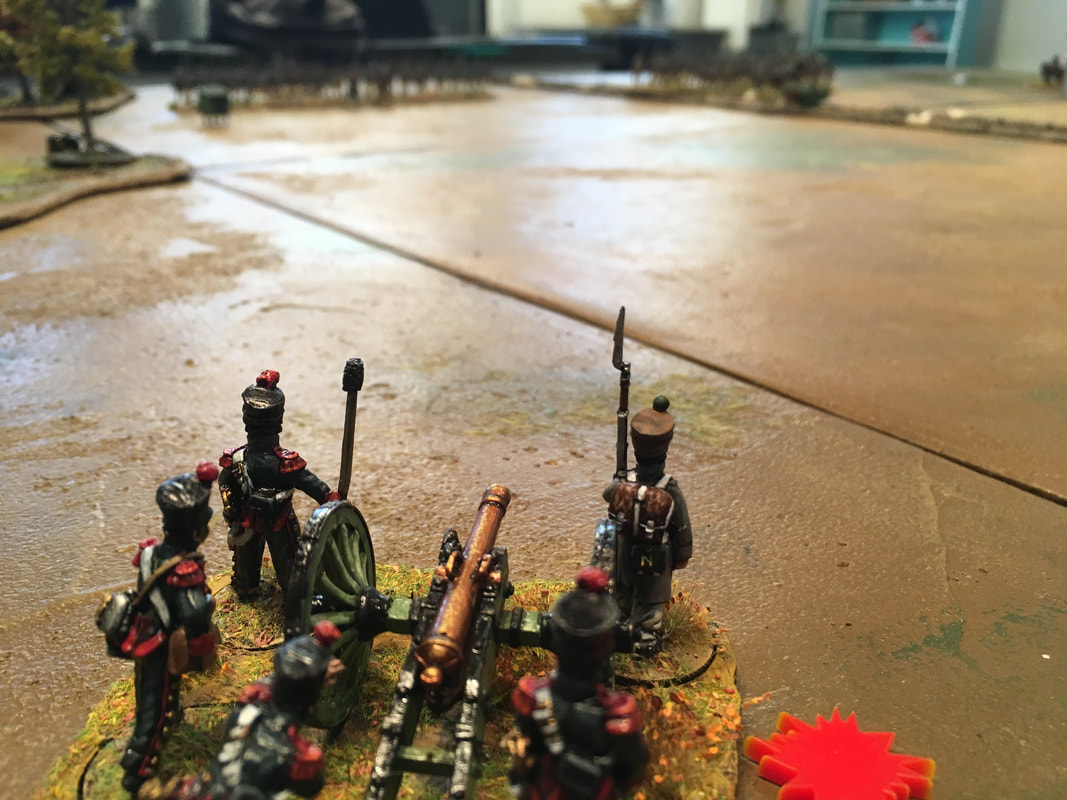 A Cavalry Duel, Again? What Were the Odds?The Russians keep pouring onto the table, while the rest of my French infantry refuses to get out of their sleeping tents. In the second turn, the Russian line is reinforced with skirmishers and another new addition: Shirty's second unit of lance-wielding Cossacks! Thankfully, the French cavalry prooves to be more reliable than the infantry, and a lancer formation appears to back the increasingly outmanned line infantry. A lone unit of dragoons turn up on the far end of the table, hoping to keep the Cossacks from rushing towards the cannon. This was before I painted up two new units, so yet again they have to join the fray as a very small, vulnerable unit. 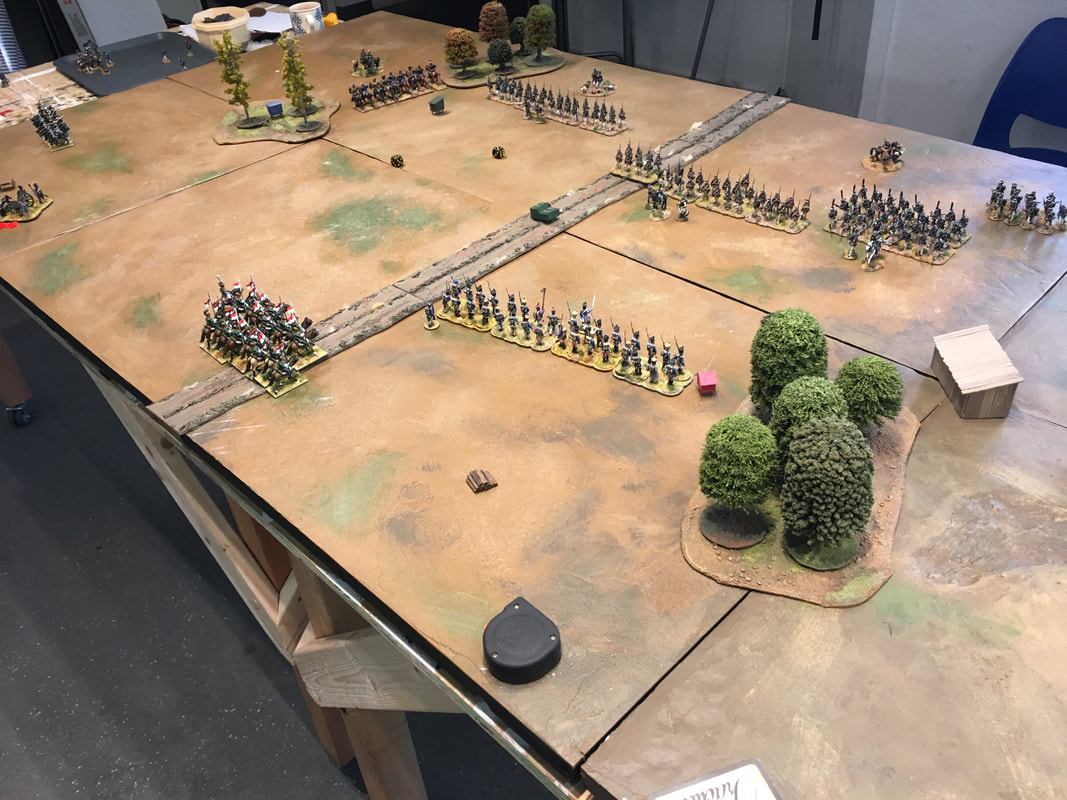 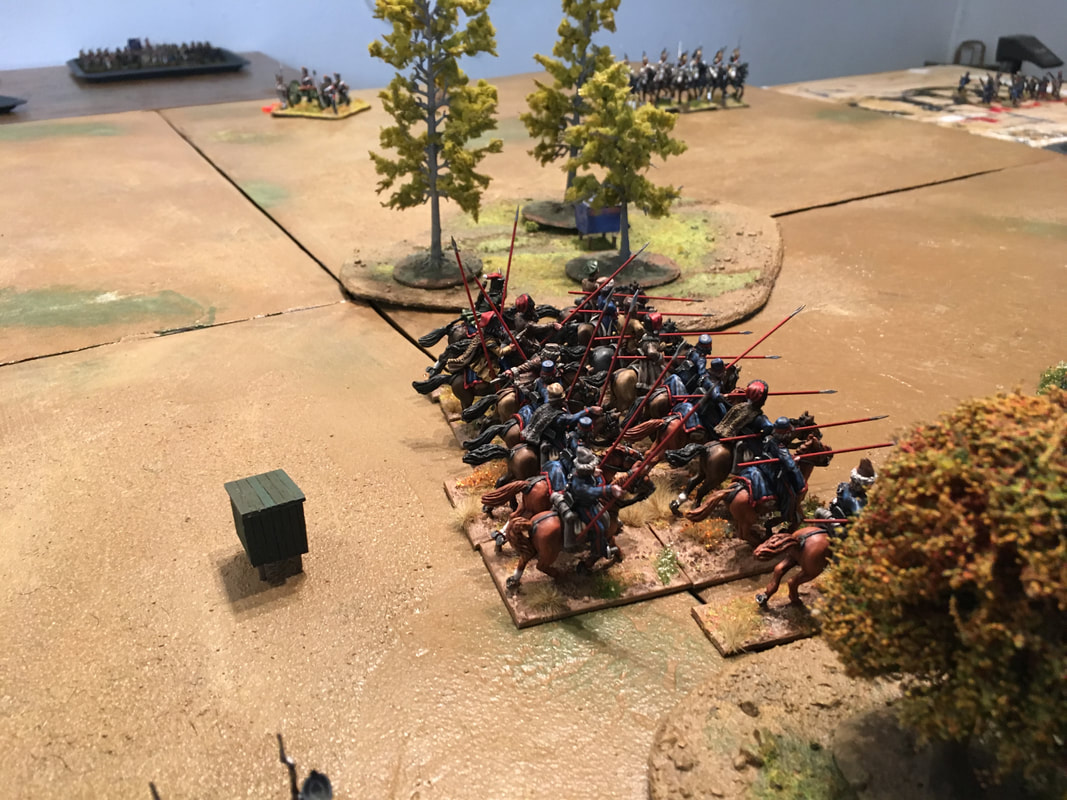 The newly painted Cossacks inspect their prey in the far distance The French dragoons are, by now, painfully aware of the role they end up playing in every game this far. Let's just say it is a very expendable role. They rapidly advance to plug the gap between the woods and table edge, blocking the path to the cannon with their bodies. 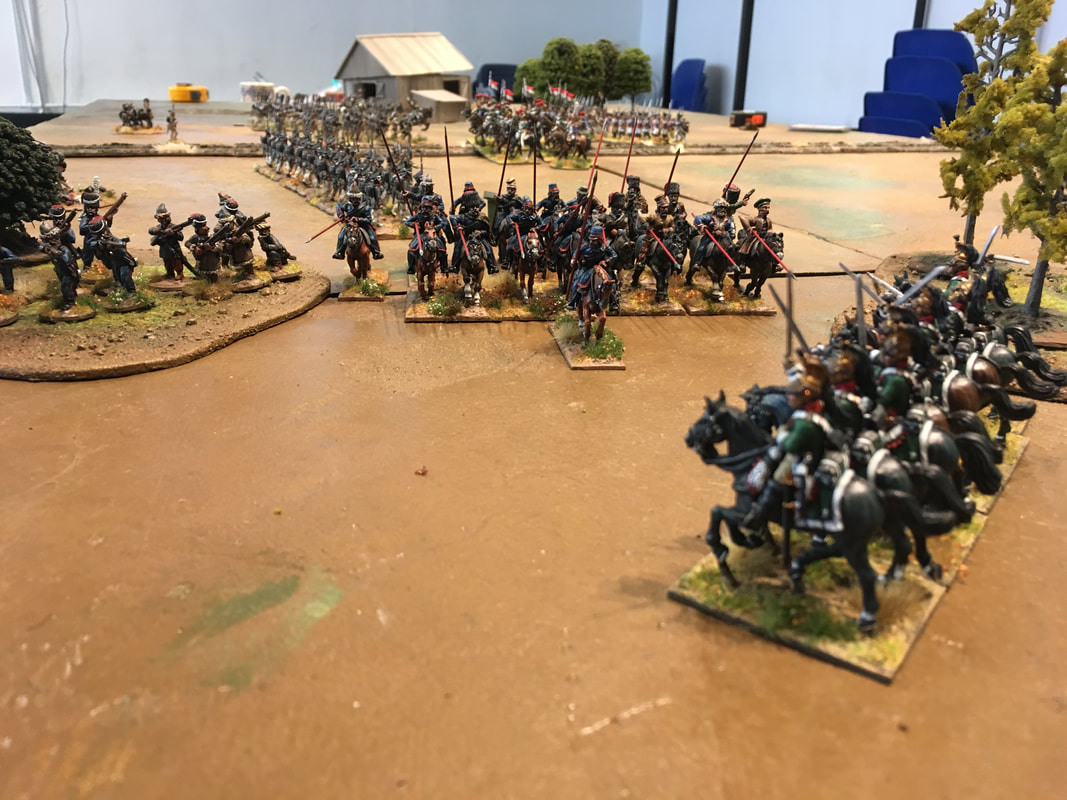 Meanwhile, two units of Voltigeur skirmishes finally catch up with their parent unit. They form up in front of the French line, and starts to snipe at the Russian lines. The Russian officers, clearly a bit hesitant due to the large body of lancers, seem a bit hesitant. Is it wise to advance? Far off in the distance, a formation of French foot carabiniers arrive, ready to defend the cannon if the Cossacks break through. 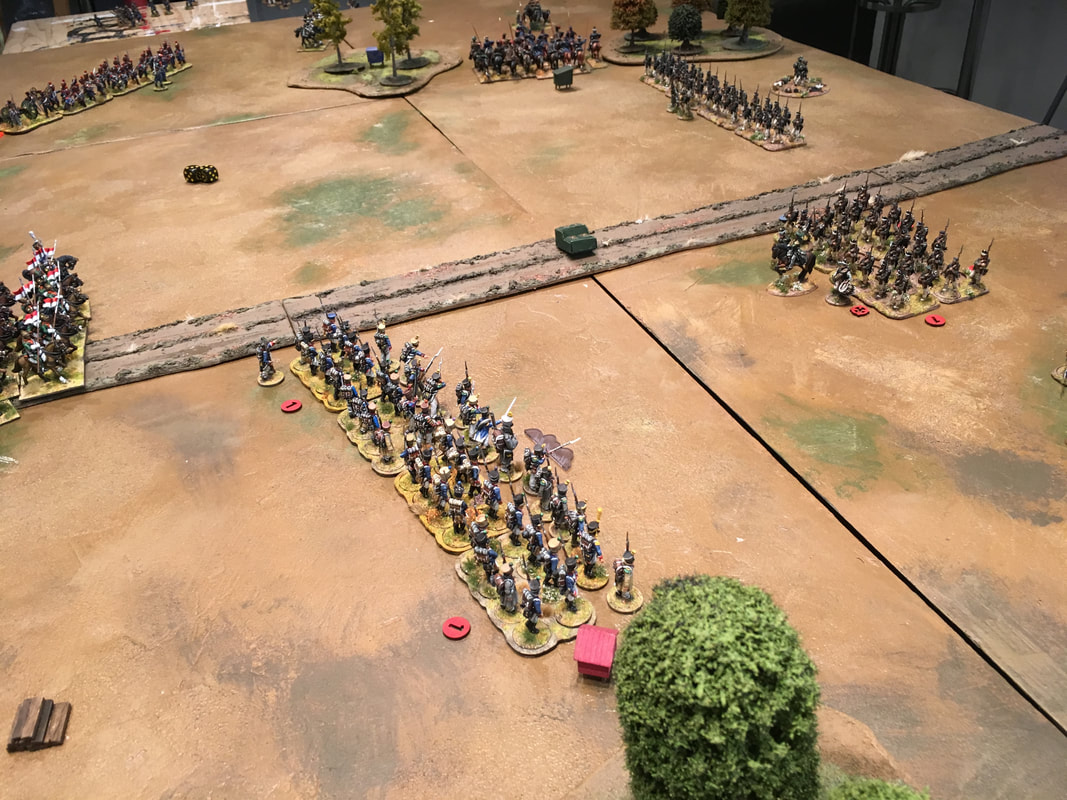 The Skirmish lines start shooting at long range 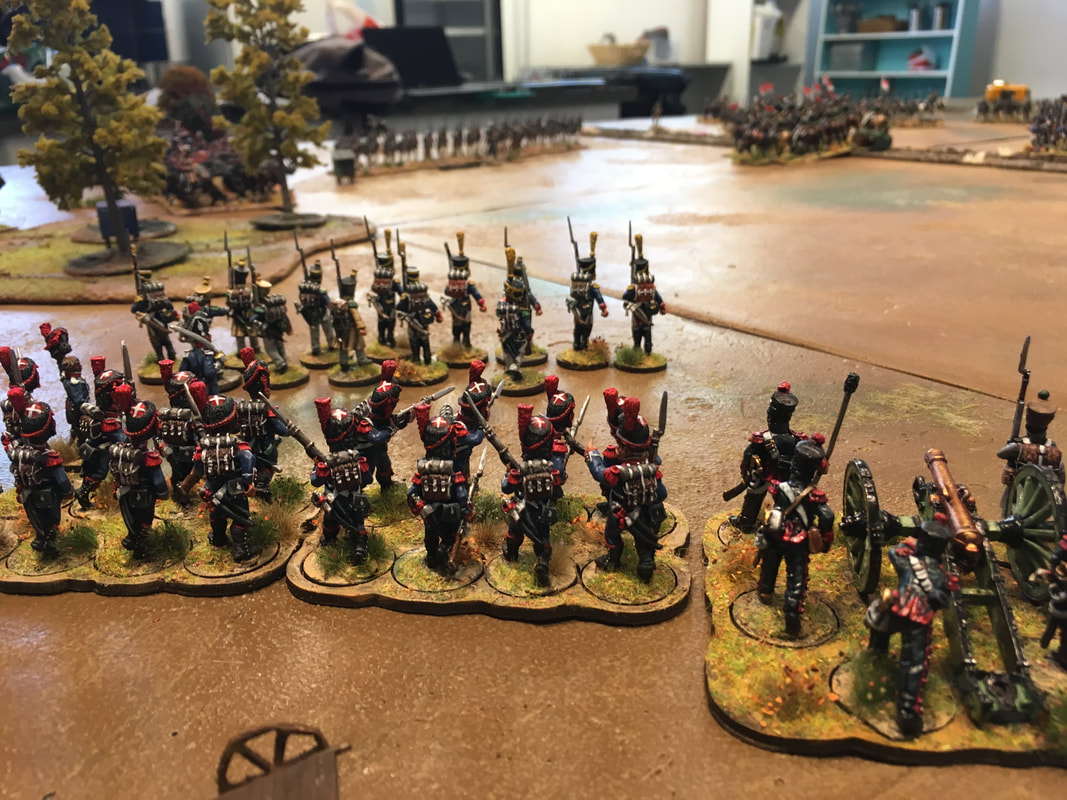 The carabiniers and their skirmish screen, protecting the French cannon 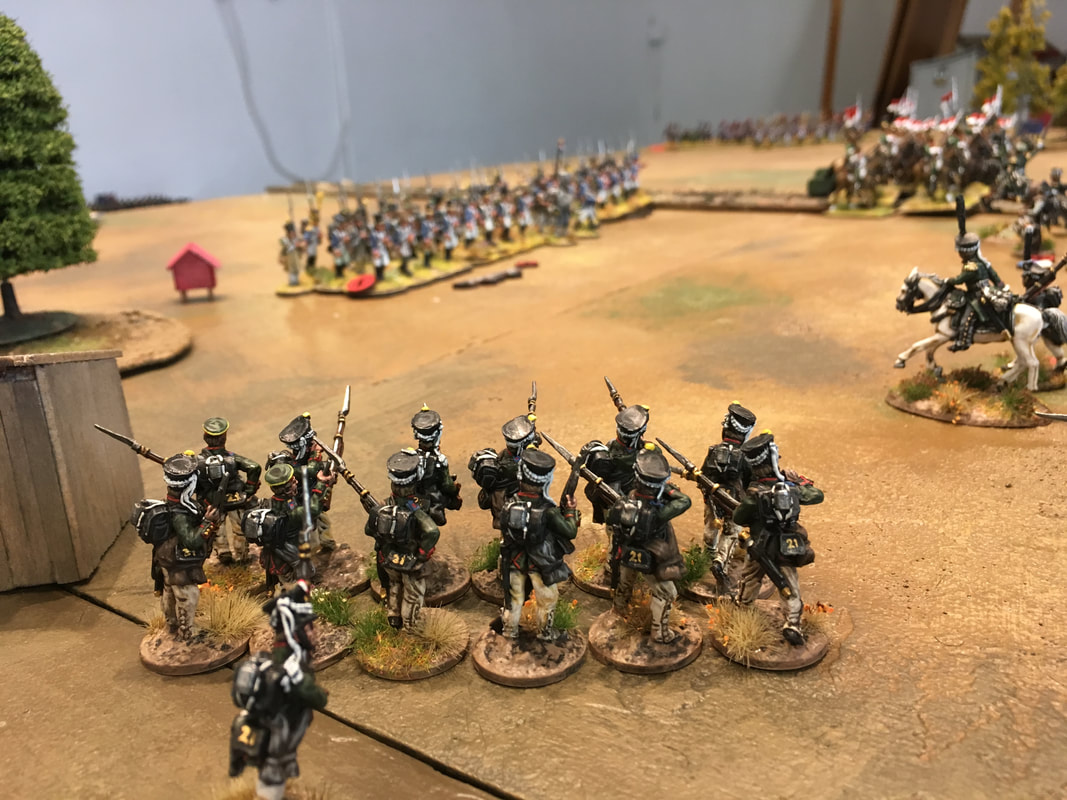 The Russian skirmishers join in on the long range fighting A Clash of HoovesThe French dragoons have the initiative. With the choice of receiving a charge or getting stuck in first, they decide to at least go out with a bang! The combat odds are quite even, despite the dragoons being outnumbered 2:1, as they are of a higher fighting quality. However, their main disadvantage in this duel is that they don't afford taking any casualties. Despite the French elan, the Cossacks are victorious! They push the Dragoons back, leaving several troopers killed, and the dragoon leader steels his remaining troopers for the inevitable attack. To little surprise, the dragoons are then wiped out, even though they drag several Cossacks down with them. But will there be enough time for the celebrating horsemen to wheel around and have an impact on the rest of the battle? 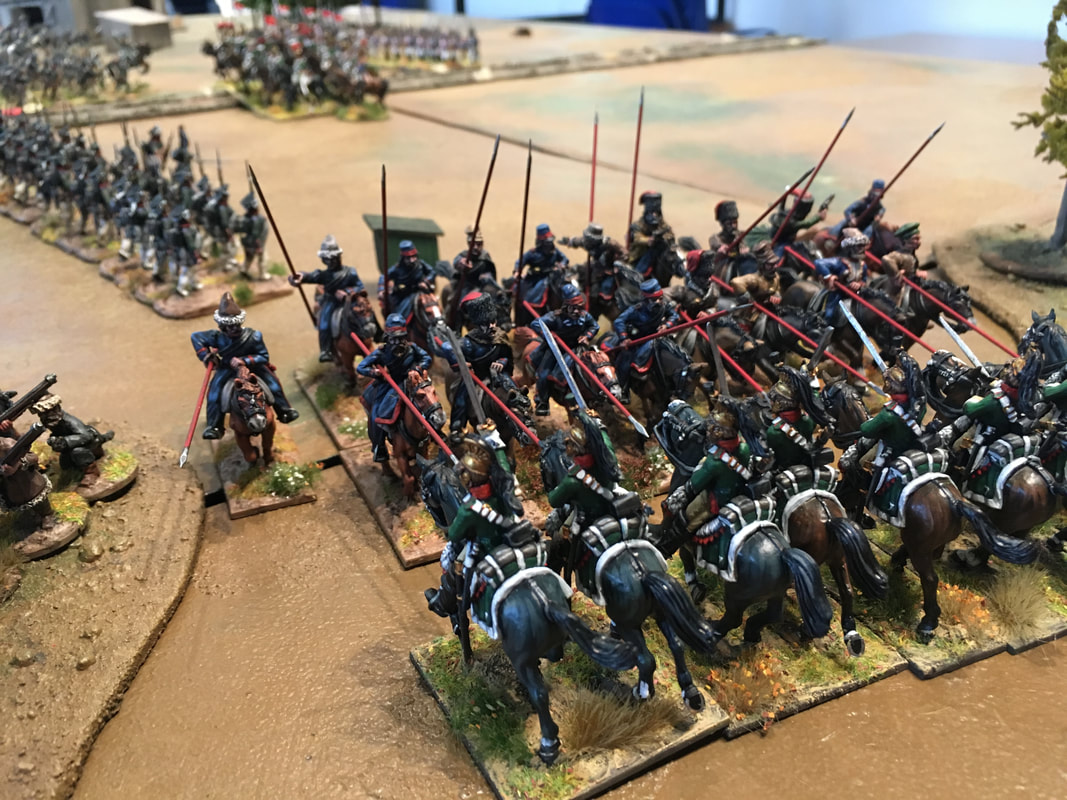 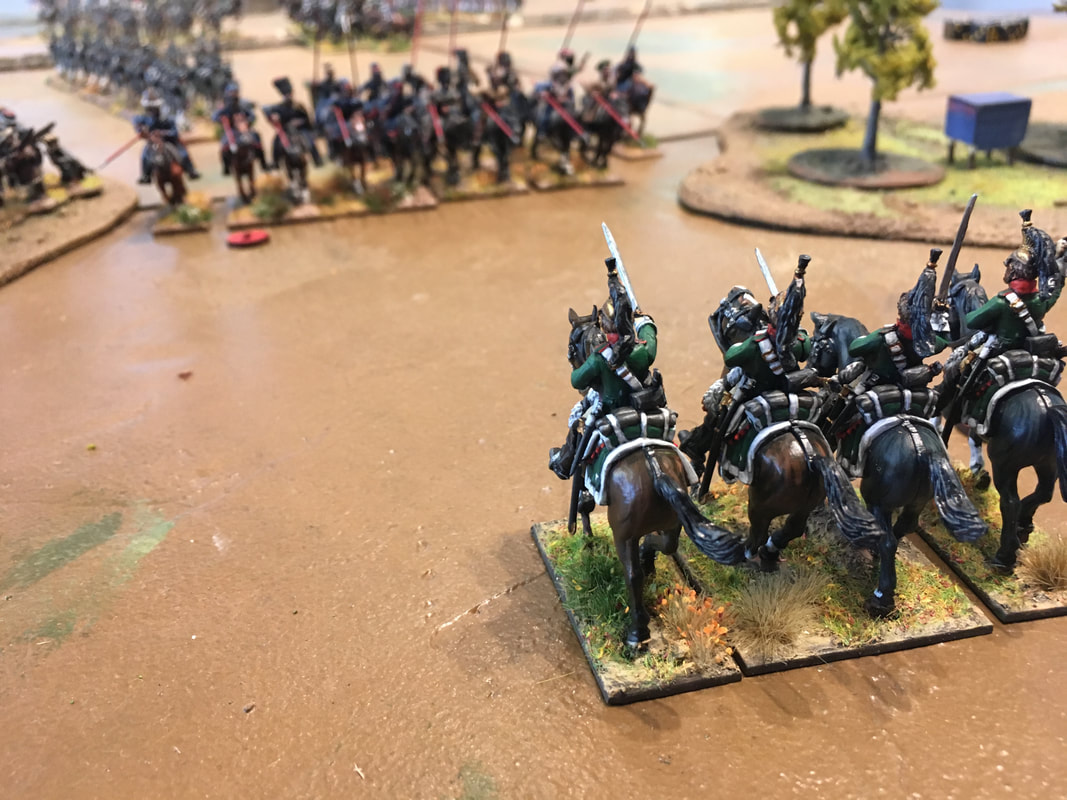 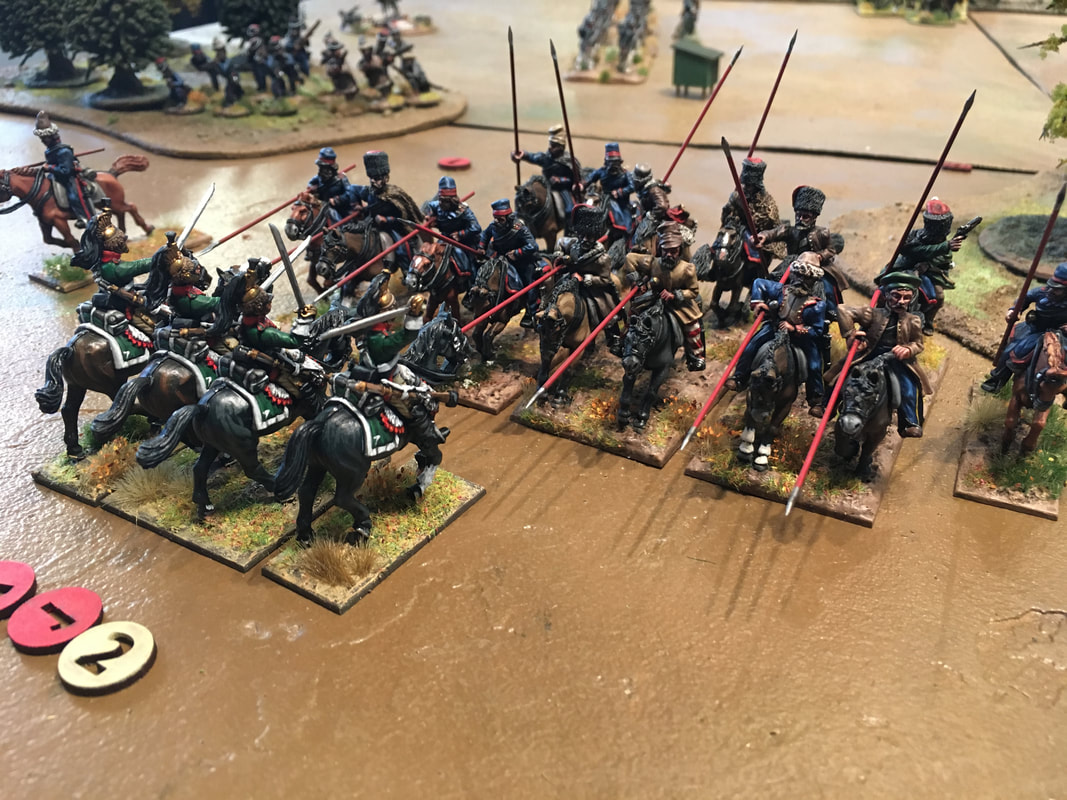 Clash of Hooves II: Equestrian BugalooThe Russian and French infantry formations edge close to each other, under a hail of long range fire from the skirmishers. Facing a 3 on 1 situation, the proud French infantry knows what to do: attack! The line marches through the skirmish line, aims, and shower the Russians in lead. The French lancers, eager to prove their worth, see the opening. dig their heels in and pounce towards the Russian centre formation. By spending two command cards, they can use their "Tally Ho!" special ability to not only get a longer move, but also deal extra attacks in combat. With their opponents in some disarray, the odds are looking very favourable for the lancers. If they can make contact, that is! I measured the distance, and it would be about a 50-50 chance. Lets roll! Let's roll two inches too short! 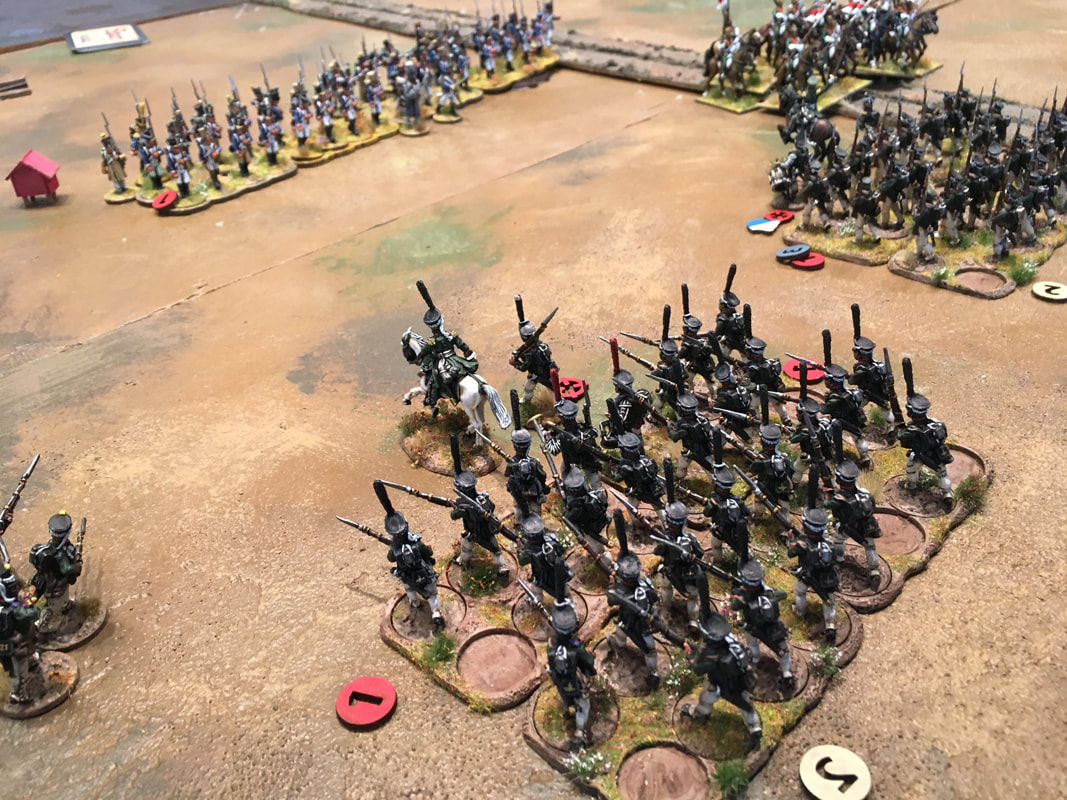  With no proper painted officers yet, Jonas has to swallow the shame of using a mounted infantry Colonel to lead the lancers. This is obviously doomed to fail: the poor troopers can't even rank up properly on the uneven road! 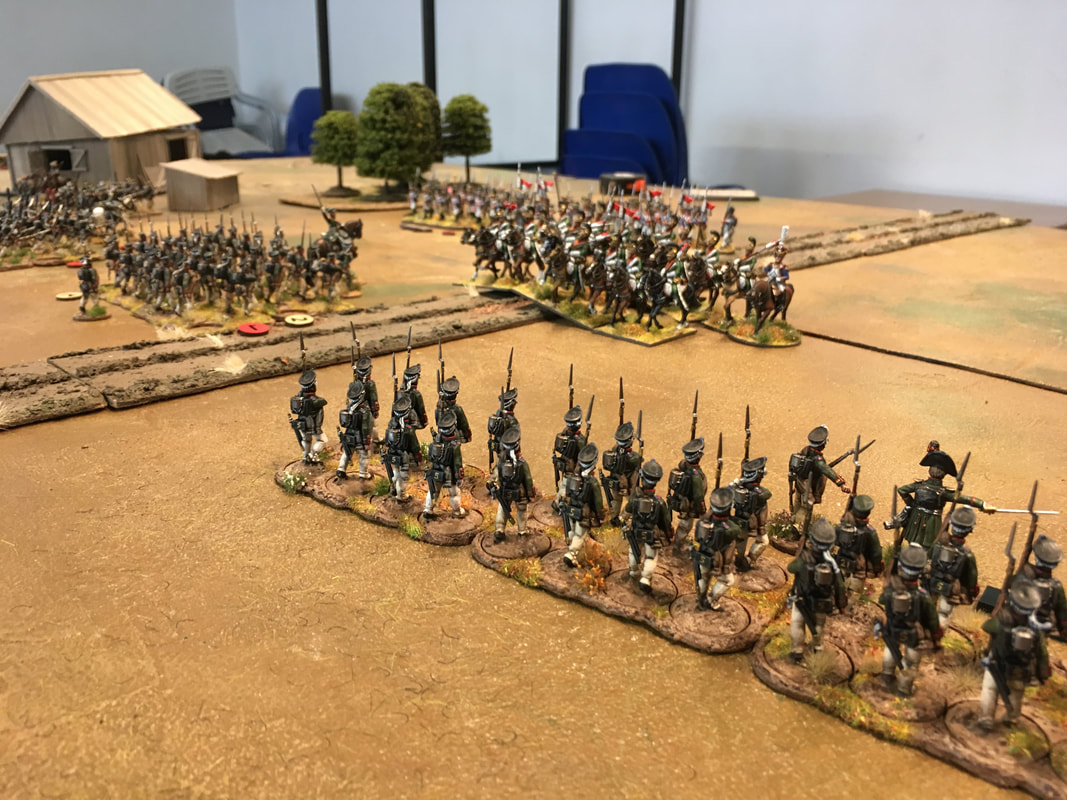 The failed charge from the Russian point of view But the danger is not over for the Russian company. As the lancers thunder towards him, the quick-thinking Russian officer rapidly forms his men into a square. He's now safe from the pesky cavalrymen, but the Russian attack is halted. Meanwhile, the poor formation of fresh recruits seen in the foreground above realize that they are now the most tempting target in range. Their officer barks out orders to present their weapons and aim, ready to either receive a charge or start firing on the approaching lancers. 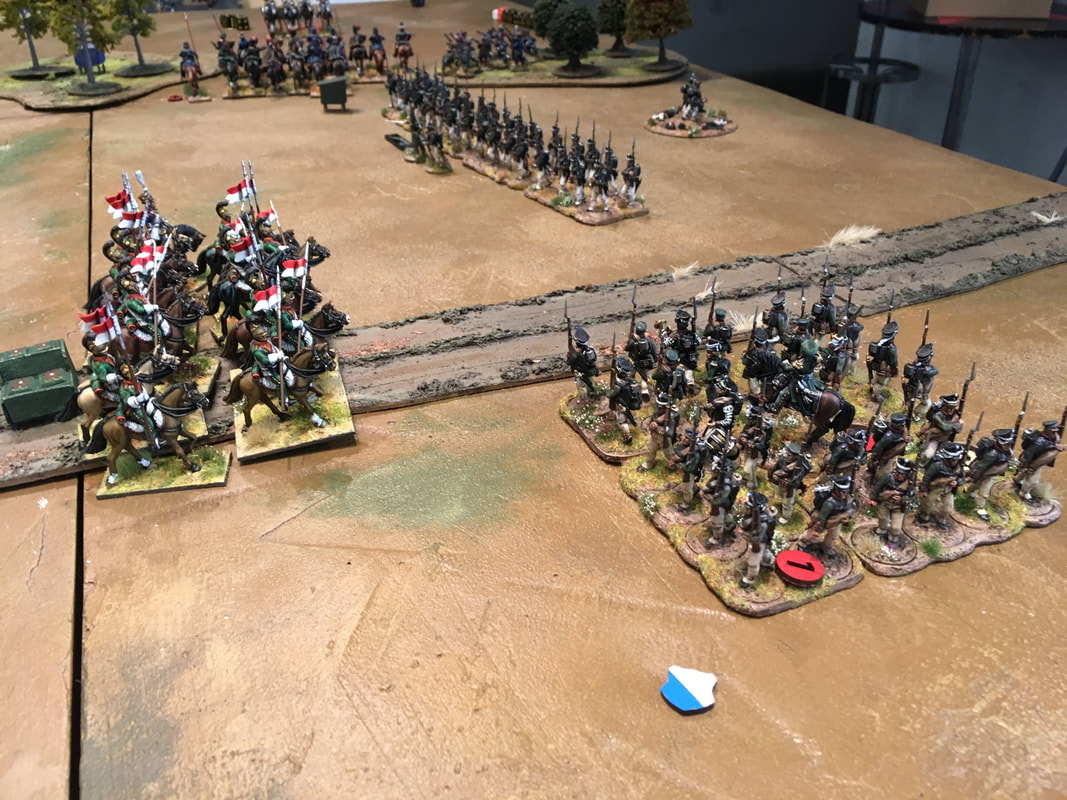 The French lancers are obviously proud enough to consider a bunch of raw recruits an easy pray, even though they are completely unharmed and bracing for impact, with loaded and presented muskets. Obviously Shirty knows my weakness by now: I'm second only to British cavalry when it comes to charge at everything, every time. Needless to say, the lancers sweer off course and crash into the raw recruits instead of the square hedghog that was their original goal. 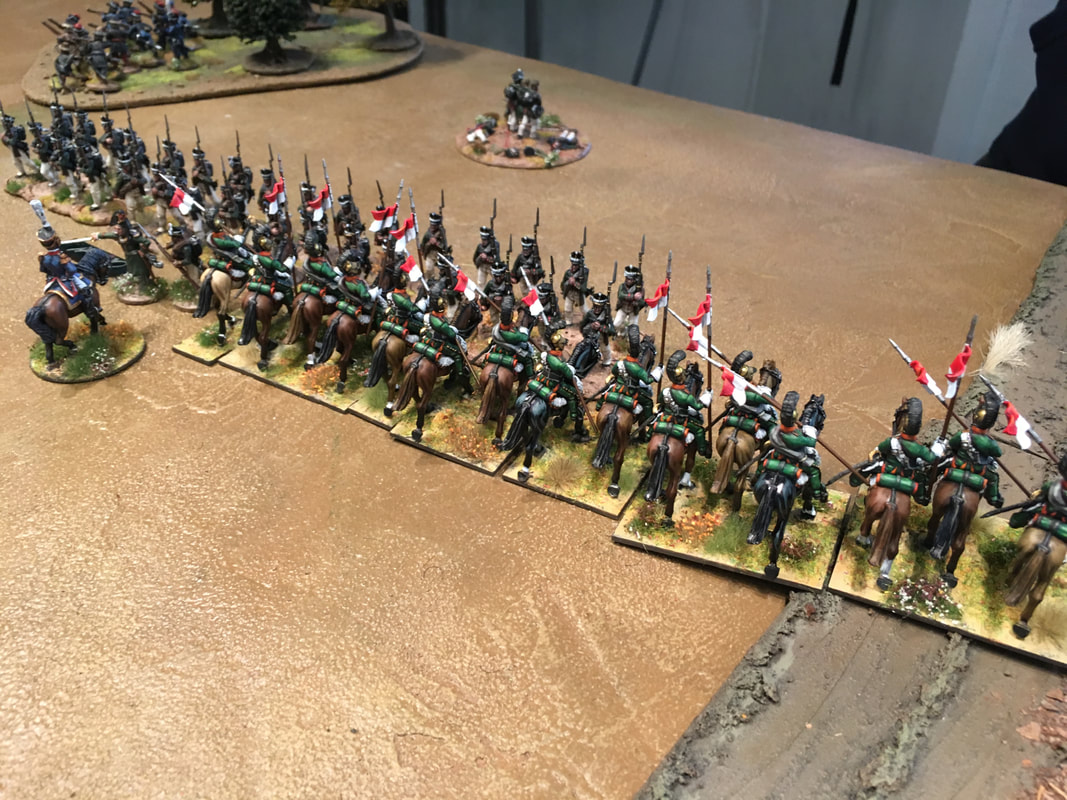 It's an absolute carnage. The two units that receive the charge lose the fisticuffs, and are pushed back. But the lancers take heavy casualites, since the infantrymen had presented and were unaffected by shock. The remaining two units of Russians evidently had ice instead of blood in their veins, because the simply wheeled around, and let loose with a volley on the lancers who were about to pursue the retreating units. The carnage continued as the French cannon, seeing the distress of the cavalry, piled in and pounded the retreating Russians. But the musketry from the remaining troops were too much for the lancers, and they decide to head off from the field as quickly as possible. 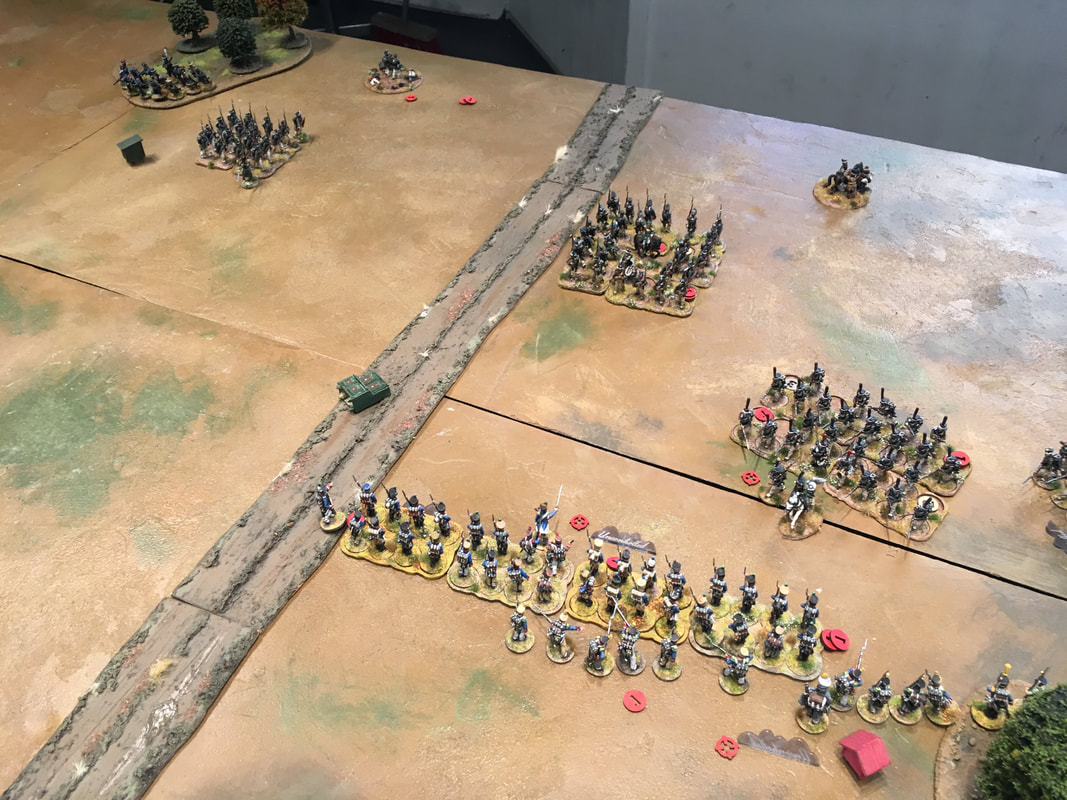 At this point we had a dilemma. According to the rules, we had several distrupted units of lancers and recruits, all milling around in various stages of routing. This single lancer charge had cost both sides about half the Morale points available for the entire game, and the game could pretty much end here, with both players just forcing more morale losses by shooting at retreating units. This felt unreasonable, given that this entire fight involved maybe 10% of our forces. So we settled on removing both French and Russian routers, and then continue the game to reach a more suitable finale. This is when our optional rules for better Morale were born. The Russian CurseBy now we were rapidly approaching the last turn of the scenario. It was clear that the French carabiniers might as well be deployed on the Champs de Mars, because they'd be just as likely to get close to combat in time. Both side's cavalry were either dead or too far away and weakened to do anything. The surviving Russian recruits were still thanking their lucky stars that they were standing on the right side of the line that day, and not the left side. With the French elite infantry far away, it would be down to the single formation of line infantry to fend off the remaining two Russian formations. And then, as if by some mysterious force, the Russians seemed to be dull and slow to react, while the French lieutenant rushed back and forth, urging his men to fire another volley. And another volley again. The Russians in the square seemed unwilling to redeploy and approach the French, who suddenly seemed to fire and reload with an unholy speed. The Russian carabinieris knew that it was now up to them to carry the day. Slowly, but steadily, the fixed their bayonets and got ready. It was time to show the French invaders once and for all. These pesky fusiliers would be no match in close combat. They charged forward, with a loud "huzzah! huzzah!".... 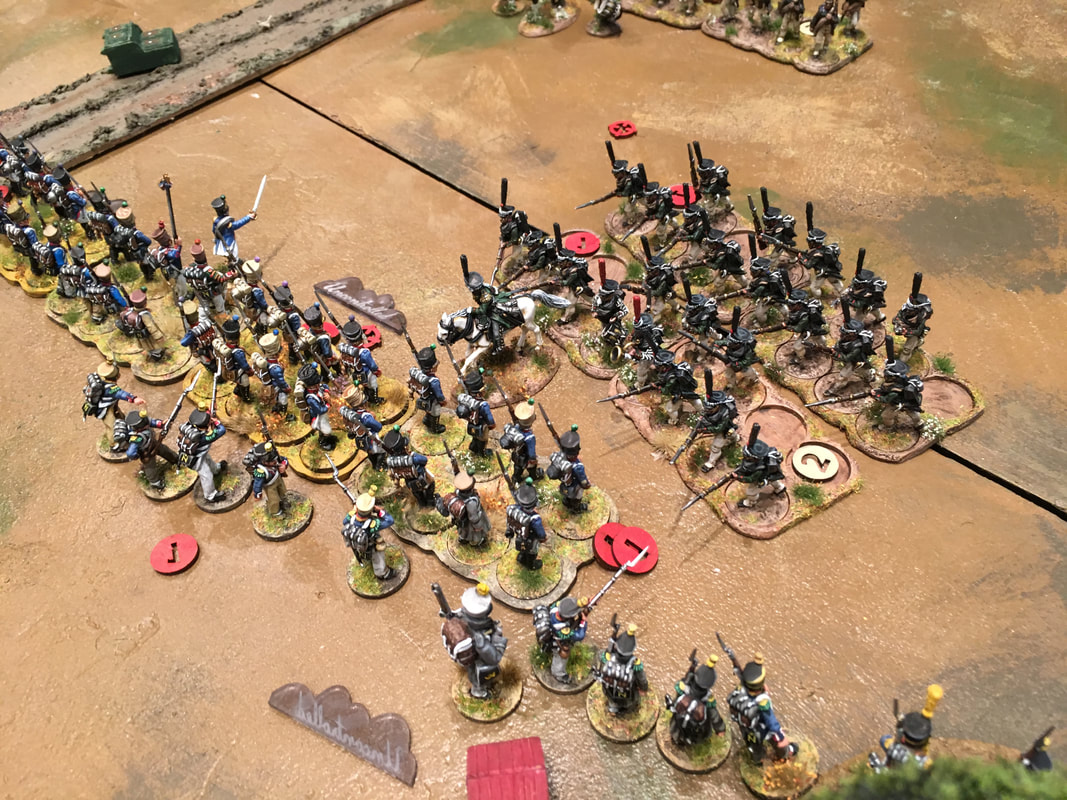 The final French volley ripped loose, just as the first rank of carabinieris were just meters (1 inch!!) away. The point blank fire cut a huge swath through the Russians, who were stopped in their tracks. Just then, the flanking French skirmishers added their firepower to the crescendo, and it was over. The survivers pulled back, dragging comrades with them as they made their retreat. It was over.  What's left of the carabinieris after the last volleys French ReflectionsYet again, the battle between the French and Russians had been settled by a failed carabinieri charge. It's insane, but true. This time it was a mere inch missing! I feel bad for Shirty, I really do.
At the same time, I also missed out barely on a charge, and I do believe that it was the right option to try both of the lancer charges. If the first one had hit, it would have been a good chance to disrupt his entire center. Instead, I got into a much worse charge, but it was an entertaining one! So in that way, it was worth it. My left flank was completely wasted. I should have deployed the cannon closer to the action so that I could have used the canisters. Then I could maybe have gotten some use out of the main investment of my army, the carabiniers who ended up deploying after half the game, and then just move forwards twice. Instead, it was the plucky line infantry who were my heroes of the day. Despite their skirmish screen snoozing, and despite being vastly outnumbered, they really pulled double duty, advancing into the jaws of death and beating back the superior Russians with volley after deadly volley. They're definitely getting a proper flag after this! But to be honest, a lot of the reason why the line infantry could appear so heroic was because the Russians just couldn't draw the right activations. The line infantry unit started out sluggish, and wouldn't redeploy into line or attack column quickly enough after the lancers passed them by. The carabinieris came closer, but with enough shock stacked on them they just couldn't get to grips with my troops, and were carved up by musket fire. All in all it was a great game, and it was down to the wire at the last turn. I think the scenario worked well, as the multiple objectives made us spread out our forces, and the turn limit put a definite pressure on us to advance quickly. I'll happy play it again. Cheers! -Jonas  A Free Campaign Setting for Sharp Practice 2This is the big one!
When we prepared for our Dawns & Departures campaign in Russia, we decided to make our own army lists as there were some entries we wanted to reinterpret. As things progressed, we ended up writing two new army lists for the setting, one French and one Russian. While we were at it, we added some introductory background and house rules, and now it's here! Our first real campaign book. This project is, however, far from over. Both army lists have large gaps in them: the Russian one is focused on the Jäger formations of the Russian army, while the French lack auxiliary corps and the Imperial Guard. We also hope to add a lot more flavourful house rules and alternative tables to make your Dawns & Departure campaign a chilly 1812 affair. But in the meantime, please enjoy the campaign book! We'd love to hear your feedback. The army lists are available as separate documents, with a more convenient layout for playing. Click here for the Rules & Downloads page To not build up the hundreds, if not thousands, of miniatures long backlogs that other club members have, I decided to give myself a rule to follow: You can only buy new miniatures when everything you have is painted, based, and ready for battle. Not very realistic, I know. And of course I haven't been able to hold myself to it. So to feel better about myself, I amended it somewhat:
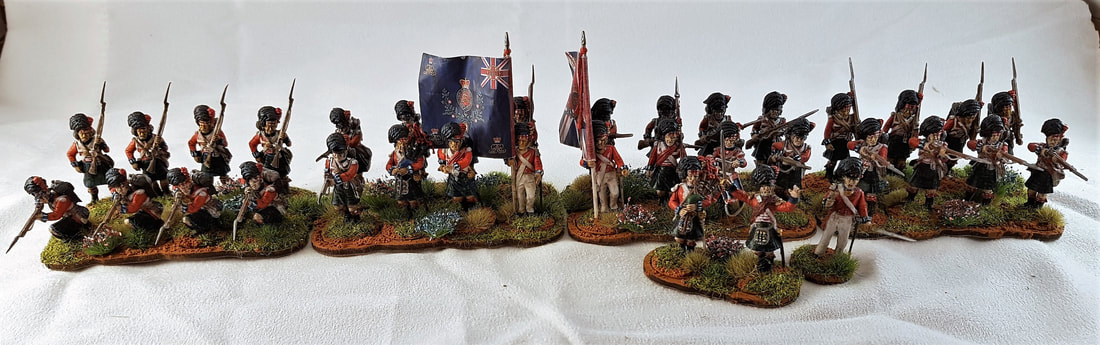 The Black Watch, 42nd Regiment of Foot
 Devil's Own, 88th Regiment of Foot
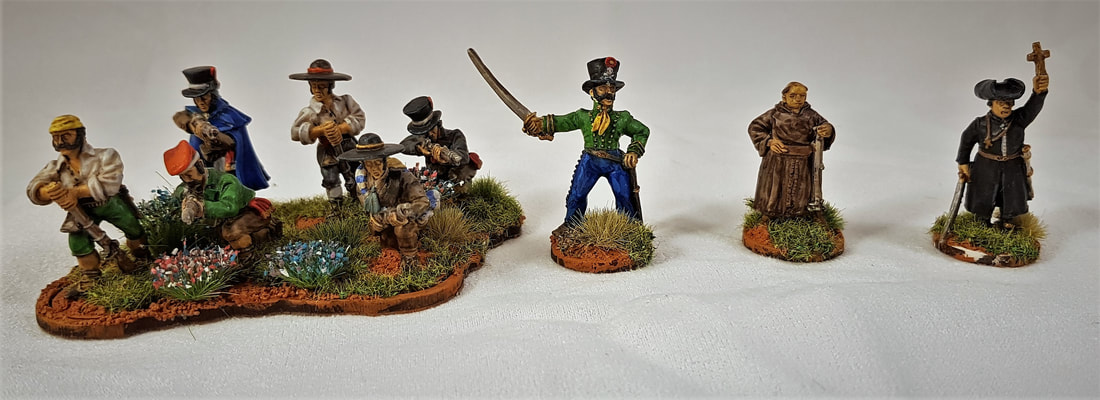 Guerilleros
 Royal Americans, 5/60th Regiment of Foot
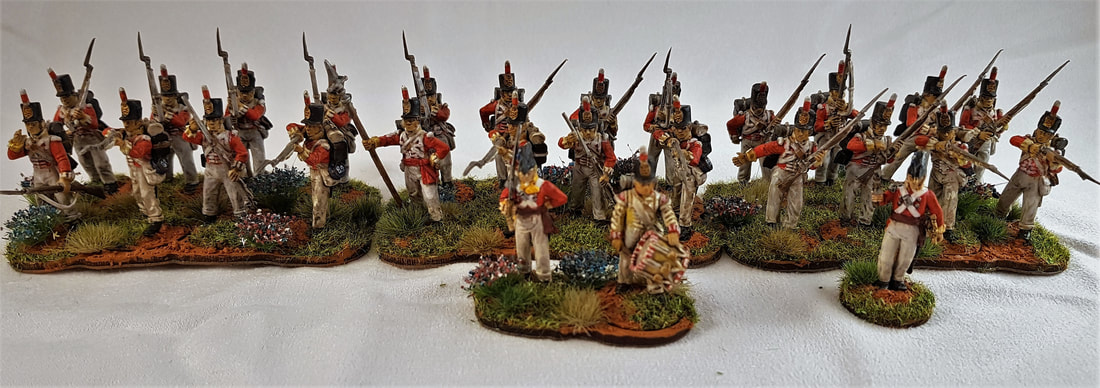
We are planning on running two separate campaigns, one in Russia and one on the Peninsula. Both set in 1812, and of course I'd like to field a force that would at least be plausible historically. Order of Battle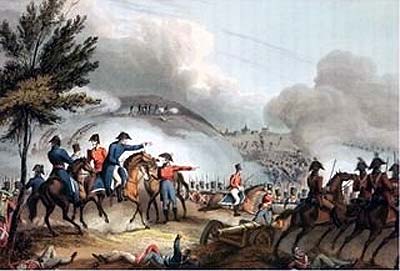 The battle of Salamanca was one of Wellingtons greatest victories, were he broke his usual style of being defensive in battle to defeat 40,000 men in 40 minutes. Using the Order of Battle (available at Wikipedia) I tried to see if my force could be fielded from a single source. Sadly the 88th and 42nd are organized in different divisions, and the only division with Highlanders in kilts is the 1st. The 74th, a Highlander regiment, were a part of the 3rd Division together with the 88th, but it didn't wear Highland dress on the Peninsula. And anyway I'm not very keen on repainting the kilts I've toiled over. Neither the 1st nor the 3rd had any riflemen from the 95th! But they did have riflemen from the 5/60th (5th Battalion, 60th Regiment), the Royal Americans. Reading Oman's "Wellington's Army" about how Nosey quite early distributed the 5th battalion of the Royal Americans among his brigades, to help them get enough skirmishers to counter the massive green cloud of French Voltigeurs, I got the impression that the 5/60th are some of the unsung (or lesser sung?) heroes of the Peninsular War. They also had a much spiffier uniform, having red facings. Just a quick little paint job and I had converted my riflemen. Historically it looks like they should have had grey or dark blue trousers, but they were issued dark green ones after the war. And I'd say a company could have been issued new (dark green) pants after having worn out their previous pairs, so I left the pants as they were. I really like the 88th, such an iconic regiment. The roughest and toughest of the Fighting 3rd. ReinforcementsMy first battle with my assembled force helped me decide how to expand the force. I wanted Light Company skirmishers, only having the (expensive pointswise) riflemen to screen my forces with felt a bit odd. I also realized that skirmishers ideally have a lot of officers attached so you can split them up during the battle. After a quick headswap, the Perry plastic Flank Company infantrymen that I over-eagerly assembled for the 100 days are ready for the Peninsular War. These I complemented with 6 skirmishing figures from Front Rank. A $15 coupon from Warlord also tricked me into getting their box of Chosen Men. 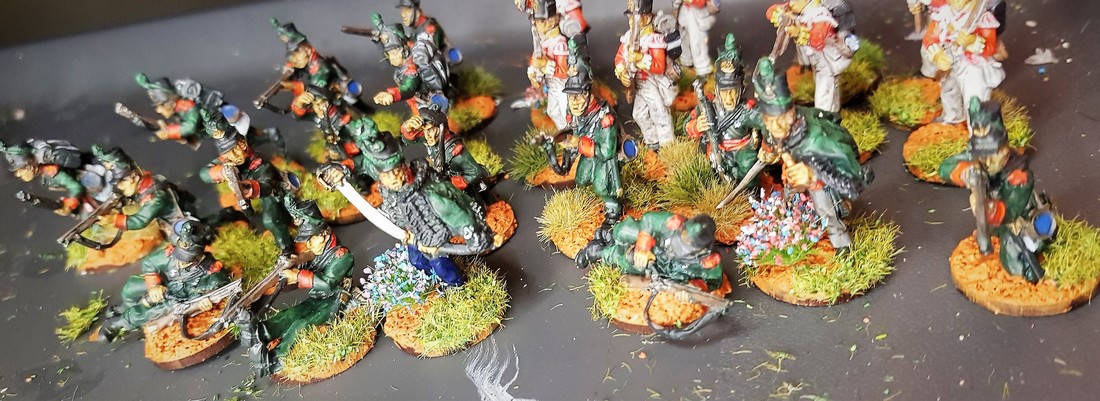 Painting all this together with some of the unfinished Perry Rifle command figures gets me:
Megalomania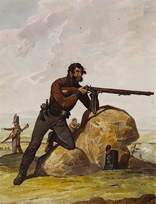 Before going into Napoleonics I must say I was a bit confused seeing Jonas and Shirty's behavior. They were buying so many little plastic (and metal) men.
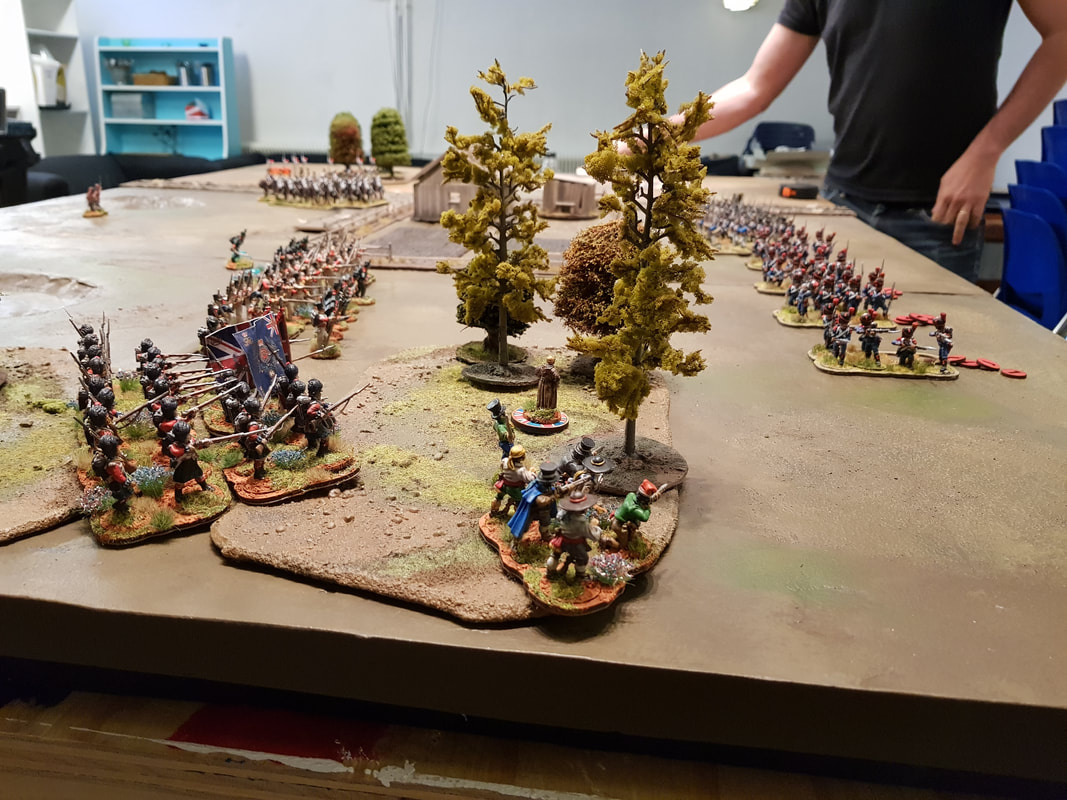
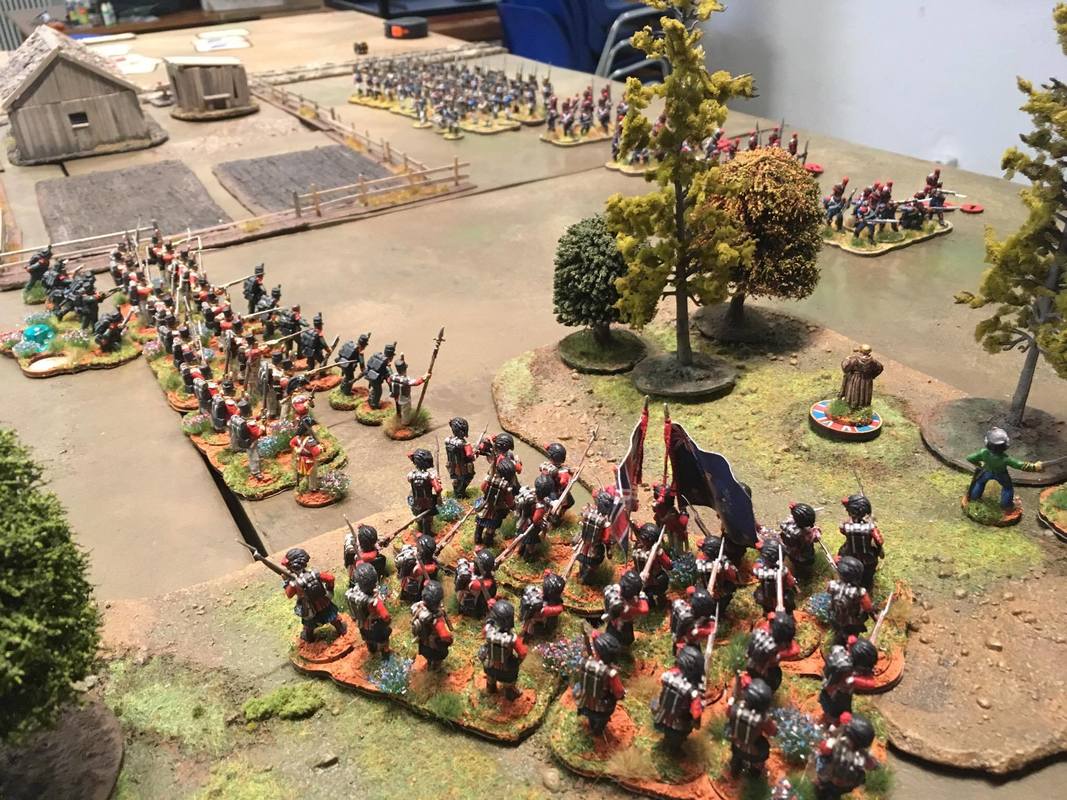
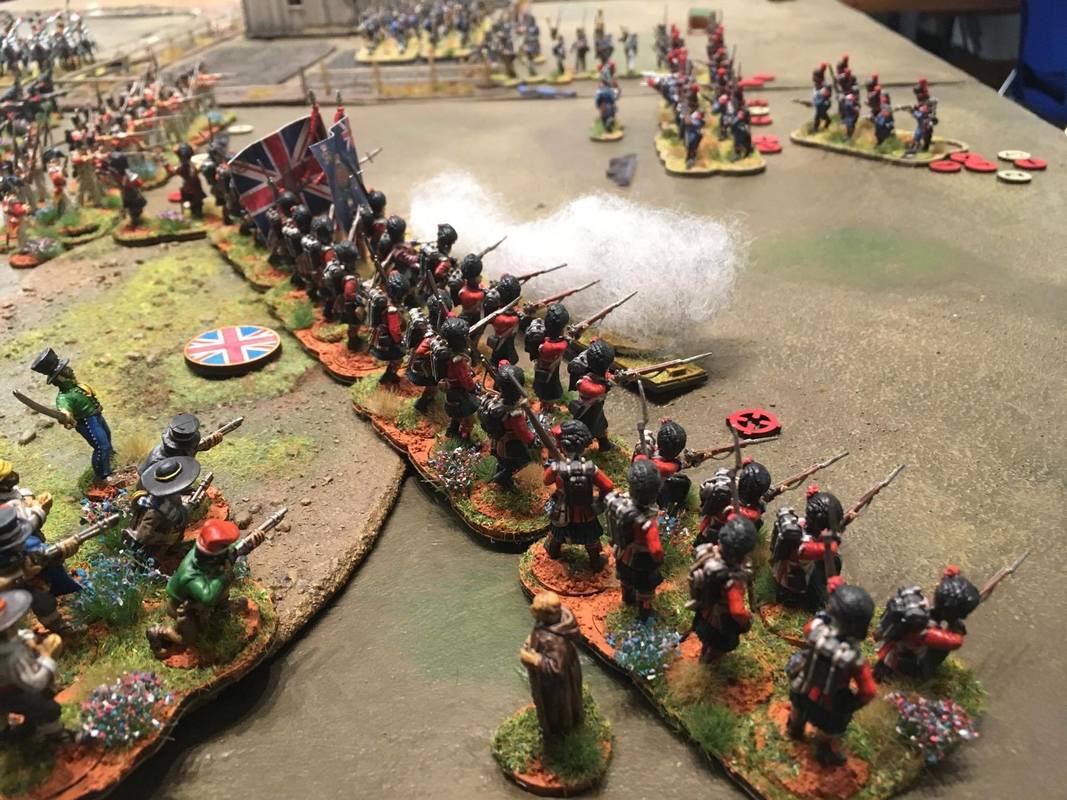
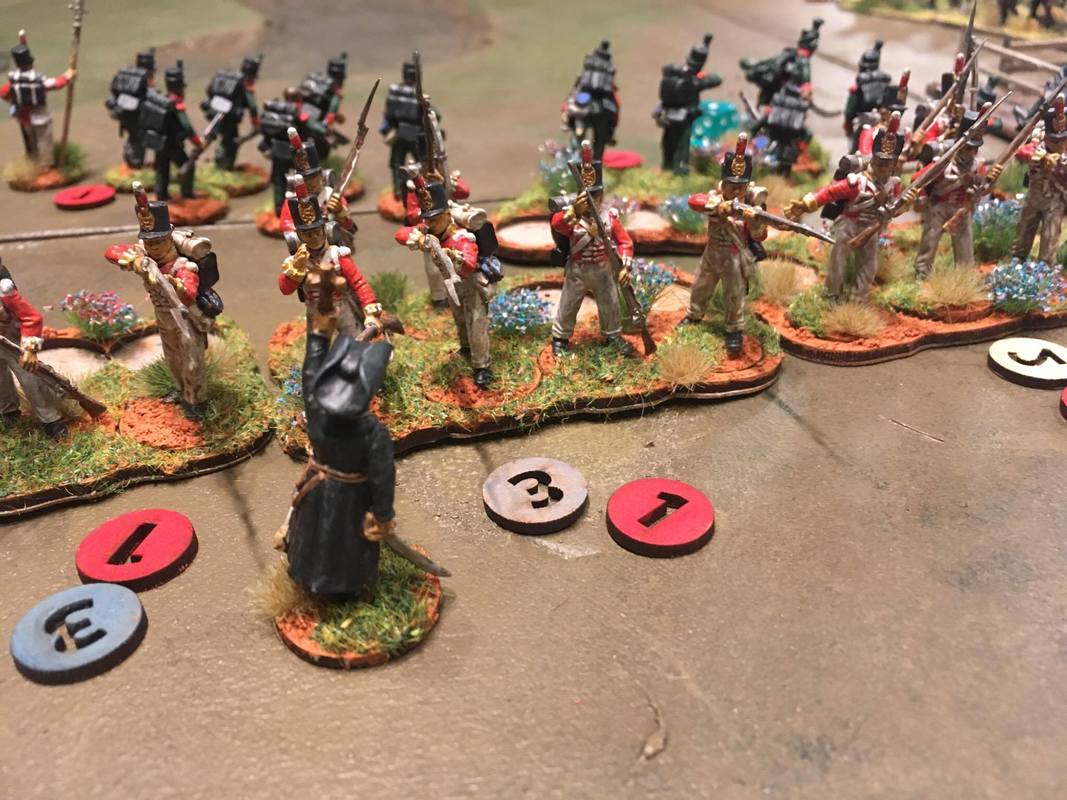
But I was intrigued, and then Jonas gave me a first taste. Now when planning were to take my force from here megalomania has struck, I've decided to set my Napoleonics goal to be assembling the Fighting 3rd. The Highlanders I have can simply be some added flavor. I wonder if the thoughts and feelings I'm having are the same as Nosey & Boney two hundred years ago. Then Warlord has a sale on sprues and I order 80 Portuguese Line Infantry to allow me to field two line battalions of Manley Power's brigade together with some Caçadores. -Zach The time has come for the red coats to test their mettle in battle. This would be my third game of Sharp Practice 2, and my first one using the British forces I've painted. Order of BattleJonas took the opportunity to try out the army list he made for our upcoming 1812 Russia Campaign. I'm using the list from the rulebook, but with updated points costs. British Braves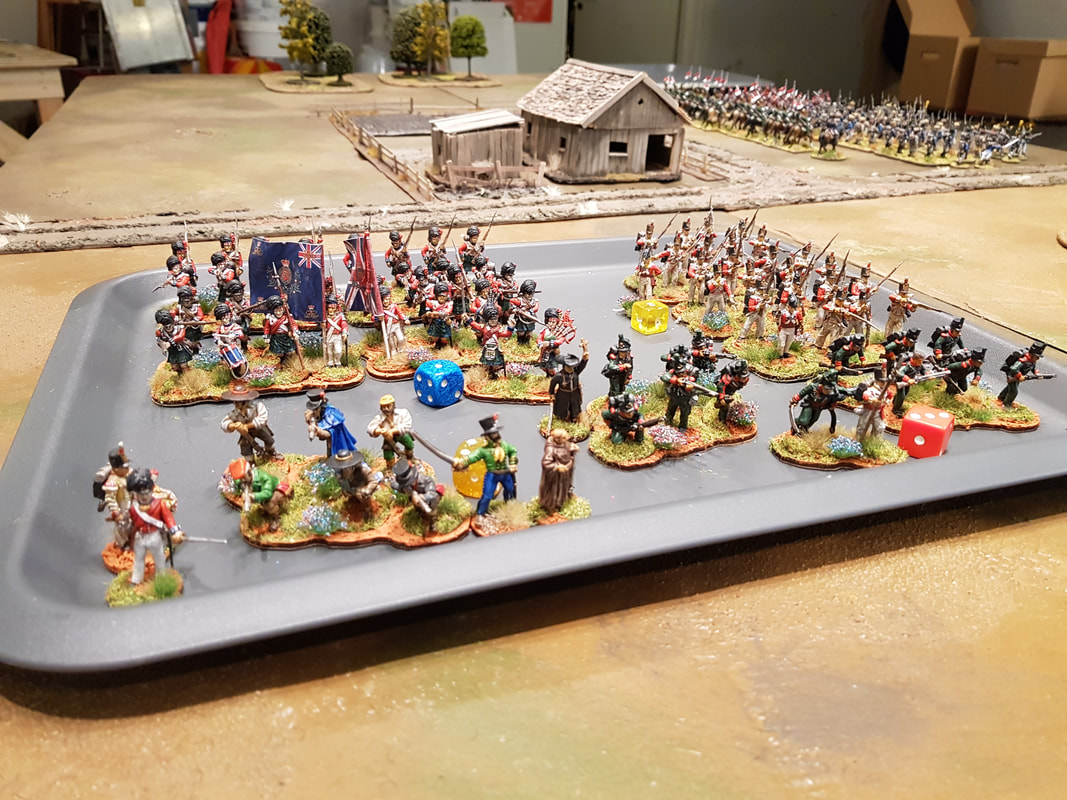 42nd Regiment of Foot, Black Watch 4 groups of Highlanders, Regulars Thin Red Line, Sharp Practice, Stubborn 1 Officer, lvl 4 88th Regiment of Foot, Devil's Own 3 groups of Line infantry, Regulars Thin Red Line, Sharp Practice, Aggressive 1 Officer, lvl 2 5/60th Regiment of Foot, Royal Americans 2 groups of Riflemen, Light Infanty Sharp Practice 1 Officer, lvl 2 1 NCO, lvl 1 1 Marksman Guerilleros 1 group of Guerilla Skrimishers, Irregular Skirmishers Moveable Deployment Point 1 Officer, lvl 2 1 Holy man, with Relic 1 Moveable Deployment Point (Guerilleros) French Fools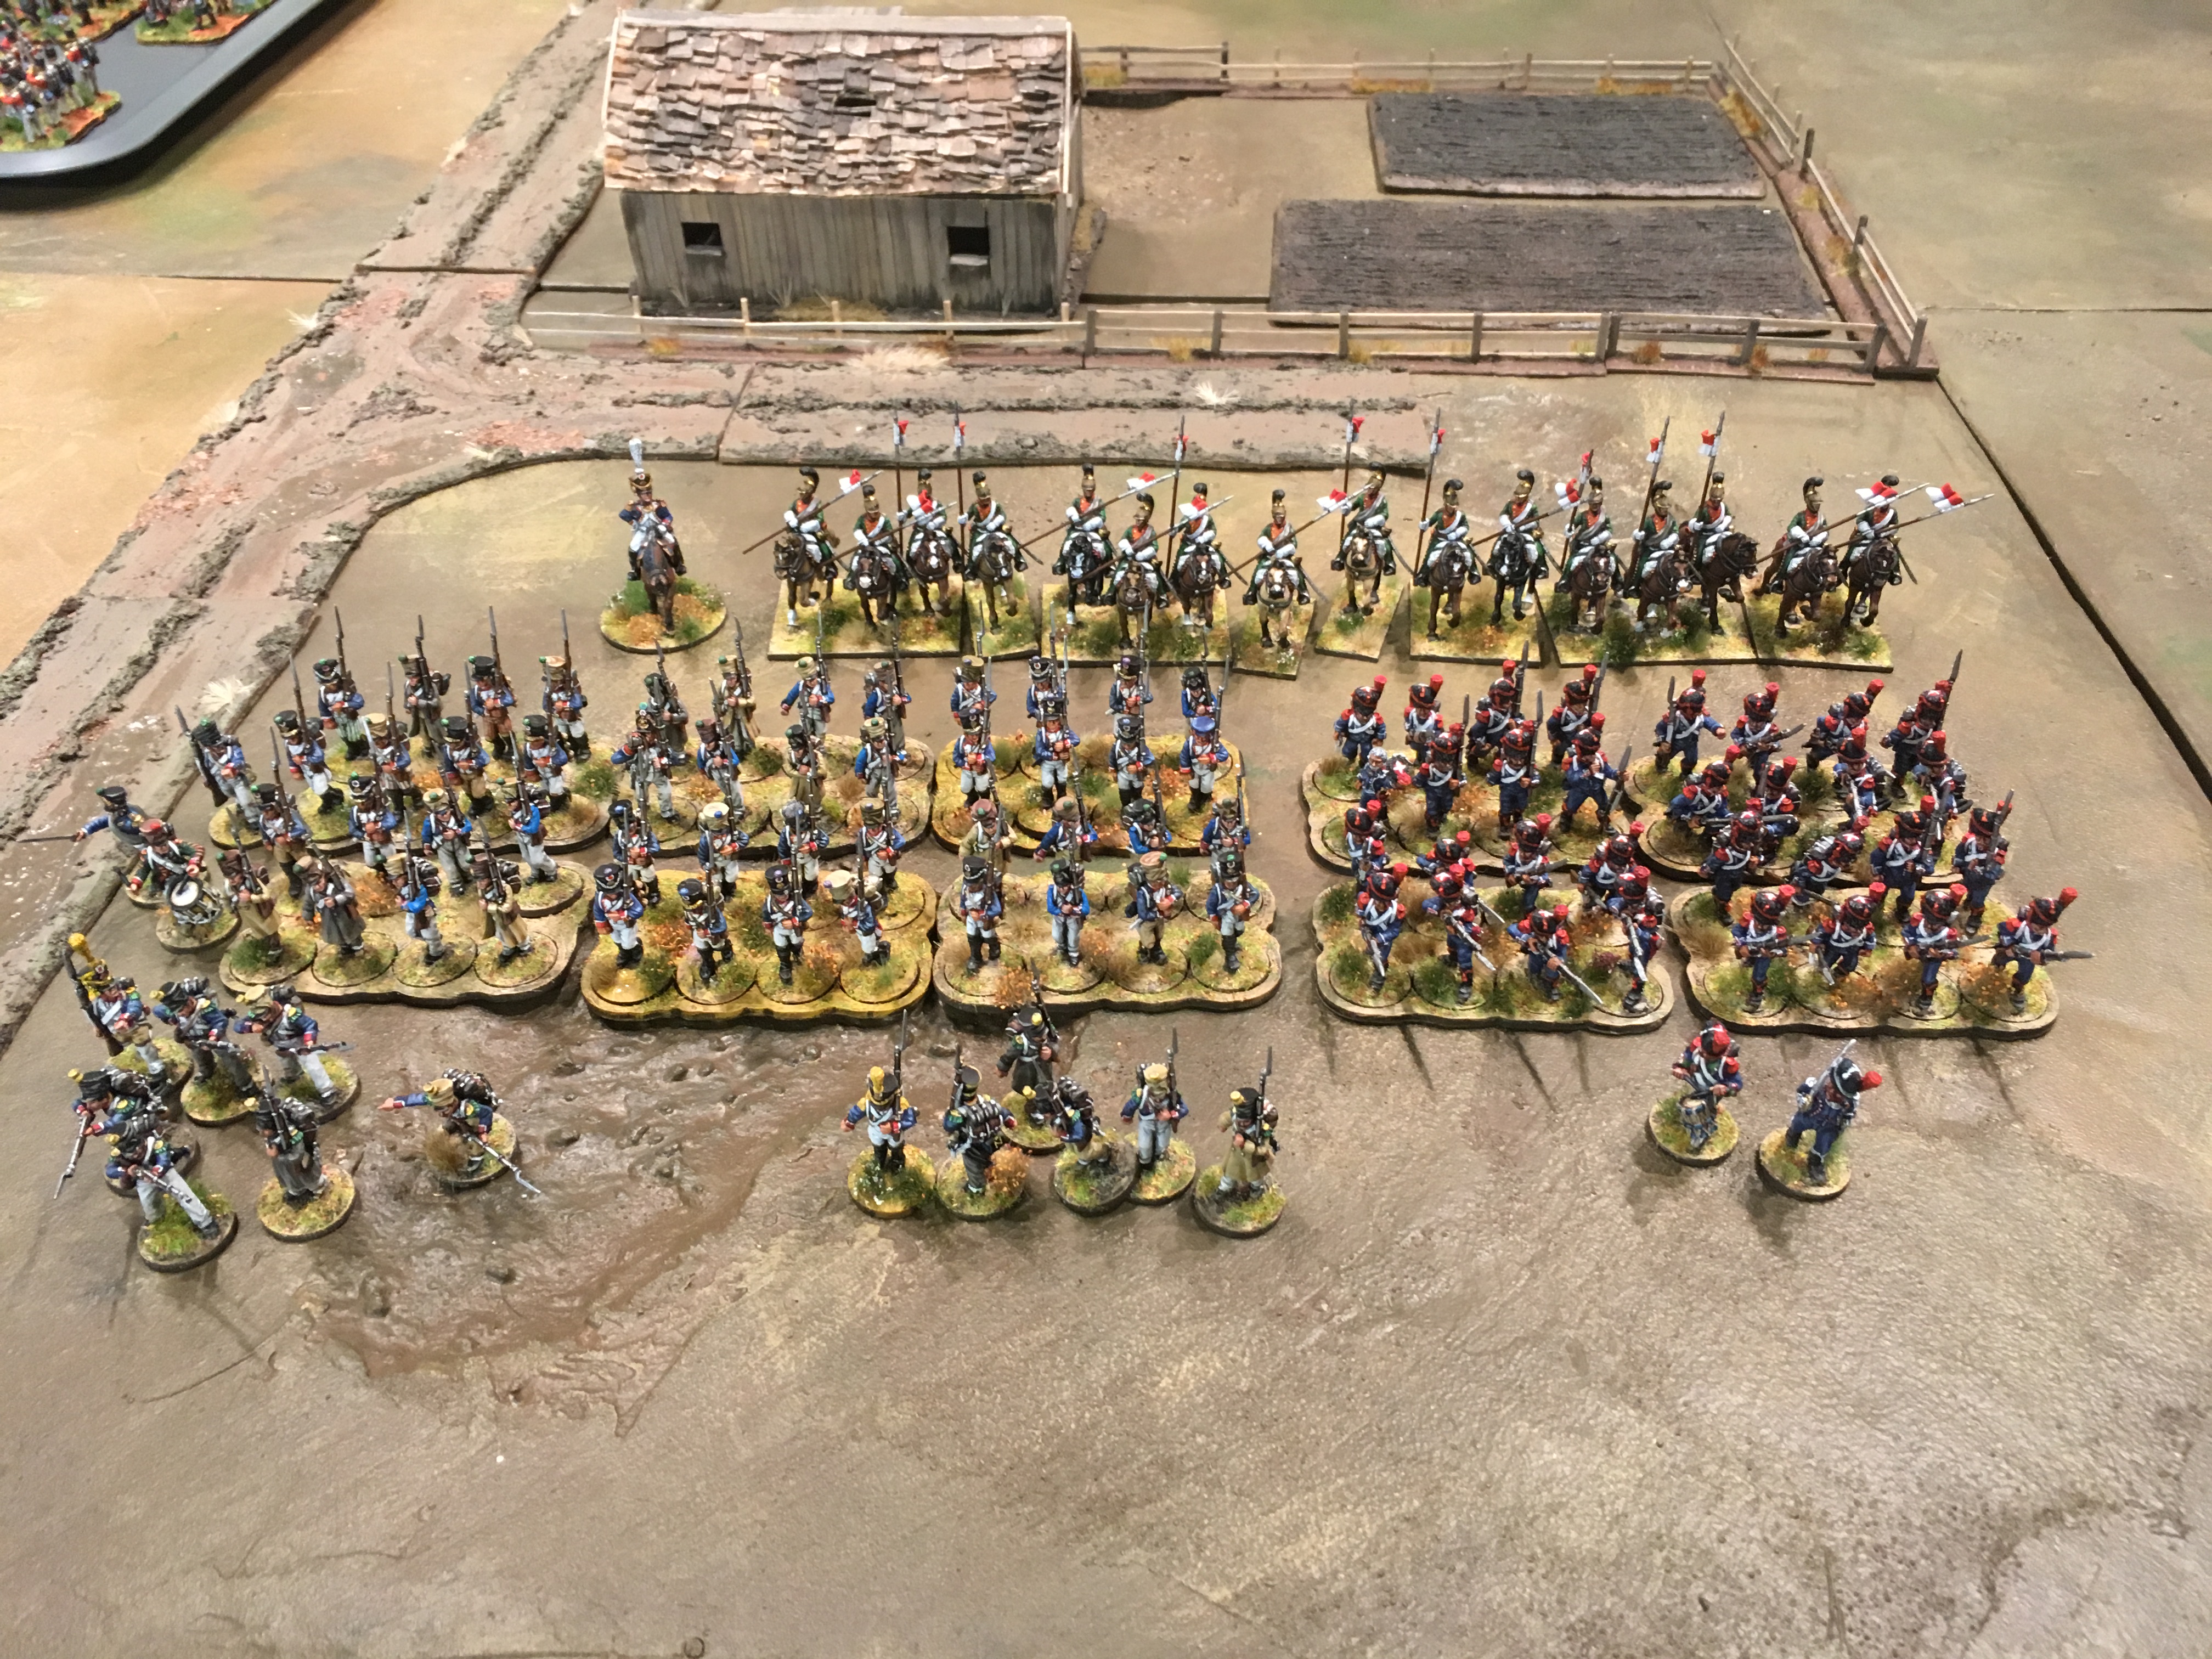 Carabiniers 4 groups of Elite Pas de Charge, Aggressive 1 NCO, lvl2 Line Infantry 6 groups of Regulars Pas de Charge 1 Officer, lvl2, 1 NCO, lvl 1 Lancers 2 groups of Lancers 1 NCO, lvl 1 Voltiguers 2 groups of Skirmishers Sharp Practice 1 NCO, lvl 2 Opening MovesI knew going into the battle that I wanted something out of my moveable Deployment Point (represented by a monk armed with a musket). I was also afraid of the Lancers which I really didn't want to give an opportunity to charge me in the flank or rear. The dice determined that my primary DP should be placed in the right hand corner, seen from my side of the battlefield, so after measuring carefully I placed my sneaky monk infiltrator in the small woods over on Jonas's side of the board. The French forces deployed from the center on their side of the board. First Turn(s)This was my first game using cards which I must say I much prefer over using the chits. It went much more smoothly because you'd be satisfied with shuffling the deck once, instead of waving your hand around in a box to pick up a chit. The first card to be drawn was for Jonas terrible monster unit of Carabiniers, Elite and Aggressive! Not something you want within charge distance. They deployed in open column which would enable them to form up to a line easily after a short march. 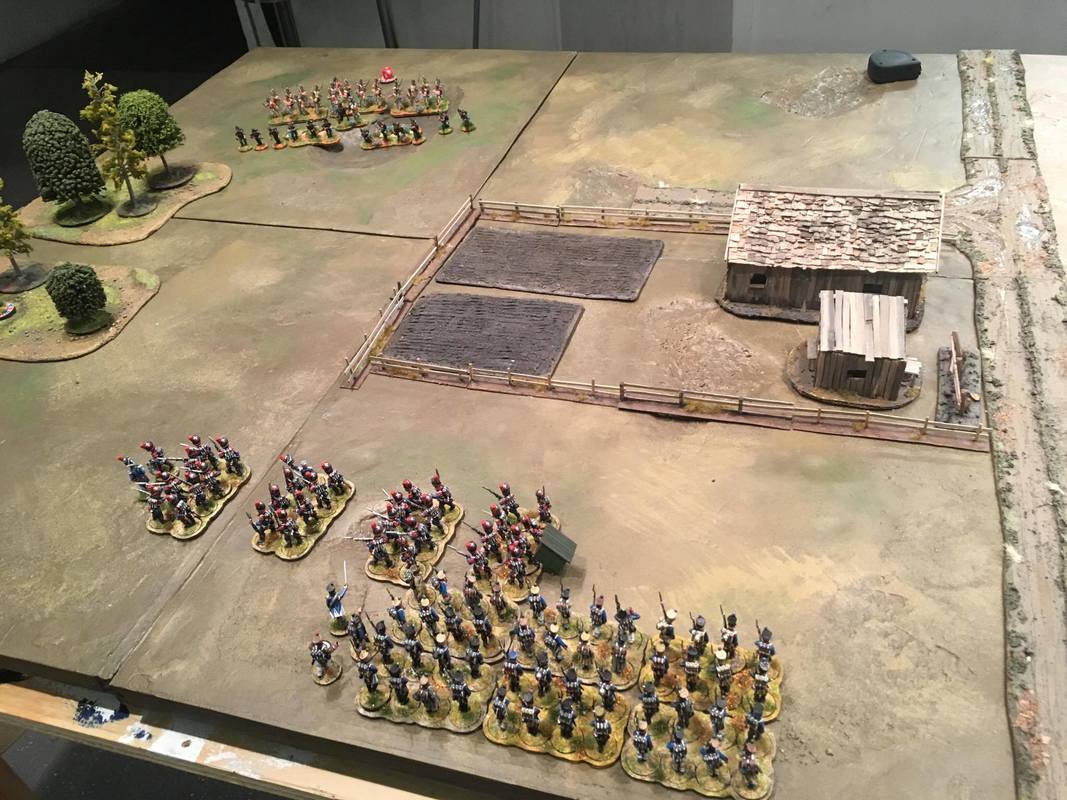 Next, the 88th and my riflemen were deployed from my primary DP, followed by a big blob of French Line Infantry and Voltiguers which deployed next to the Carabiniers. Further away by the road, some Lancers appeared. Then the card for my Force Commander was drawn. I couldn't decide if I wanted to deploy my Highlanders so that they would eventually face the Lancers, or if they should join the 88th. On top of that, I hadn't had a chance to "open" my moveable DP yet. In the end I kept the Highlanders off the board and instead moved my monk forward a few inches. Then Tiffin! "Zach's Guerilleros were equipped with a Movable Deployment Point, which he got to put in the woods on my flank. If he managed to deploy his Guerilleros through it, they would then enable other undeployed units to follow through this DP and easily flank my forces. However, if I could move my forces close enough, I would be able to block him from deploying from it, and give his overall morale a kicking as well, A race against the clock begun!" - Jonas Heating UpNow I got to experience the frustrating thing about moveable DPs. if you want any sort of ambushy action you need to draw the cards in the correct order. The following turns saw me and Jonas advancing towards each other, with the Lancers swinging around the central farm towards my rear. Instead of facing the threat they posed, I tried to keep moving forward and away. I was hoping that once they catch me it would be too late and I'd already done enough damage to win. I just couldn't draw the Guerilla Officer's card, not to mention doing it before drawing my Force Commander's. In the end Jonas's Carabiniers got too close to the moveable DP for me to be able to pull something flashy. However, I did get to deploy my Guerilleros, and they started to harass the French flank. The next turn they were followed by the Highlanders deploying in a attack column in the woods. The Lancers were getting close, but a well aimed shot by a rifleman put took down their NCO down to level 0. A leader with level 0 is not dead, but has no Command Iniatiatives if his card is drawn. Jonas needed a Command Flag to activate the unit, either on the officers card (by temporary boosting his number of Command Initiatives to 1) or at the end of a turn when the Tiffin was drawn. As my luck would have it, Jonas again and again failed to draw a Command Flag before the Lancer NCO's card came up, giving me a chance to keep them away from my flank for a little while longer. Dueling MusketryJonas's Carabiniers and my 88th were getting closer and closer. Jonas decided to fire his first volley just outside of Close range, while my forces were still screened by the Royal Americans. This wasn't as effective as he had hoped. My 88th hadn't activated yet, and in an attempt to get a devastating first volley I decided to move closer and Present. Hopefully I would be able to activate before Jonas in the next turn. I also managed to get my Highlanders up to the edge of the forest. Then I drew two Command Flags, giving me the option to use Sharp Practice. I could either fire a controlled volley with the 88th, or uncontrolled with the larger unit Highlanders. It was a hard choice, but in the end it was the Black Watch that got the order to FIRE! The next turn had us both anxious to see who would get to activate their units first. We both had level 4 officers in the thick of it, and whoever got his first would be able to do a lot of damage. And as always has been the case in these draw-offs between Jonas and me, Jonas proved to be the luckier one. My 88th got a super sized serving of lead salad, and were dangerously close to being forced to withdraw from the combined fire of the Carabiniers and Voltigeurs. But my No. 1 wasn't far off! He started by calling in a Holy Man, to provide some much needed solace to the hard pressed rogues of the Devil's Own. Then he had the 88th and 42nd deliver one volley each into the Crapaud Carabiniers, who broke under their relentless fire. The Glorious EndThis happened just before the Lancers finally got to attack, but the Riflemen managed to safely evade their thunderous charge. To protect my infantry I had the 88th form a square, and was preparing to angle up the Highlanders to form a new line of battle to face the big blob of French infantry that had finally managed to get close enough to join the fight. We never got to see their first volley, as the slaughter of the Carabiniers had crashed Jonas's Force Morale. As a final display of defiance he charged the 88th with his Lancers. He ended up with just a few dice to roll while I needed two hands to cup mine. The results were predictable and Jonas graciously retired. -Zach A French EulogyArrrgh, sacre bleu! The indignity of losing to the British royalists!
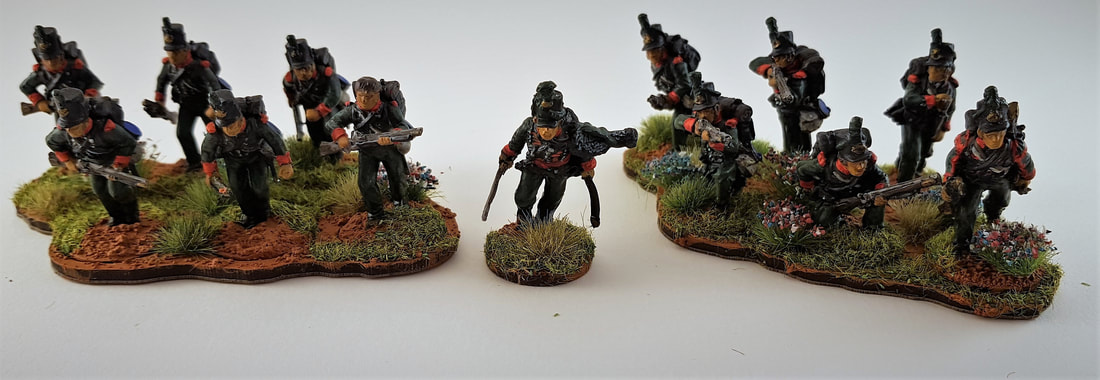
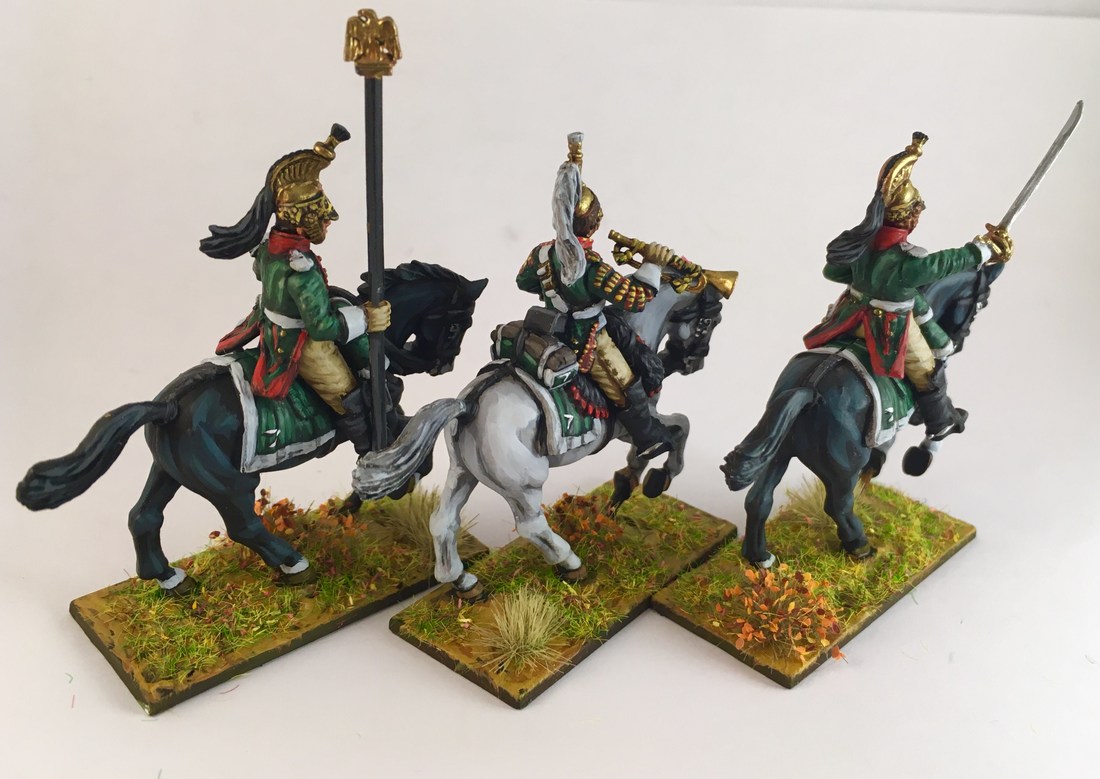
This was a great game, and it really showcased the British army in Sharp Practice. With their line infantry having both Sharp Practice and Aggressive, they have the unnerving ability to be both great at close combat and at shooting. And with Thin Red Line, there is always the threat of a sudden rush into Fisticuffs as well. So when you meet them, you have to be wilier if you want to survive! In this particular game, my deployment turned out to be crap. The big Fusilier blob took too much time to climb over the fence and wheel in the muddy farm backyard. A complete waste! I should probably have avoided the farmhouse completely, and focused on maintaining a solid line that didn't allow one of my formations to be outnumbered and picked apart. My only saving grace were the Lancers, and if the NCO had been lvl 2 instead, they would have plowed into the British in a very unpleasant manner. As it was, they were inches away from a good chance to even the odds. This time they failed, but like in all games before they added a lot of fun to my role as French commander. While heaping praise on the proficiency of the British infantry, let's not forget that in this game the Guerilleros also played a vital role. They poured lead into my poor Carabiniers, halting their march (you move slower if you have shock markers on a unit) and made my deployment mistakes so much more punishing. This was also our first game where we really took care to use the rules for resolving volleys correctly. Before, we tended to just spread out shock on the formation hit, which made big formations really good. With the "proper" rules, big blobs are much more prone to have one or two units chipped off, wrecking your Force Morale. While it was a bit fiddly the first couple of turns, we gradually got used to it, and in the end it made for a much more tactical feel to the game. It did change the effectiveness of small formations vs large ones though, meaning that this was probably the last time in a while that I take a 6 unit strong formation. All this combined and looking back, I would have been much better served by trading some of that big blob of infantry for more Voltigeurs. Being outnumbered in skirmishers is never fun, but doubly so against British. Anything that can protect you from their Sharp Practice-fuelled controlled volleys is worth considering. So more skirmishers, smaller and more manouverable formations, and better coordination? Sounds like a plan. Next time! -Jonas My poor dragoons. I've fielded them in most of my battles, and every time this lonely little unit has been chewed up by enemy cavalry or infantry. And to make matters worse, they haven't even had proper officers to lead them, or trumpeters to make them look good! The line must be drawn here! This far, no further. It was time to crack up another one of Perry's lovely French dragoon boxes, and get to work. 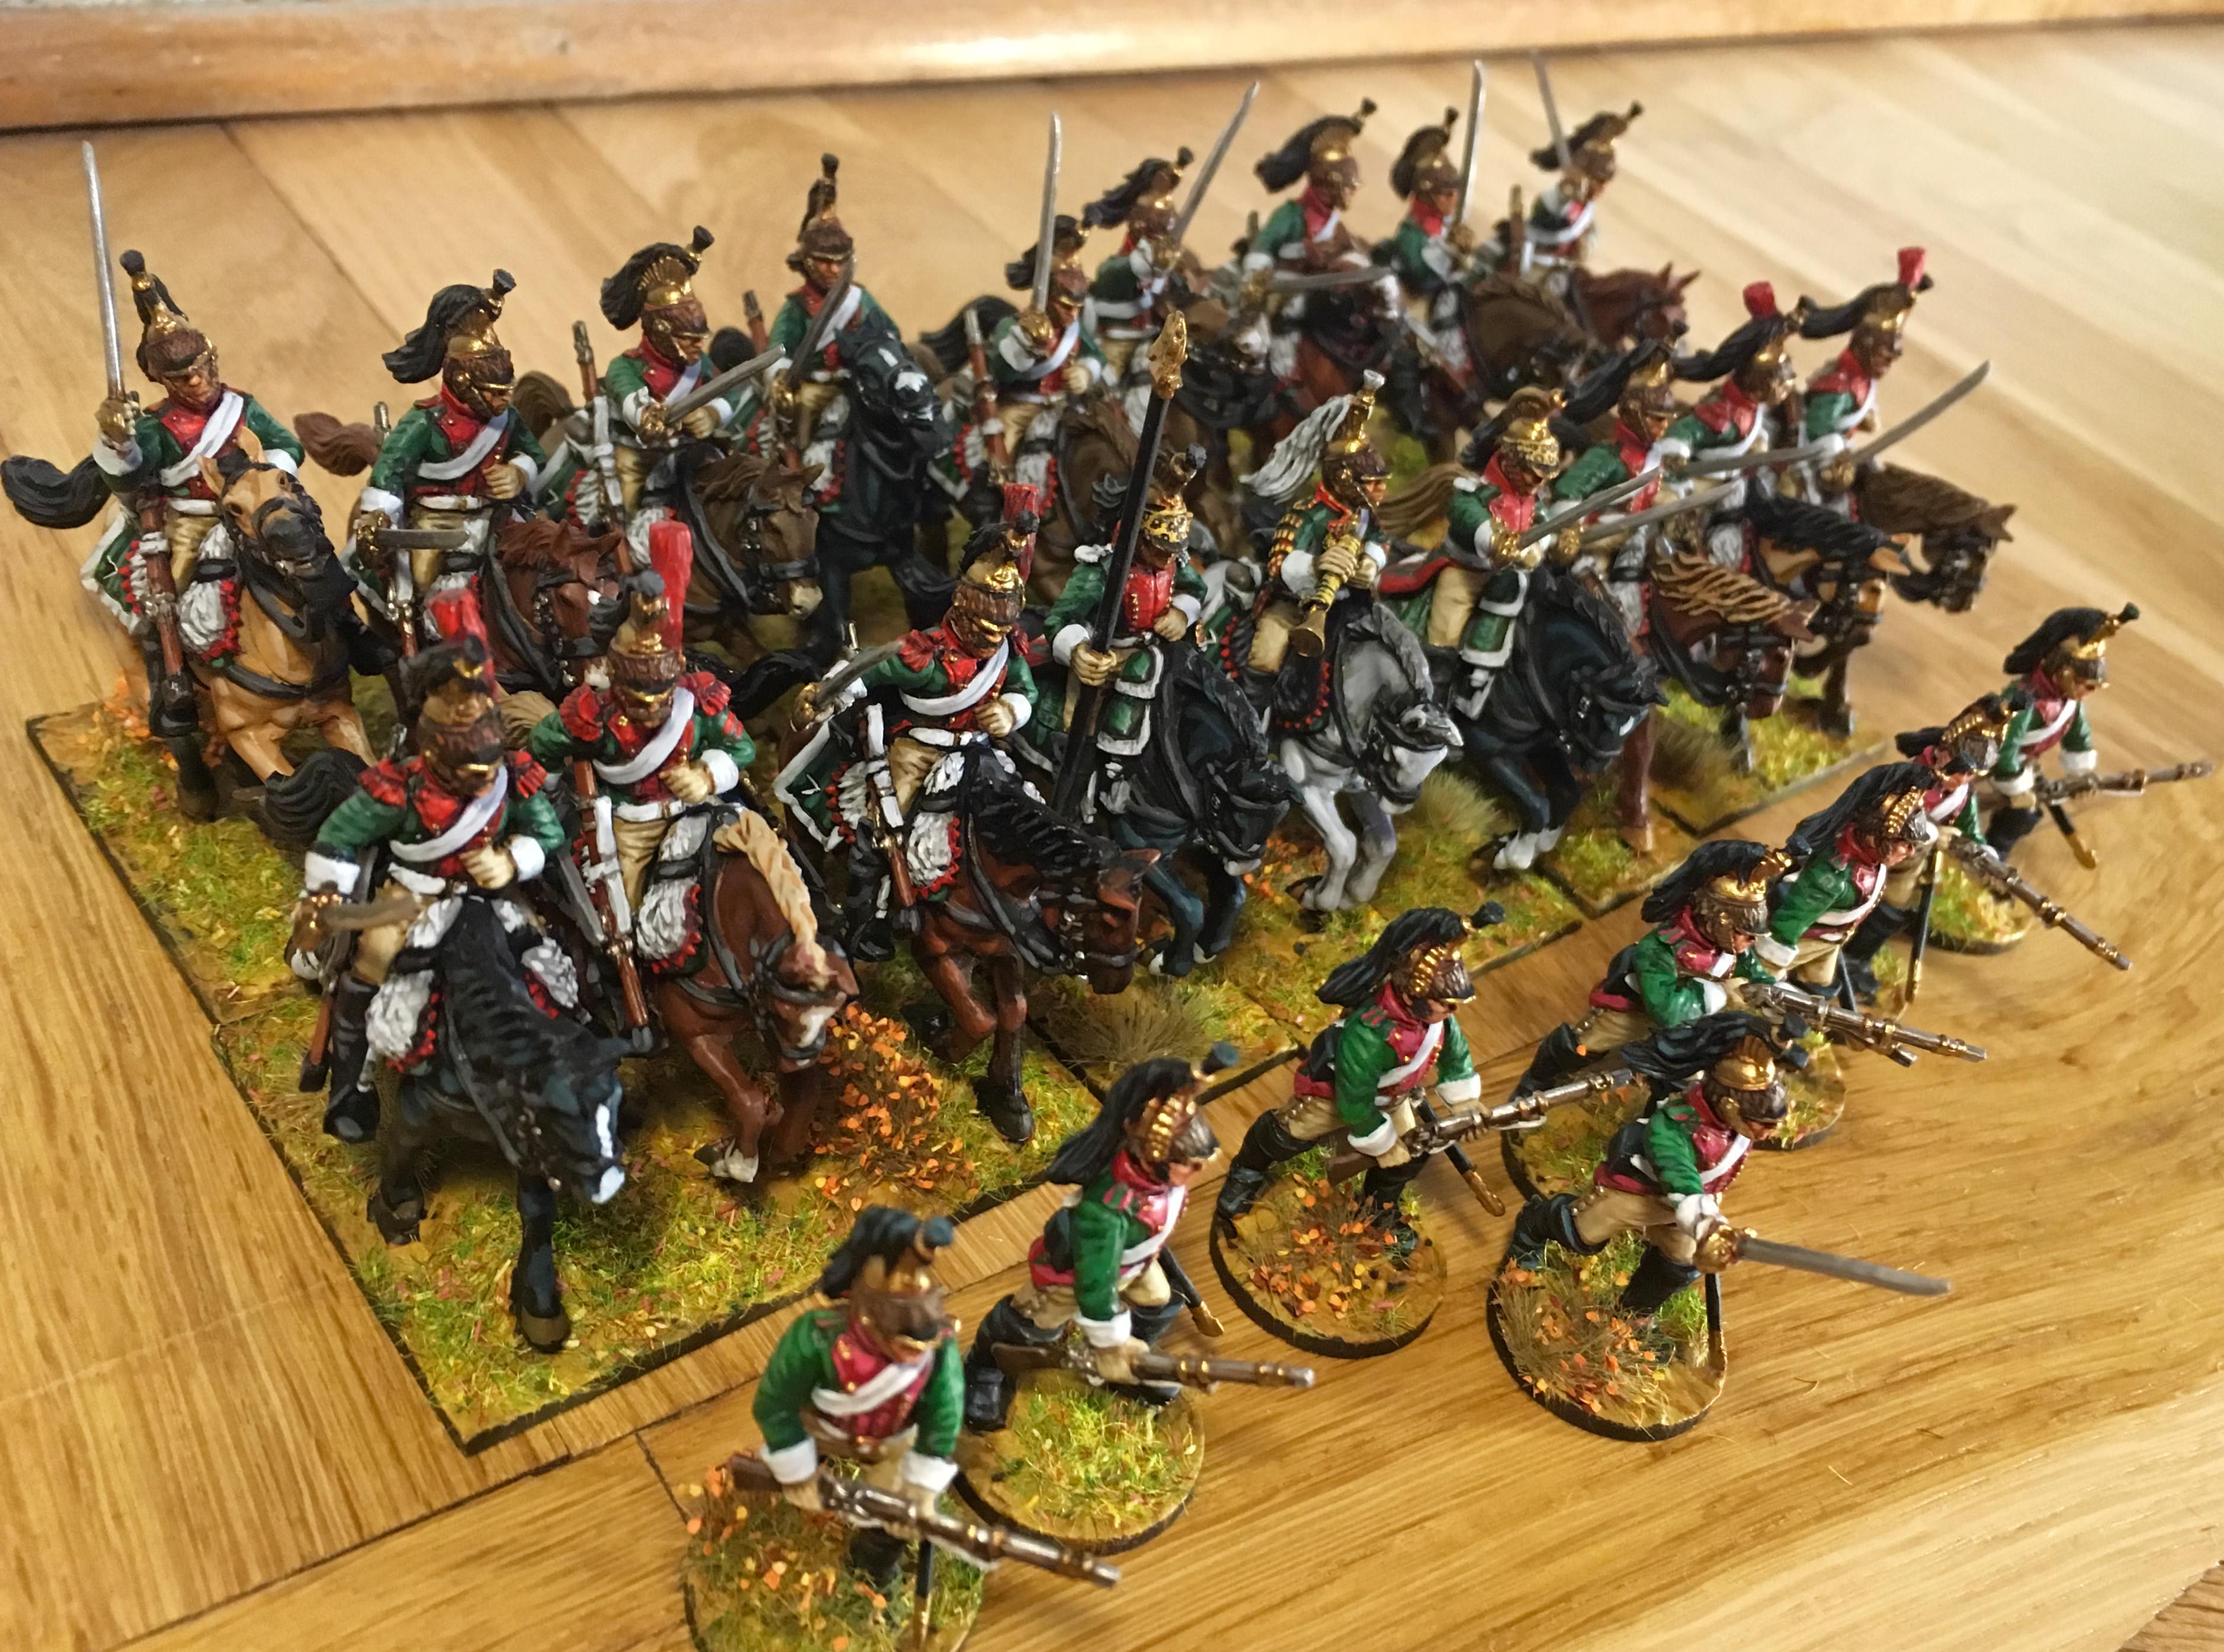 Le 7e Régiment de Dragons charging across the harsh, oaken soil of Russia This batch was pretty pretty big, as I had a couple of unpainted minis left from the first box. First off I needed 16 troopers to for two more units. Some of these I gave the heads indicating the elite company of the regiment. The box comes with both bearskin heads, which were for elite companies before the 1812 uniform change, and the plumed heads for post-1812. I'm saving the bearskins for a possible future project, and went with the plumes. I only had enough for half a unit of elite company dragoons, though. Regular Troopers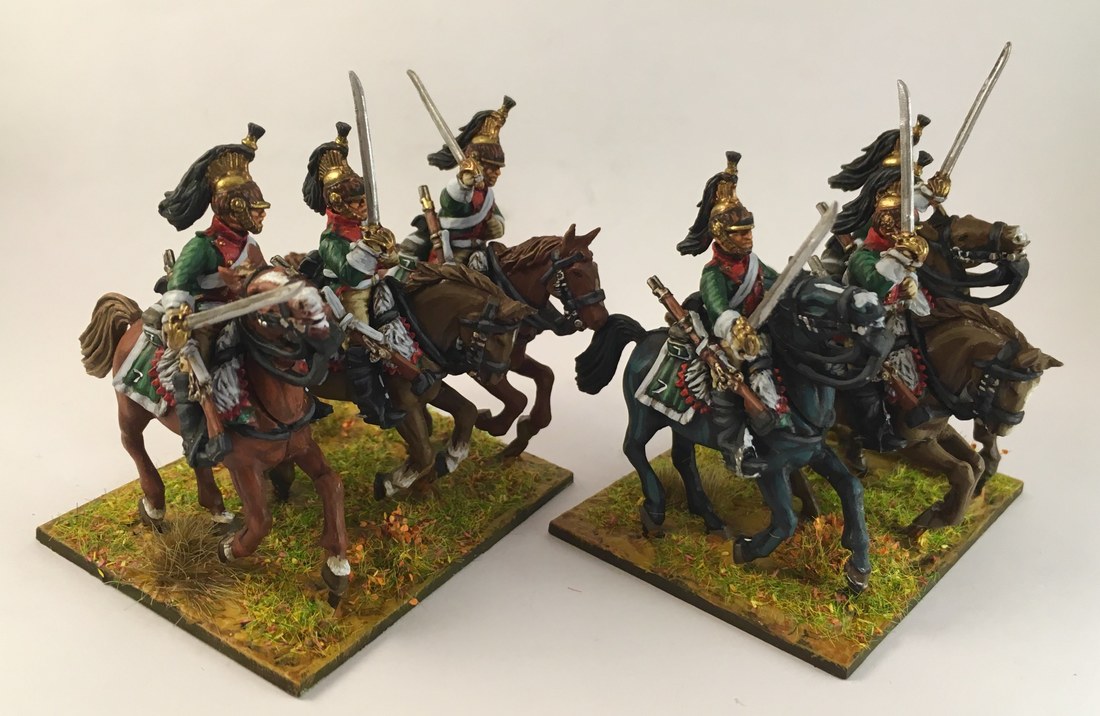 Elite Company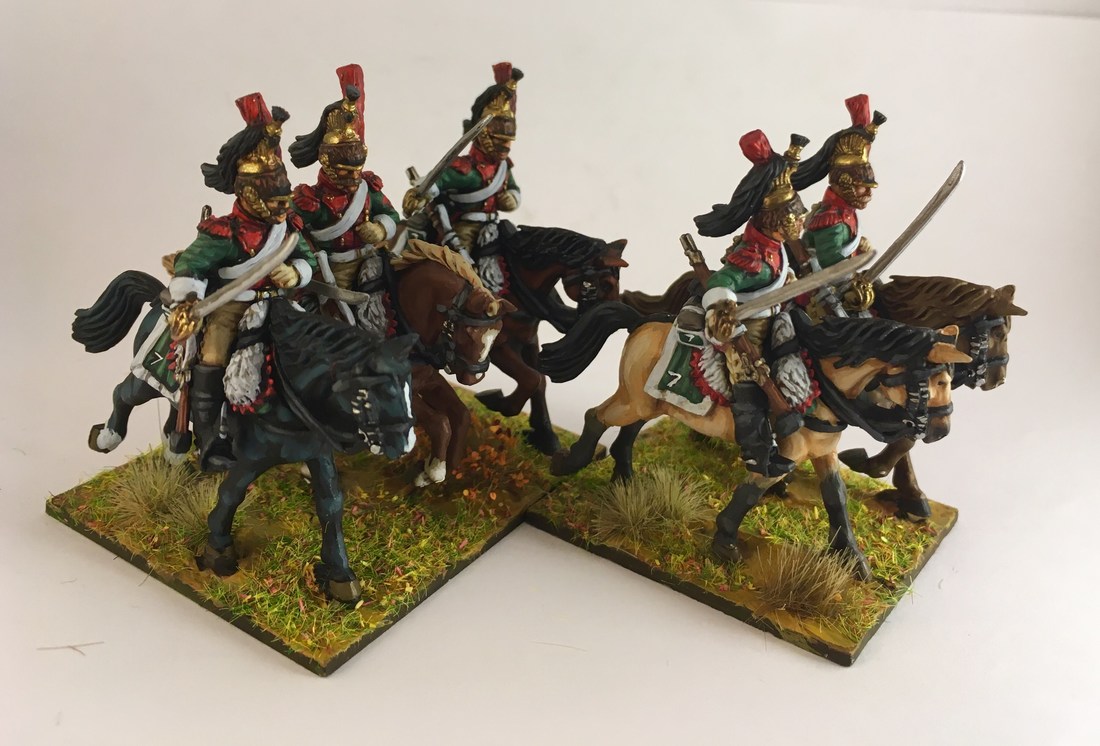 CommandAfter the troopers, I went for the command group. The officer and the standard bearer have the fake leopard skin covers on their helmets. The musician has the (honestly more boring) 1812 regulation uniform, where they kept the jacket green instead of using the facing colour. Maybe I'll paint up a second, alternative musician later.  I didn't go with a flag for the standard bearer. Napoleon got fed up with cavalry squadrons losing their eagles in the confusion that is so typical of cavalry warfare, but a lot of cavalry regiments refused to keep them in safe storage despite orders. I've decided not to use the paper flags that come with the box, so now I've got to decide which brand of flags to go with. Then I'll order flags for all my regiments at the same time. Dismounted Dragoons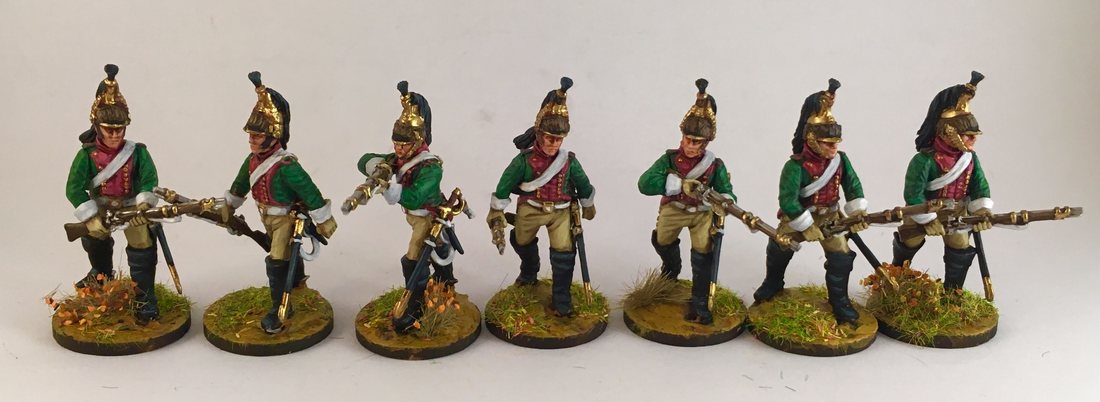 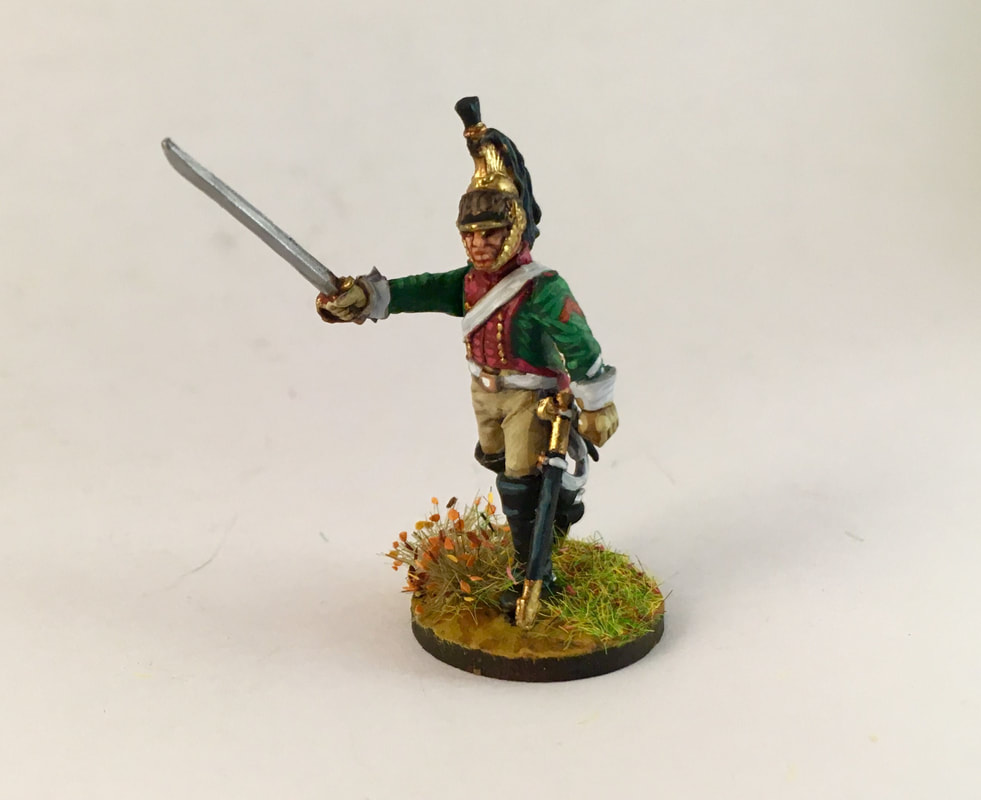 Finally, my dismounted dragoons got a well deserved reinforcement as well. One more unit of skirmishing dragoons join the fray, and I also painted up a NCO (so no fancy leopard skin) to lead them, brandishing his sabre.
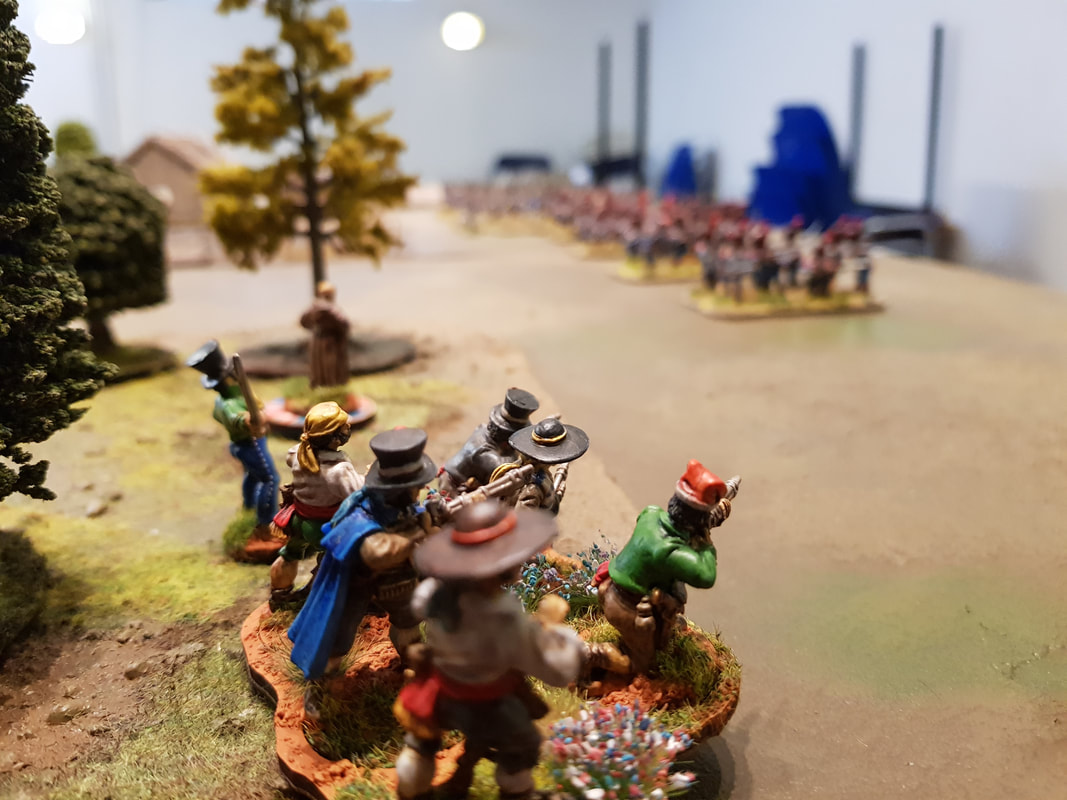
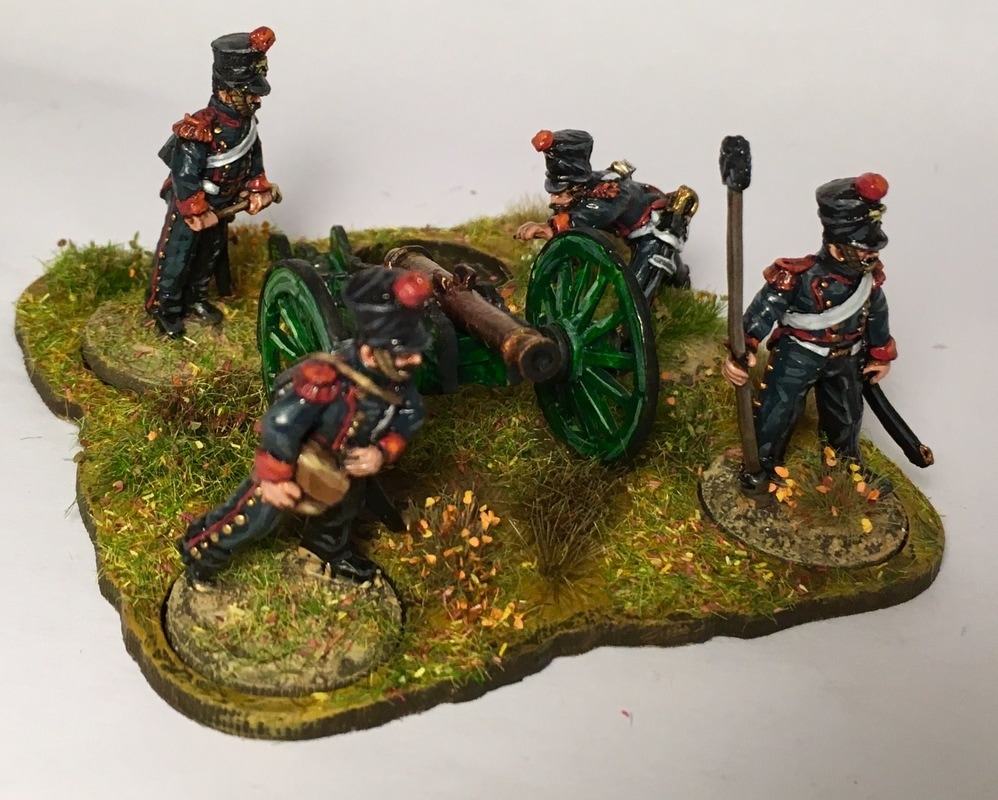
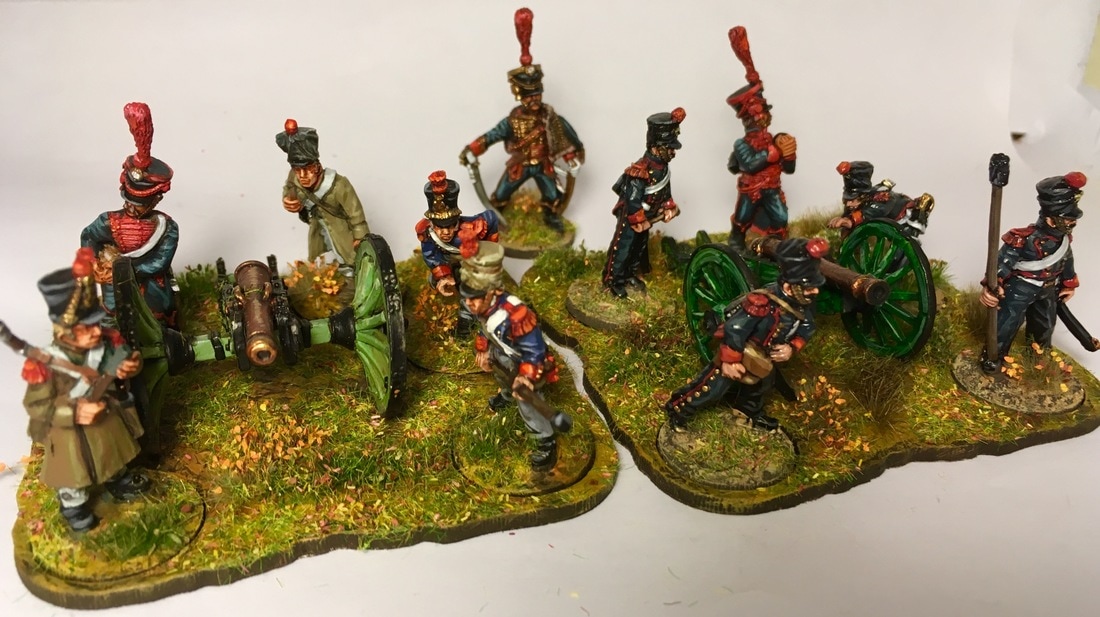
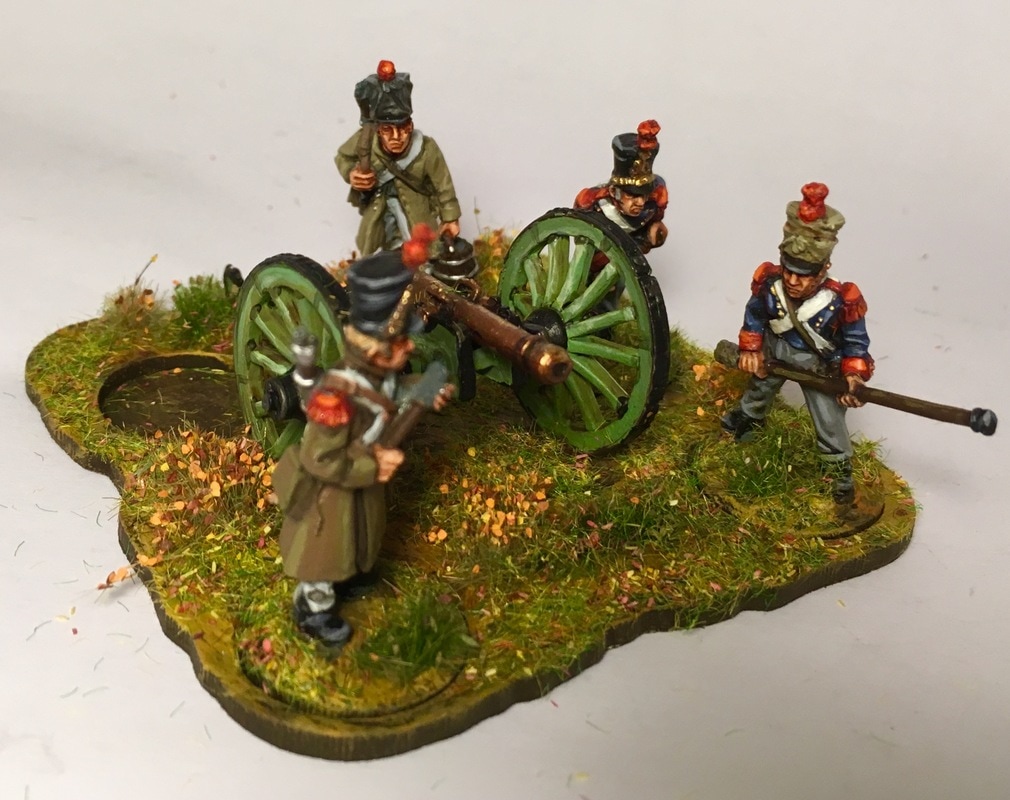
Altogether this increases my dragoons to five units, a much more respectable force. But will it be enough to finally see them win a scrap?  A French Edge on the BattlefieldGod fights on the side with the best artillery, according to Napoleon. And by that measure, God really was on France's side for two decades, as a combination of new technology and doctrine made sure that French artillery was the world's finest. This development started well before Napoleon's entrance on the scene, or even the Revolution, as Jean-Baptiste-Vaquette de Gribeauval laid the foundation set to work in the 1760's. He redesigned the artillery arm from ground up, including the artillery pieces themselves, their ammunition, their wagons, and the entire logistics apparatus. This early work at making a uniform system of cannon that were both smaller and better was not fully introduced, but the foundation was laid for a Revolutionary government desperate to find a weapon to repell an increasing number of antagonistic neighbours. And once the army was in the hands of a genius artillery officer, it would continue to wreak havoc against France's enemies across the continent. By the invasion of Russia, the French artillery had been further standardized, in the "System of the Year XI", referring to the new calendar introduced in Revolutionary France. The cannon came in three sizes, 24 pound, 12 pound and 6 pound cannon. In addition there were mortars (24 and 6 pound) and howitzers (also 24 and 6 pound). French artillery came in two kinds, the line and the horse artillery. Horse artillery were the more mobile version. By using the lighter 6 pound cannon and with an all mounted crew, they could be tasked with either giving heavy support for cavalry attacks or to manouver to new positions during the battle to gain advantage of how the battle developed. The line infantry could either be divided to give close support to attacking infantry, or bunched up into huge destructive batteries that could virtually eradicate an exposed enemy formation. A typical full strength artillery company would have 6 cannon and 2 howitzers, and around 100 to 120 men. Artillery in Sharp PracticeSince Sharp Practice is a skirmish game, you are not likely to see a full company of 8 guns staring down the table. The artillery's main advantage is range, as a cannon can reach any target it can spot on the table. However, they need two actions to reload, compared to the single action of most infantry, so you will not be able to fire every turn. A medium cannon will fire with 12 dice, and a heavy cannon fire with 16 dice. While the short ranges of a skirmish would mean that artillery would be well within canister (+1 to hit) range, Sharp Practice takes a bit of leeway and you'll firenormal cannonballs ("shot") if the target is more than 24" away for medium guns, and 30" for heavy guns. Each gun also only carries three rounds of canister. Finally, they can get additional +1 to hit by firing at columns or squares, and spend an action to fire controlled (+1 to hit) shots. So while we have yet to play with artillery on the table, I don't believe they will be some kind of death star weapon. They shoot as much as one and a half or two units of infantry, and have the advantage of a practically infinite range. I can definitely see that a shot from a heavy gun, especially if you take the time to aim, can hurt a lot. The limited frontage is also nice, as we are already seeing how cramped space can get when we increase the army sizes. However, in return you'll be firing two out of three turns at most, the cannon lack the manouverability of infantry, and you can not use it for the close combats that we see decide our battles again and again. Overall I'm really excited to see how they'll play out! Artillery MiniaturesSo what to do if you want some big guns in your Sharp Practice force? Well, let's start with the good things. The standardization of the French artillery is a huge boon. If you use individually based crew, like I do, you can just swap them out as you go. You can buy separate guns from companies like Front Rank and Calpe, so a single crew can turn up with a 12-pounder one battle, and a 6 pounder the next. You also use the same cannon for horse and line infantry. Just get whatever guns and crew you want, and mix and match. Very versatile! Now, the bad thing is that a lot of companies sell their cannon with a crew of four gunners. This won't do, as Sharp Practice calls for a crew of 5, and you'll also want an artillery officer which is rarely included with the cannon crew. So you are pretty much stuck with either keeping to ranges that let you buy individual crew members (like Front Rank) or buy several packs of crew members (Perry have extra crew sets, which include officers). The exception I can find is Victrix, which has a plastic artillery set which is just short of enough crew (15 crew, including officers, for 3 guns). Warlord doesn't even have artillery officers, so you're out of luck there. My own solution has been a very ad-hoc one. First, when I decided to get a bunch of Dragoons, I got a Horse Artillery 6 pound cannon from Perry to support my nascent cavalry force. The Perry box comes with four crew members (sorry for the glare from the gloss varnish): 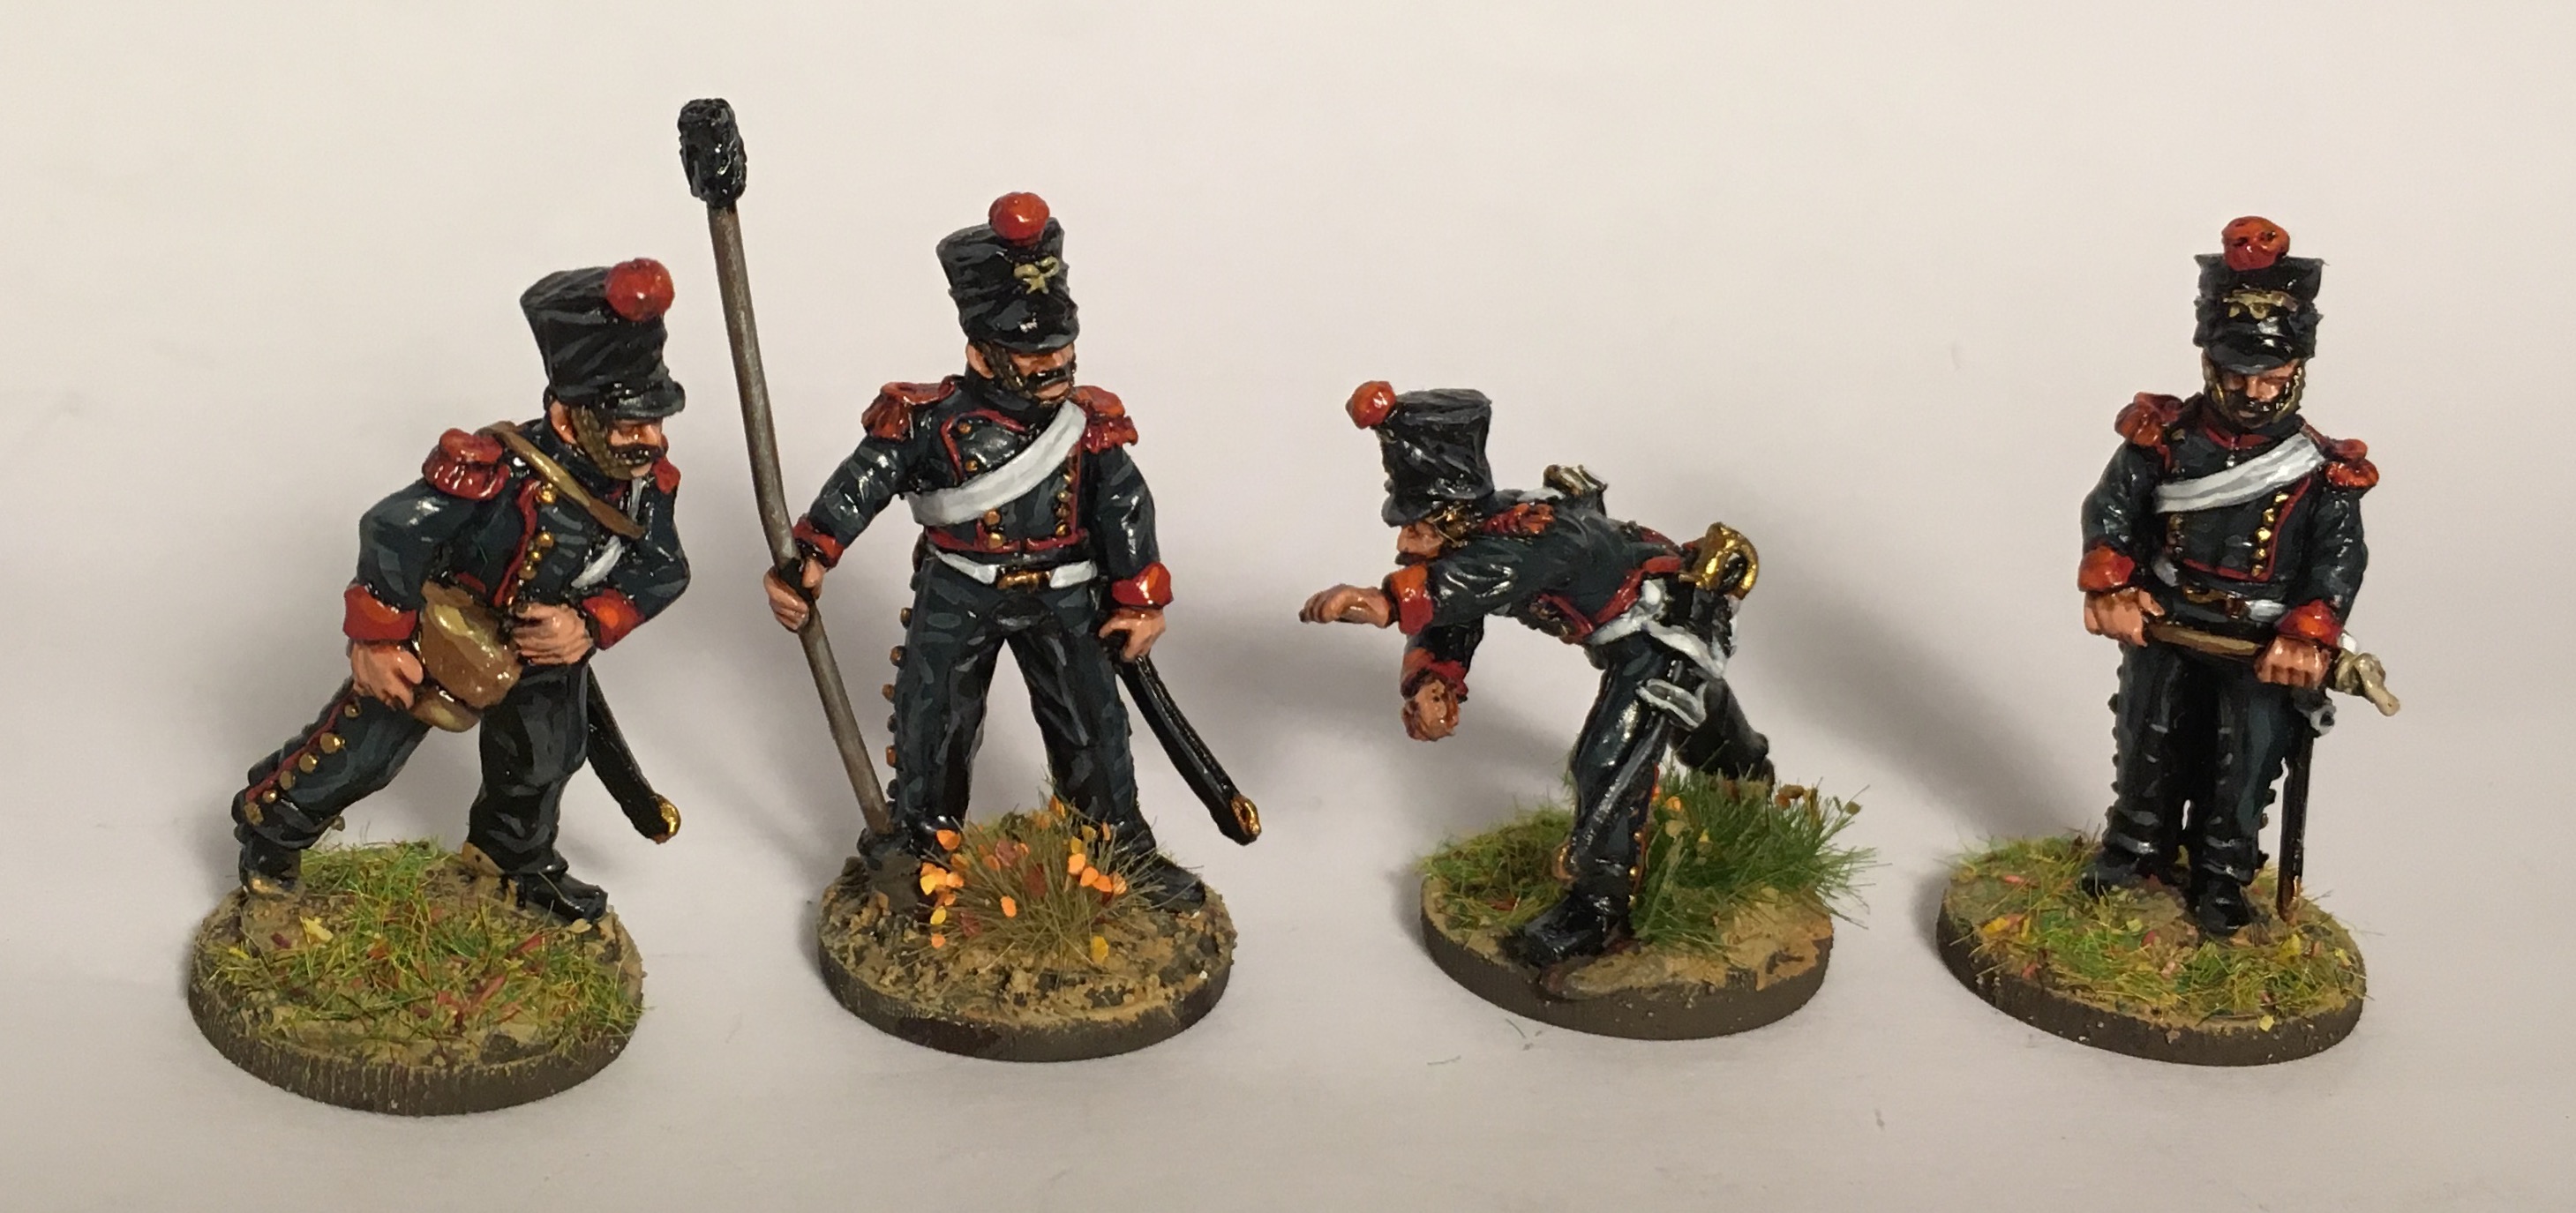 Perry Miniatures Horse Artillery crew As I was a crew member and an officer short, I bought some extras from Front Rank. What I didn't consider was that their style is a bit different, but more importantly, they come in full parade uniforms! Stylish indeed, but they do stand out: 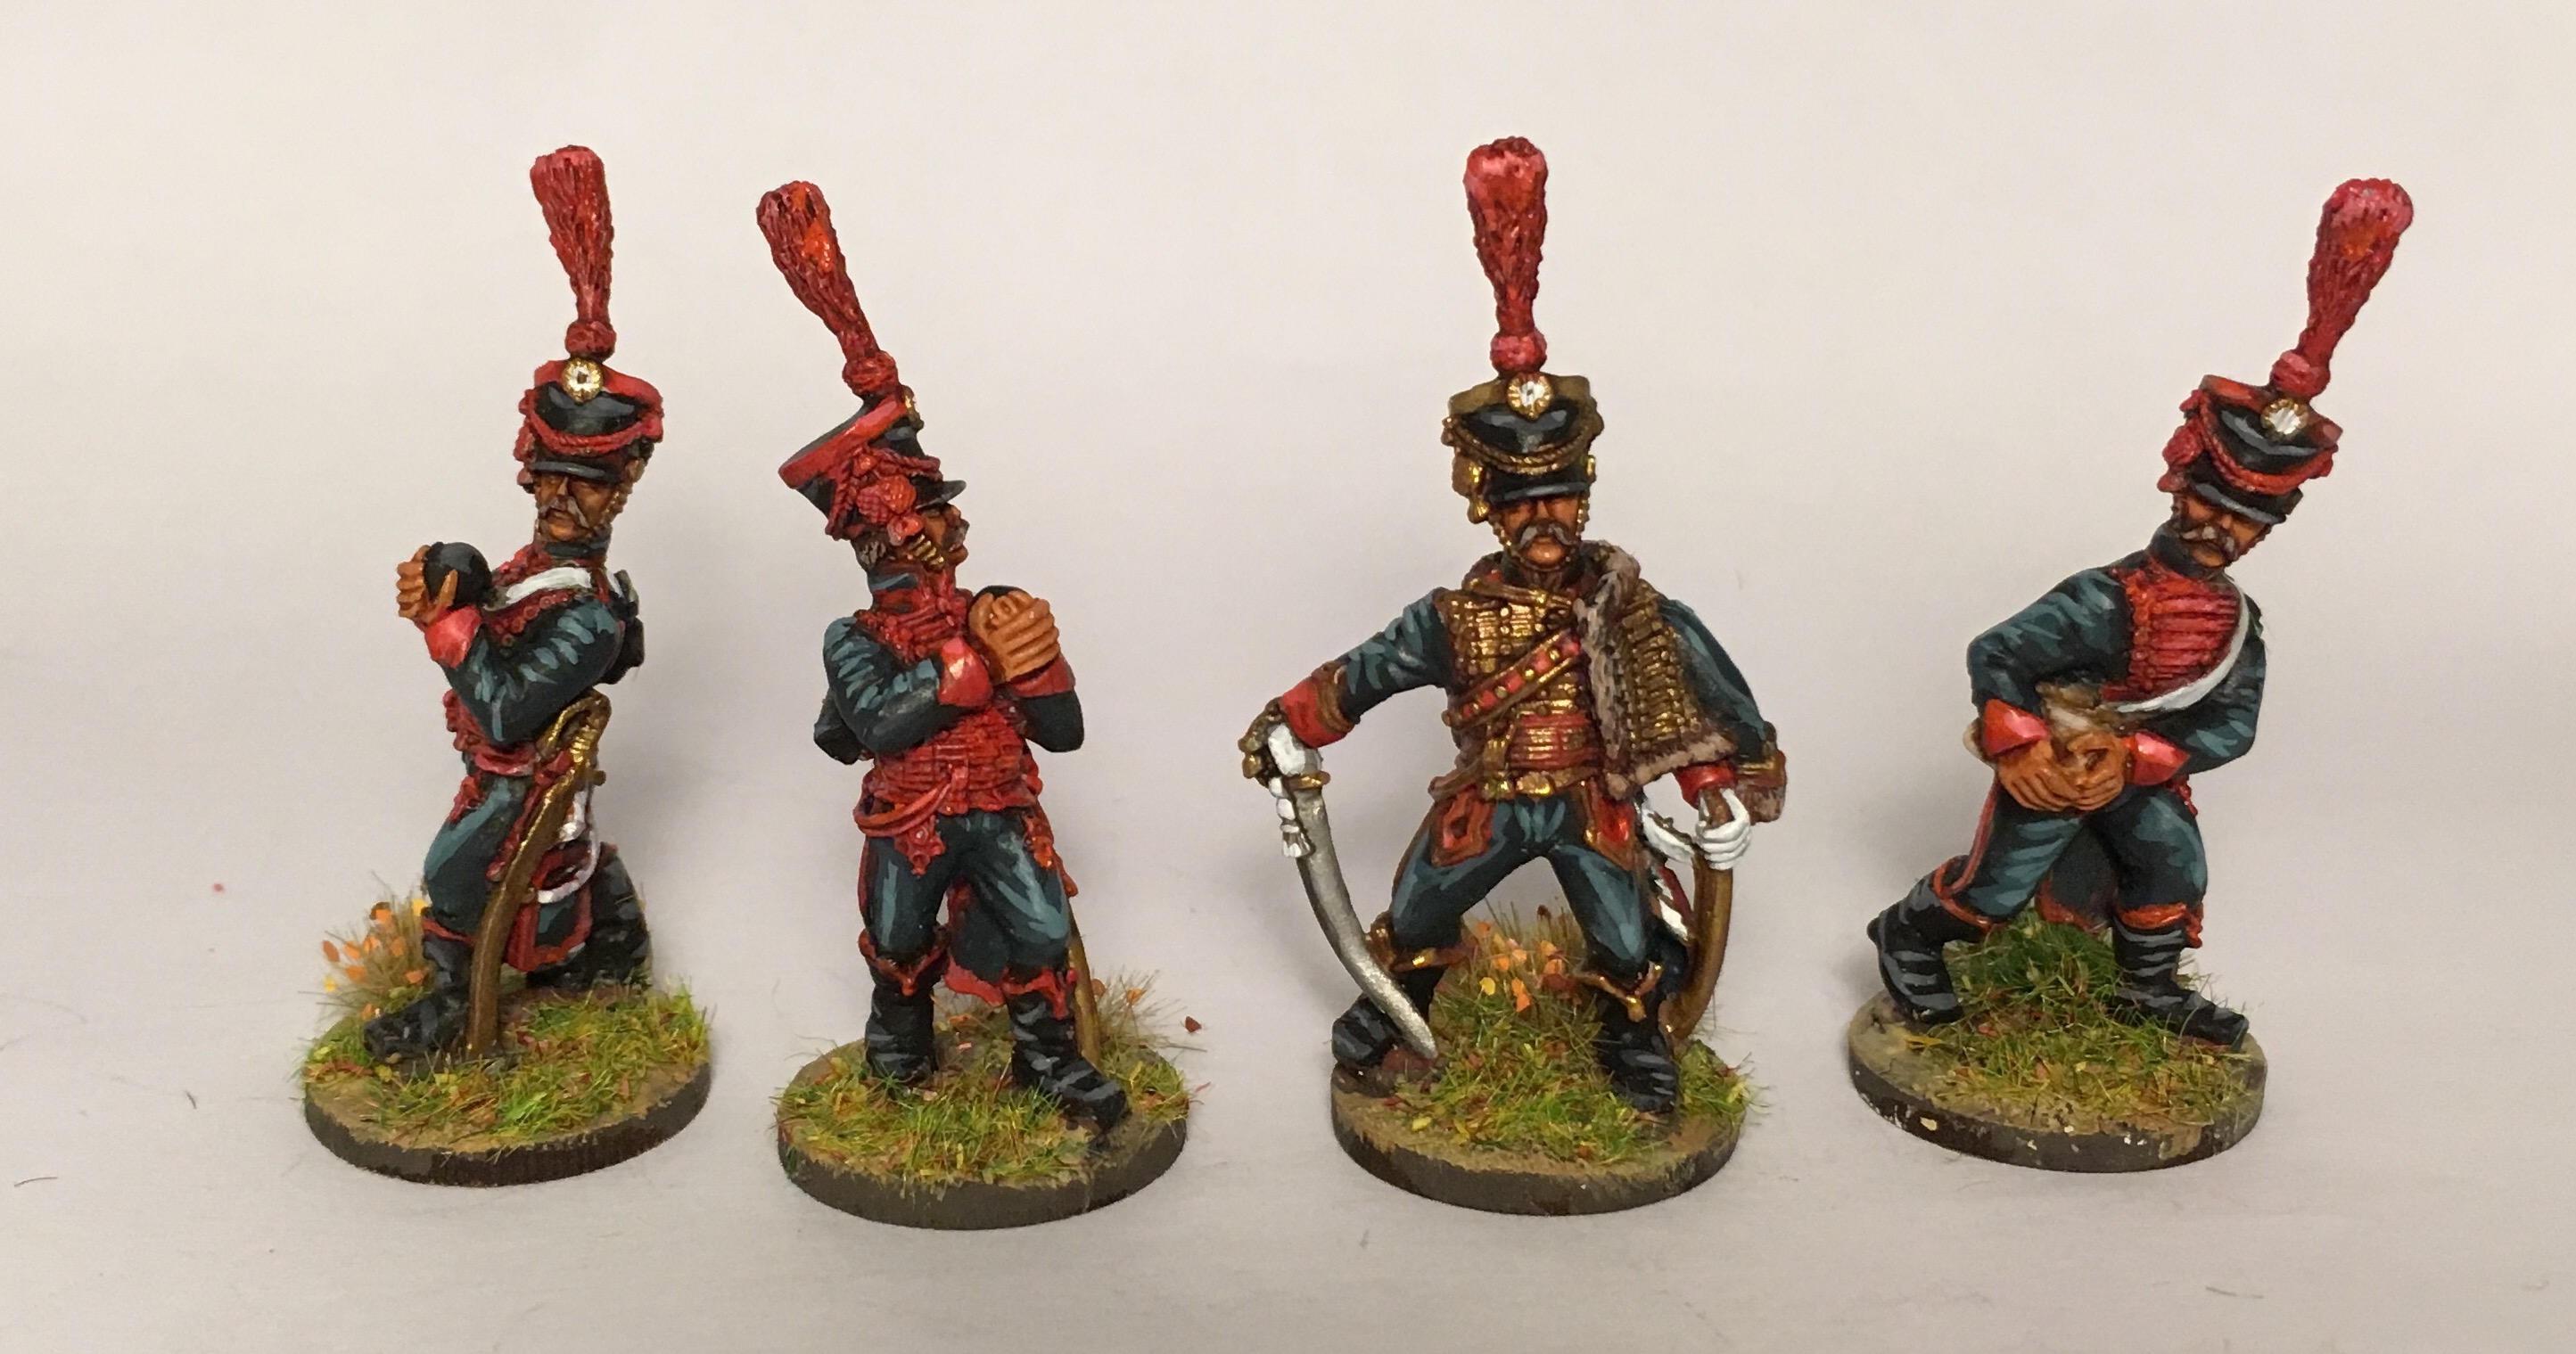 Front Rank Horse Artillery crew. The officer lugs around about as much metal as the cannon ball carriers. To make things more complicated, I also got two sets of Warlord Games 6-pounders with Line Artillery crew in the second hand lot I recently picked up. One set was halfways painted already, so I finished it: 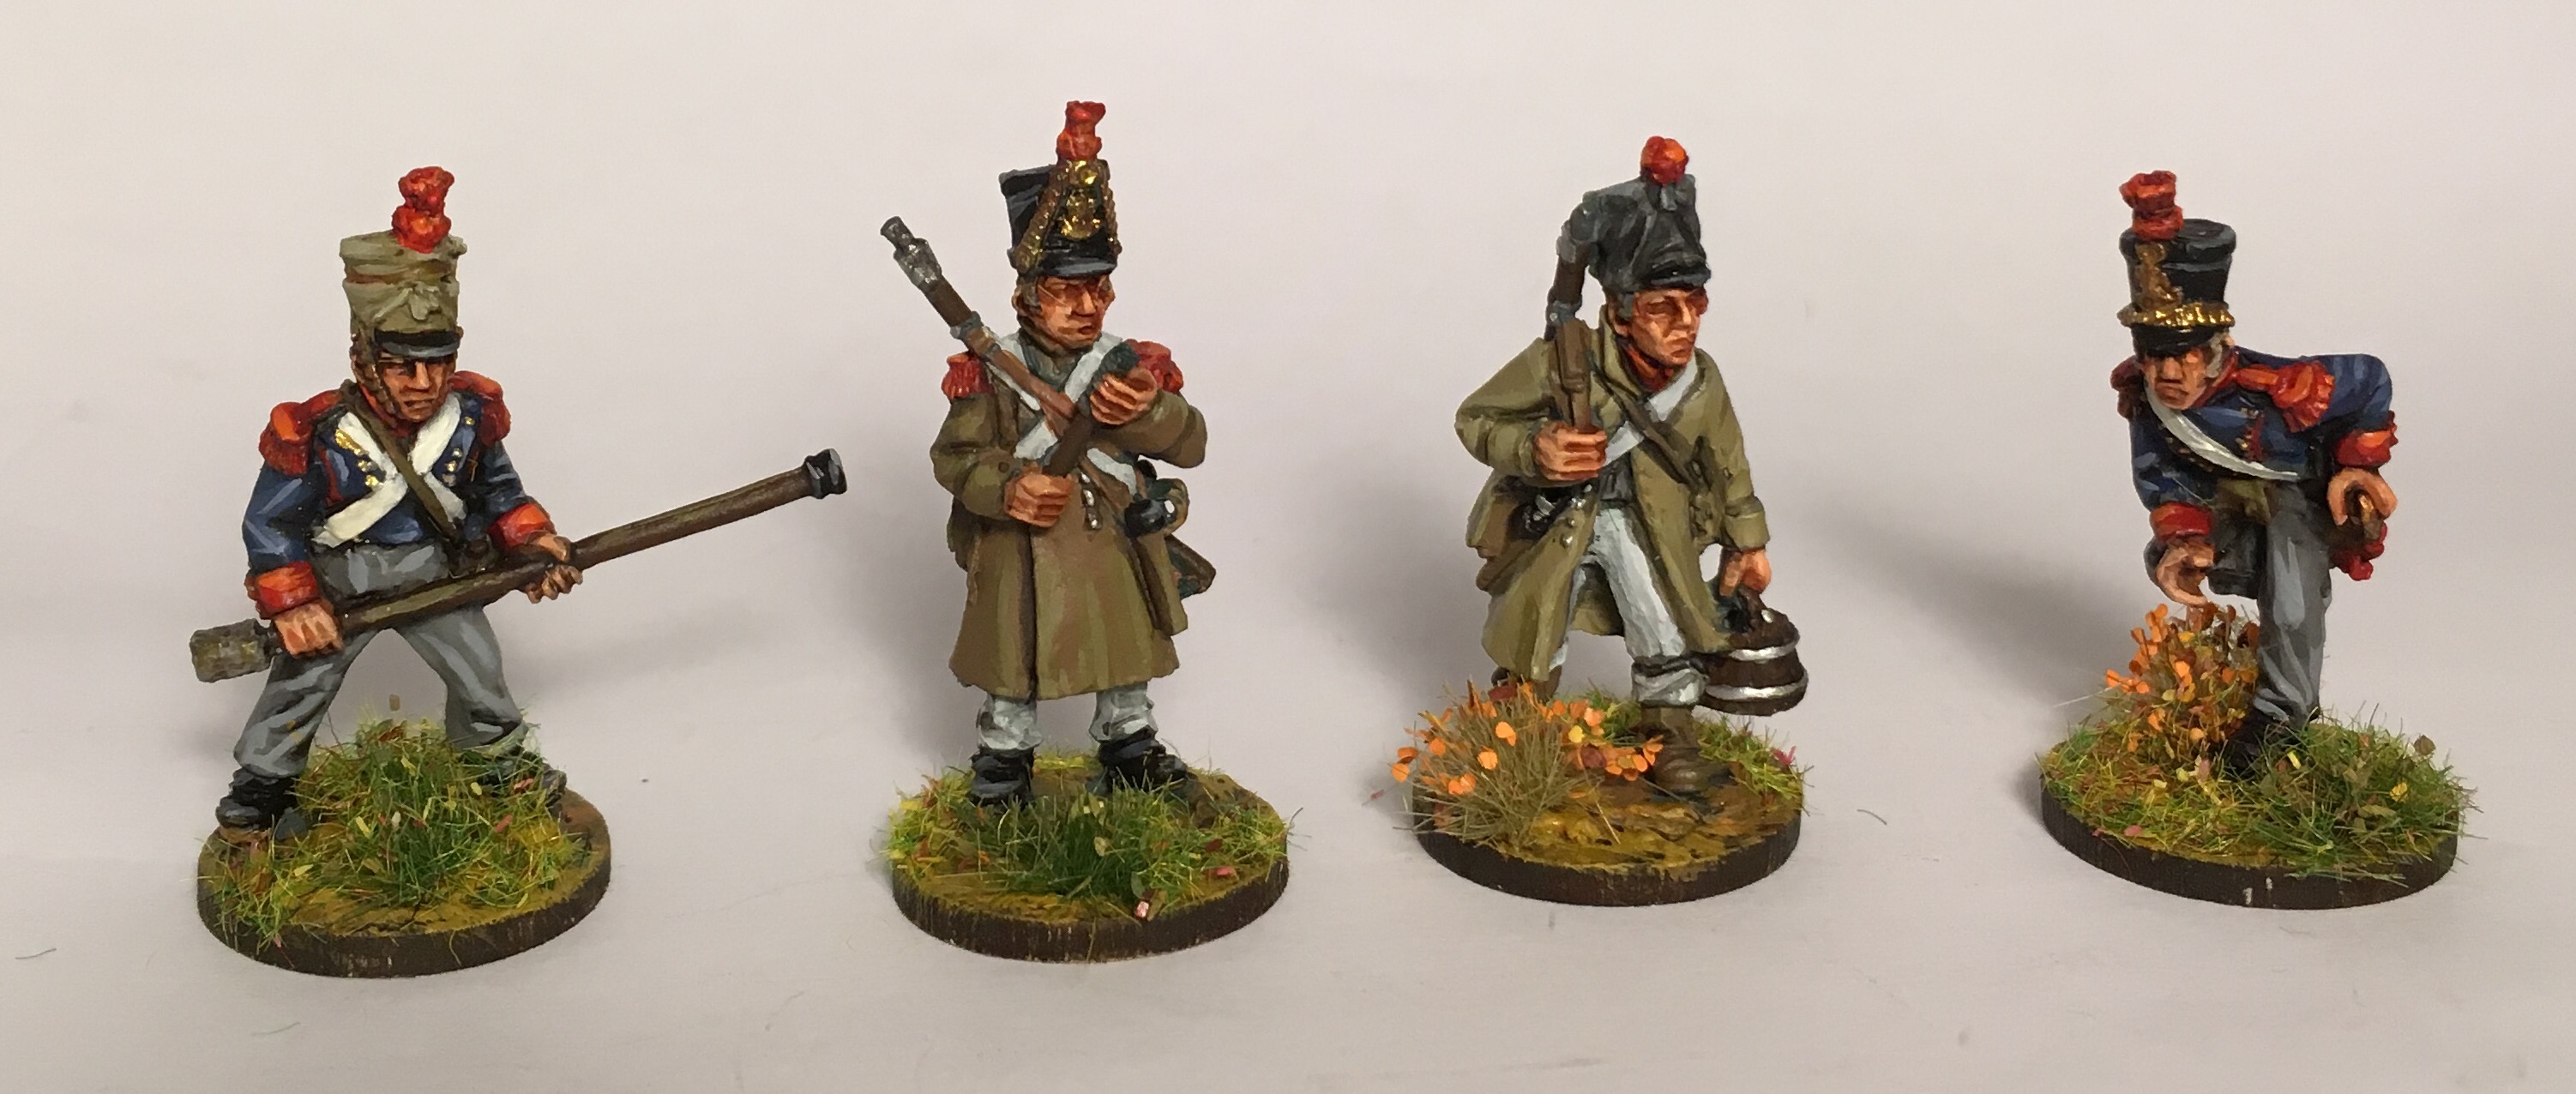 Warlord Games Line Artillery crew The Road ForwardsSo now I'm in a convoluted mess resembling the hotdog-to-bread ratio dilemma. There's pretty much no way to get an exact number of crew to guns, so I'll probably pick up some more Line crew from Perry to get enough to field two guns and then some, and then either get even more Front Rank Horse Artillery crew or find another source of campaign uniform Horse Artillery crew. The alternative would be to get even more guns from Perry, as they don't sell separate Horse Artillery crew, and then we're starting to get ridiculous numbers of guns for a skirmish project. Anyway, here they are as it stands now, with somewhat uneven manpower: Setting the SceneA couple of months ago, the club got together and made big order from Great Escape Games; it was so big, we broke their shipping calculator. The order was placed through email, but once it arrived we noticed one "problem". It contained a box of British Line Infantry instead of French (Great Escape Games quickly shipped the missing box of crapauds). Jonas has a theory that something like this happened: At some time, at the Great Escape Games office:A: "Boss. Boss! Look at this order that just came in."  Jonas already had a box of Victrix Highlander Centre Companies lying around somewhere waiting for a gentleman to lead them to victory against the Corsican Tyrant. And Jonas has been hinting in the blog for ages that SOMEONE should start playing the British. This just won't do, someone must do something! Enter Zach! After my first game of Sharp Practice 2 in which I used Shirty's brave Russians and just barely failed to stop the cowardly Monsewers from escaping with their garlic stinking sausages I was hooked. As a consolation prize I got to take both boxes of British Infantry with me home. Face Off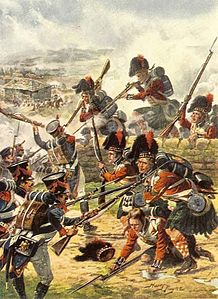 Fighting Ladies Fighting Ladies Now I had a base on which to build the army that will defeat Boney. Because I, like Prometheus, can be a bit rash, I immediately built an officer and all 8 men flank company men in Waterloo uniform. Next I did some research, first by buying the first Sharpe's books, second buying the rules for Sharp Practice. After confirming with Jonas that his froggies could be used for both the Peninsular War or 100 Days I decided to go for a Peninsular War force. The very same day I stumbled upon a whole bunch of Sharpe's DVDs at a closeout sale. Surely this must be fate. Next came choosing which regiments to field my little mens as. For the Highlanders the choice was easy. Since I've only been painting miniatures for about 6 months, and don't consider myself the most skilled painter, I went with the 42nd Regiment of Foot, also known as the Black Watch, simply because their tartan had what looked like the easiest pattern. Finding a regiment for the regular line infantry wasn't as easy. Wanting something a bit special I first found the 56th (West Essex) Regiment of Foot, called the Pompadours, with purple facings. But they never served on the peninsula. Next there was the 35th (Royal Sussex) Regiment of Foot, the Orange Lilies, that were so hardcore protestant that King William III gave them special permission to wear orange facings as a mark of royal favour and a sign of their piety. Sadly, these badass disciples of Martin Luther never set foot in the peninsula either. 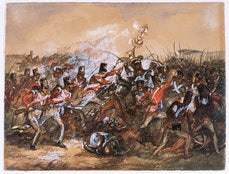 Well if I can't have God's own boys, I guess I'll have to settle for the Devil's Own. The 88th (Connaught Rangers) Regiment of Foot was an Irish regiment with yellow facings, that were known as the most troublesome and fearless rogues of the whole British army. And at Salamanca they captured an old Moorish standard, a 'Jingling Johnny', which sound like an interesting conversion for the future. I also had four riflemen, they will be of the 95th Rifles. No need to research any alternatives, Sharpe's literary exploits decided for me. A Starting Force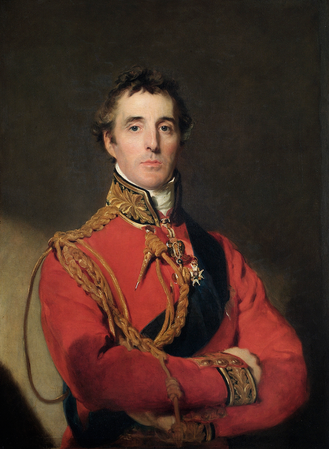 The first Duke of Wellington The first Duke of Wellington The box of Victrix Highlanders contains 60 men and out of these you get 4 of both Officer, Drummer, Sergeant, Colour bearer, and Piper. This leaves a bayonet strength of 40, exactly 5 groups of 8. Not quite an even number, this won't allow me to make a symmetrical Attack Column. Not that I ever would, but still it's a cause for annoyance. Luckily Napoleonics is very much about style and fancy stuff, and we have already decided as a club to feature a lot more musicians, Colours, sappeurs, etc. than the rules of Sharpe Practice recommend. Filling out groups with extra musicians (a force can field only one in Sharp Practice) and some Colours guarded by Sergeants I should be able to field 6 full groups of Highlanders eventually. Perry's box of Line Infantry comes with 40 men, out of which I have already "wasted" the officer and 8 flank company men. The flank company men can easily be salvaged with a simple head swap, and to get some officers I converted the Ensigns carrying the colours into proper officers. The box also comes with four Riflemen, a drummer boy and a Sergeant, leaving me with a current bayonet strength of 24. Since skirmishers fight in groups of 6 in Sharp Practice I made an order from Perry for one more pair of plastic Riflemen, their metal Riflemen, and a pack of command figures to lead them all. This adds up to 2 groups of 6 Riflemen. This should be able to keep me busy for quite some time, but I know that my adventures in the Peninsular war won't feel complete without also experiencing the little war. Shopping around for Guerilleros I settled for some from Front Rank, combined with Perry's Carlist Fighting Clergy, with the vision of homebrewing some rules for an armed band wielding pistols, swords, blunderbusses. As a bonus the armed priests and monks can also be used as Holy men, with or without Relics. I've gotten an unhealthy liking for the vendors where shipping is calculated as % of the order, because it's like: slightly more expensive duders and FREE SHIPPING!  Order of BattleFrom all the forces available for me, Duke W(Z)ellington, to fight the crapauds getting it all ready for a first battle won't be necessary. As an initial force to bring to first true battle (and to finish before I can buy more stuff), I settled for:
4 grps of Highlanders, w/ Officer 3 grps of Line Infantry, w/ Officer 2 grps of Riflemen, w/ Officer 1 grp of Guerilla Skirmishers See you next time, with my force all painted, based, and ready for battle. |
"Glory is fleeting,
|


 RSS Feed
