|
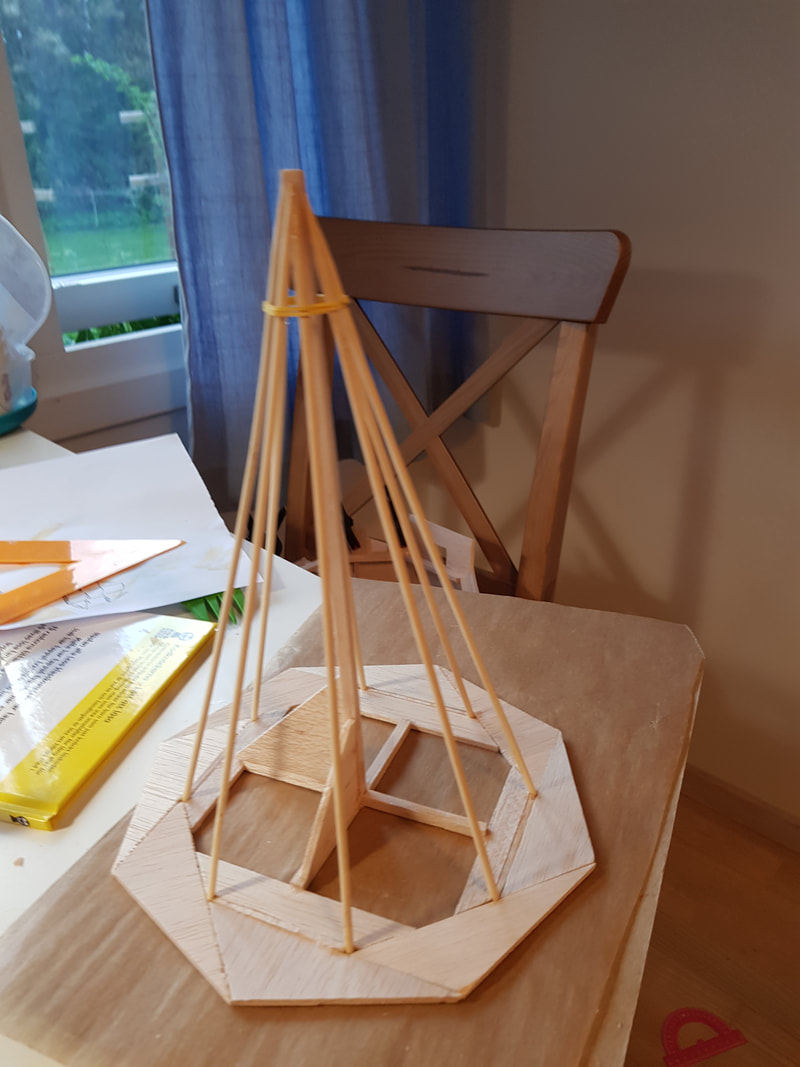
By Zache Ever wondered how to paint your cattle for period accuracy in Russia? Then I might be able to help out. 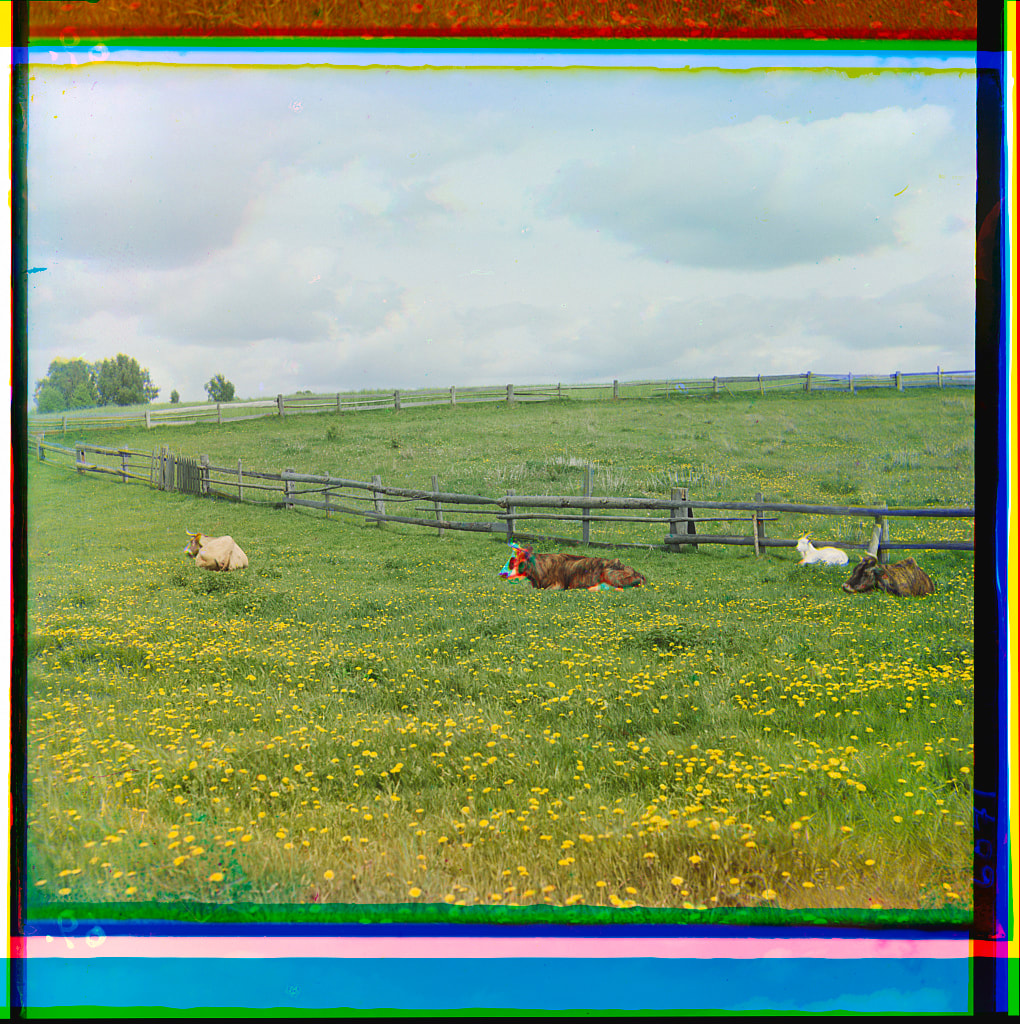 Taken between 1909 & 1915, so probably accurate for both Napoleonics and WW2 Taken between 1909 & 1915, so probably accurate for both Napoleonics and WW2 Sergey Prokudin-Gorsky, a Russian photographer who was an early pioneer in colour photography, spent 1909-1915 traveling around the Russian Empire taking photos. These are available in the Library of Congress! Here is the whole collection. Why not check out the photos from Borodino? Jonas & Shirty used them for inspiration when basing their armies. Just look at these beautiful pictures: And then there is this church! Look at it, look at this beautiful church. It almost looks like a model. Someone needs to build it, and I'm that someone. What a perfect model for my first ever balsa wood project. So I started building it! I started with building a floor and figuring out how to make octagons. One thing I eventually figured out was that the inside angle of an octagon 135°, is 90° + 45°. So most of my construction was made by fitting a piece cut to 45° on a straight edge. The floor was a total waste, but useful experimentation. Dimensions
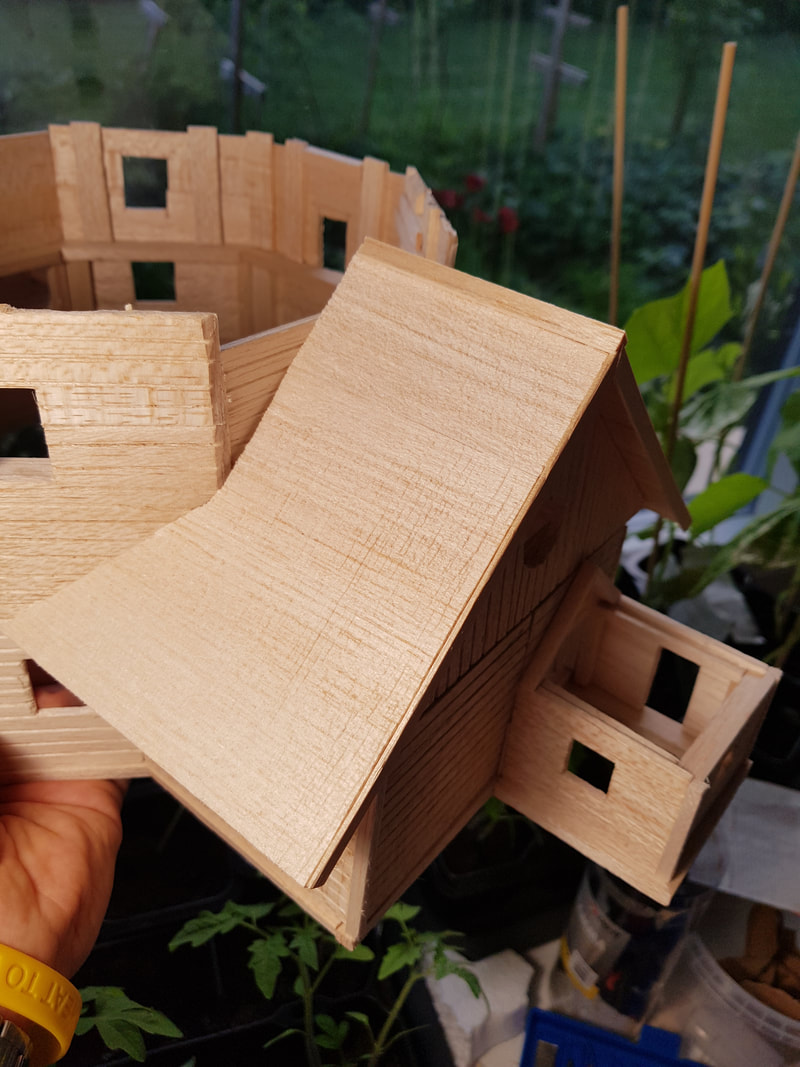
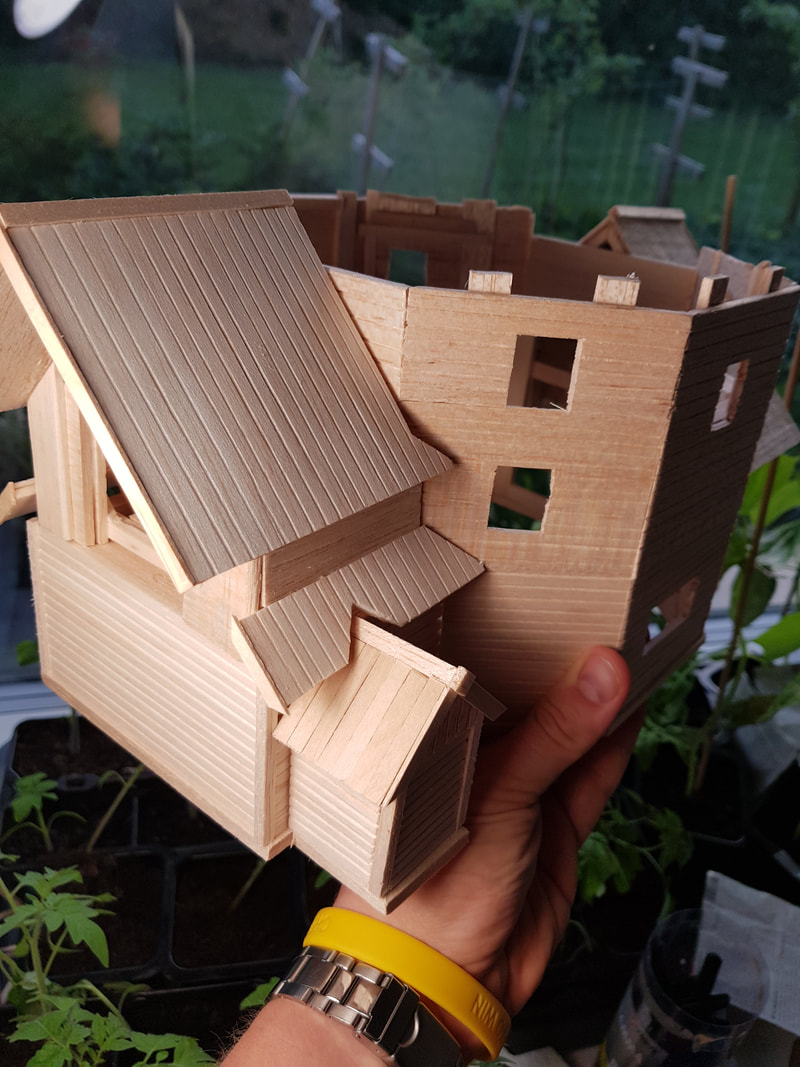
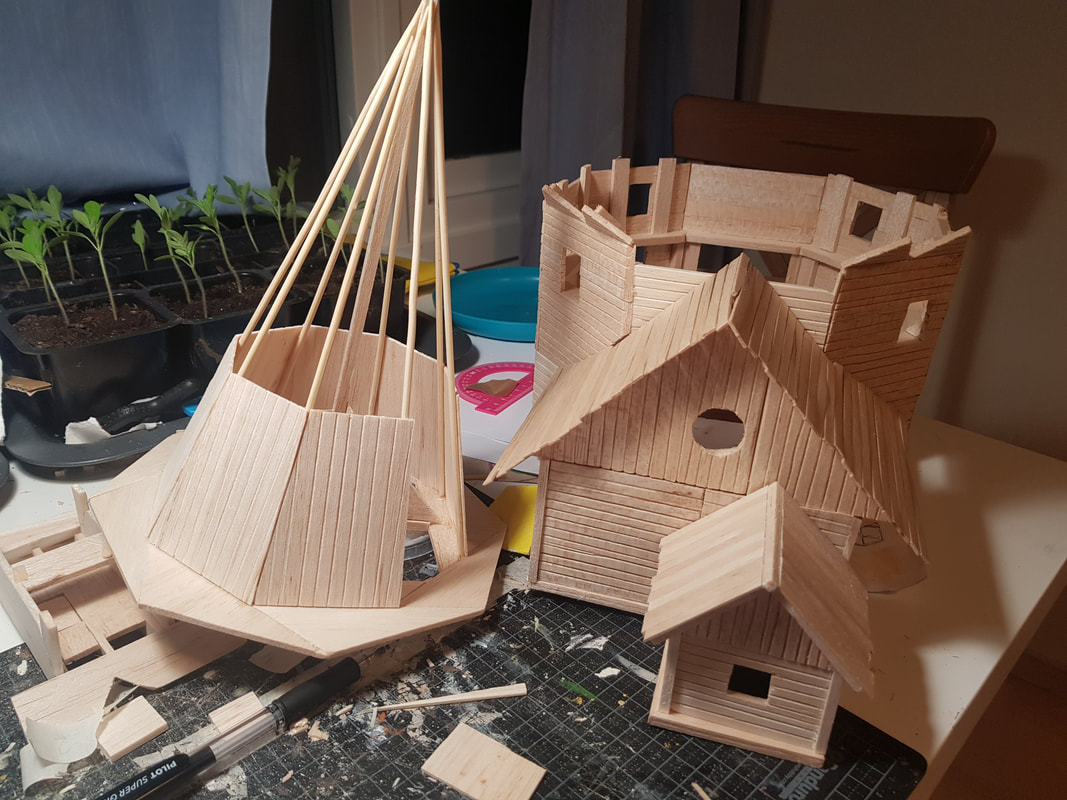
Since I was a balsa novice when starting out I didn't know quite how to start. But I decided to begin with a framework for the church. Once it was done I started dressing it with panels inscribed with a plank pattern. Do make sure to inscribe with the grain, not across it. The panels are quite thick, 3mm, which I think is actually a bit excessive. It has the benefit of making the church quite sturdy and allowing me to inscribe the plank pattern quite deeply (which is nice because when painting the wood can swell and fill in the inscribed grooves). But it does make for more tedious cutting. I've only found pictures of one side of the church, but going from my understanding of church architecture I decided to add a small vestry on the side of the chancel so the priest has his own door. ROOF ROOF! I'M A DOG
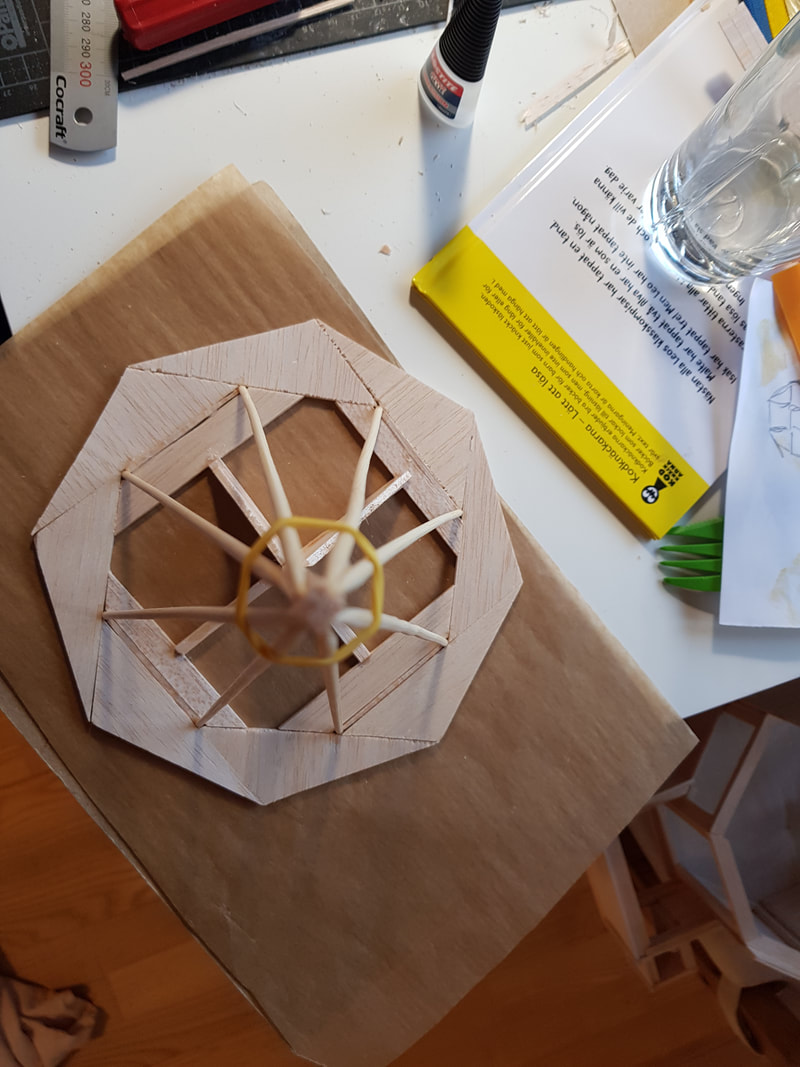
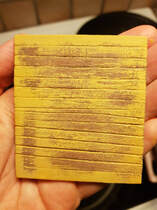
SpireI'm quite proud of how I constructed the spire, it was much easier than expected. I had some of cut pieces left over from my initial experiments making an octagon, these actually fit together to make an octagonal frame. I fitted some internal support pieces and mounted a central rod with supports to keep it fixed in. Then using barbeque skewers placed on in the frame leaned against the central rod I got roof beams. The beams were then covered with thin pieces of balsa, that had their lower edges cut into a 'roundish' pattern. The spire also got a skirt made from pieces like the ones covering the spire. Painting intermissionOuf, that's a lot of construction work. At this point I was getting bored with the project, feeling like my initial motivation was running out with repetitive work. To stimulate myself I decided to paint some of my available parts. Doing this worked great since some parts got finished, allowing me to see the light at the end of the tunnel. The small ice cream stick roof was stained with washes of acrylic paint, it's neighbour was stained with a homemade stain made from vinegar and steel wool as an experiment which I think turned out fine. The red roofs look almost purple I painted them with Maimeri Crimson Alizarin which is a red with a slight purple tint. To make it a bit more purple and add more variation and vibrancy I used purple, pink, and red pastel chalks to give it a sludge wash.
The spire was painted with Maimeri Turqouise Green and given a sludge wash made from turqouise, light green, and light blue pastel chalks. In the end the spire ended up getting another coat of Turqoise Green covering up most of the wash. Tower
More paintingFinally I was done with the main construction. Before I started painting all the walls I made a test piece after researching some chipping techniques. I used this piece to try out different scrubbing methods, figuring out that once again it was important to go with the grain of the wood.
Onion dome & CrossIt's not a proper Orthodox/Russian church if it doesn't have an onion dome, it's just not optional. But how to construct it? At first I started looking for curtain rod knobs, but couldn't find any in a proper shape or at a proper price. Then I saw a flag pole! I bought quickly found the cheapest flag available and drilled a hole in the top of the knob where I fitted a nail. On the nail I put an orthodox cross made from balsa wood. First Jonas made an attempt of airbrushing it with Vallejo Verdigris glaze but it just would not cooperate, so I took it home and airbrushed it with diluted Maimeri Turqouise Green, the same color used for the roof. WindowsThey say that our eyes are the window to our soul, well I windows are the window into a buildings soul. Without proper windows you just get gaping maws of evil trying to devour your soul. For some spice of life I took an executive decision and added a small round window on the gable end of long house. And I added a larger window in the gable end of the chancel. I'd really like to add something in this window to give the impression of stained glass but haven't found the proper thing yet. These windows where trimmed by cutting carefully cutting a 1.5mm sheet of balsa wood. Other than the special windows there are 15 regular windows and two double windows on the church all with quite intricate trimmings. Jonas and I cut out the trimmings in pieces from 1.5mm balsa, which we then painted white. We cut a few extra pieces of each and not being to exact with the measurements as I hadn't been when cutting out the holes for the windows. Once the trimming pieces were dry we could glue them in place. The mullions are cut from matchsticks, while I did measure the windows before cutting them those measurements were just a guide line once again since the windows were a bit un-uniform they were pre painted and also glued together. When all the mullions were dry I randomly picked one for a window and trimmed of any excess before glueing. ConclusionsWhew! This was quite a project, but so is any project in the spirit of Kriget Kommer. If it's worth doing, it's worth doing to excess! I learned a lot from this build, and had quite a lot of fun. It took a long time to complete, I started in March 2018 and wasn't done until the end of July and I did work on this project for at least a few hours each week. The church is H U G E and not really suitable as terrain for gaming given its size but I must say that I'm proud of the end result and I'm proud of finishing this project. And it has seen action as the Gleboff monastery in our 1812 Russia campaign.
1 Comment
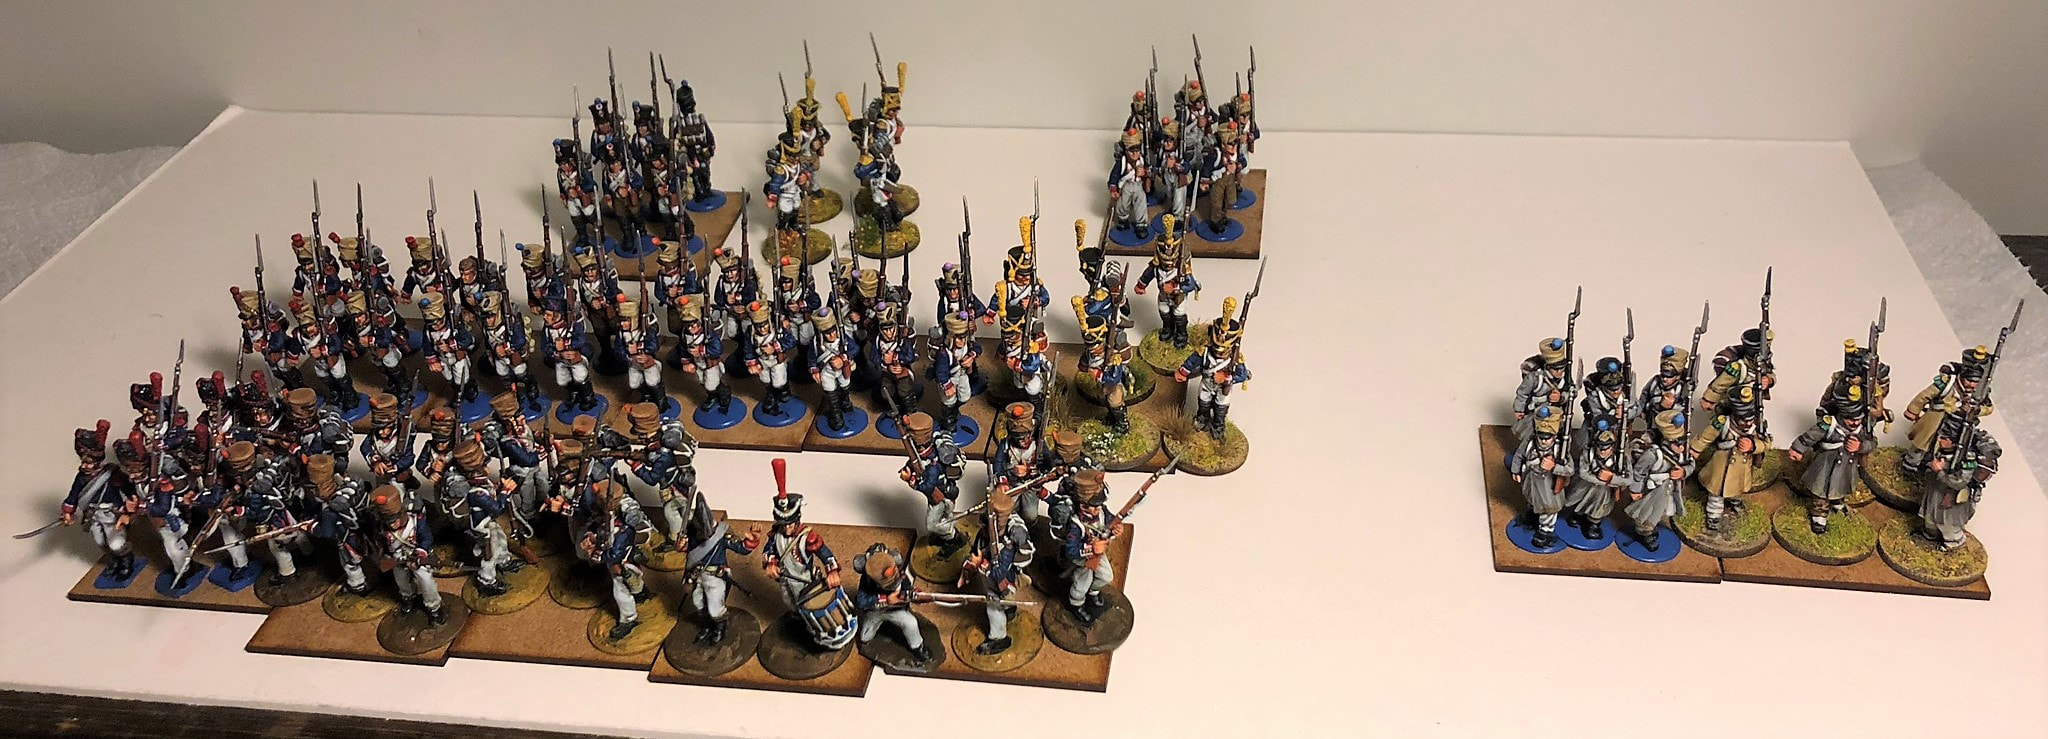
By Jonas  Why Thinking is BadWith a painting plan in place, it's time to deal with the part that is hard to avoid in Napoleonics: painting a metric ton of infantry. This is a perfect opportunity to dig into that plastic and metal mountain most of us have, as rank-and-file is generally the fastest to paint. In my case I had quite a few sprues of Warlord's plastic French kits, but also a variety of Victrix plastics as well as some other odds and end. For the first step I'm looking at around 5-6 battalions, which means around 200 minis. Most of these will be from my unpainted wardrobe pile of shame, which will please my wife immensely. My opinion on army painting is that if you want to paint in bulk and get an army done, you should do it in an organized fashion. My 13-year-old self could not paint armies for shit, because I had no idea about how to do that. I would paint a single orc on a war boar to a descent standard, then base-coat some spiders, and the next thing I knew I was building some space elfs or something. Needless to say, nothing got done. Exactly what you decide your method to be is of secondary importance - what matters is that you get into a rhythm, so that you end up painting when you sit down to paint. The death of bulk painting is thinking. If you're thinking, you're not painting. If you're not painting, you're not getting your army done. So your method is there to ensure that you know what you've done, what you're currently doing, and what your next step will be. My Current MethodSince I'm basing my infantry in groups of six, I divide what I plan to paint accordingly. So a batch will be either 12, 18, 24 men etc. It's tempting to go with a really big batch, and if you can pull it off you're great. Personally, I find 18 or 24 man batches works best for me. Step 1: I prime using a spray primer. I've experimented with both blue primers, brown, black and more, and I've come to term with that all of them works for me, except pure white. Get that thing away from me. Step 2: Once primed, I keep to a pretty basic painting method. I will first block in all colours with a basic layer. This layer is often a tad darker than what I want them to end up as - so red parts gets a dark red, yellow parts might get a mustardy yellow, straps that will be white gets a deck tan paint, etc. I take one colour at a time, and coat everything on the model that will end up with it. Step 3: Washes are great for bulk painting. I use three washes - one flesh tone for flesh paints, one brown for yellows, brass and browns, and a black for most of the rest including whites, reds, metals and blues. When painting French, you're basically painting those colours. I slab it on quite freely. Step 4: I basically repeat step 2, recoating the base colour on top of the washes. Step 5: I highlight some parts, but not all. The parts that tends to give the most effect is highlighting flesh coloured, black, red, blue and white parts. The idea is to not give lavish details for everything, as these are hundreds of dudes who will walk in big blocks, so spending too much time on them will hinder painting progress. So I guess leave them as basic as your painter's pride allows you to? Now, this is not the best way to paint. It will not make the nicest miniatures out there. It's not even the speediest way to paint! The important thing is this: it's a painting method that I'm very comfortable with, as it's my default way to paint. So I don't need to think a lot when doing it - I can just sit down, see that I haven't painted white yet, and get to work. So if you're not used to bulk painting and want to try it out, that's my advice. Paint in a way that you're used to, maybe removing a few steps if you're usually a very detail-oriented painter. The greatest improvement in speed will come from painting many miniatures at once, and also thinking about and planning your painting less. With that said, let's check some progress: 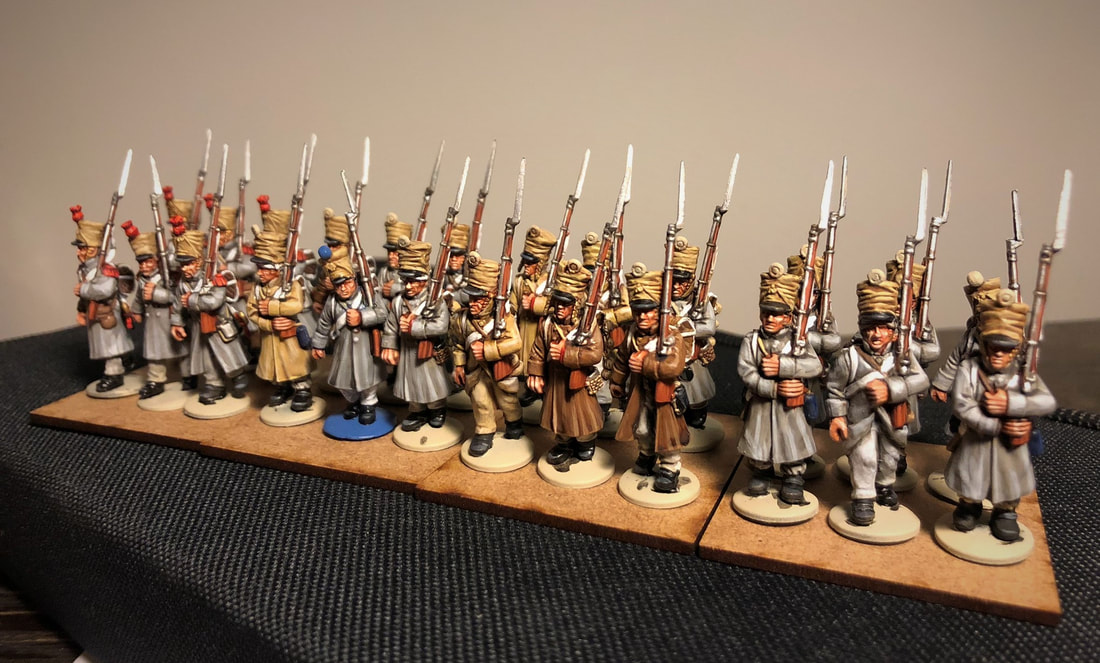 First out are four companies of Warlord's plastic "Late French". These are the epitome of speed painting, as there's almost no colour to them at all beyond beige and gray. 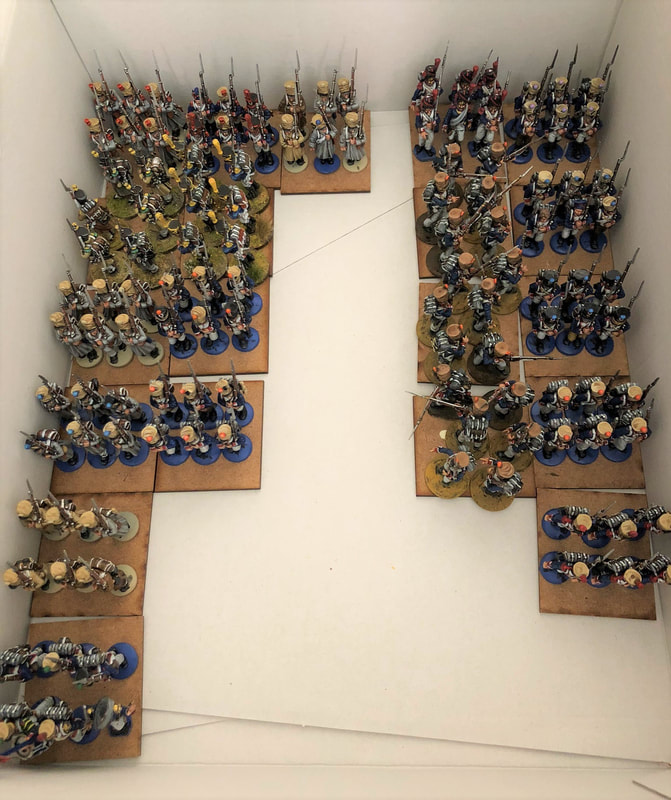 Keeping track of your progress can be a great motivational tool. I put the finished bases, minis attached with blue-tac, in a box divided in battalions. Six bases deep means they are finished. This way it's easy to see what's missing, which is mostly voltigeurs and command stands. 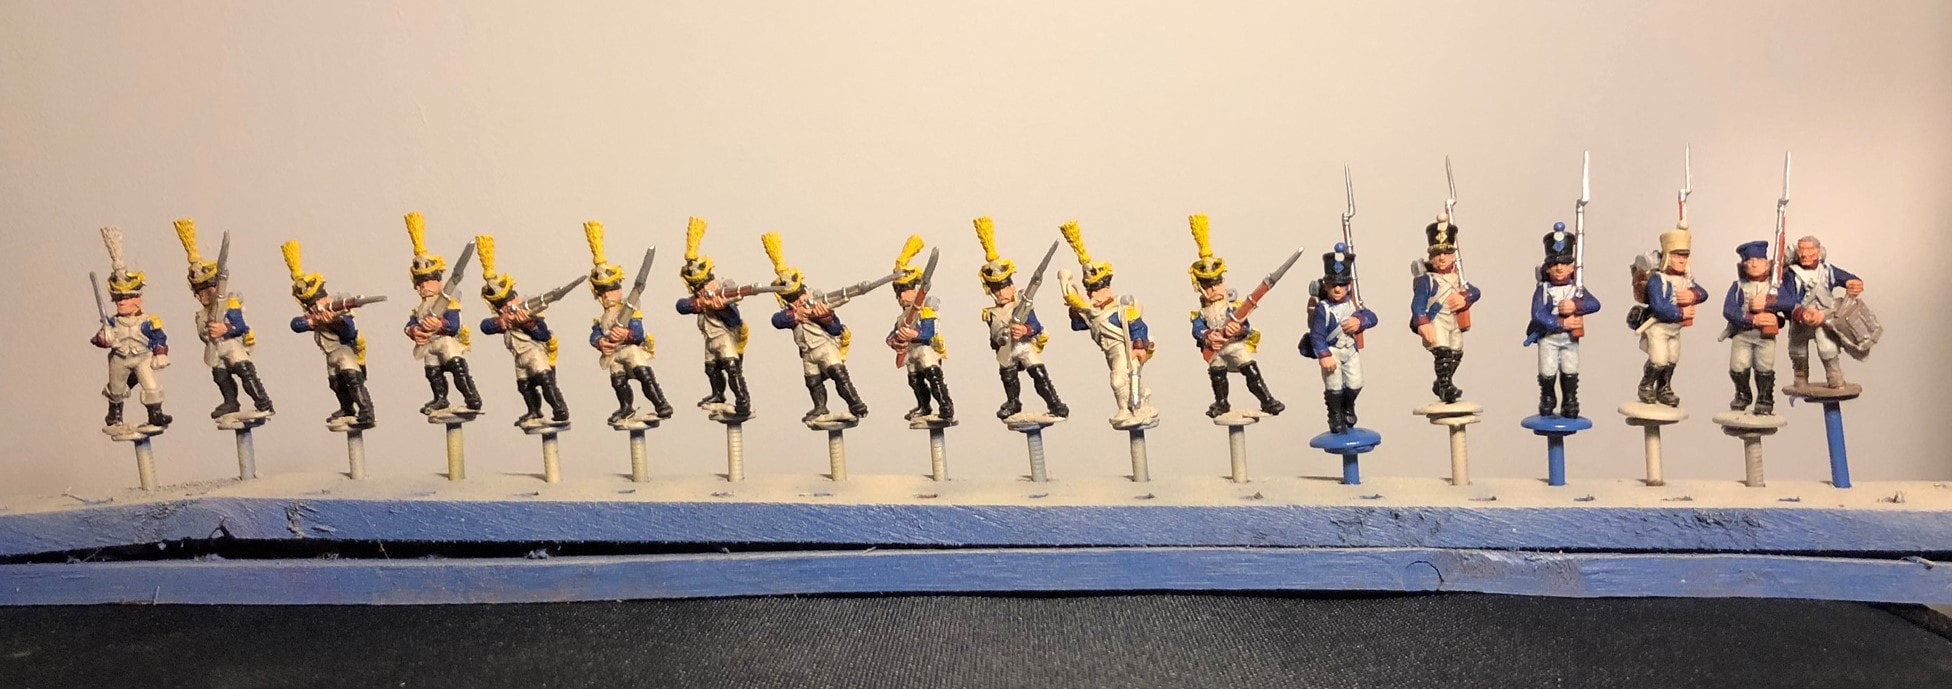 My next batch will deal with my voltigeur deficiency. Two companies, all from Foundry, with a lovely officer and a musician. It's hard to tell from this picture, but they are lovely sculpts and I'll show them more properly when done. The six remaining troops are fusiliers, some of my last remaining non-greatcoat Warlord. As you can see, these are in the step where I'm blocking in the colours, with these being quite close to be ready for washes. Bonus Painting Challenge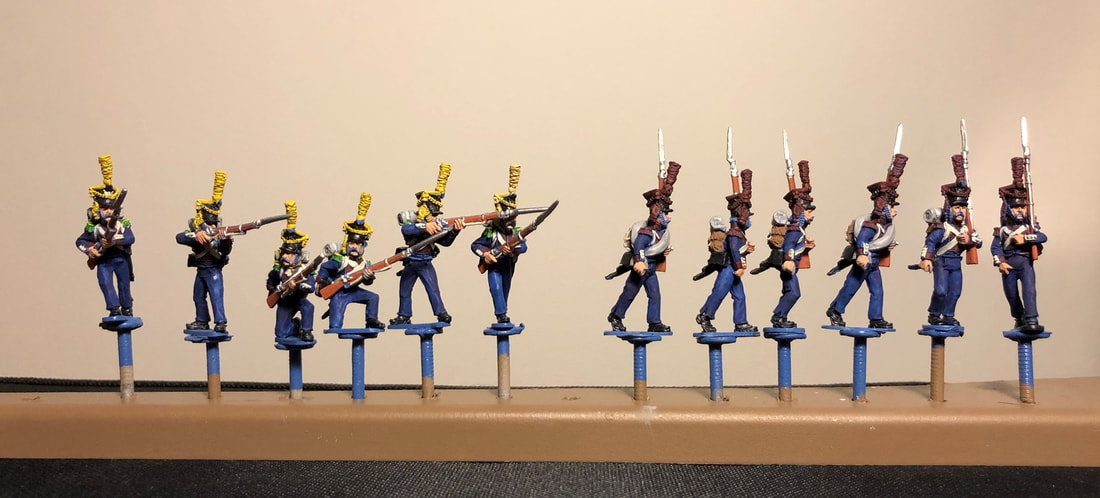 The lovely people over at Murawski Miniatures put up a painting challenge on their facebook page, and I'm a sucker for painting challenges. It's simply to finish some of their minis during the month of September. Now, I've had these Polish Duchy of Warsaw troops in my lead pile for a long time. They're by the excellent sculptor Paul Hicks, a big favourite of my club. It's a pity not to paint them up, and sometimes you need to treat yourself in between the line infantry. I'll try to do these two companies of voltigeurs and grenadiers before the month is ended, let's see how I do! It's such a small number of minis that it shouldn't keep progress back, and maybe I'll end up with a Polish battalion to bulk out the army. I'd love to see if you're also partaking in this Murawski challenge, or if you're busy bulk painting an army yourself!
Cheers, Jonas By Jonas 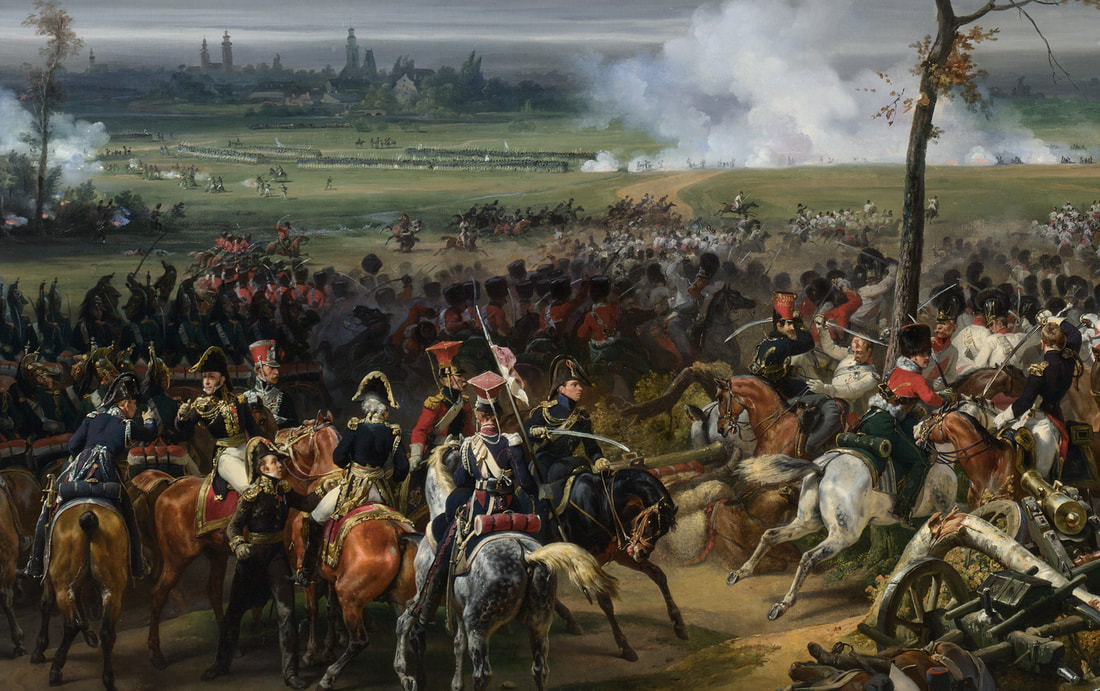 If you want to refight the Battle of Hanau in 1813, a few skirmishers won't do In the previous entry in this series, I looked into what it would mean to expand from a skirmish Napoleonics army into an army suitable for fighting real battles. Now it's time to go from thought into action, as well as figuring out what this requires in practical terms. Frenchmen Roll Call!Not starting from scratch should give me an advantage. I've already painted Napoleonic French on and off for a few years. But how will that work translate into a useful foundation for a "big boy" Napoleonic army? It's time for a  I went to our gaming club and took out my French trays. Let's start with the important stuff: Death on Hooves - Cavalry Check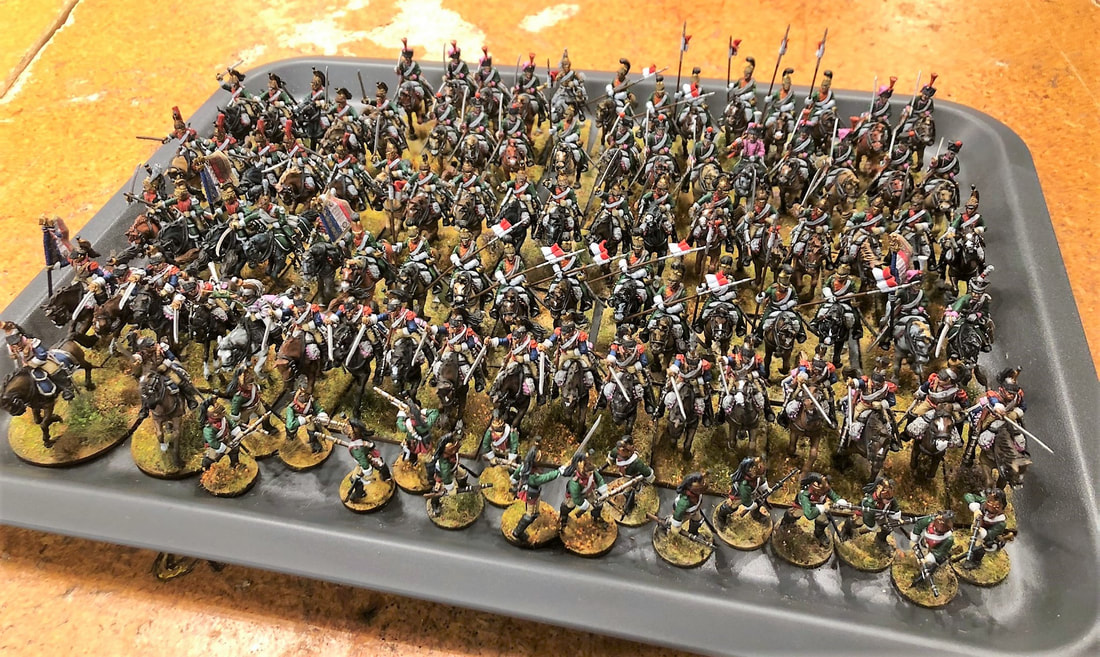 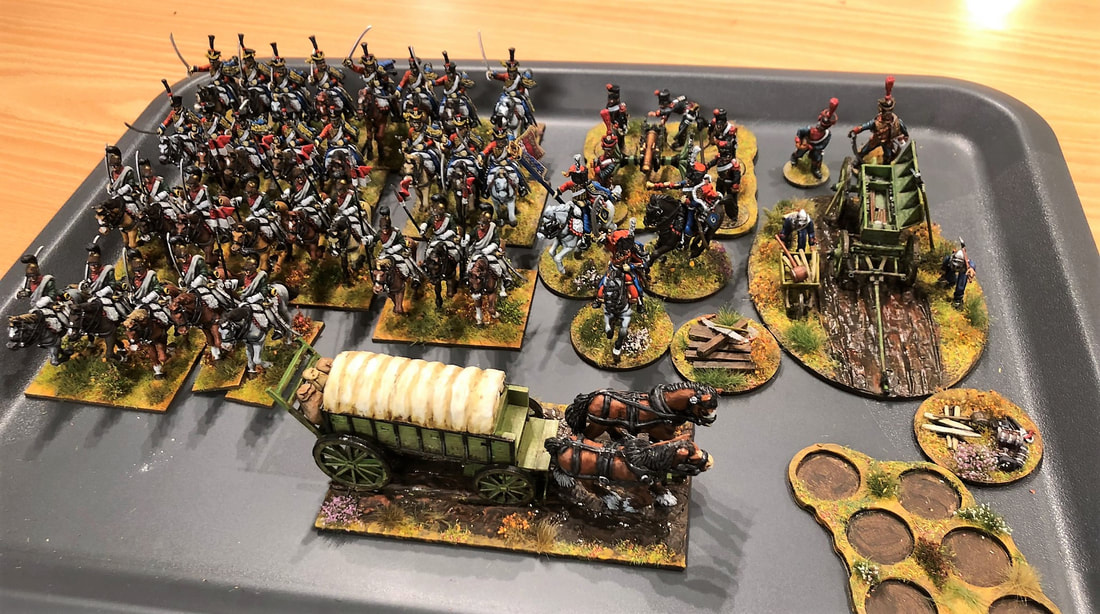 The cavalry situation looks promising! If we're looking at about 12-14 cavalrymen per regiment, which seems a pretty common unit size, I can squeeze out about 7 or 8 regiments. That's at least half a cavalry corps! While I always like the idea of painting more cavalry it's clearly not a top priority for this project. Though, a few more chasseurs-a-cheval and maybe some dragoons and some more cuirassiers would be nice. And... Adding Dignity to a Vulgar Brawl - ArtilleryHere it looks worse. I only have one horse artillery and one foot artillery cannon with crew painted up. Preferrably I'd paint up at least one battery of three cannon for each type. I do have three unpainted cannon, but it would be nice to have some howitzers as well, as those were mixed into the batteries. Footslogging Infantry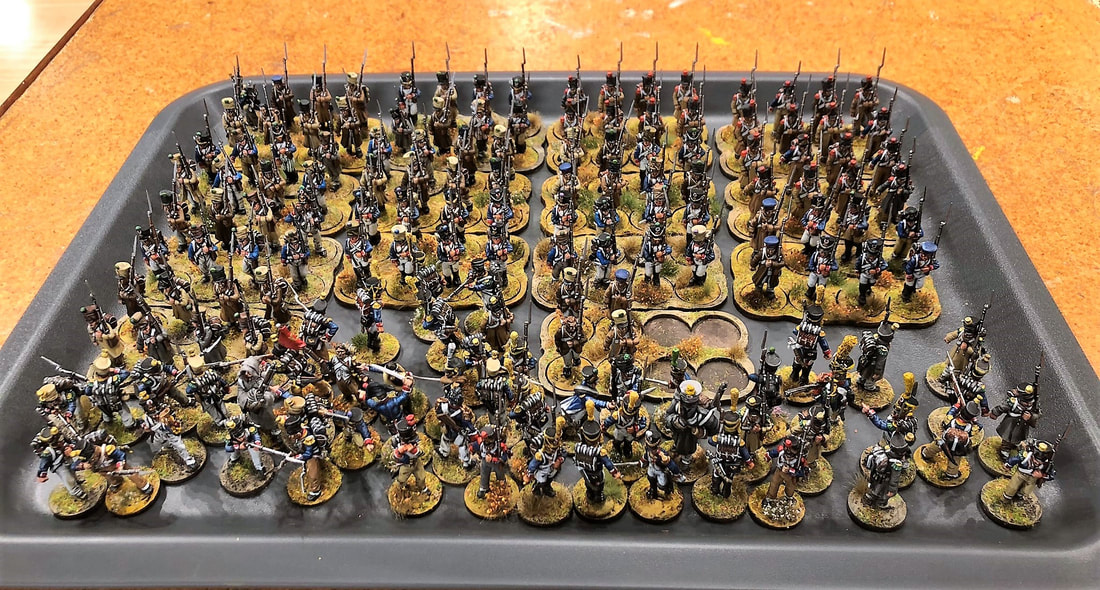 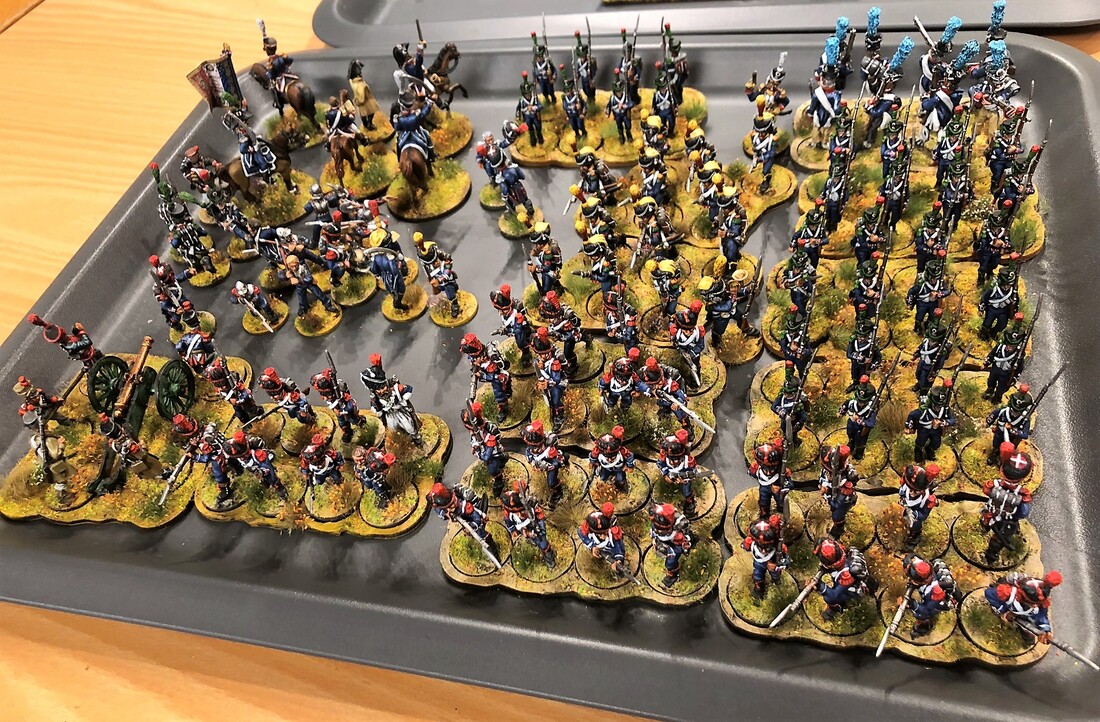 Now it gets messy. I've collected these without aiming for the proper proportions of the various kinds of companies, instead going for useful and interesting options in Sharp Practice. This means I have too many of some options, such as the specialist voltigeur skirmishers which are superb in SP2, and not enough of others, especially the poor old centre companies of fusiliers. If I were to make battalions of 24 figures out of these they would have the same width as the 36 figure battalions that I aim for with my "real" army. Even without even proportions, that means that I could squeeze out about four or five battalions of line infantry and maybe two battalions of light infantry. Once I had inventoried my collection I whisked away most of my voltigeurs in march attack poses that I always thought look strange to use as skirmishers in my SP2 games. They'll be press ganged into my new army, where they'll look far more normal when marching along the rest of the companies. Batch Paint PlanMy initial plan is to be able to field about eight battalions of line infantry and four battalions of light infantry. After that I plan to gradually replace 24 minis battalions with 36 minis battalions, to get a more coherent look. I also plan to paint up a couple of artillery pieces. This bread and butter routine will most likely be mixed up with some special regiments to keep me from getting bored of French infantrymen. I set out with painting plan with five main parts:
 After this Summer's painting, combined with some troops kidnapped from my SP2 army, this is how the Big Boy army is taking shape. You can see the two battalions that are almost ready: one of Victrix line infantry and one of Warlord's "Early French". The greatcoats are starting to form on the right, using leftover Perry's, and two new battalions in the background (more early Warlord as well as Perry's in Bardin uniforms). Painting TacticsWith my painting strategy more or less decided, I needed some tactics for how to reach it. For Napoleonics I've always been a fan of batch painting, and that's how I plan to get this army done. With each base having six miniatures it makes sense to divide the painting into factors of six. That's how I painted the figures above - out of my big pile of random minis, I'd take six guys in greatcoats, or twelve Early Warlord guys with shako covers, and so on. Most of these batches I paint in 18's. I glue them onto nails using wooden glue, and stick the nails into strips of wood that I've drilled holes into: 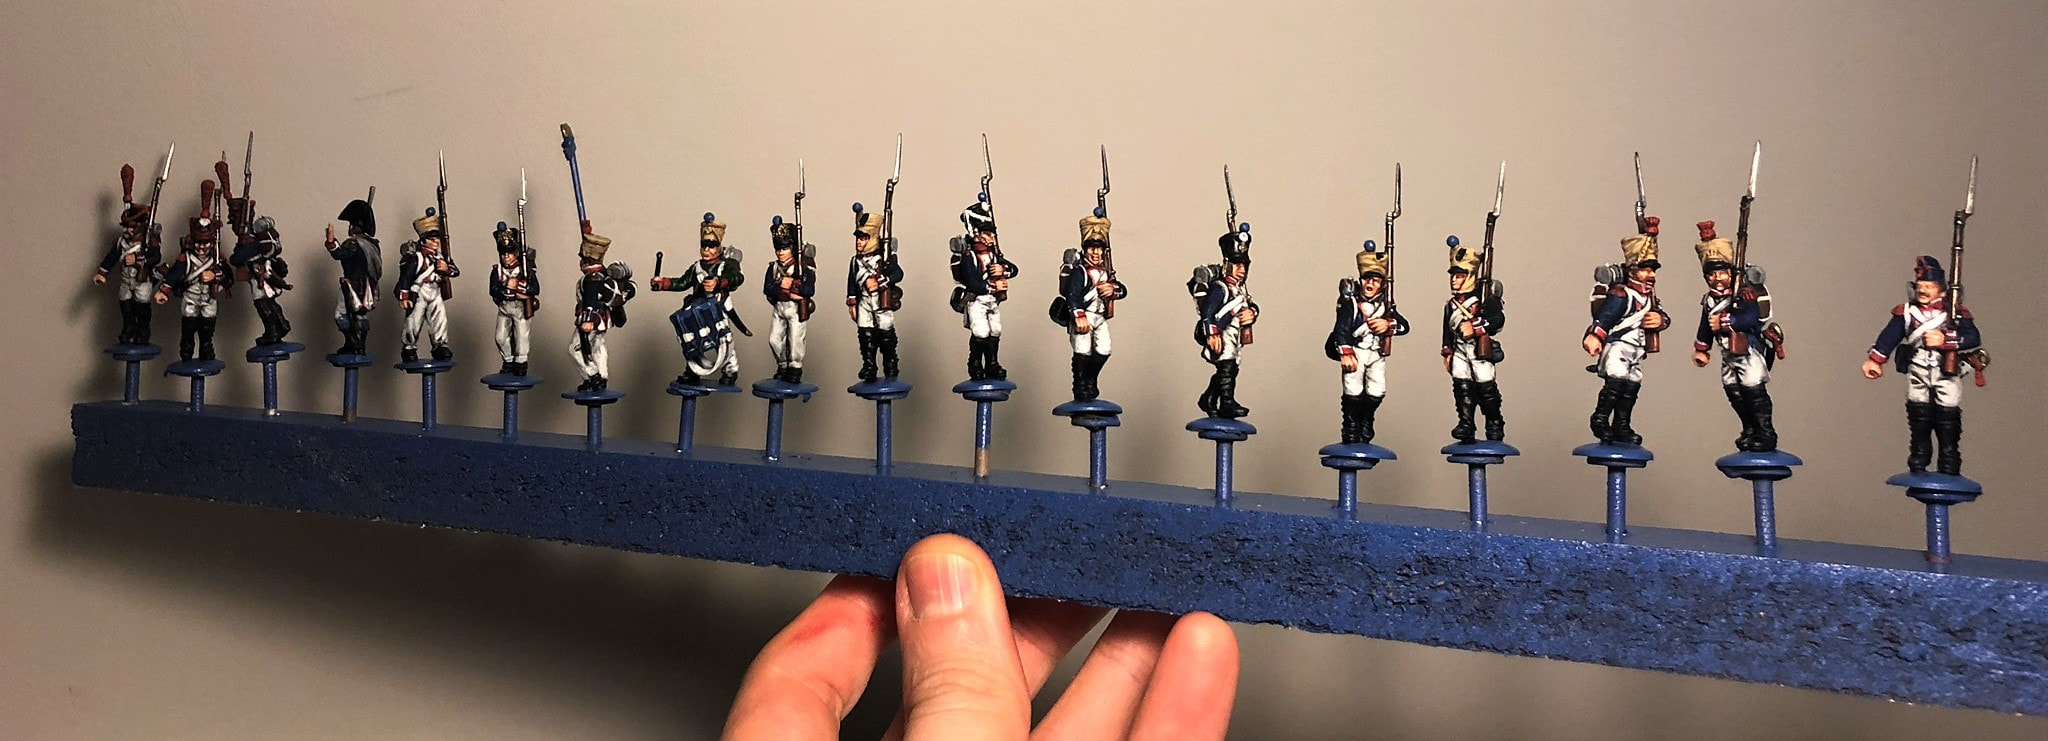 My current batch while writing this I start out with one colour at a time until I have basecoated every colour. Then I apply washes, and go over them again with the original paint and maybe a highlight. These are going to be tabletop standard after all, so no need to spend too much time on them. I've found 18 to be a reasonable number when I need to paint the full uniform, like above. 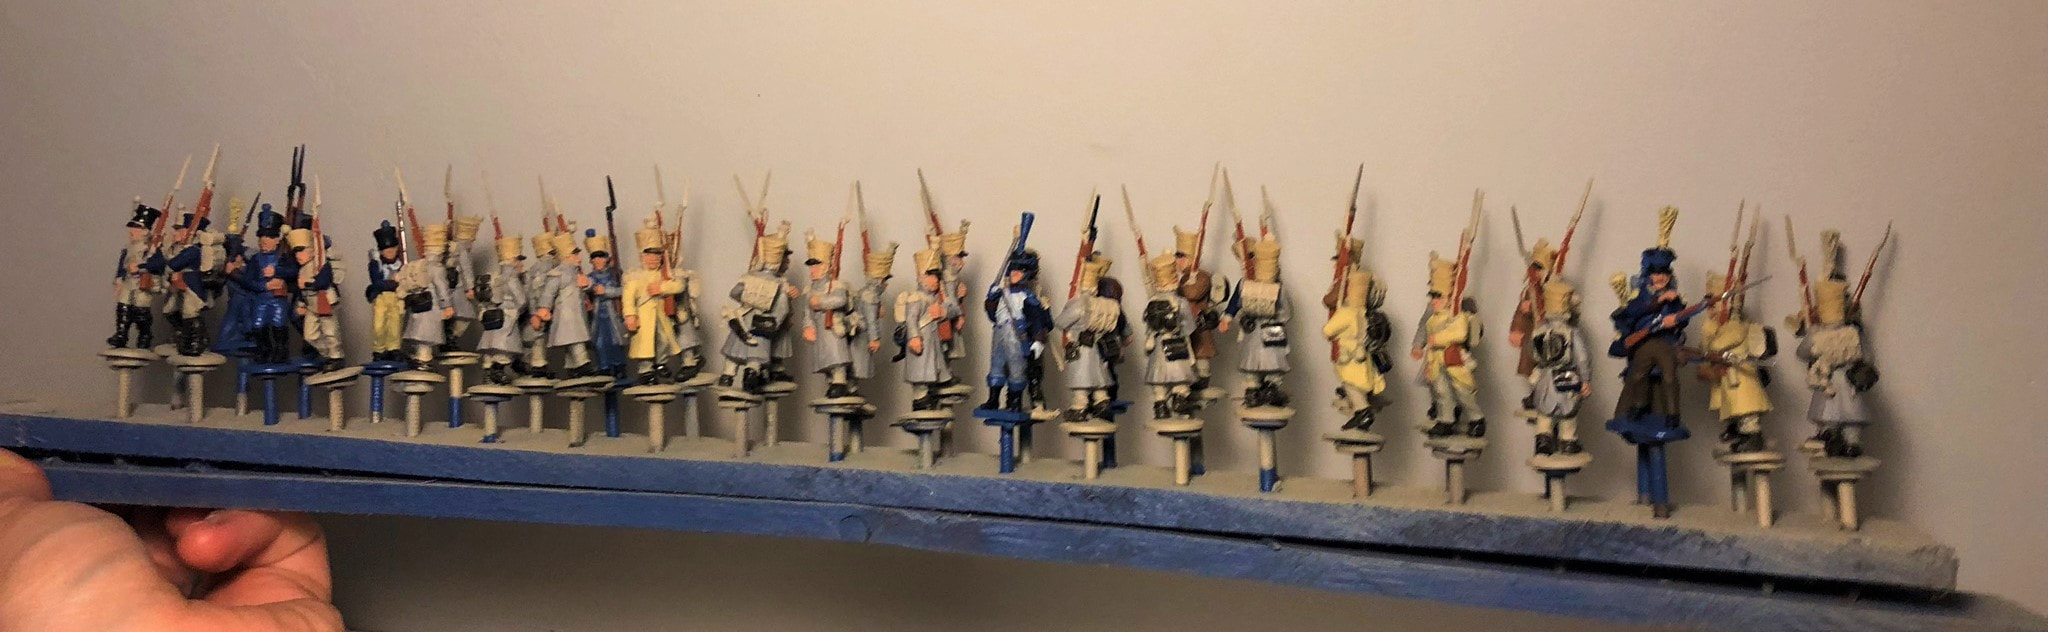 This is the batch I'm gearing up for afterwards. It's much larger, seven companies (or 42 minis), since most of them are wearing greatcoats. But I'm still working in factors of 6, so that I get nice and even bases out of each batch. It'll take two more batches like this to work through all my greatcoats - not counting the Guards! Purchasing PlanFinally this inventory also makes is obvious what I'm missing, and will need to buy for my army. Unfortunately it's not flashy cavalrymen, but command groups! Of the new battalions I'm forming, I only have two (!) command groups. This means that I'll need to get at least four or five command groups to go with them. If I buy command groups from Perry, which comes in boxes of six, each one will also take up an entire company's worth in the battalions. This, of course, means that I can make even more battalions. Great!
I might also end up buying enough extra twoops in Bardin uniforms to at least form a whole battalion of them. With all that said, I guess someone has to go back to painting line infantry. Wish me luck! -Jonas |
"Glory is fleeting,
|
 RSS Feed
