Setting the SceneA couple of months ago, the club got together and made big order from Great Escape Games; it was so big, we broke their shipping calculator. The order was placed through email, but once it arrived we noticed one "problem". It contained a box of British Line Infantry instead of French (Great Escape Games quickly shipped the missing box of crapauds). Jonas has a theory that something like this happened: At some time, at the Great Escape Games office:A: "Boss. Boss! Look at this order that just came in." 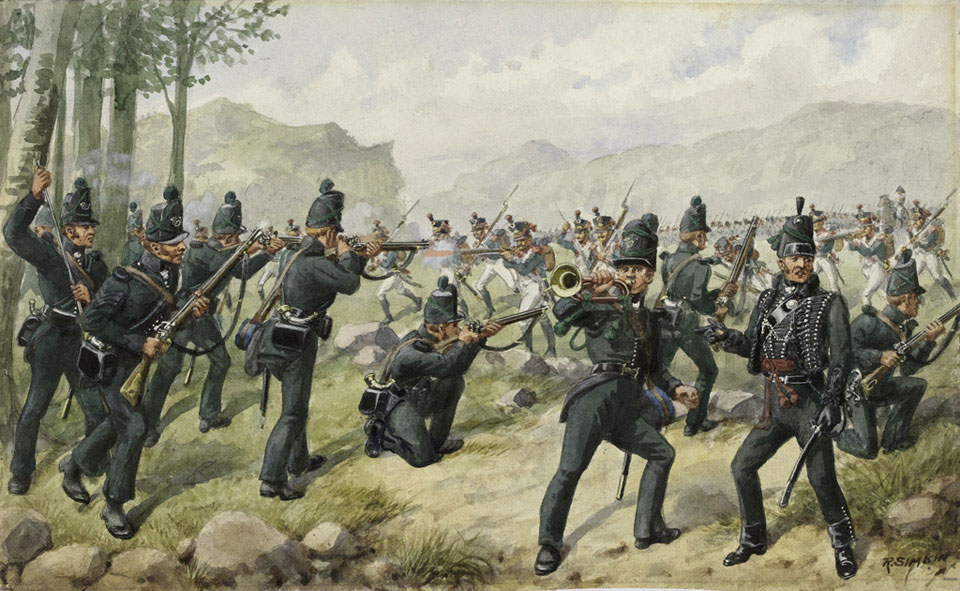 Jonas already had a box of Victrix Highlander Centre Companies lying around somewhere waiting for a gentleman to lead them to victory against the Corsican Tyrant. And Jonas has been hinting in the blog for ages that SOMEONE should start playing the British. This just won't do, someone must do something! Enter Zach! After my first game of Sharp Practice 2 in which I used Shirty's brave Russians and just barely failed to stop the cowardly Monsewers from escaping with their garlic stinking sausages I was hooked. As a consolation prize I got to take both boxes of British Infantry with me home. Face Off Fighting Ladies Fighting Ladies Now I had a base on which to build the army that will defeat Boney. Because I, like Prometheus, can be a bit rash, I immediately built an officer and all 8 men flank company men in Waterloo uniform. Next I did some research, first by buying the first Sharpe's books, second buying the rules for Sharp Practice. After confirming with Jonas that his froggies could be used for both the Peninsular War or 100 Days I decided to go for a Peninsular War force. The very same day I stumbled upon a whole bunch of Sharpe's DVDs at a closeout sale. Surely this must be fate. Next came choosing which regiments to field my little mens as. For the Highlanders the choice was easy. Since I've only been painting miniatures for about 6 months, and don't consider myself the most skilled painter, I went with the 42nd Regiment of Foot, also known as the Black Watch, simply because their tartan had what looked like the easiest pattern. Finding a regiment for the regular line infantry wasn't as easy. Wanting something a bit special I first found the 56th (West Essex) Regiment of Foot, called the Pompadours, with purple facings. But they never served on the peninsula. Next there was the 35th (Royal Sussex) Regiment of Foot, the Orange Lilies, that were so hardcore protestant that King William III gave them special permission to wear orange facings as a mark of royal favour and a sign of their piety. Sadly, these badass disciples of Martin Luther never set foot in the peninsula either. 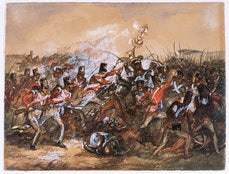 Well if I can't have God's own boys, I guess I'll have to settle for the Devil's Own. The 88th (Connaught Rangers) Regiment of Foot was an Irish regiment with yellow facings, that were known as the most troublesome and fearless rogues of the whole British army. And at Salamanca they captured an old Moorish standard, a 'Jingling Johnny', which sound like an interesting conversion for the future. I also had four riflemen, they will be of the 95th Rifles. No need to research any alternatives, Sharpe's literary exploits decided for me. A Starting Force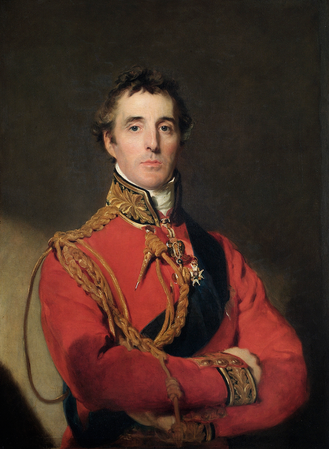 The first Duke of Wellington The first Duke of Wellington The box of Victrix Highlanders contains 60 men and out of these you get 4 of both Officer, Drummer, Sergeant, Colour bearer, and Piper. This leaves a bayonet strength of 40, exactly 5 groups of 8. Not quite an even number, this won't allow me to make a symmetrical Attack Column. Not that I ever would, but still it's a cause for annoyance. Luckily Napoleonics is very much about style and fancy stuff, and we have already decided as a club to feature a lot more musicians, Colours, sappeurs, etc. than the rules of Sharpe Practice recommend. Filling out groups with extra musicians (a force can field only one in Sharp Practice) and some Colours guarded by Sergeants I should be able to field 6 full groups of Highlanders eventually. Perry's box of Line Infantry comes with 40 men, out of which I have already "wasted" the officer and 8 flank company men. The flank company men can easily be salvaged with a simple head swap, and to get some officers I converted the Ensigns carrying the colours into proper officers. The box also comes with four Riflemen, a drummer boy and a Sergeant, leaving me with a current bayonet strength of 24. Since skirmishers fight in groups of 6 in Sharp Practice I made an order from Perry for one more pair of plastic Riflemen, their metal Riflemen, and a pack of command figures to lead them all. This adds up to 2 groups of 6 Riflemen. This should be able to keep me busy for quite some time, but I know that my adventures in the Peninsular war won't feel complete without also experiencing the little war. Shopping around for Guerilleros I settled for some from Front Rank, combined with Perry's Carlist Fighting Clergy, with the vision of homebrewing some rules for an armed band wielding pistols, swords, blunderbusses. As a bonus the armed priests and monks can also be used as Holy men, with or without Relics. I've gotten an unhealthy liking for the vendors where shipping is calculated as % of the order, because it's like: slightly more expensive duders and FREE SHIPPING! 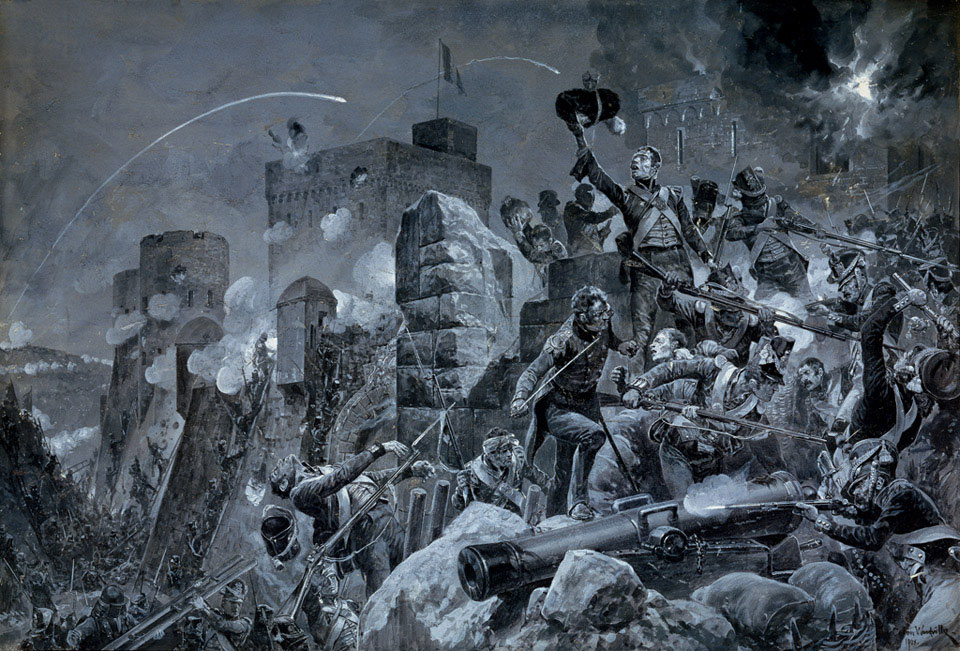 Order of BattleFrom all the forces available for me, Duke W(Z)ellington, to fight the crapauds getting it all ready for a first battle won't be necessary. As an initial force to bring to first true battle (and to finish before I can buy more stuff), I settled for:
4 grps of Highlanders, w/ Officer 3 grps of Line Infantry, w/ Officer 2 grps of Riflemen, w/ Officer 1 grp of Guerilla Skirmishers See you next time, with my force all painted, based, and ready for battle.
1 Comment
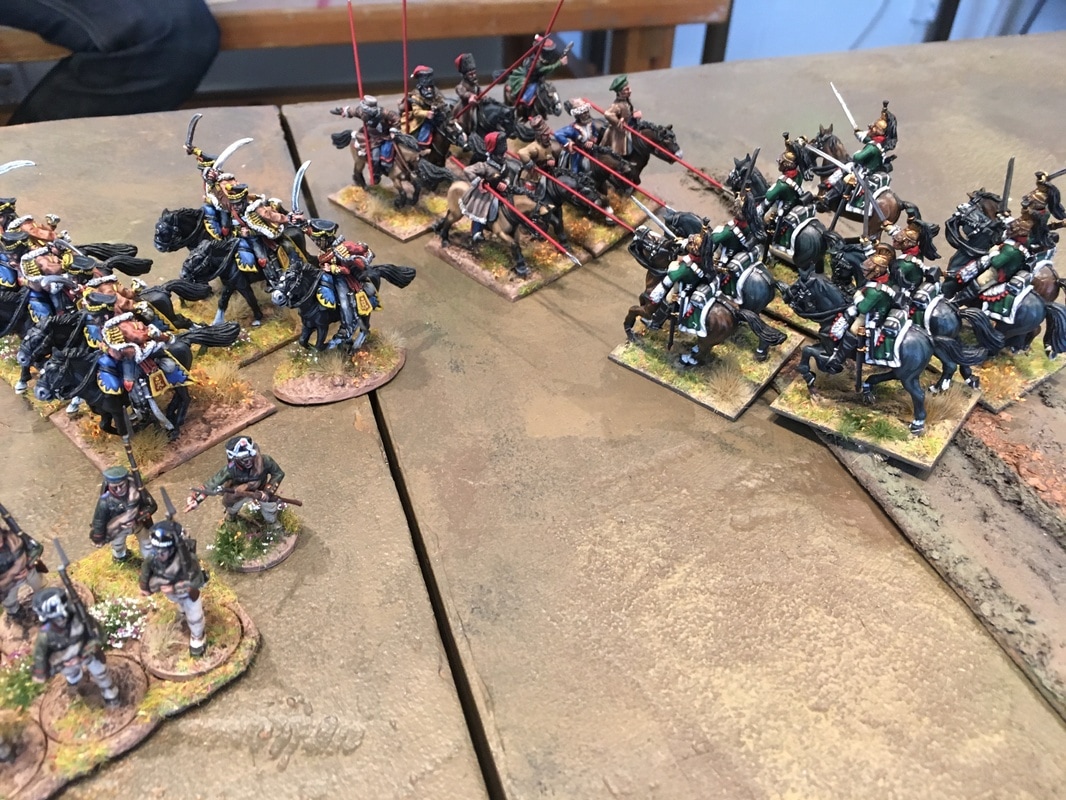
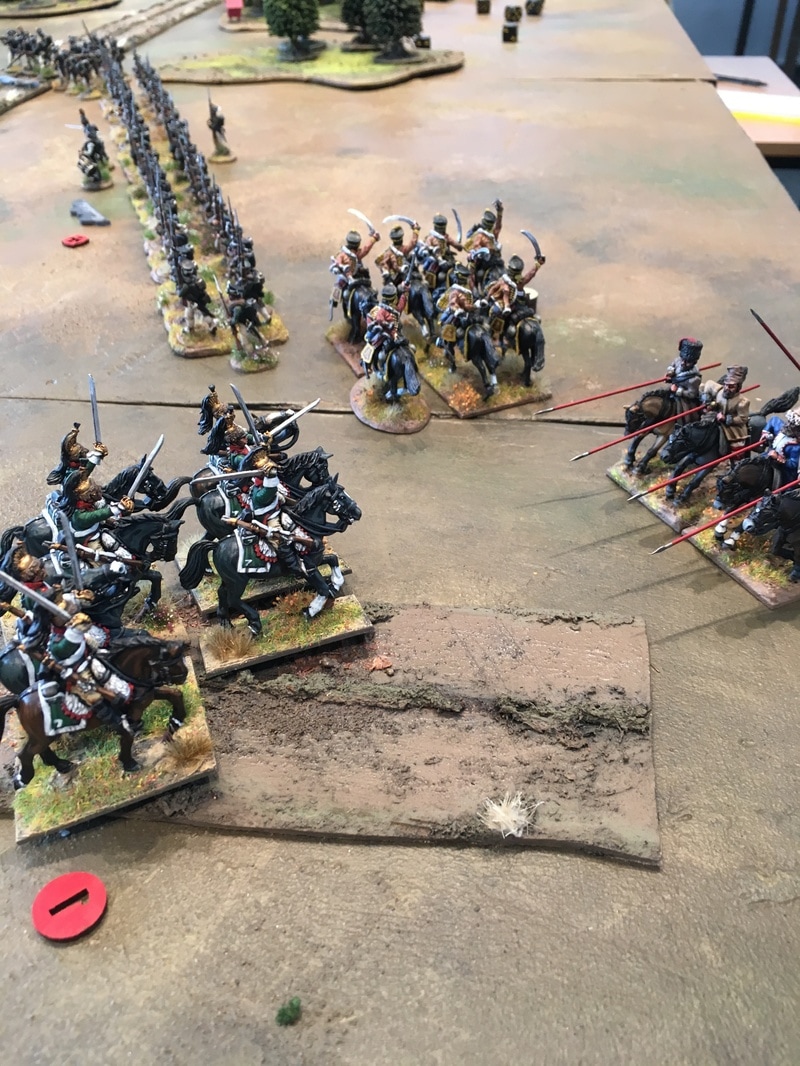
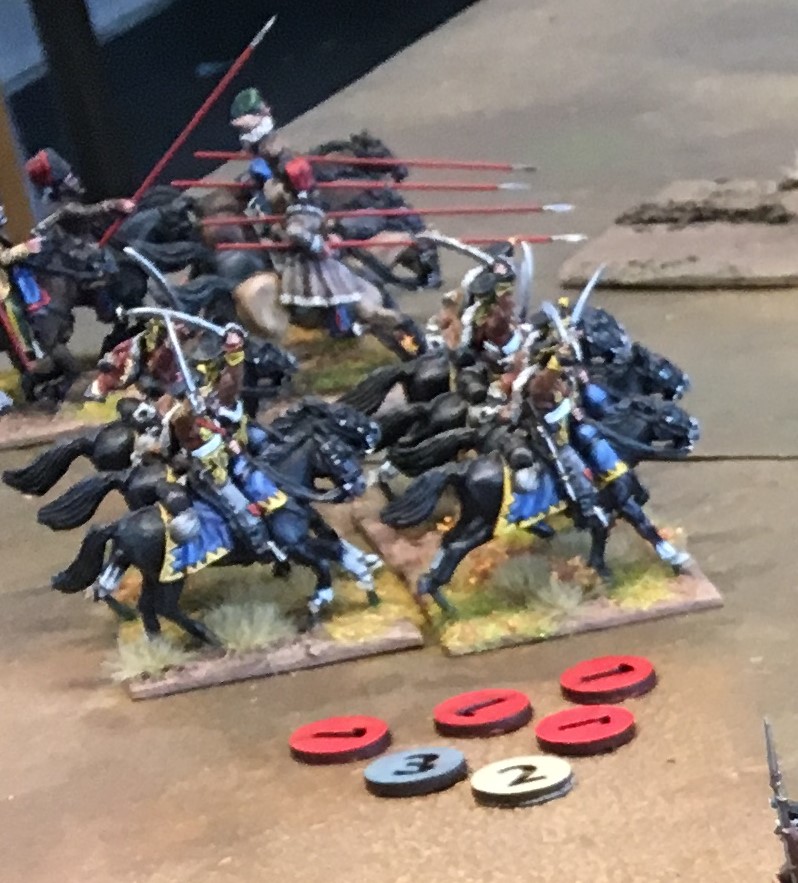
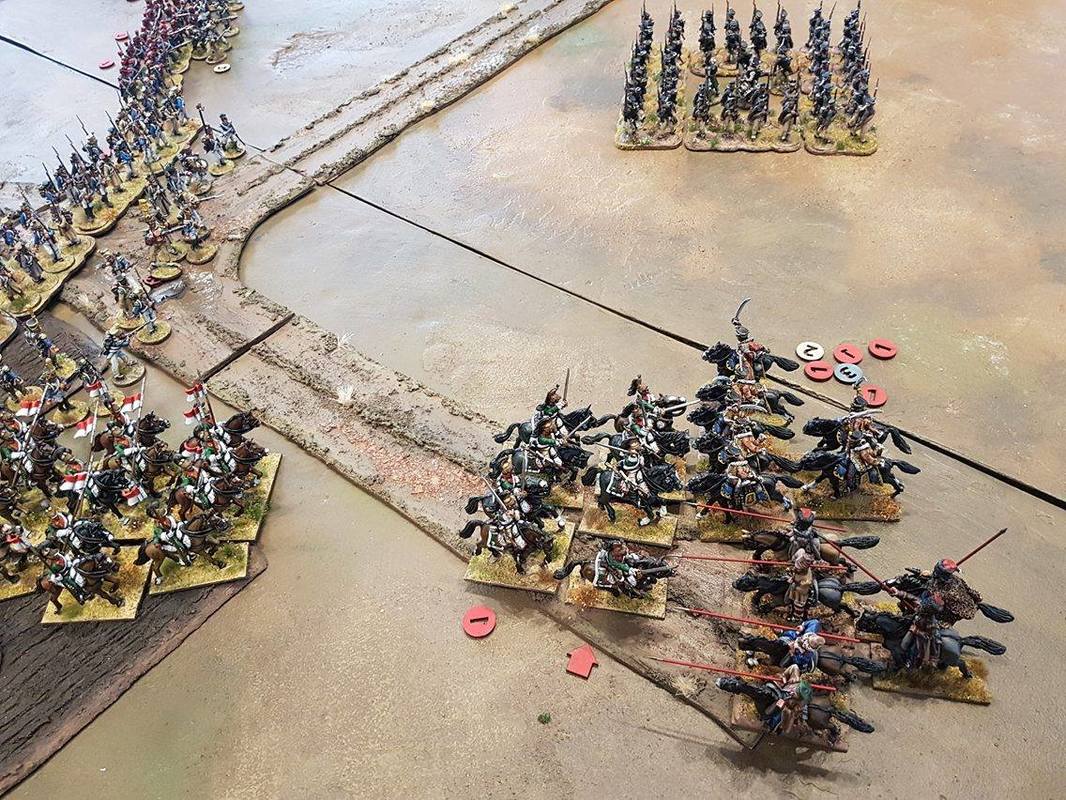
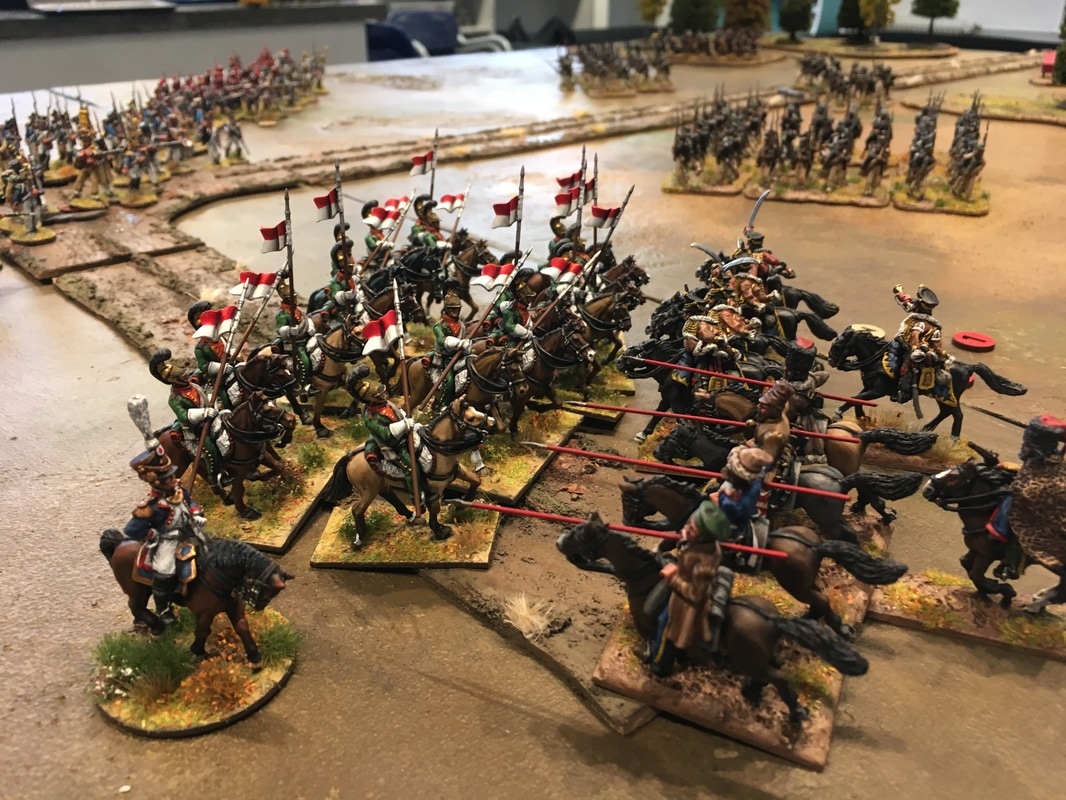
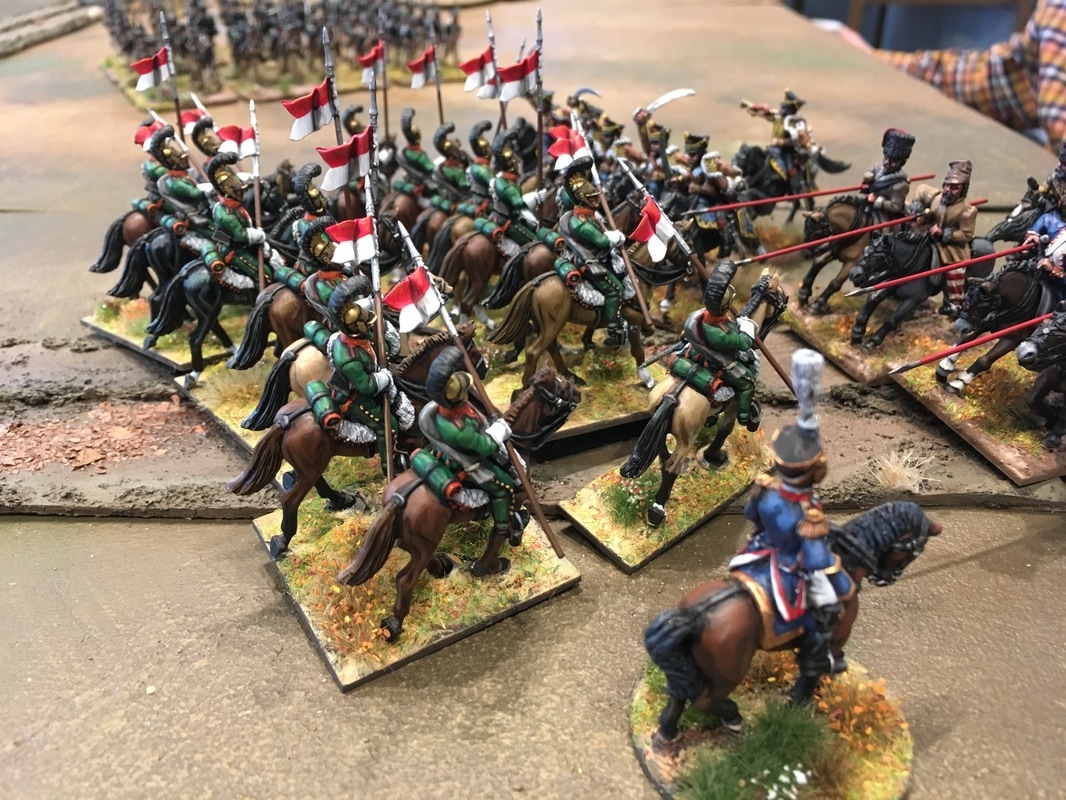
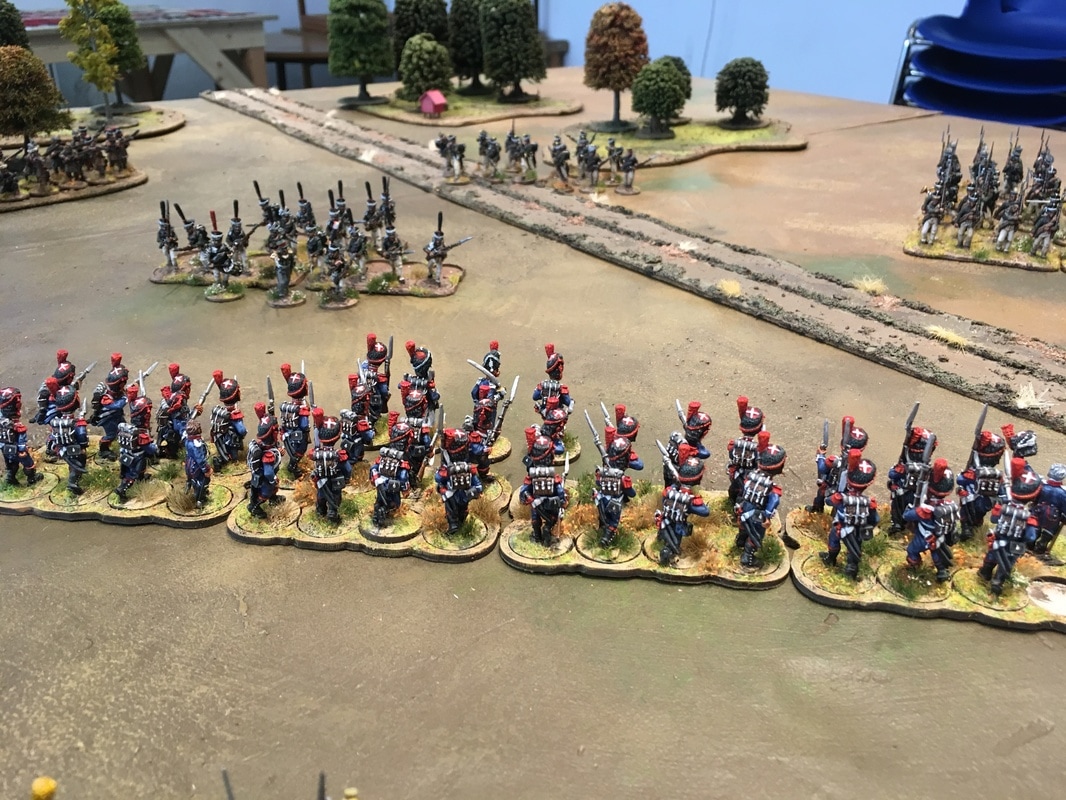
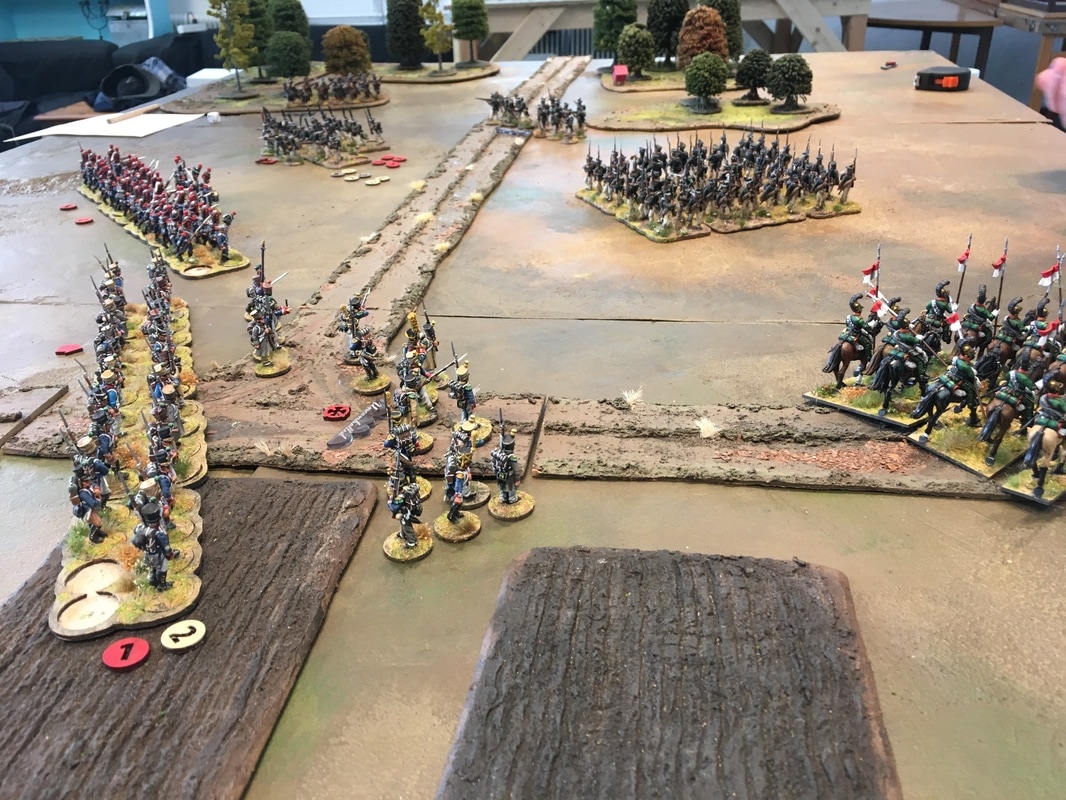
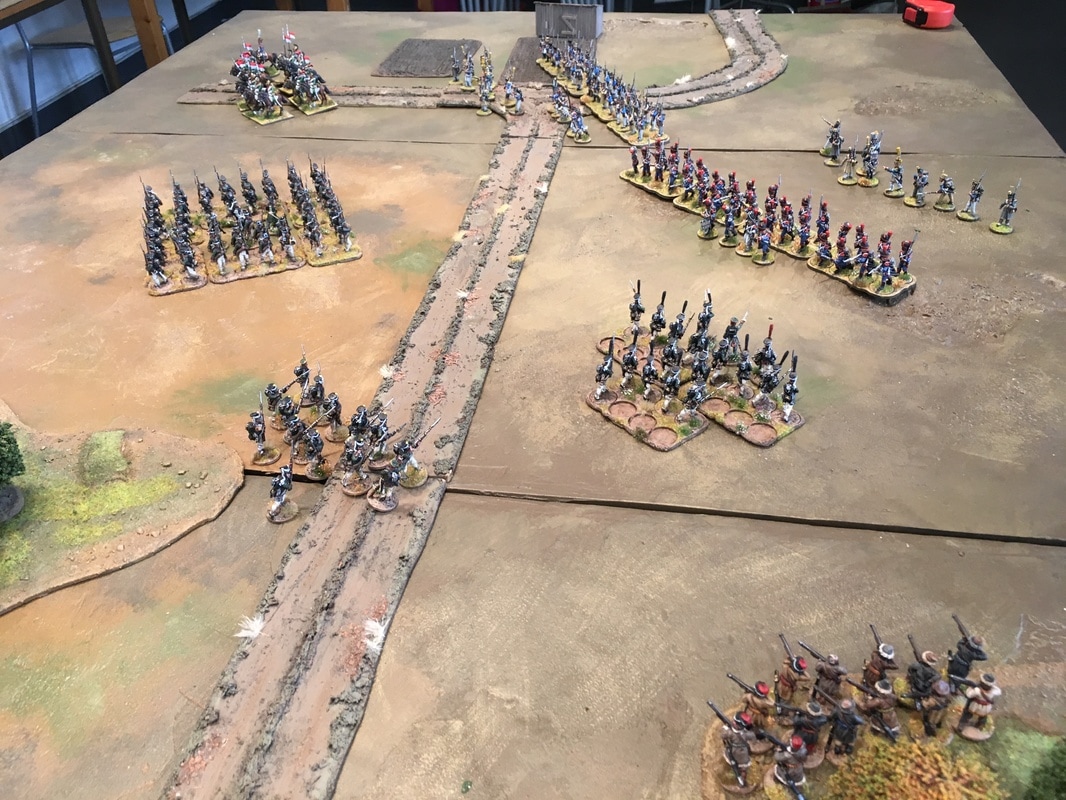
 Ok, not that kind of escalation, we're still a ways from Borodino After two games with Zach as the Russian general, Shirty was happy to return to give the humbled French another lesson in slavic grit. Even better, this game was one of those great moments of tabletop wargaming when both sides have painted up a whole bunch of new miniatures! The French thought that the addition of two lance-armed Chevau-léger units and some Carabiniers would be enough to incite fear in the Russians. However, the Russians turned up with two new cavalry units of their own, as well as some dismounted Cossack skirmishers and even more line infantry. Now it's starting to look like the invasion in Russia for real! Will these bigger forces give us more tactical options, or will the ruleset be bogged down as we start to go beyond the suggested force sizes? It was time to escalate things, Kriget Kommer style. Scenario - Encounter at the Forest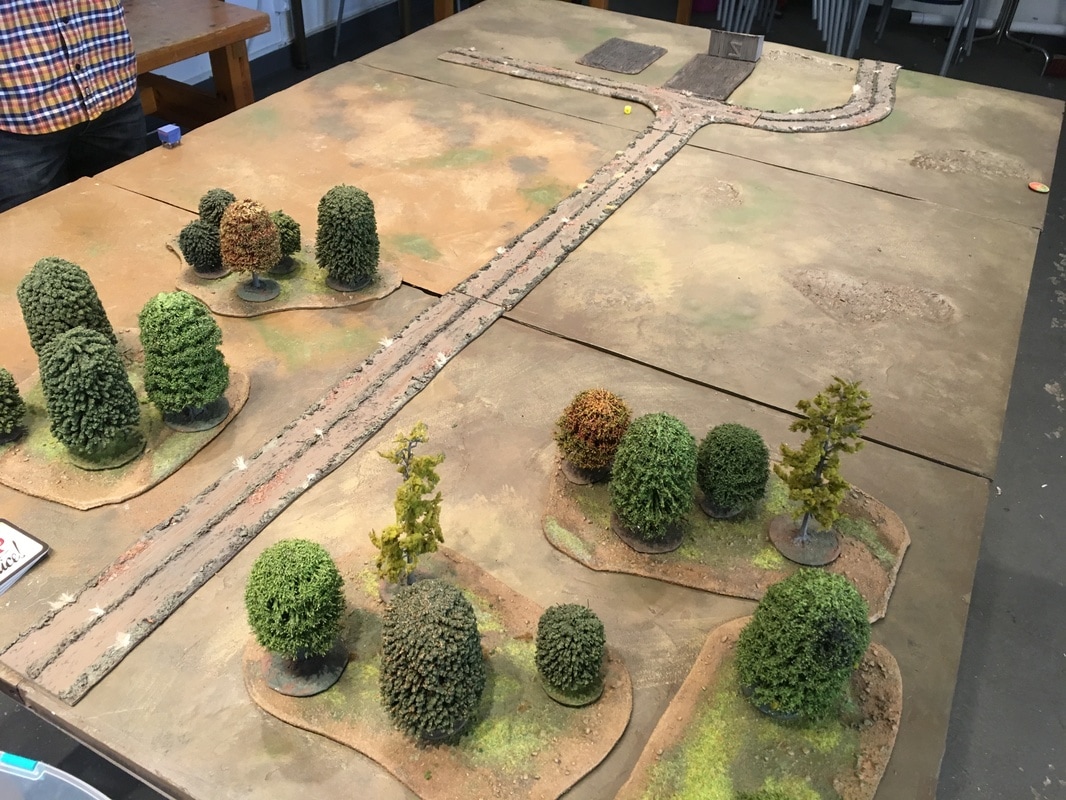 On my to-do list: a less shamefully anachronistic French deployment point marker We wanted to focus on testing the two increased forces with as few distractions as possible. Instead of rolling for scenario we simply picked "Encounter", and made an open table with few terrain features. The forces would meet each other at the outskirts of a forest, with a road that forks at a deceptively innocent looking shed. In the Encounter scenario you roll for which third of the table edge you deploy from, and the Russians entered by the blue beehive, but with a second, movable, deployment point in the woods that the sneaky Cossacks provided. The French would deploy at the French Foreign Legion marker. I know. I've ordered more suitable deployment markers for them. The Russian Force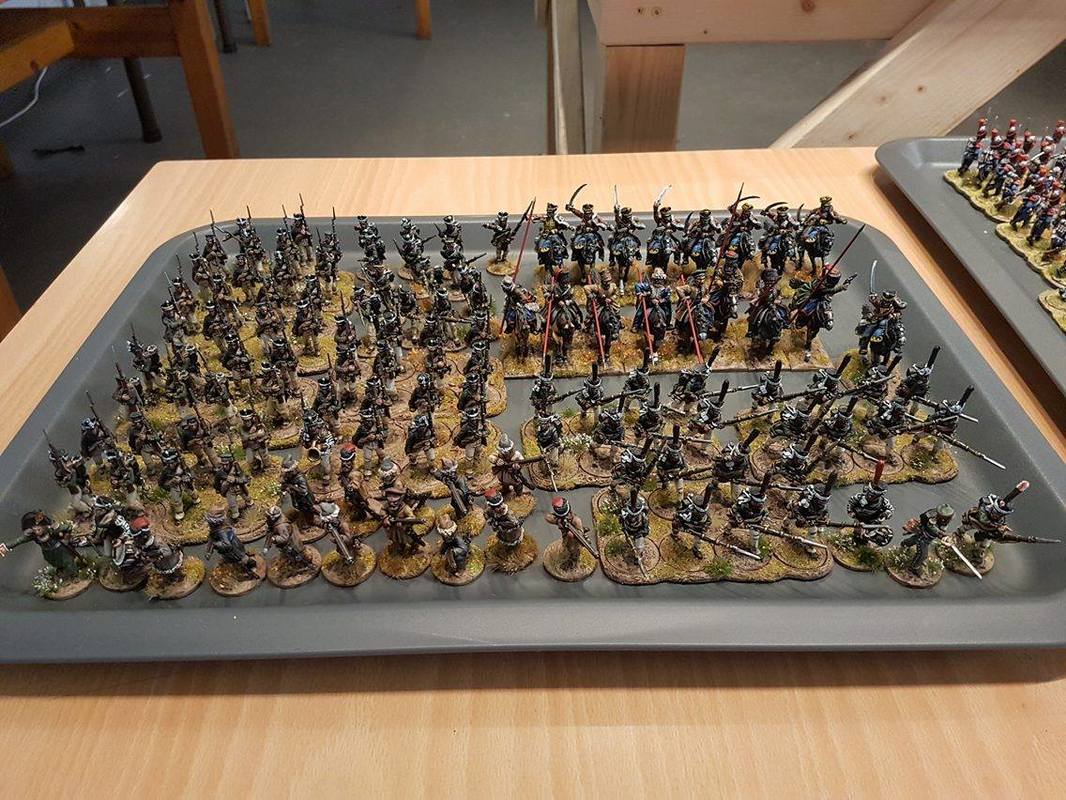 The Russian force has two regular infantry formations. The first one is made of 6 units of line infantry, and the other consists of three units of Grenadiers. The regular ranked up formations are supported by two types of skirmishers, both Jäger skirmishers (who are "proper" skirmishers) and foot Cossacks, who are irregular skirmishers. Each type have two units on their formation. Finally, the Russians have two units of light cavalry, both Hussars and Cossacks. The latter are irregular cavalry rather than scouting cavalry, and give the Russians a Mobile Deployment Point at the start of the game. The French Force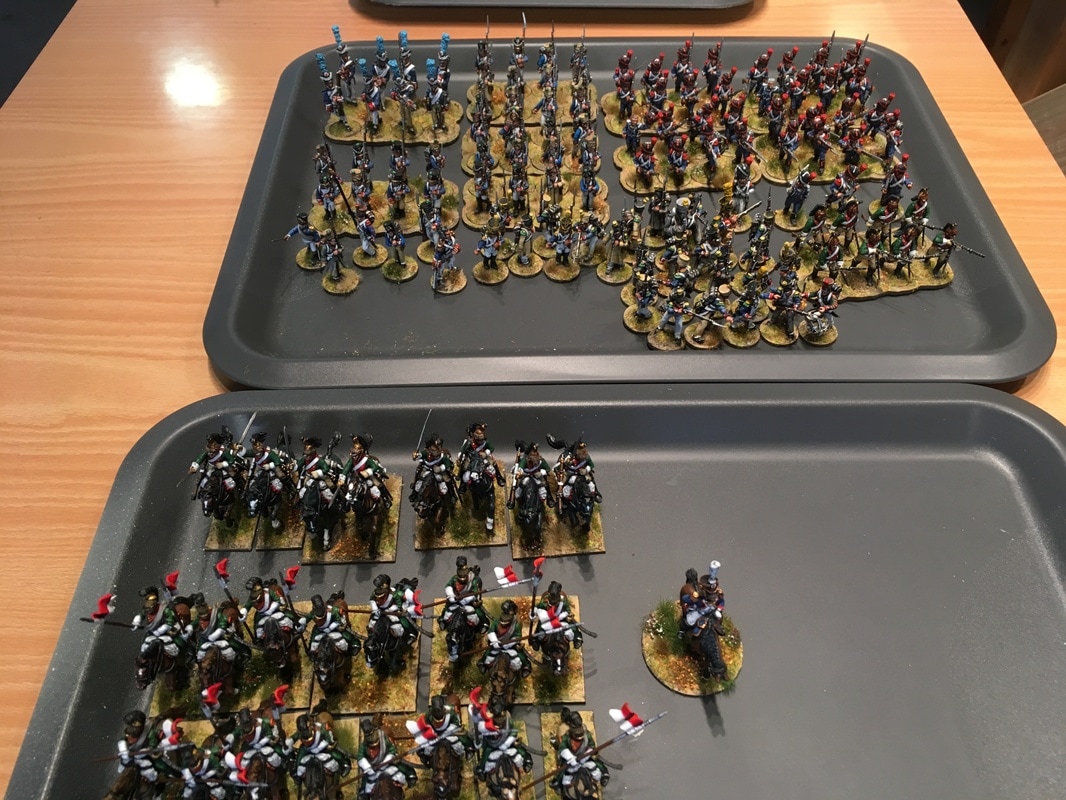 I didn't take a proper picture of the French force, so here it is picture with a few additional troops that didn't hit the table. 4 units of Carabiniers, led by a lvl 3 leader. Carabiniers are the equivalent of Grenadiers for light infantry, so this is pretty much as good as my French infantry gets without being from the imperial guard. 4 units of Fusiliers, led by a lvl 2 leader. Bog standard line infantry. Two formations, each with 2 units of skirmishing Voltigeurs, each led by a lvl 2 leader. These will act as skirmish screens for my two ranked up infantry formations. 2 units of Chevau-léger lancers. In a possible contradiction in the rules, these are Scouting Cavalry (which are worse in close combat than regular troops), but lancers are also specifically listed as the same quality as regular troops in close combat. However, no lancers are noted as being armed with lances in the rulebook. So we figured out that these are simply scout cavalry that fight as well as regular troops in close combat, which seems to fit the descriptions I've read of lancers in historical accounts. So in gameplay terms we treat them as Dragoons that can't dismount to fight as skirmishers, but instead they can deploy further away from a deployment point. However, I think it would be nice to have some more special rules for lancers. 1 unit of mounted Dragoons. These are cavalry that are expected to get stuck in, but can also fire with slightly less accuracy than musket troops if they stand still, or dismount to fight as skirmishers. We were both short on cavalry leader models, so each of our cavalry units had an "invisible" lvl 1 leader, and each of our cavalry wings were led by an additional lvl 2 leader. The battle beginsAs in last battle, the French starts pouring onto the field. Since their deployment point is towards the corner, they need to fan out quickly or get surrounded. 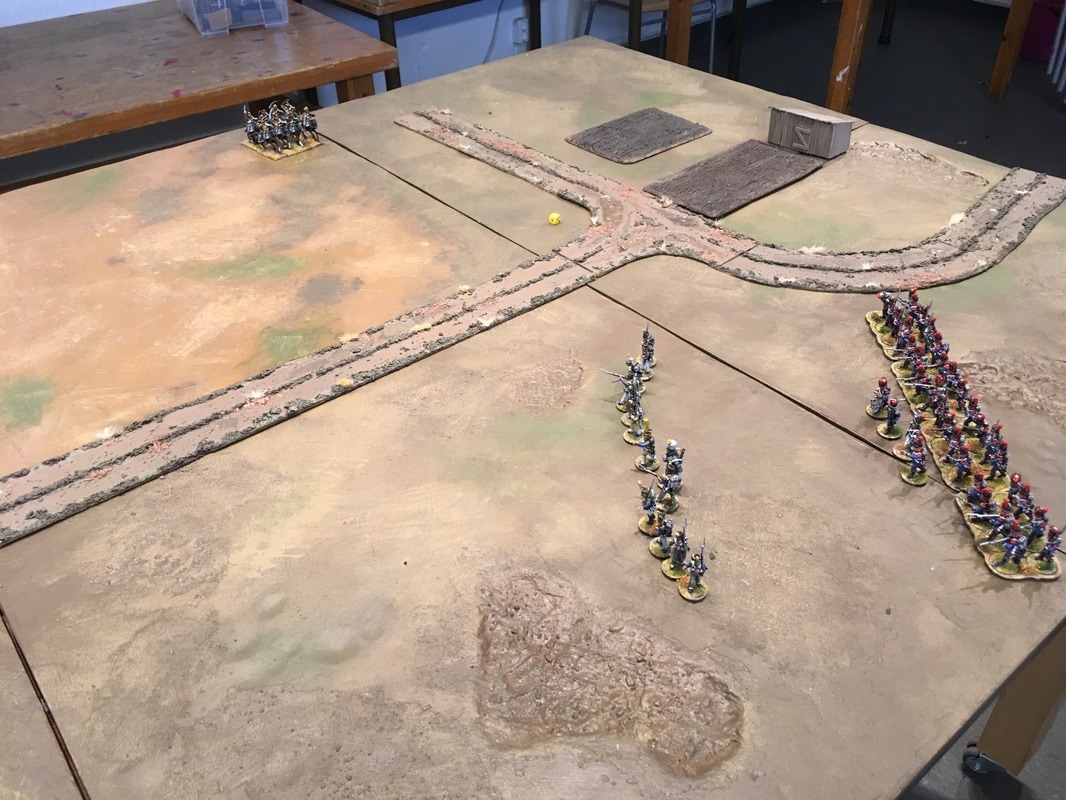 The table looks so empty before you fill it with soldiers A lone unit of Russian Hussars look on as the Carabiniers deploy in line, screened by skirmishing Voltigeurs. 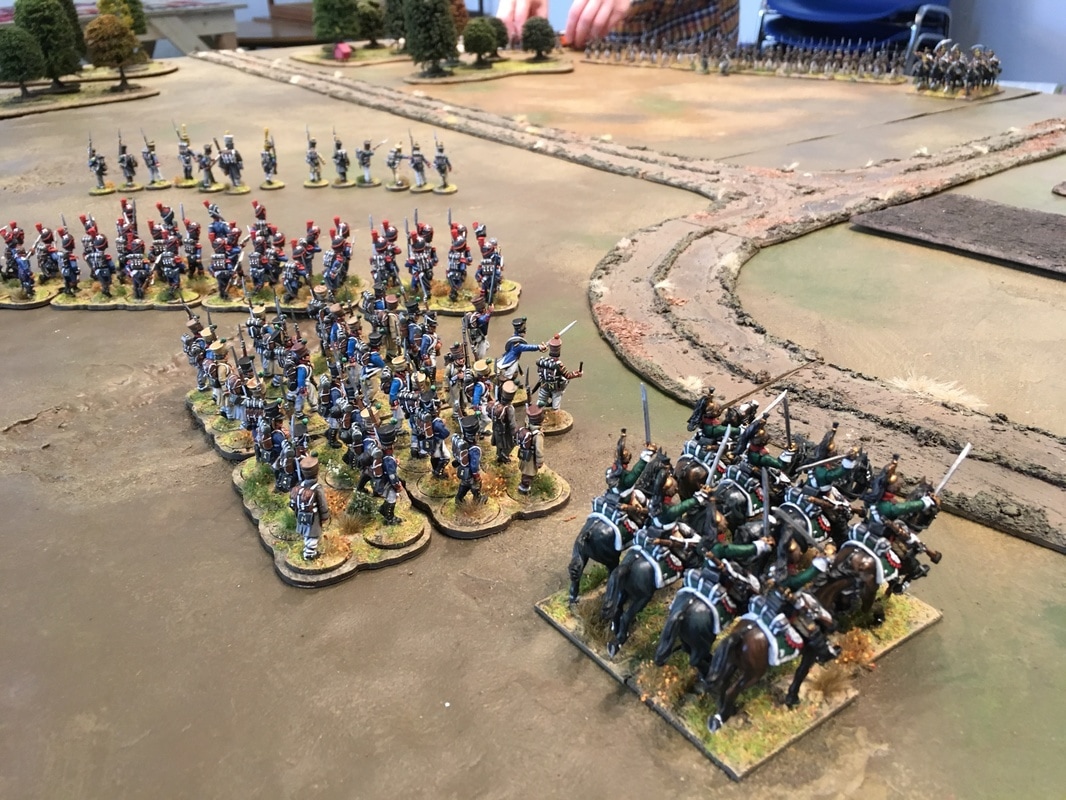 A long line of Russian line infantry back up the Hussars. The French deployment area is so cramped that the Dragoons and Fusiliers have to deploy in column, to be able to squeeze through the space left by the Carabiniers. 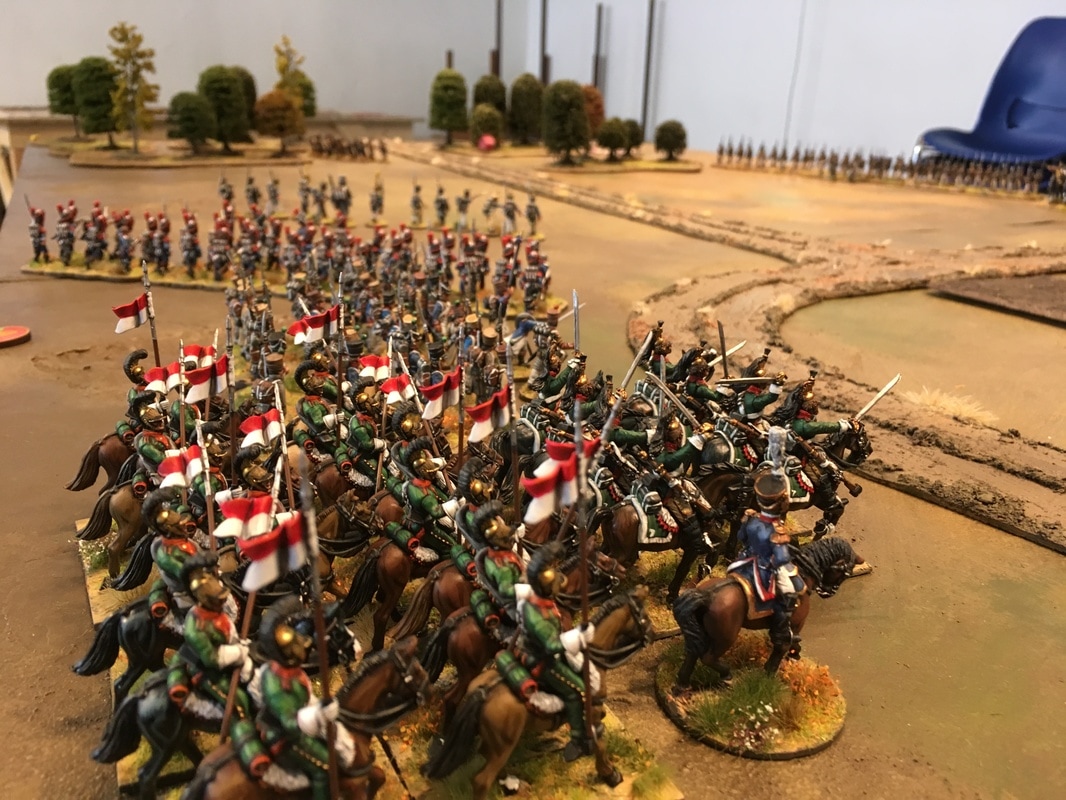 Finally, the lancers make their debut on the table, hemmed in behind the rest of the force. In the distant edge of the forest you can see the Russian skirmishing foot Cossacks turn up. They are irregular skirmishers, which means that they don't have all the perks "true" skirmisher have, but irregular skirmishers still get +1 to hit at long range if they fire from cover. First actionsThe battle lines are drawn pretty much immediately. The Russians have one long line of regular infantry and cavalry, which faces the weaker French infantry and their cavalry. The French Carabiniers and their skirmishers are facing the rest of the Russians, with their Grenadiers and supporting skirmishers. 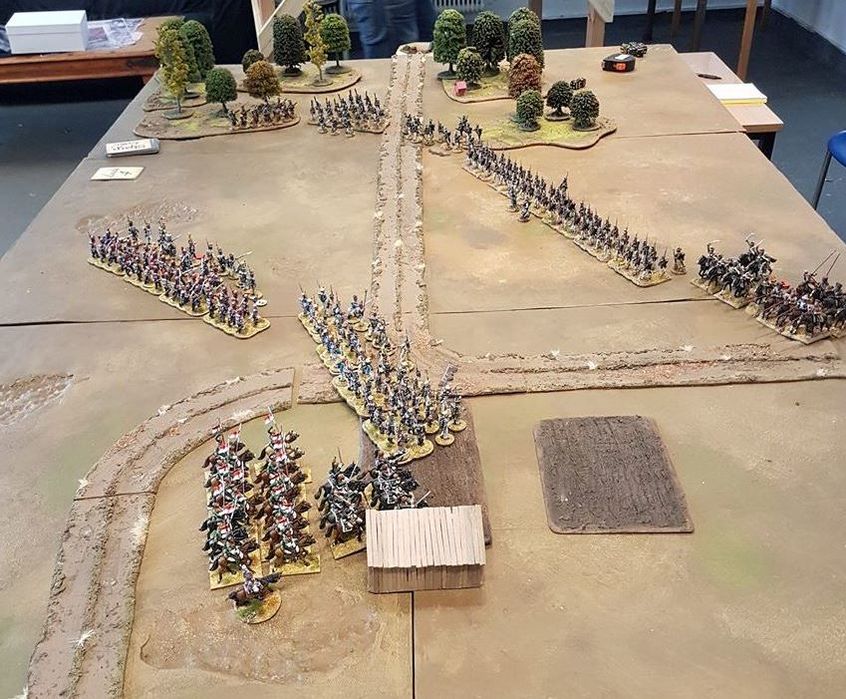 Even a casual glance will tell you one thing: that shed was built in a really bad place for the French! Unable to fan out, the cavalry has to slow down and squeeze by in column. To dissuade a sudden attack by the Russian cavalry, and with no enemy skirmishers in the way, the French Voltigeurs open up at long range and start to land some shock-causing volleys on the Hussars. It might not sound like much, but shock can really complicate an attack in Sharp Practice, as the shock will reduce the number of attacks in both musketry and in close combat. But worse, shock reduces the distance your units move, which means that a charge might not hit home, leaving you stranded in close musketry range. 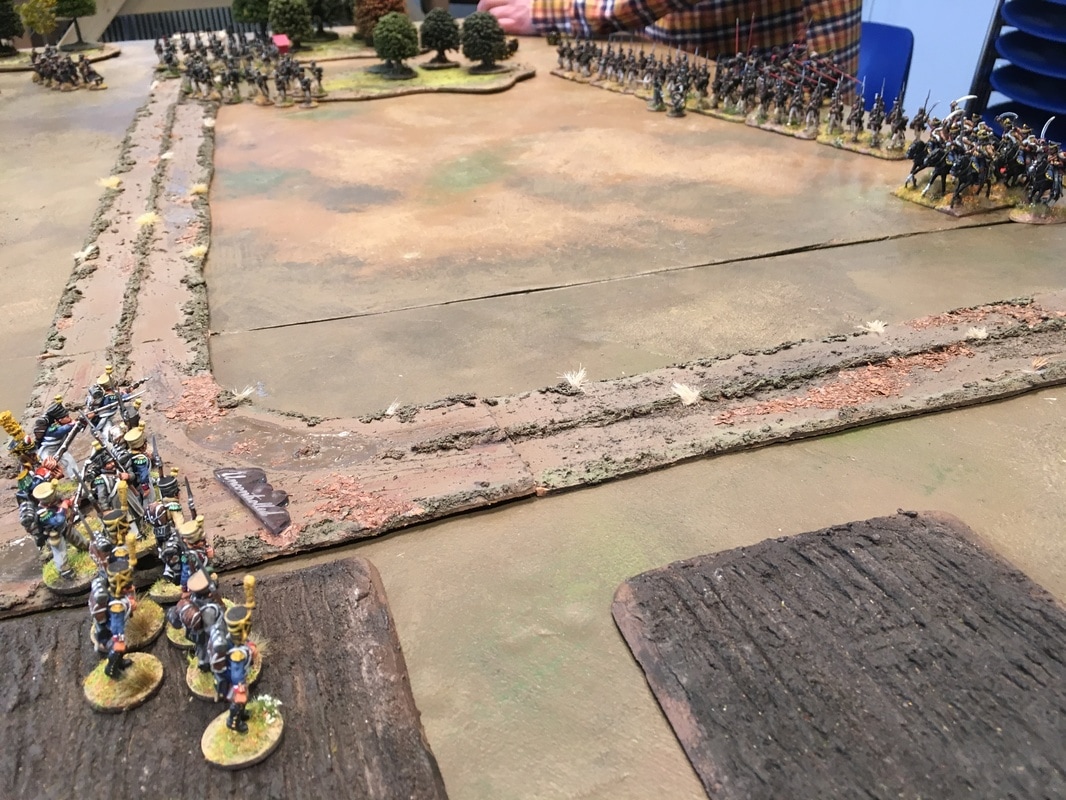 The French skirmishers open fire  The Russian Hussars take a few hit, while their skirmishers by the forest return the favour on the French left flank The cavalry clash beginsWhen the Hussar start taking a beating, they turn and move into cover behind the Russian infantry lines. The Dragoons are smelling blood, their eyes focused on the remaining irregular cavalry at the tail end of the Russian lines. The French general, thinking "when have ever an impetuous charge on Cossacks failed?", seizes the opportunity. With spurs dug in, the Dragoons charge across the field! For the Emperor! Their charge hits home, but both sides roll badly. Close combat is normally pretty deadly in Sharp Practice: you'll usually roll somewhere between six to ten dice per unit in combat, with 5s causing kills and 6s causing both a kill and a point of shock. But this time both sides are mostly unharmed, with the Dragoons barely scraping in a narrow victory. The Cossacks are pushed back, but they manage to remain on the table, facing the attackers. Instead of routing the enemy horsemen as they expected, the Dragoons are now facing a mostly unharmed unit, as well as the distraught Hussars who move up to support a counter-charge. C'est Magnifique!And then, in another first time event, the Russian regulars lines up in a square! This way, they wíll be protected from the French cavalry if the combined Russian cavalry units would be humbled by the heavier Dragoons. However, they are now immobilized and will not be able to bring their superior numbers to use against the French infantry line. Proper Napoleonics, ladies and gentlemen! 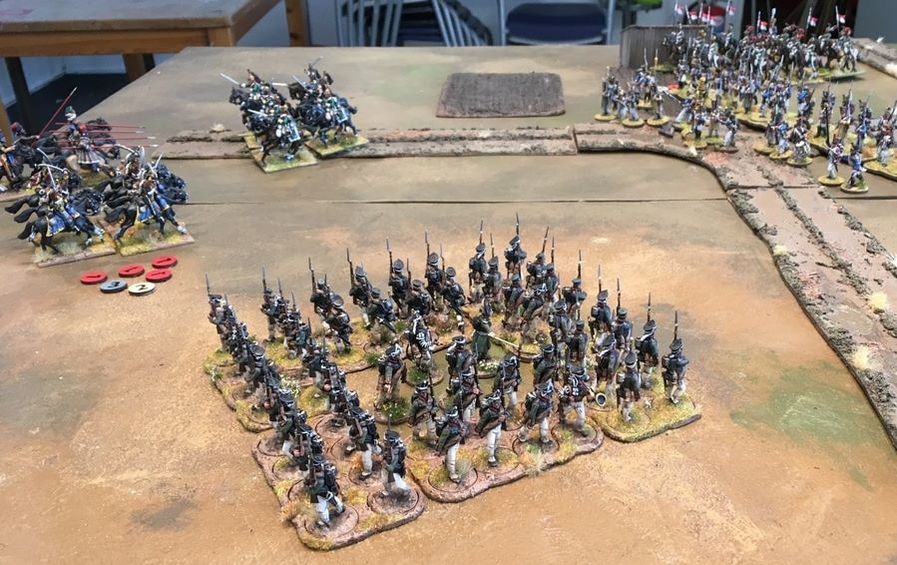 Note that the French lancers are still stuck behind the shed, unable to help their mounted comrades. At this point Russian musketry has knocked out several French infantry leaders, which has left their units stuck and unable to move out of the way for their own cavalry. Cavalry clash, concludedNow it was the Russians turn to unleash their riders. The Cossacks and Hussars smash into the French Dragoons, and the time of low die rolls is over. The rash Dragoons are outnumbered, outfought, and cut down to a man! However, the cheers among the Russian horsemen are interrupted when the French Lancers finally snake their way between infantry, and counter-counter-charge the counter-chargers. Their deadly steel lances find their marks, and the Russian cavalry is eliminated, with riders and mounts strewn across the battlefield. This leaves the French equestrians finally in control of their flank. But will they be able to make a dent in the neat infantry square in front of them? Or even dare to try? 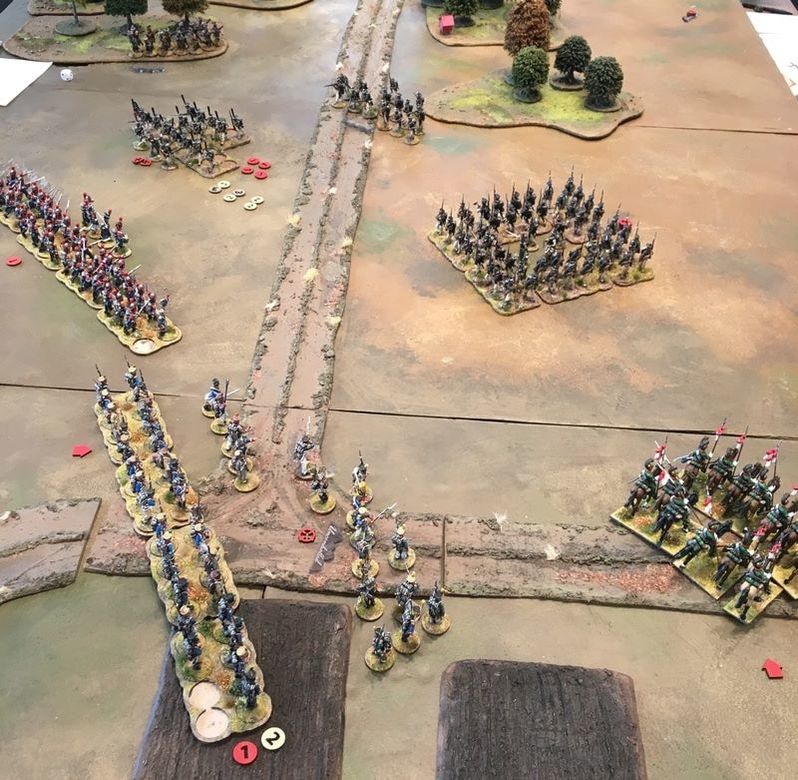 The battlefield position after the cavalry combat A contest of elitesAs the back-and-forth of the cavalry progressed, the other side of the battlefield saw two groups of elites facing each other. One one side, the Russian grenadiers who excel in close combat, and supported by plenty of skirmishers. On the other, the French Carabiniers who have a numerical advantage in regular troops, but half as many skirmishers. 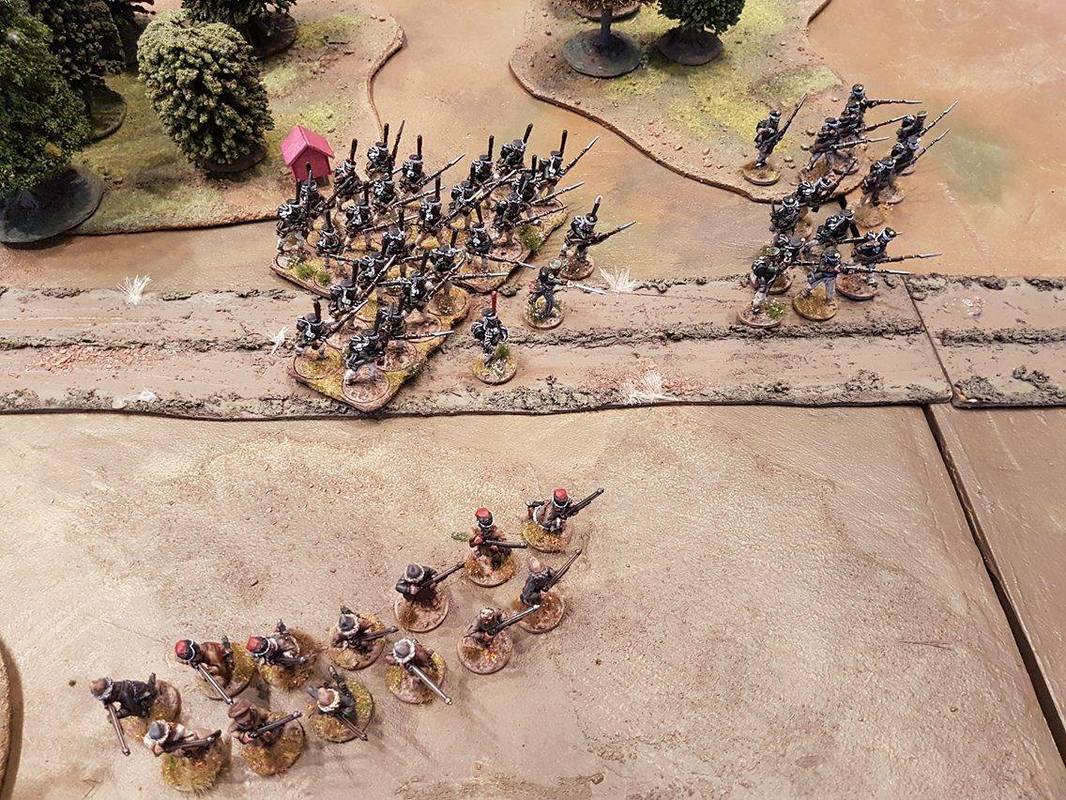 The Russian Grenadiers march out of the forest, flanked by plenty of skirmishers Initially the contest unfolded in the Russians favour, with the French leaders again getting knocked out by pot shots from the skirmishers in the woods and unable to activate their units. Their saving grace was that the nimble Voltigeurs did their job well, and their skirmish screen kept the French lines from taking too many casualties. Skirmishers count as having one level higher of cover, and if you fire through them at the units they screen, those units get the same benefit. With pressure mounting on their other flank, the Russians move forwards, aiming to even out the odds by beating the French in hand-to-hand combat. But they have to get across the killing field that is the 12" close range of muskets, and their movement roll is unfortunately not enough to make contact. 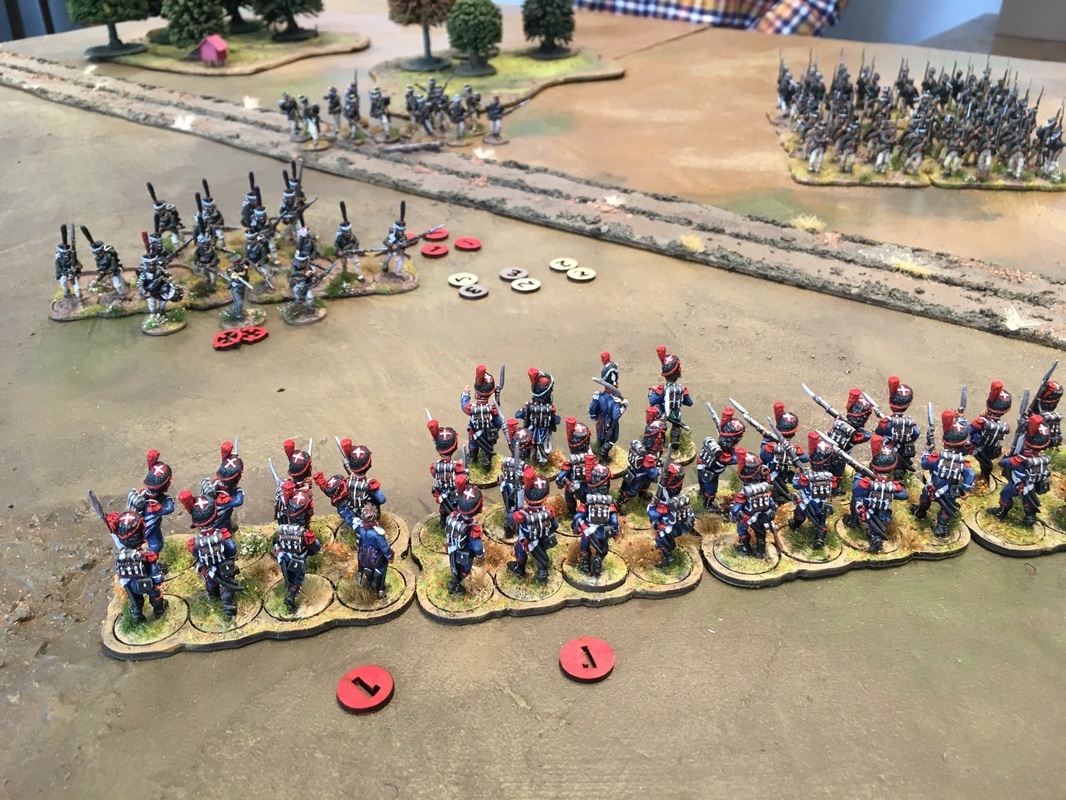 The row of Russian Grenadiers are looming in when the French light infantry captain finally woke up. He pushed his men forward, and the line shoved their way trough the skirmish screen, opening up a last minute volley at close range. Yet again, the devastating effect of a first fire volley in the open (32 men firing, 3+ to hit, 3+ to shock) was demonstrated. The reeling Grenadiers, almost losing a third of their men and with a wounded officer, find themselves with so much shock that they are unable to get to grips with the French. With the tide turning against the Russians, a last salvo breaks the willpower of the Russians. The remaining skirmishers and the besieged infantry square are no longer a threat to the remaining Frenchmen, and the battle is called. 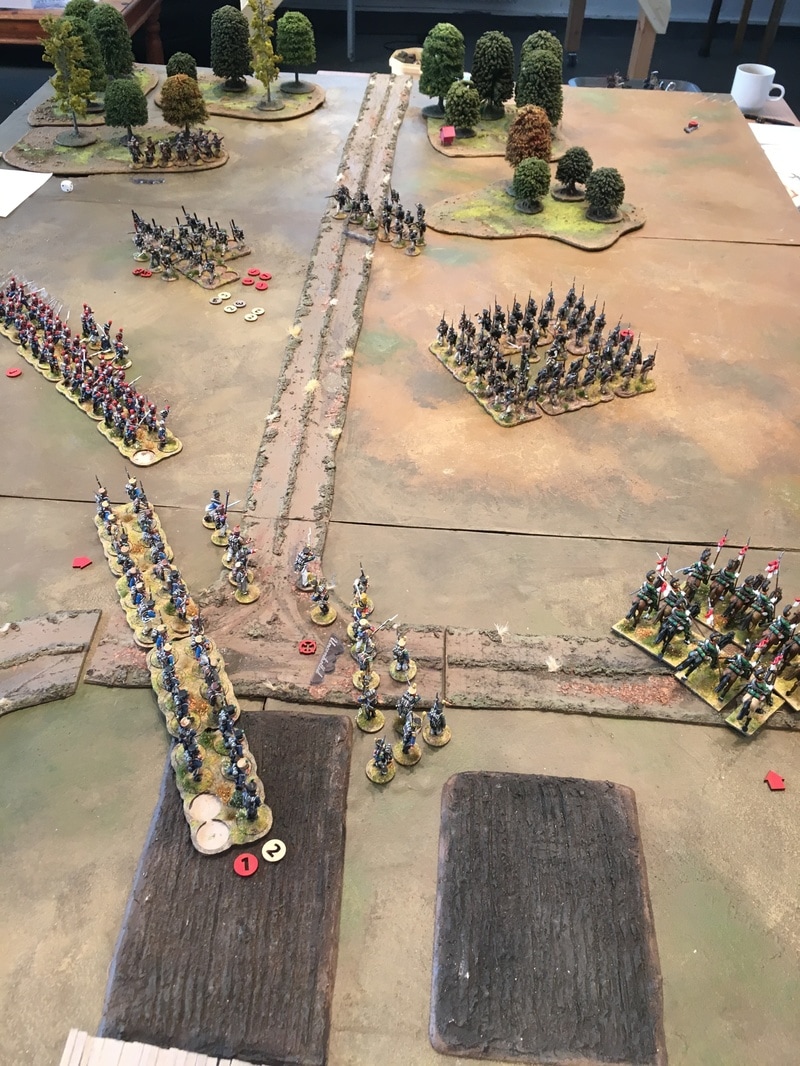 Lessons from the gameFirst of all: never ever underestimate a first fire volley at close range. Especially since the activation system means that sometimes one side can get in two volleys in a row before the other side can retaliate. In this case, the volleys at the end simply eradicated the poor Grenadiers. Secondly: skirmish screens are really good. The French line infantry spent quite a lot of this battle stranded, with knocked-out leaders, unable to do anything. Still, the incoming fire from the Russians, both from skirmishers and line infantry, didn't manage to really harm them. Each formation lost a few men here and there, but all of them were still in fighting shape. A line formation that has a skirmish screen is quite likely to get into close range without that many casualties or shock. Thirdly: cavalry is fun! And more cavalry is more fun! It can be hard to manouver them, but they are actually quite threatening in close combat, especially as soon as you have two units at the same time. We had read a lot of posts online about cavalry being ineffective in SP2, but we really haven't seen that in the latest battles, and especially not now that we have 2-3 units per side. I'm excited to see what happens once we get three or four unit formations... Fourth: the game actually got even better with these larger forces. With both sides having two ranked formations, several skirmisher units AND cavalry, it felt a lot more tactical. And this size was actually great for our experimental simplified NCO rules, as you had a suitable number of leader cards. We did not have a whole bunch of command cards piling up every turn, as we had when we tested the new NCO rules with smaller forces. Fifth: if we go for even bigger games, we might need to look into multiple deployment points, as it's really hard to squeeze in more than a dozen units within the allowed distance from your deployment point. Speaking of escalationAnd larger games would not come as a surprise. After this game, a quick note appeared on our group chat, informing me of a guy selling some Napoleonic French.  It turned out to be a bit of a small army, with two boxes of Warlord French, one box of Perry French, one box of Warlord's Vistula Legion, a box of Chasseurs-a-Cheval, some officers and two line artillery 6-pounders.
I'm still thinking about what I'll end up painting them all as, but this should be a start on the light infantry Chasseurs, a bulked up formation of line Voltigeurs, more Voltigeur skirmishers, and maybe even the start of a small Polish contingent? Please share your ideas of how to best use this unexpected infusion of infantry! /Jonas |
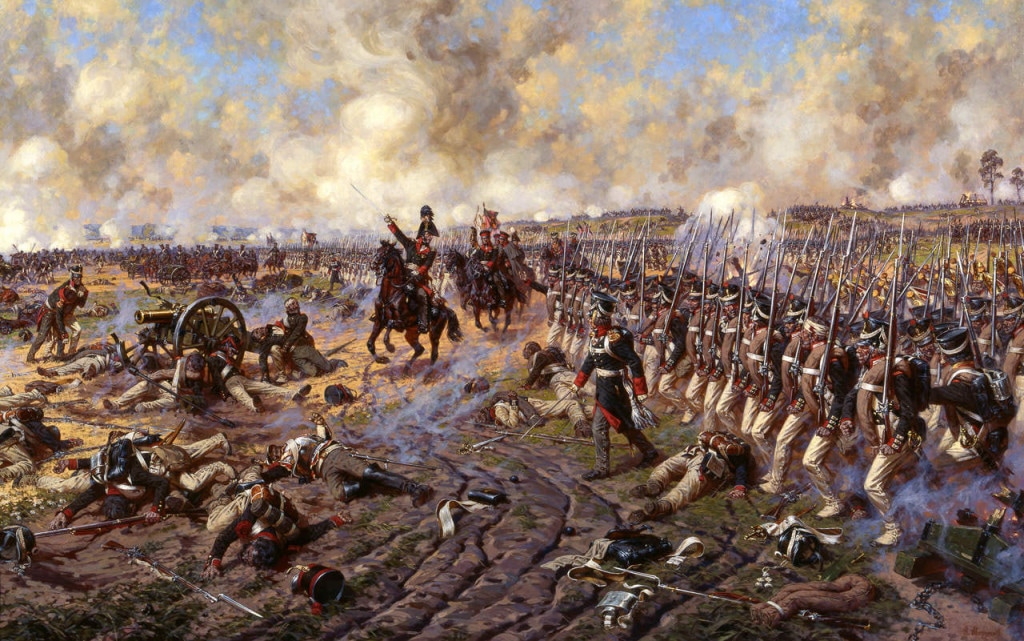
"Glory is fleeting,
|

 RSS Feed
