Building stuff and posts about the campaign3. Reinforcements and Panzer 38(t) model kit Jonas digs into a pile of 1/48 kits, a starts building a Pz 38(t) 4. Friendly burglary and army overviews A quick snapshot of the forces, before we add more stuff for the campaign. Well the title says it all, doesn't it? WIP on a Tamiya 1/48 Kübelwagen. 6. Kfz. 305: 3 tonnes of German Trucking Expanding the German forces some more, a WIP Opel Blitz (Italeri 1/48). 7. Homemade Russian Railroad Water Tower More work on terrain for the campaign. This project includes making a brick wall out of foamboard. 8. German Riflemen and Pioneers. More infantry for the German side, with a list of the paints Jonas uses for his platoons. More home-made terrain. 12. Track-keeping for the Campaign Some ideas about how to keep track of the well-being of your platoons in a Chain of Command campaign. 15. Building Stalino: Flak Gun Emplacement In Chain of Command you're not placing artillery bigger than small mortars on the tabletop, but Jonas can't resist building and painting a 1/48 scale Italeri 8.8cm Flak gun, because it looks great. 17. German Reinforcements: a Gebirgsjäger Project Not content with the company of German infantrymen, Jonas decides to make a Gebirgsjäger platoon for the campaign. 19. Simple Commissar Conversion The Soviets also expand their force, with some conversions of their own. 21. German Reinforcements: First Gebirgsjäger squad and a Hanomag German forces are growing in anticipation of the campaign. 22. Campaign Chits Tiles and 1941 Mountain Rifle Platoon Structure for CoC How we decided to field a Gebirgsjäger platoon for 1941. 27. Campaign Kick-off! But how does it work? Some meat and potatoes about how the campaign will work. 28. German Eighty-Eights Roll Into Stalino Jonas finishes a big gun. 30. German Reinforcements: Platoon Commander and AT Rifle The Gebirgsjäger platoon gets some much needed members. Battle Reports
0 Comments
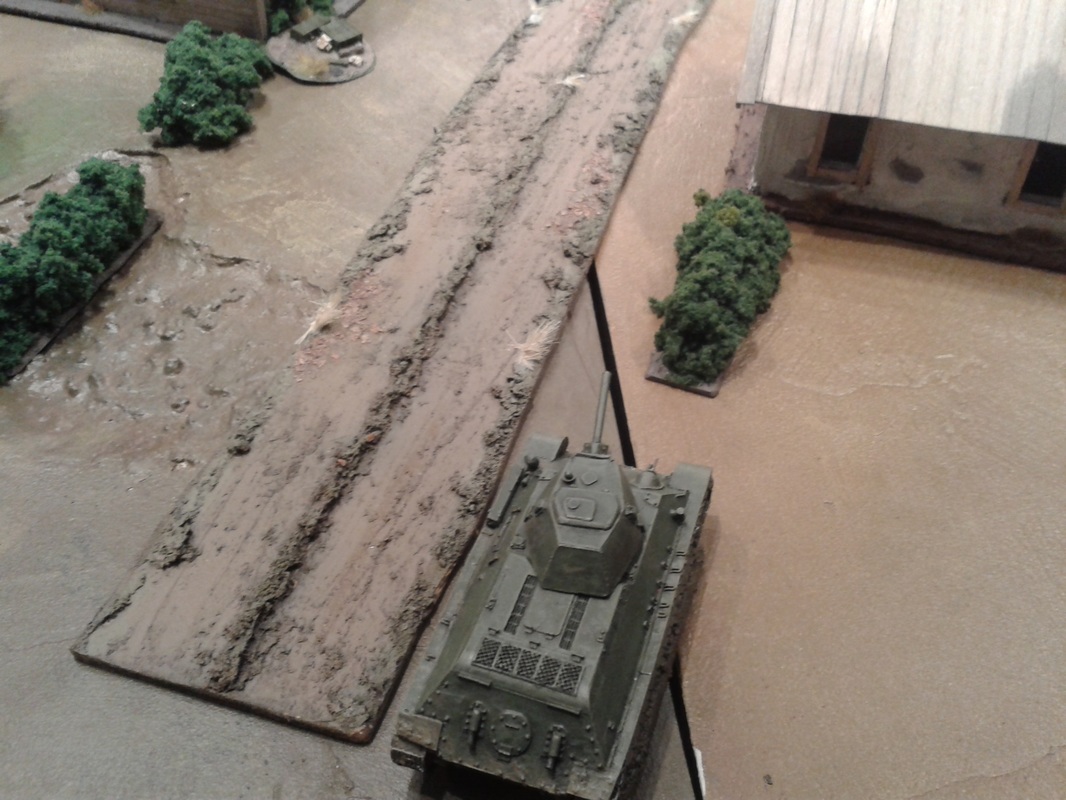
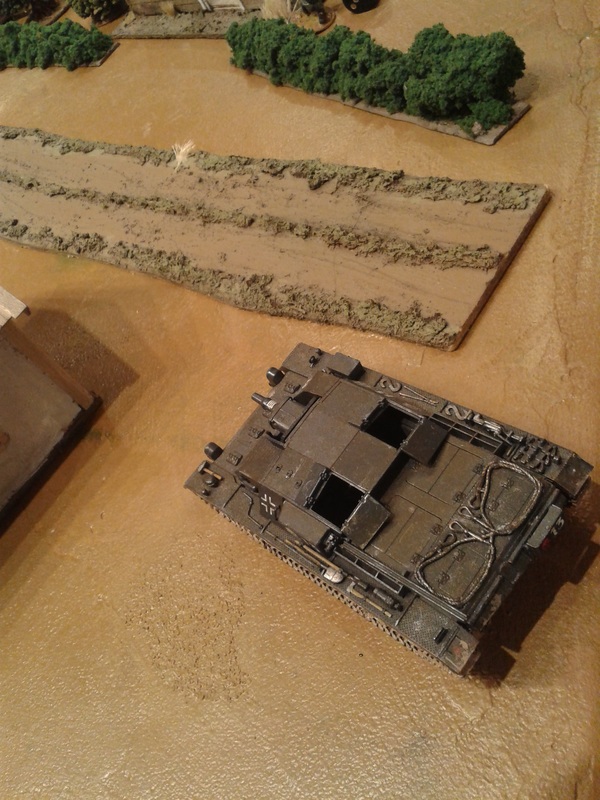
Campaign Turn 5, Western Column and Campaign Turn 6, Central Column (Tanks, Tanks, Tanks!)15/10/2016 This was bound to be a huge battle! Last game on this column was a draw, so we were up for a patrol scenario. But we wanted to play it out as a six player game, and so we decided that it would also count as the fifth game for the western column (don´t remember how we solved that this would have been a Soviet attack). We had two Soviet platoons of infantry and dismounted cavalry, who were opposed by one Italian and one German platoon. The third player on each side commanded a tank platoon each: the Soviets driving two KV-1 (one with ace) against the Germans' Zug of three Panzer III (one with ace). The Germans' StuG was left in no-man's land after the last game, where it got a mobility kill. So we decided that the Germans could buy a crew (which bailed out last game after their tracks were blown) for a few support points, which they did. The crew had to be deployed and move as a team on the table, and could jump into the StuG and start fire if they saw anything (it was still a mobility kill). You can see the StuGs position at the right hand of the photo below. Here you see the battlefield. The Soviets came in from the left and the Germans/Italians from the right. The part of the table that is closest to the viewer is were the Soviet cavalry and Italians met, and the middle saw the engagement of the Soviet infantry and German platoons, as well as all the tanks. 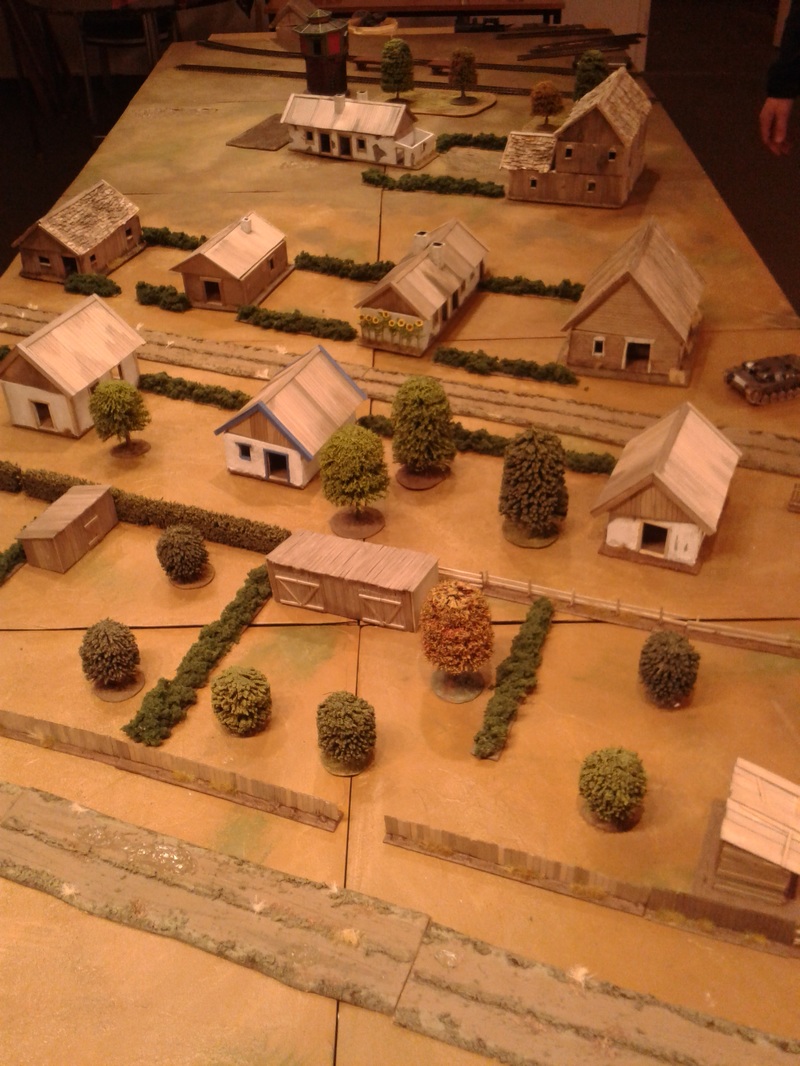 The Axis started out changing the balance of the game by letting one of their Panzer IIIs support the Italians. The German panzer player got a double phase and charged home on the Soviet cavalry! The Soviet positions were severly disturbed by this, as they were expecting an Italian infantry attack which was backed up by a flame-thrower tankette. The Soviet player responded by deploying two 45mm AT guns, and a brave cavalryman threw a satchel charge in the flank of the approaching tank, but to no avail. The Panzer was alive and kicking, and right there in my lines. It drove over both of my ATGs, and after this the whole defense collapsed... and this was meant to be a Soviet cavalry ATTACK!!! The Soviet cavalry player withdrew his force and ceded the entire Soviet right flank to the Axis. This was the first showing of the "indestructible tank syndrome" we experienced this game. 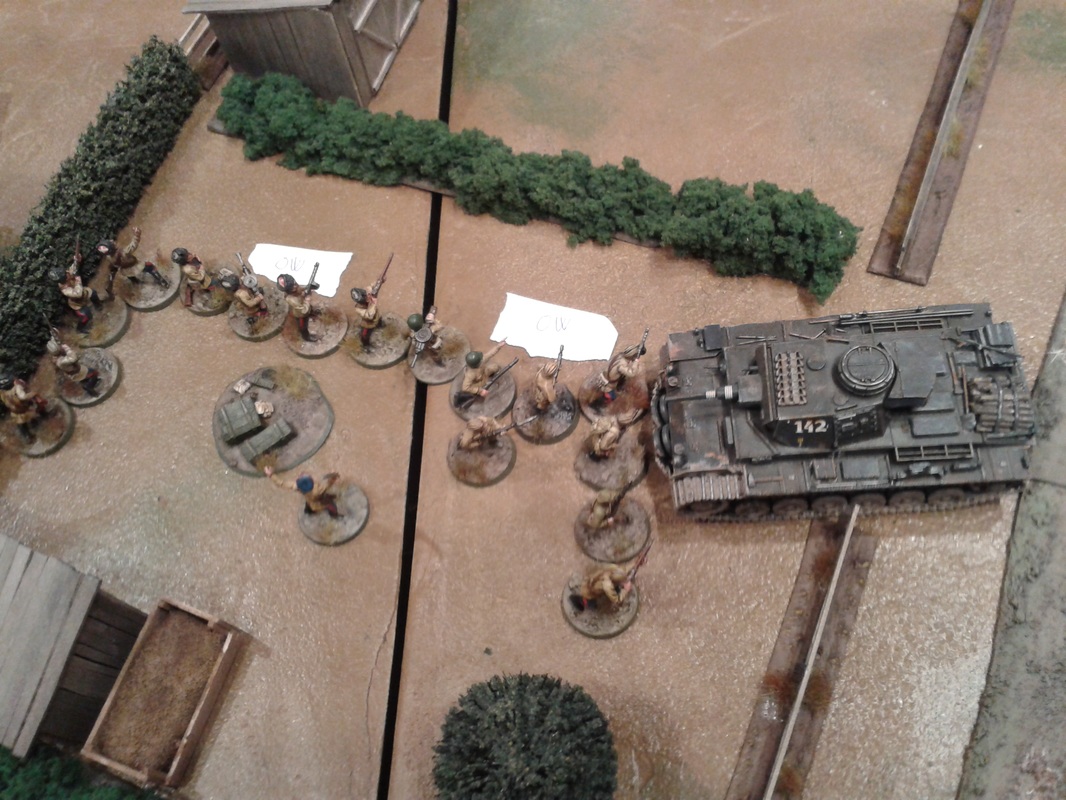 Meanwhile one of the KV-1 tanks (number 212) had rolled up in the middle and started to fire AP shells at the unmobilised and uncrewed StuG! Fair? We don´t ask of fairness in this unjust war! What a sight in a wargame...! Finally the German tank crew arrived, jumped into their machine and started firing back. The StuG was without a scrach even though it had been hit at least three times. The KV-1 had to reluctantly leave the tank duel when the cavalry guarding the KV-1s right flank retreated, to face a more immediate threat: the Italians (and more important - their flame-tankette) were closing in! Slow and lumbering, it headed for the fight in the centre, chased by the flame-throwing vehicle. The StuG crew probably cheered as they saw the beast rumble away...! On the picture below we see the KV-1 "212" relocating. We also see the Italians coming after it. The Germans are kicked out of the two storey building (here without its second storey - between the two Panzer IIIs) by Soviet infantry in a dance of death. You can see them in the door of the house a German squad just evacuated. The Soviet infantry is also occupying the woods close to the tracks. But the main thing was the armor duel - one KV-1 (at the corner of the house furthest away) and a T-34 against two Panzer IIIs. This shoot-out produced a lot of "klinks" and "klonks" and maybe a frightened crew member, but nothing more... we were staggered by this result, but not even when the second KV-1 got into the business something happened! Many jokes and curses followed both sides disillusionment. 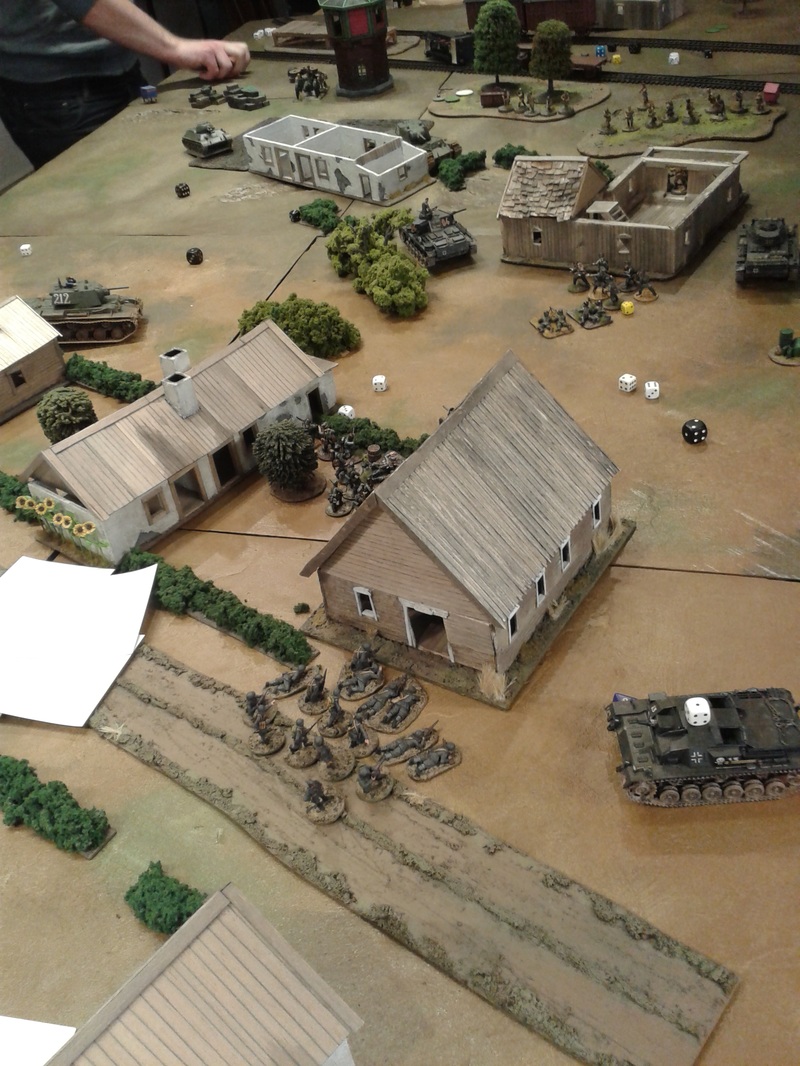 Here you can see the second half of the Italian platoon advance under the protection of the third German Panzer III. They have made a swing around the battlefield that would have made old Schleiffen proud (even though it's around the left flank and not the right!) You can see the flame-tankette (small and yellow) in the upper right corner of the picture KV-1 "212" has escaped by driving AROUND the house that the Germans were kicked out from. The T-34's gunner carefully covers a gap so that the flame-tankette can´t advance further. 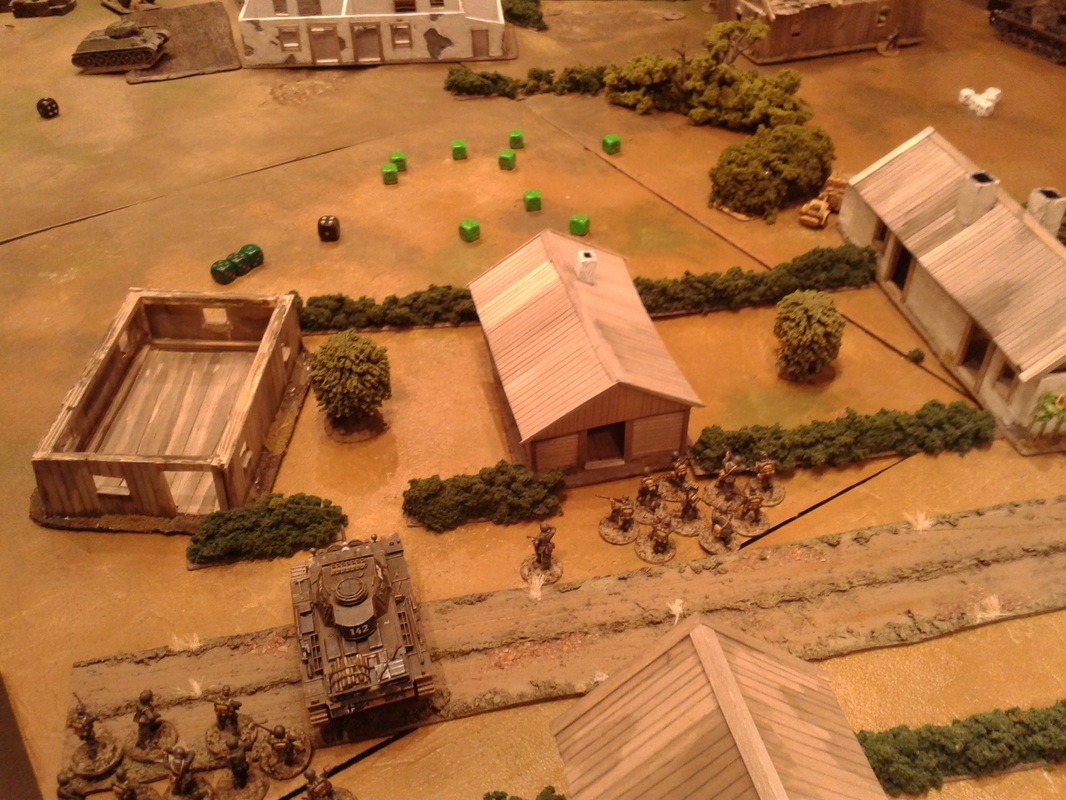 Sorry for the dice everywhere, but this was an intense game and noone wanted to stop playing and clear the board just for me to take photos. I was the unfortunate Red Cavalry player... so I had time taking some shots, but most of the time I spent arguing with the Soviet armor player that the flame-tankette actually was a very serious threat to the "212". Especially as the Italian player hold a menacing CoC-dice to roast any armor. In the uppermost right corner you can see the "212" battling it out with a Panzer III at very short range! 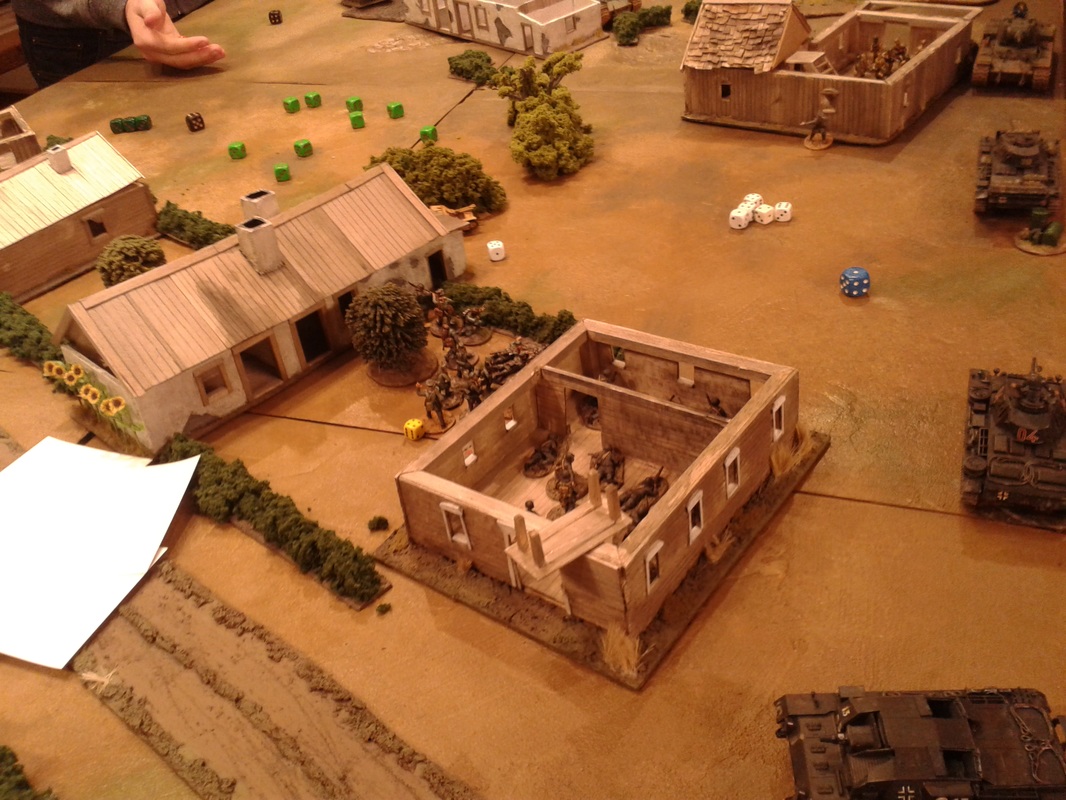 The end - the ongoing and inconclusive armor duel is still going on. The Soviet infantry has occupied the large house. But the Soviet morale had dropped dangerously low. As the Red Cavalry were out of the battle since long and the Germans were also routed, it was up to a battle with armor vs. armor and battered Soviets vs. untouched Italians. The game come to an end as an Axis victory. I think the last Soviet platoon routed. Anyhow, it was a really intense game! 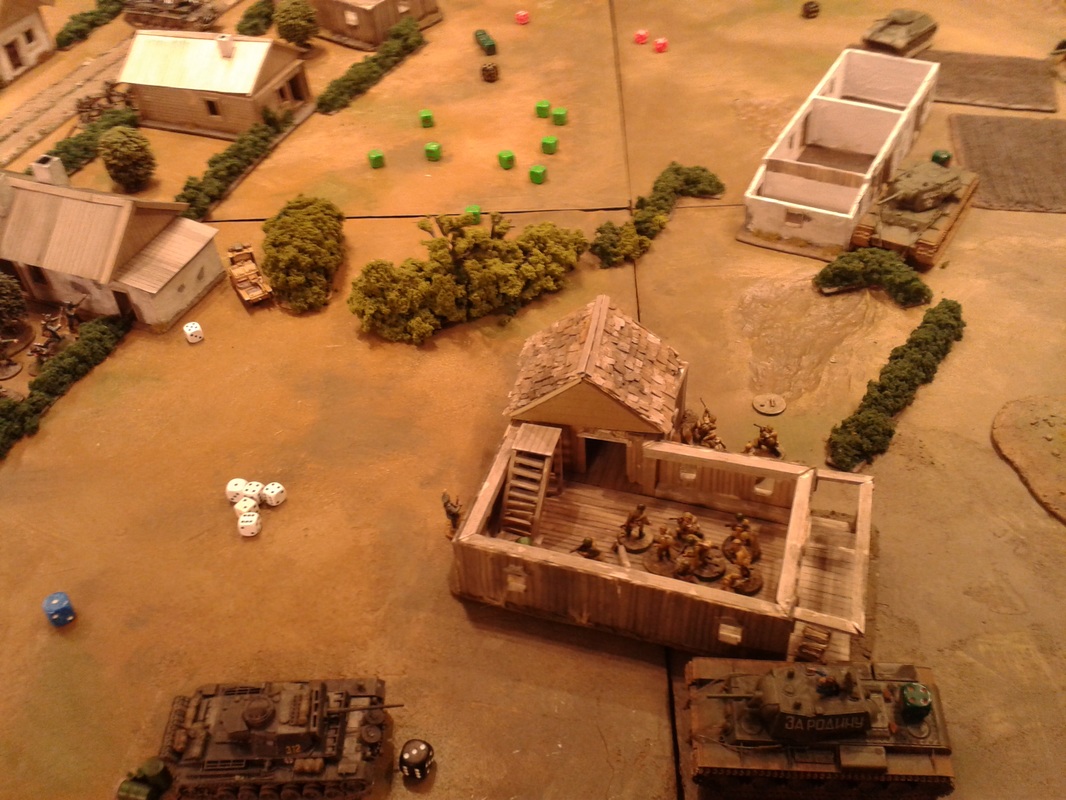 We finally got an real armor clash - which knocked out no armor! Despite my own experience of being thrown out of the game early by the Italian infantry/German Panzer-combo, this was a very exiting game. It hung in the balance and every shot from the tanks could have counted for a victory, at least that's what we felt during the game! The Axis managed to turn a losing streak as this counted as a victory in Turn 5 for the Italians on the western column and for the Germans at the centre column Turn 6.
As seen in the previous updates, there are some some things hobbywise that we found ourselves missing when we started out playing the Campaign. One of them was proper minefields, and a lot of the times a well placed minefield can dictate how the game will be played out. We played around with loose counters that could mark out the edges of the mine fields, or simply use the barbed wire pieces that we had. However, the area they marked had an uncanny ability to swell or shrink as the game progressed and players accidentially bumbed into them as they moved their forces around. Fortunately our Italian player jumped into the fray, and produced enough minefields to last even for the bigger four-player games. The solution of making them out of a square of MDF had a hidden bonus as well, as the act of deploying them is now less fidgety, as you don't have to measure every length of the area. 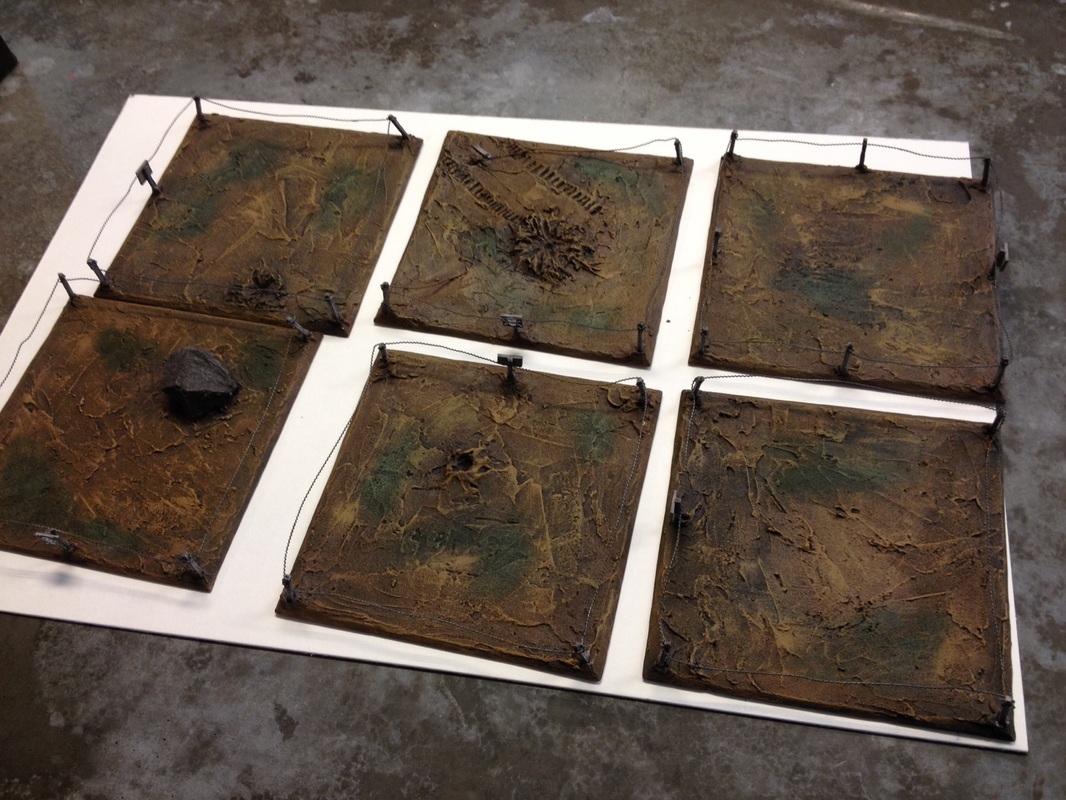  The minefields were based on the same MDF that we use to base all our buildings, and the ground is made of spackling paste. Some tread marks, explosion craters and universally legible signs add a nice flavour.
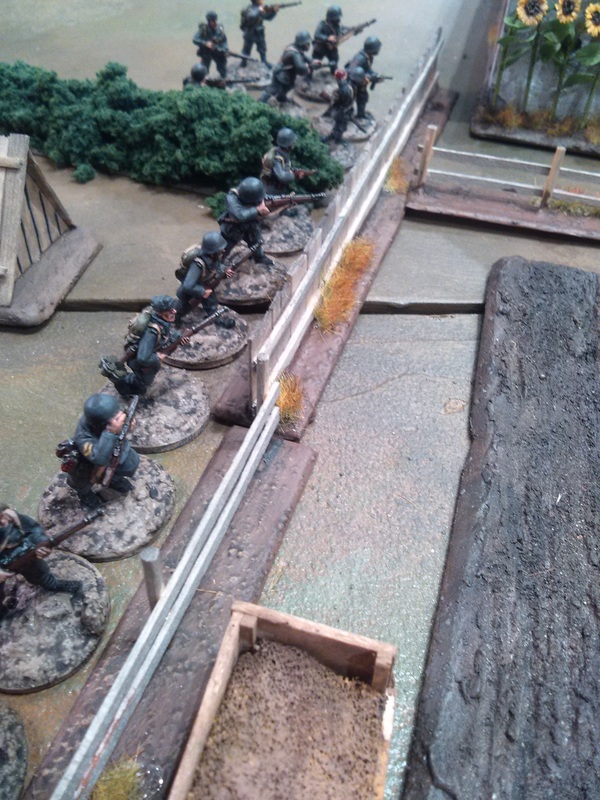
/Jonas This fight was another attack from the Soviets on the Germans, as they continue to push down the Germans in the east. I did not see the whole game, but I will tell the tale as I have been told! Here you can see the board, with the Soviets attacking from the right of the photo and the Germans defending from the left.  The Soviet did something we never have done before, and took a ride in a GAZ-AA truck and captured a JOP from the defenders. Interesting use of transport. Don´t mind the truck being put up to shield the section from fire, I did not play and so I´m innocent of this! 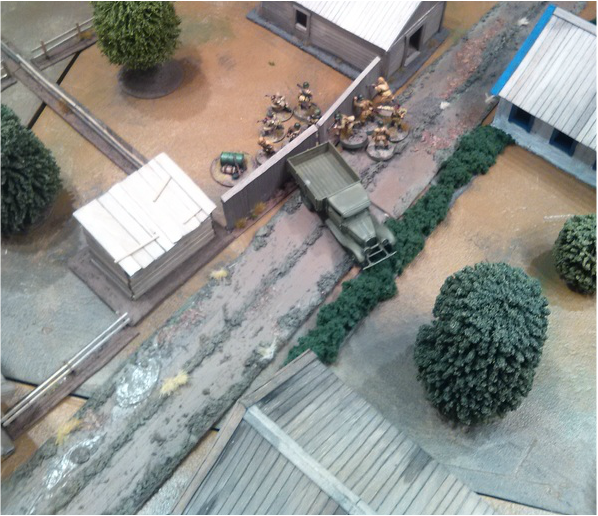 The Germans try to scramble a defense with one of their JOPs lost. The Soviets that arrived in the truck is on the right hand of the house, to the right of the Germans. This has turned into some kind of garden-to-garden fighting, rather than house-to-house fighting! 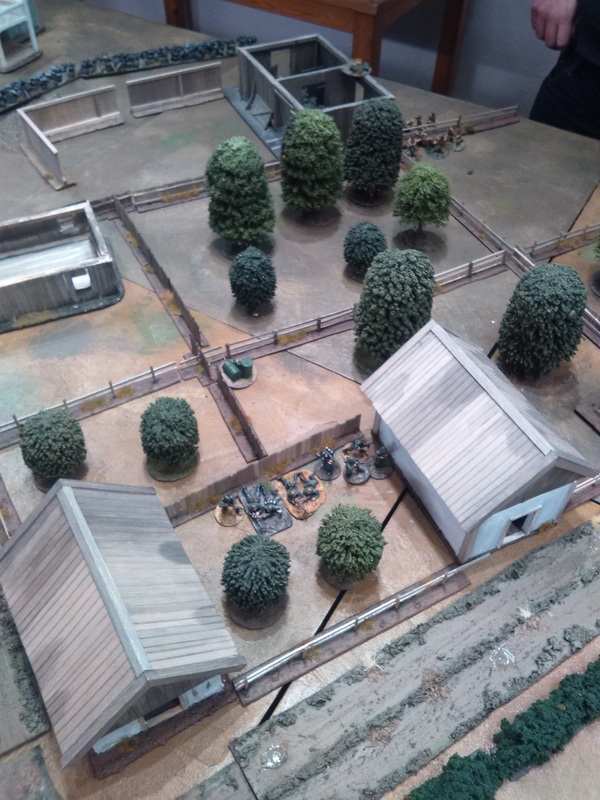 The Germans decide to counter-attack. In the open. Against enemies behind hard cover. In cross-fire. This is not the way to do it in Chain of Command. You see what's left of the attacking section in the middle - two two-man LMG-teams. The Soviets behind the stone wall (you should not have stone-walls in Stalino, however I did not build the board and not all people are as detail-oriented as I am) were not there when the Germans "went over the top", but they sure did use the nearby JOP to open up some murderous fire when the Germans ran for it. 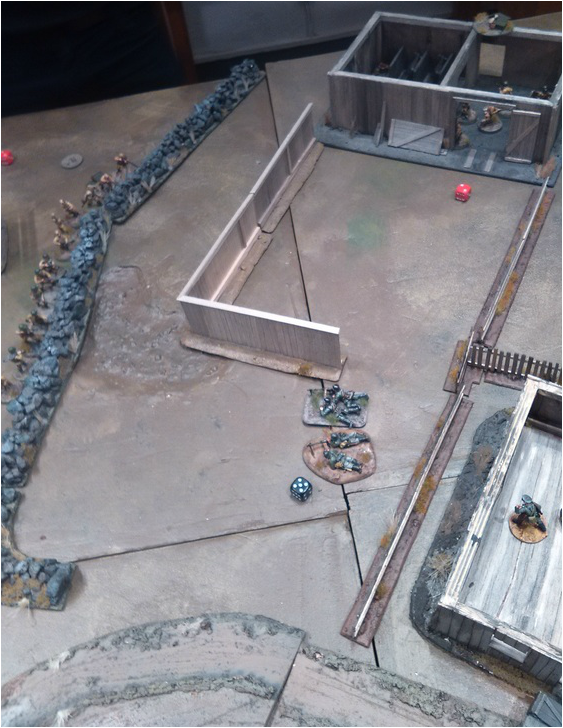 The remnants of the counter-attacking squad have fled into a garden. The senior leader are calculating his odds after this costly set back. Another German section have taken up defensive position behind a road-block. In the upper right corner you can see the truck-delivered Soviets starting the fence-hopping operation that comes with fighting in Stalino. But this was the end of it. Having one JOP taken and a section badly shot up, and with Soviets coming after them from almost every direction, the Germans withdraw. 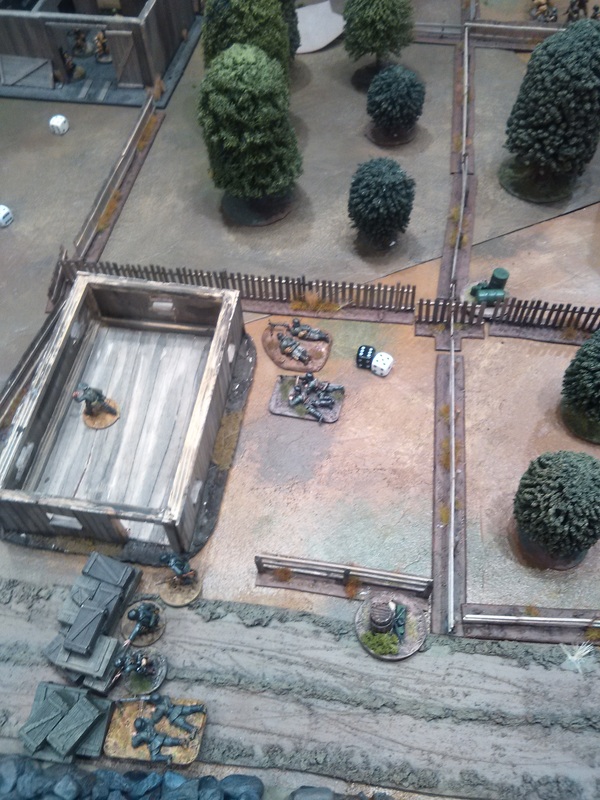 Now, the road to the last Axis area on the eastern flank lay open and next game could win the campaign for the Soviets. We will make sure that it'll be a worthy finale! /Shirty This game saw the Soviets attack by throwing a quite fresh platoon against a rather battered German one. Both platoons started the game with -1 on the Morale roll, due to the soldiers sharing a low opinion of their commanders. This was an awesome game that was not decided until the last phase of around 50 played! We had the campaign's first "heavy" armor duel between a T-34 and a StuG III. The T-34 got the better of it with the use of a CoC die and a double phase. The campaign ruleset for Chain of Command, At the Sharp End, tracks how appreciated (or reviled!) the platoon's officers are by the men. The men's opinion is affected by both securing victories and maintaining low casualty rates. Previous games had left both of these platoons with -1 on the roll to decide starting Morale. Some cleverly placed mines made the Soviet advance perilous, and a Soviet rush for a Jump Off Point (JOP) was about to end in disaster when the Germans opened fire with double MGs. In the end, after much enjoyment, the battle ended in a draw. As an extra fun feature for the future of the campaign, the StuG III was left abandoned and immobilized on the field of battle. Since the game was a draw, we'll decide its destiny in the next game! Casualties were heavy on the Soviet side, and it is rumored that the men in Faadevich's platoon has started to call their leader "The Butcherer" when he is not around… At each end of the road, a tense tank duel: Soviet T-34 vs. German StuG III. It was fun to see some armor manoeuvring and not just a shoot out from table edge to table edge. I think the Soviet player was anxious to ensure that his tank did not back out, like the BT-5 had done for him in the Turn 4 fight on the eastern column. Sorry about the minefields, but ours were not finished yet during this game, so we went with paper. Anyhow, here you can see the Soviet attack, hampered by the minefields which have cut off the easy path for moving up a JOP within 12" from the German table edge. Soviets attack from the left of the picture and have managed to get a JOP quite far across the table (seen in the foreground in front of the T-34). 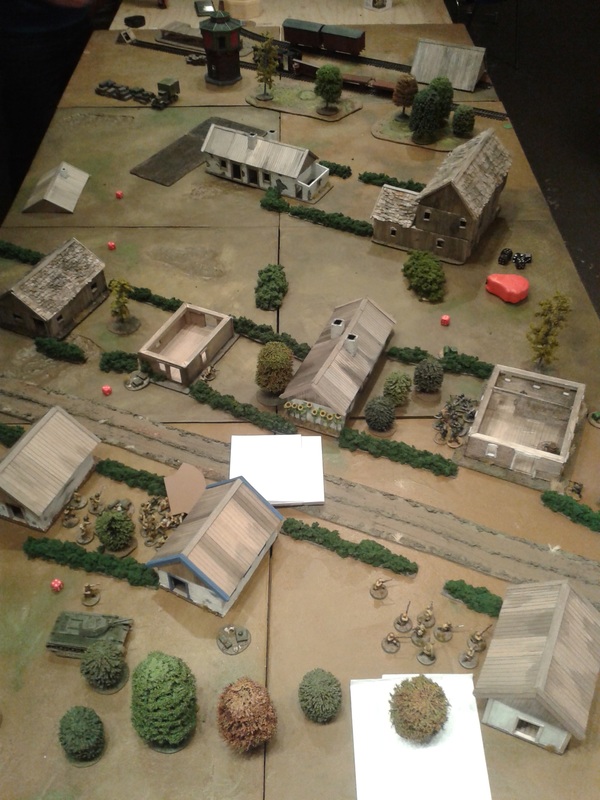 The closest Soviet squad can't get any further as there are no windows or doors on their side of the house in front of them, and they can't get around the far side of the house due to the minefield. The German StuG has deployed and the infantry decides to wait for their armored support. 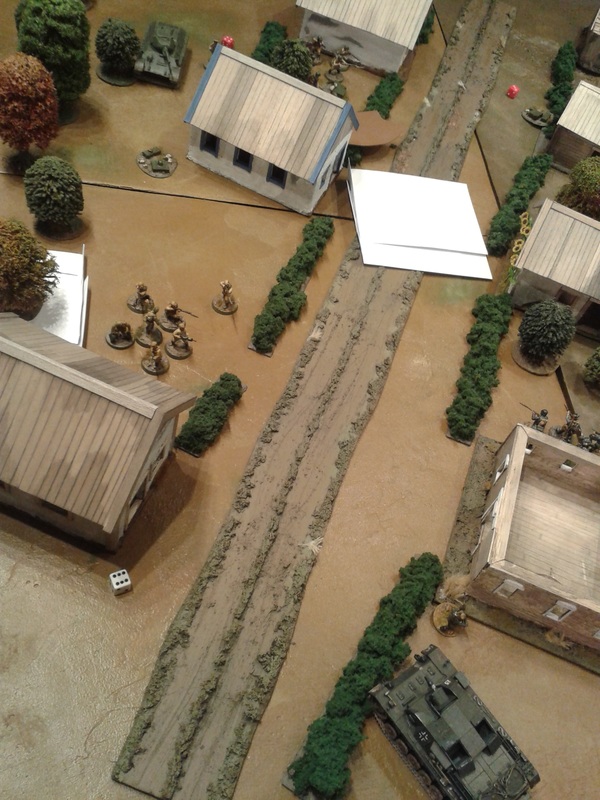 The infantry battle is cautious on both sides. The T-34 rolls forward to take on the fight with the StuG that has complicated the Soviet advance. 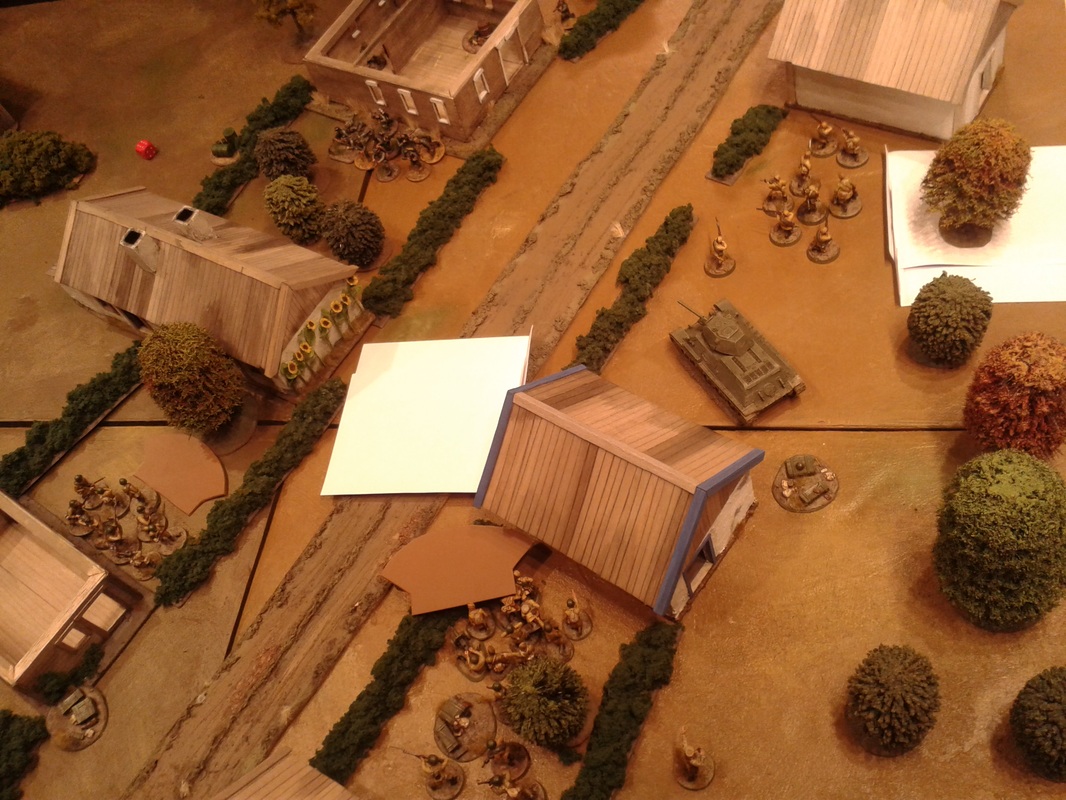 With luck and daring the T-34 immobilise the StuG with one shot and makes their crew bail out with a second. The infantry squad tries to run for the German JOP in the house, but fails to get close enough to affect it. The Germans deploy a squad from the very JOP the Soviets tried to capture, and blast away with two MG 34s. The Soviets try to save themselves by running forward and get out of the arc of fire from the front of the building. They are very close to get pinned here! The hunters are now the hunted. 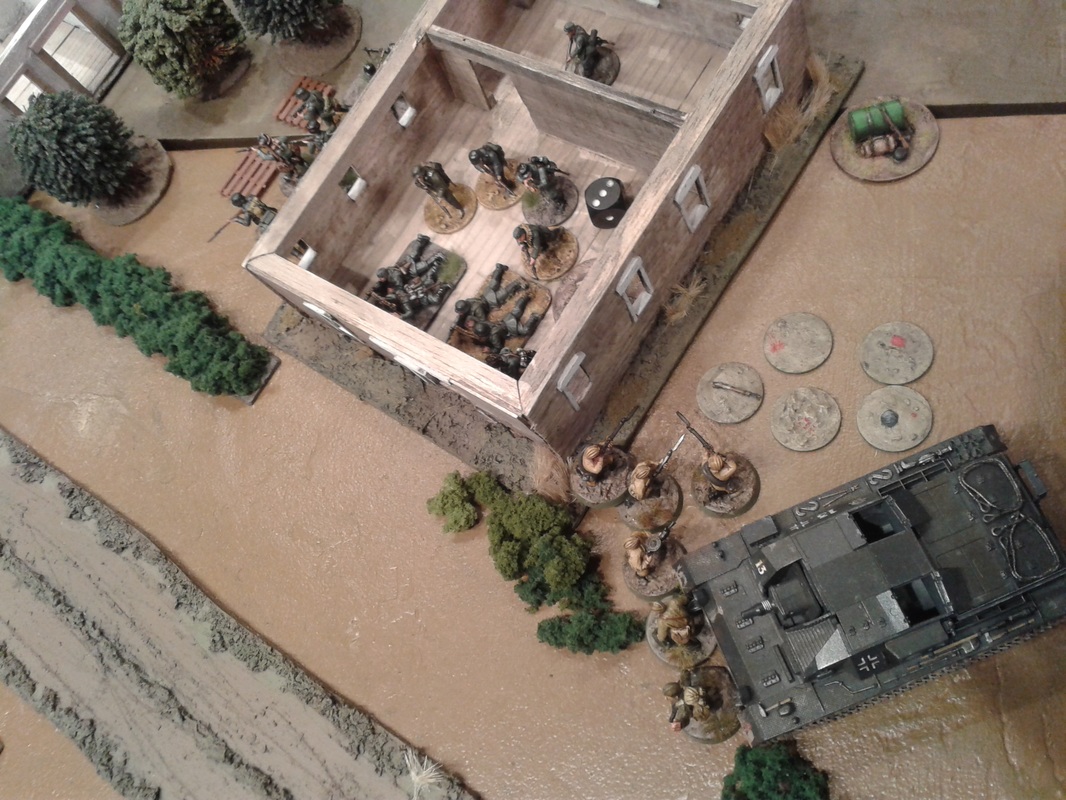 The T-34 tries to save the remnants of the squad as more Germans have run to save the JOP at the corner of the house. Here you can se the difference between a 1:56 (T-34) and 1:48 (StuG III) vehicle. In my opinion the 1:48 is much better in scale with 28mm miniatures, I think it is due to the bulkiness of the miniatures. 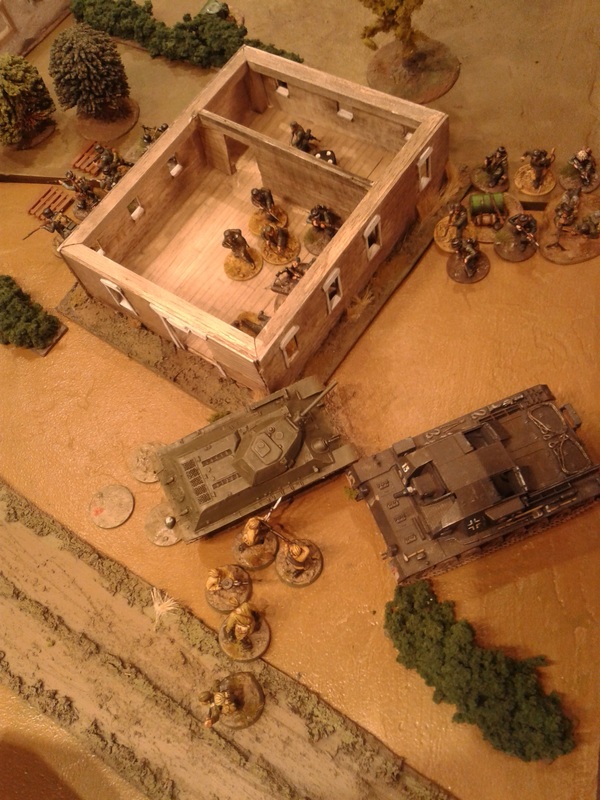 The T-34 tried to smash the house (and the Germans in there), but got stuck in the process! The Germans evacuate towards the enemy, but at this point both sides has so low morale that neither is able to actually win. This was a truly nerve-wrecking game which I appreciated despite only being a on-looker. It was also fun as the German player, who was beaten by the same Soviet player the game before, managed to both stop the Soviets and cause some heavy casualties in return. It is always great when a new player gets to grips with the rules and can give a more experienced one a bloody nose for the first time! Good for the campaign. 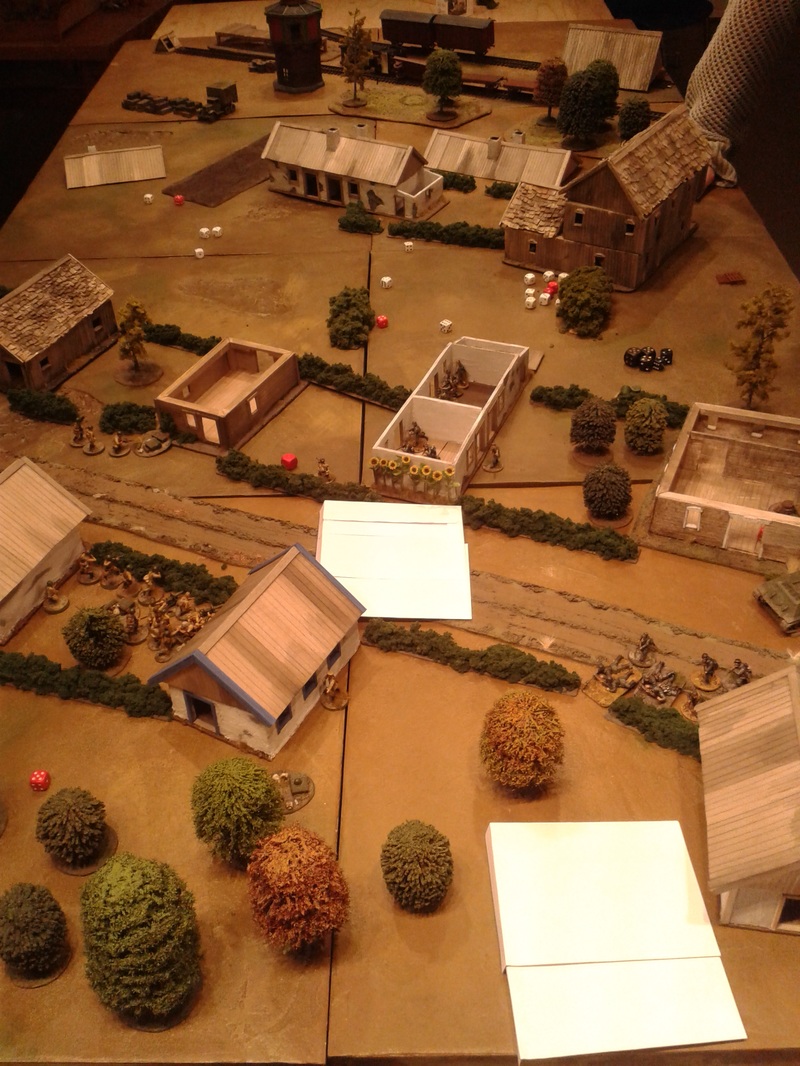 Cheers! /Shirty  The fourth campaign turn saw Soviet victories across the board. The Italian march on the left flank was halted again, the Panzershützen counter-attack on the east flank was thrown back, and the dogged resistance of the Gebirgsjäger company in the center finally lost grip of the train station. This means that campaign turn 5 will see the Soviet forces launching attacks everywhere. Will the Axis platoons be able to resist, or are the mounting casualties going to be too much? And who will bicker the most - the Italian officers, or the Russians? One thing is sure: neither side will be holding any punches from now on!  The Soviet players are ready to unleash a massive surge On the hobby side, the Germans are mostly adding stuff that unfortunately rarely see the battlefield such as motorcycles, staff cars and so on. Other hobby projects are also springing up, as summer is a typical period for audacious plans and irresponsible spending. Rumours are spreading about new WW2 forces being drafted at the club, including both French Foreign Legion and British. Are these rumblings of something as modern as *gasp* 1942-43? But what about all my grey tanks?!
Slightly worried regards, /Jonas  The table seen from the west. The German counter-attack comes from the right of the picture. 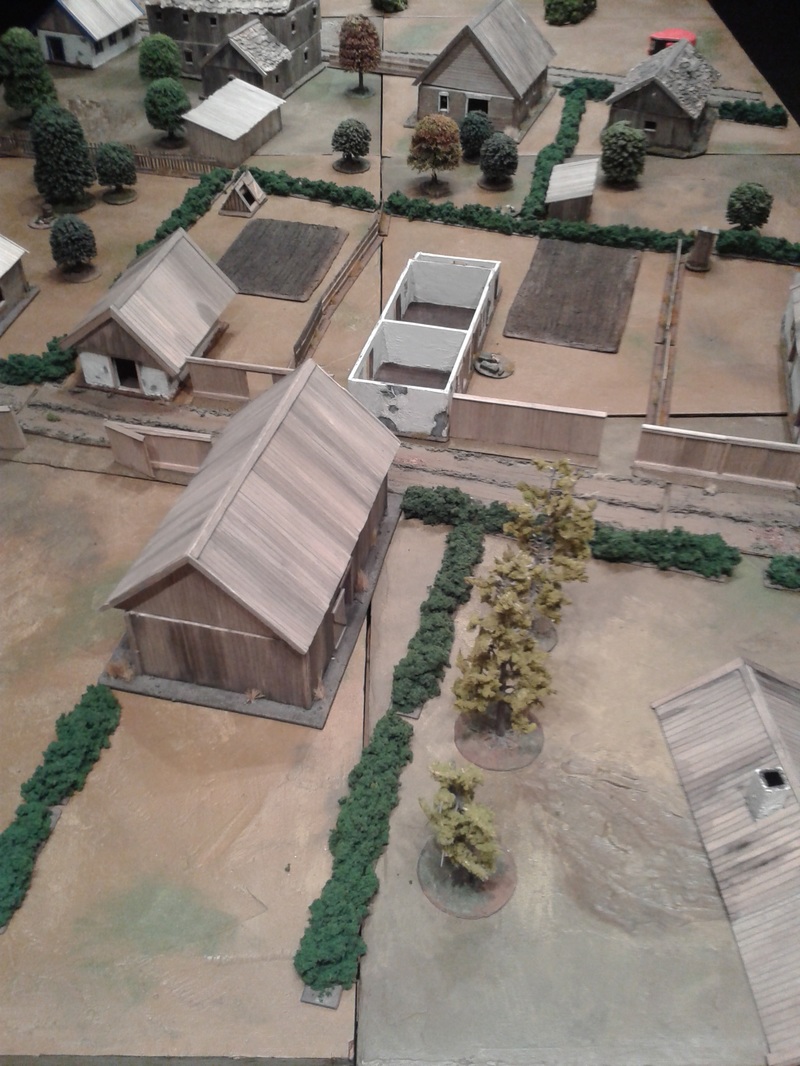 The table from the east. This terrain has already seen a bloody encounter, the Germans are counter-attacking from the left of this picture. The Axis player used his "Counterattack" for this column, to halt the recent Soviet progress. The counter-attack re-takes the initiative and let the Germans be attackers against the enemy platoon that won the last game. That means that the Soviet platoon didn´t get their "miss one turn" casualties from Campaign Turn 3 back until after this game was resolved. The counterattacking player also may choose the outcome of the "armour dice" that we use to decide which types of armoured vehicles (if any) are available. The Axis player decided to go for "light armour", which means that heavier tanks would not be allowed as support options. This flank has seen lots of back-and-forth attacks, and the Soviets used up their counterattack on this column to win with the KV-1 in Campaign Turn 2. Like many of the games we have played on these boards, this started out with a MMG vs. MMG shoot-out in the centre. This time the Germans brought 2 MMGs and prevailed in the fight. But when a German heavy armoured car showed up, the Soviets deployed an 45mm ATG section and knocked it out. The ATGs then had to retire because of incoming MMG fire. We treat the gardens as orchards with 18" sight range so the fire-fights starts at longer distances than in a wood. 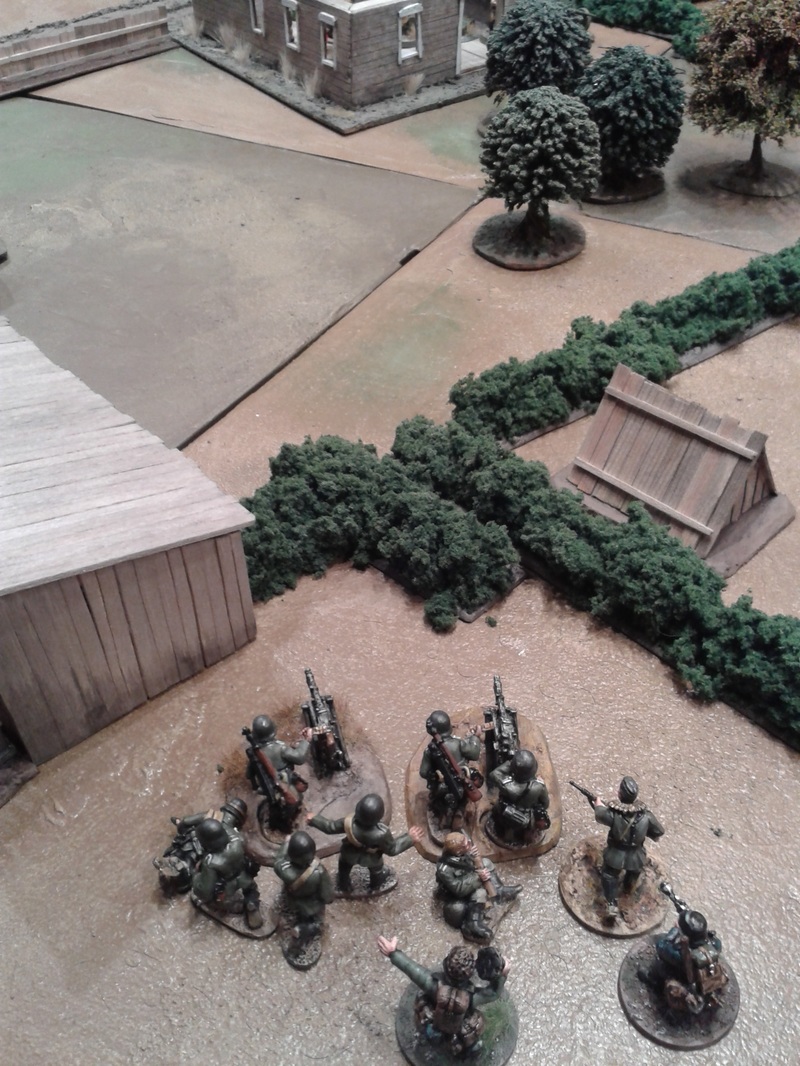 The German fire base - two tripod mounted MG-34. This section first drew away two Maxim guns from the orchard and then two 45mm anti-tank guns. Some impressive fire-power that chased away many Soviet defenders. At the eastern road a Panzer II began a duel with a BT-5. The Soviet tank took a hit and promptly withdrew (the dreaded 5-6 result on List Zero for a newly arrived tank! We show no mercy as this sometimes is more or less the only way to get rid of enemy armor - for example with MG fire). 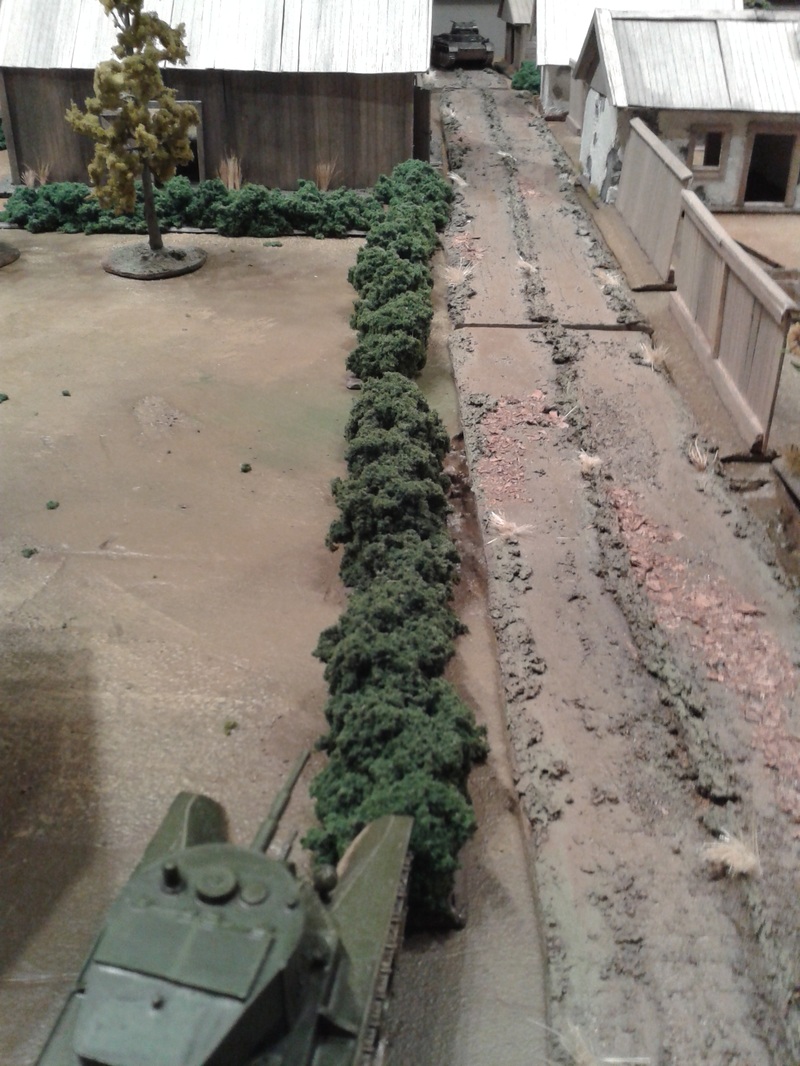 "Someone is shooting at us. Reverse! Reverse! Reverse!" The BT-tank is out of the game. 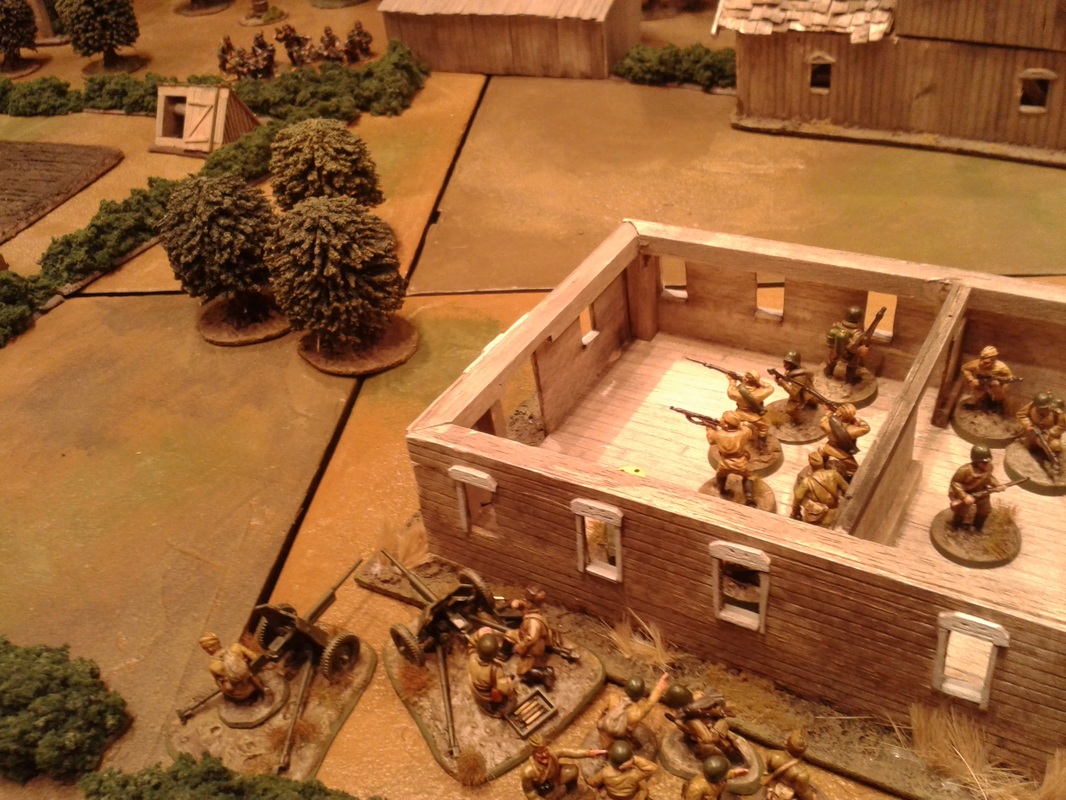 The cornerstone in the Soviet defense. A anti-tank gun section has deployed and taken out a German armoured car, but are met by a hailstorm of bullets from the german MG-34s, seen in the top left corner of the picture. The infantry in the house have some distance to the windows to not engage in this fire-fight. 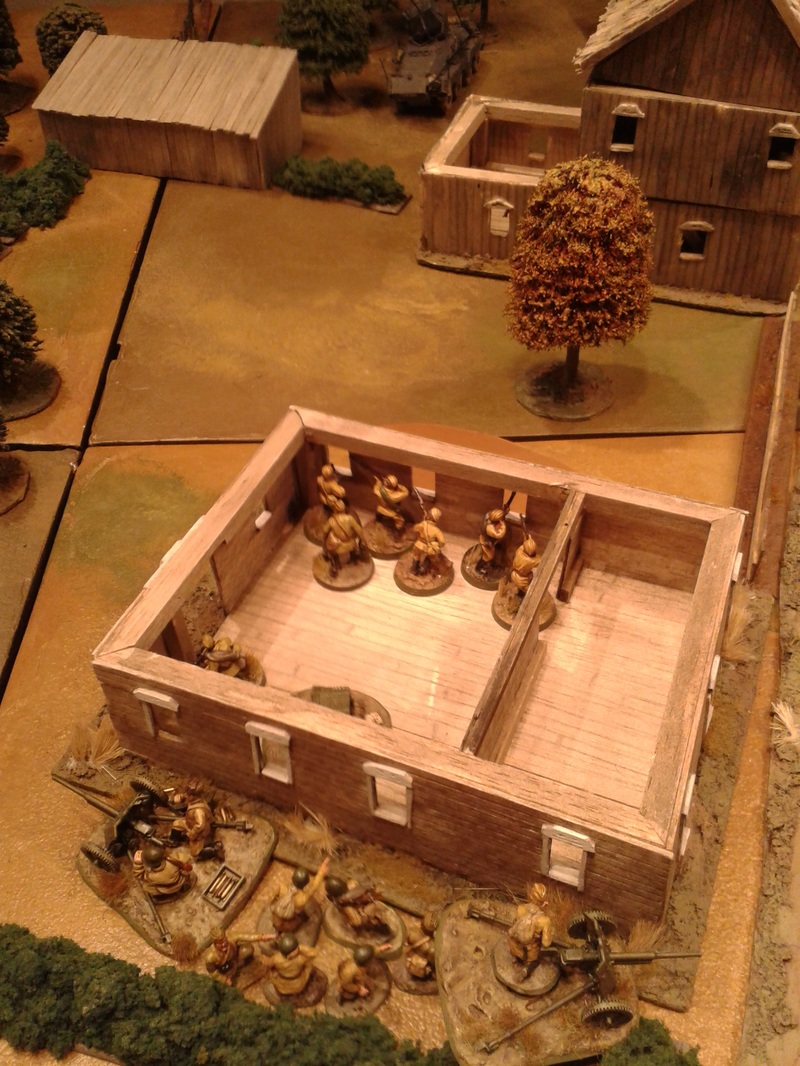 The anti-tank guns has withdrawn behind the house. The infantry has moved up into position to cover this move, losing men in the process. At the top of the picture is the knocked-out German armoured car, possibly the same that bested Ponomarenko in his BA-10. But time ran out for the German attack to fully develop and the fight ended a Soviet victory. After this game we adjusted our time-limit for winning as defender (from three Turn Ends to five Turn Ends) so we must admit it was some kind of a trial and that the Germans got the worst of it. More time could have let the Germans to use their MMG section and Panzer II against the defenders (or maybe move up a JOP at their right flank) but we were not to see this happen.
/Shirty This game was played at the same table as the second fight on this column with the Italians as attackers, for earlier action in the area table-lay out and aerial photo take a look here: Campaign Turn 2, Western Column Leytenat Korotea from the 2nd Squadron and Sjljapin from the 1st took stock of the situation. Ahead of them, where Morduchvitch had been repulsed at the opening of hostilities, Ryzhi was heading back. Sjljapin had tried to help him, but in vain. The two leytenants heard the sounds of what they thought was the Italian armored car - the very same car that had probed Khabibulin's defenses. They were defending the same position that they had thrown back the Italians from that time. Korotea had dug in his men and two AT guns on Kapitan Jegorov's orders. Sjljapin was covering the right flank and acted as a mobile reserve, as his men have not had the time to dig in. They expected an Italian attack to come from the same direction, bringing armour and support by mortars, so digging in on the left flank seemed the right thing to do. Korotea did not send any men over to the big two-story house on the left, as thought that the Motorized troops fighting for the railway station proper had secured it. The Italians should come down the road and through the gardens and woods. As it tuned out he was right in three of this four presumptions - the house was not secured after all!  Italian troops has secured a house, not Soviet ones (as was the assumption of Leytenat Korotea). The Italians possibly felt at home as they occupied the same house not too long time ago... That the Italians had managed to infiltrate into it was soon obvious enough as Koroteas platoon was coming under accurate sniper and machine gun fire from the building. And then the Italian armoured car came into action at top speed, driving straight down towards their position. Korotea sent a thankful thought to Kliment Vorishilov (and maybe old Buddeny) for equipping the cavalry with handy anti-tank weapons.  The Italian attack develop. The house in the foreground is occupied by infantry, a sniper with funny hat hides outside the same house and an armoured car races down the street. In the far away centre leytenant Sjljapin deploys his men in defense of the gardens in the middle of the battlefield. 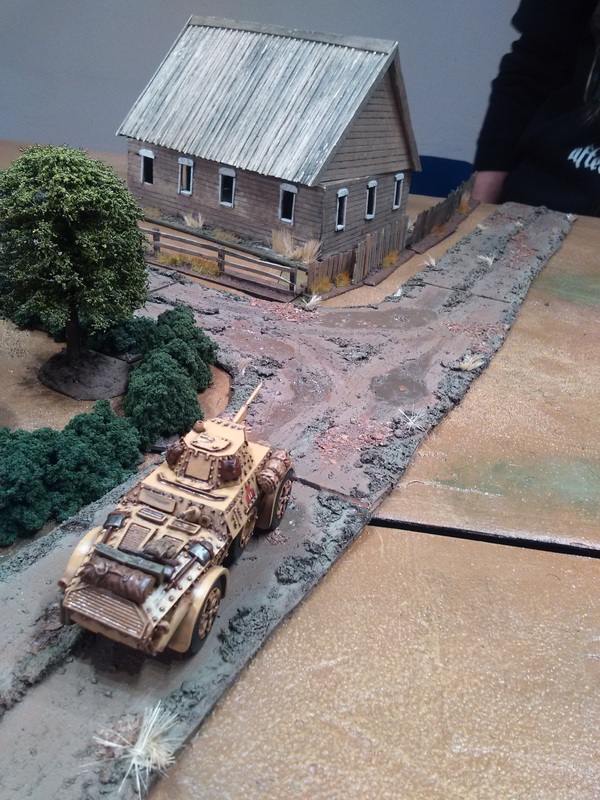 Wroom! The Italian armoured car arrives at fast speed. Last time it entered this area it took the western road and missed the action. This time the Italian commander was sure not to make the same mistake and let the armoured support to take a more direct approach. Two shots were herd as the anti-tank guns stopped the enemy dead in his wheels. Korotea heard someone scream angrily in the Italian-occupied house. 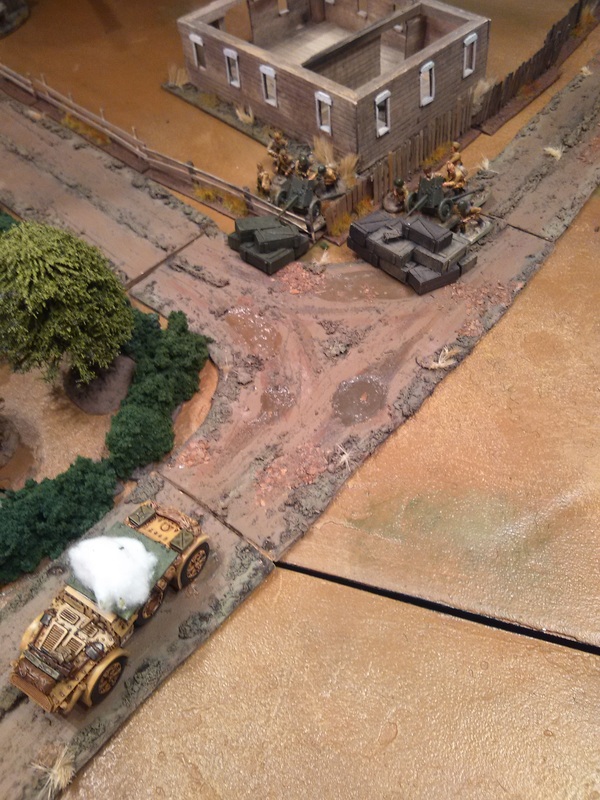 The dug in anti-tank gun section (two 45mm guns) reveal themselves by opening fire on the armoured car. The first shot misses but the other hits home and brew up the vehicle. The petty Italians answered with their mortars, and the bombs plunged down on the same area as they had when Khabibulin defended this crossroad. Certainly, this was plotted all along! 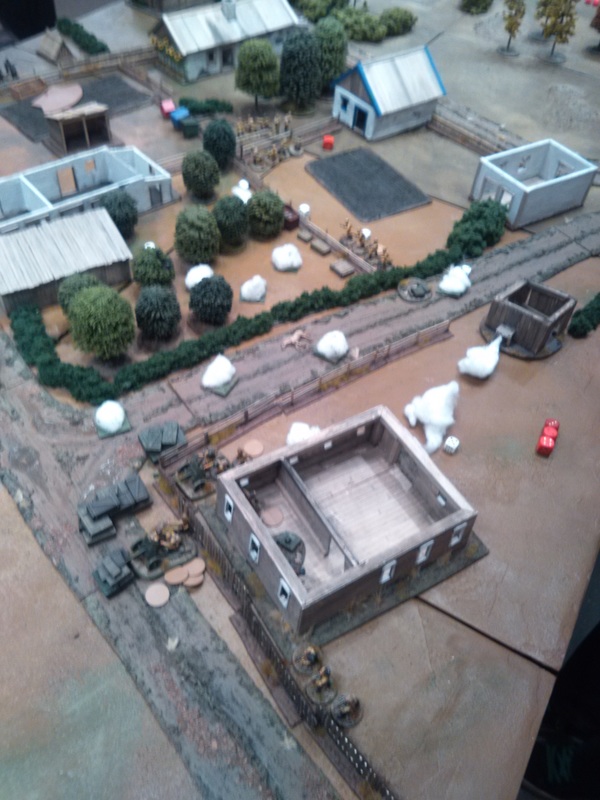 The anti-tank guns were left outside the barrage and started an uneven duel with the Italians in the house. The fire-fight was getting murderous as man after man of the anti-tank gunners was killed or wounded. The crews fought with valor. The 4th campaign turn continued to to some real harm to both sides, I lost one AT gun due to crew loss and the Italians got an armoured car destroyed. Attrition in materiel had at last started to show. 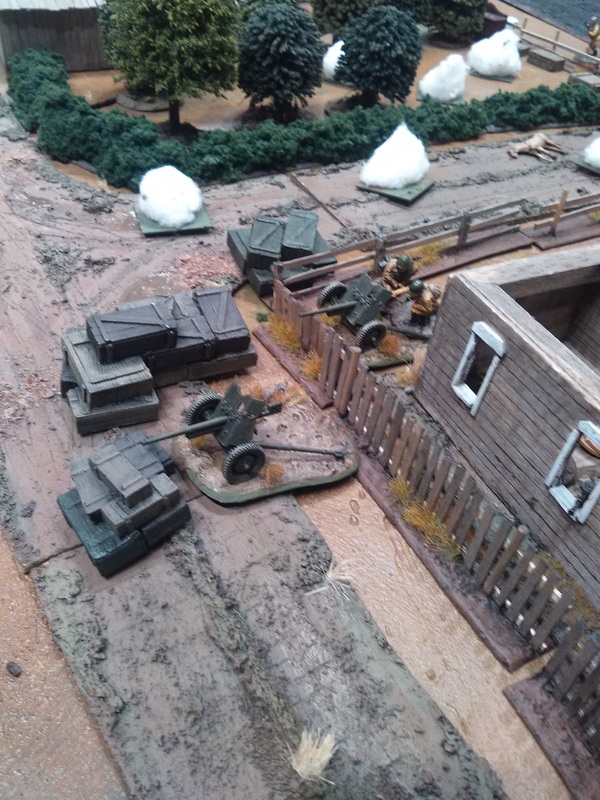 At the same time, Sjljapin guarded the centre with one of his sections, leaving the other in reserve. He took Borisov with his Maxim with him for extra fire support. But the Italian attack there was not developing very fast and the men could wait uneasily in a orchard until the fighting died away. They did not see much of Mussolini's men. 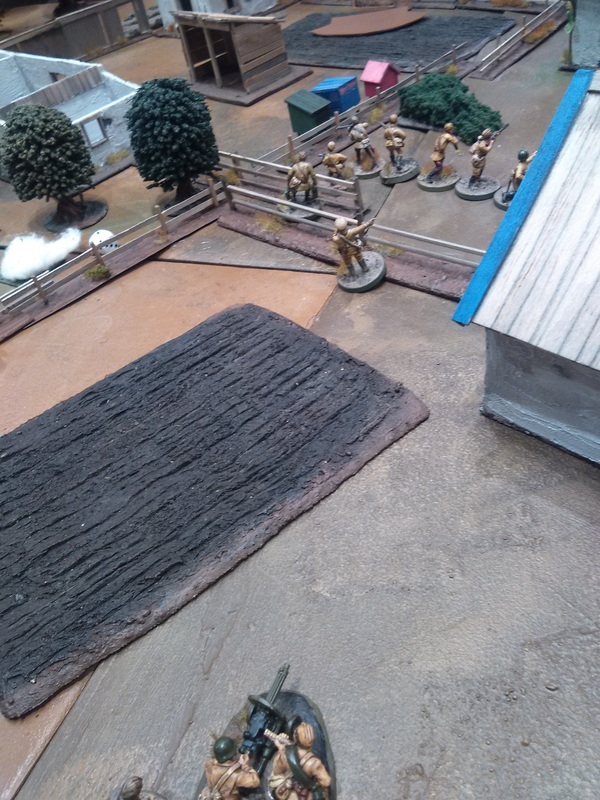 Sjljapin directs the defense of the gardens in the centre. Borisov with his Maxim is on his way to bolster the position with some heavy fire-power. Back at Korotea's position things were not that easy. The mortar bombs were continuing to fall down on them, but failed to cause to any casualties - a result of the soft ground and entrenchments. The mud was also getting deeper as it started to rain during the bombardment! But then, after what had felt as an eternity of human misery, the rain stopped, and then the mortar shells stopped coming. As soon as this happened the battle with all kind of small arms fire resumed. When it was apparent to the Italians that the Red Cavalry´s fighting spirit was not crushed by this mortar bombardment they quietly withdrew to where they came.from. 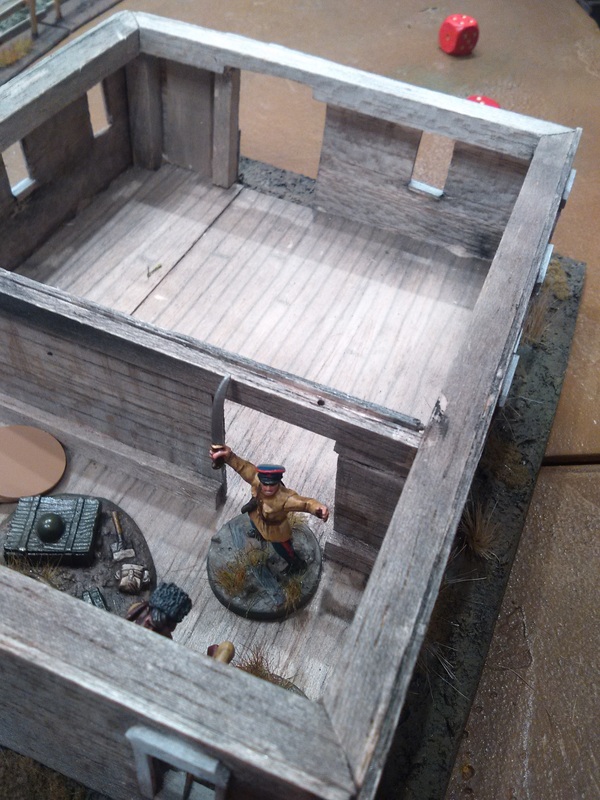 Leytenant Korotea has lunged himself into the house that was the centre of resistance on the left flank. With no thougth about his own safety he endured the bombardment together with his men. This act of solidarity between men and commander kept the Red cavalry moral high during the darkest moments of the battle. For the second time at this table I had to throw in a Senior Leader into a mortar bombardment - it worked out, but oouch what an uneasy feeling!! Probably there was much truth in what Colonel Tsvetovich had said - the Italians did not desire hand-to-hand combat, and the cavalrymen were waiting in their holes with grenades, carbines and sabers! As long as the will to resist to the death were unbent, the 138th Cavalry Regiment would at least hold their ground in Stalino. The outlook of a swift mounted counter-attack was nevertheless not as promising as before. Most of the exploiting forces platoons were engaged with infantry, if not house-to-house, then a garden-to-garden fight. Much of the attack's momentum seemed to be spent. Korotea hoped that Tsvetovich had something up his sleeve!
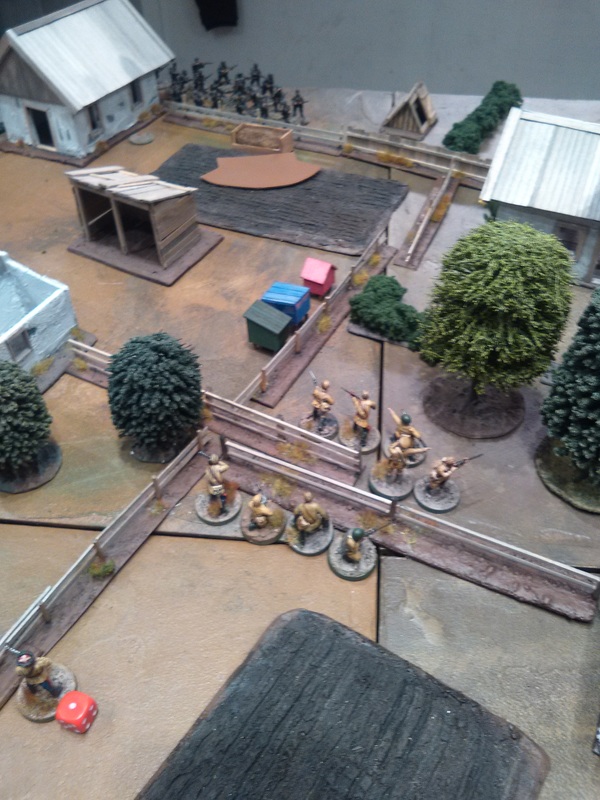
Urahhh! /Shirty This was the second game in a row on the board just south of the railroad station. The first one was a bloody draw (for the Soviets, for the Germans it was a non-bloody draw!) so this was a second attempt to get a decision on this front. Since the last fight was a draw, this was to be a "neutral" game, so we chose the Patrol scenario. 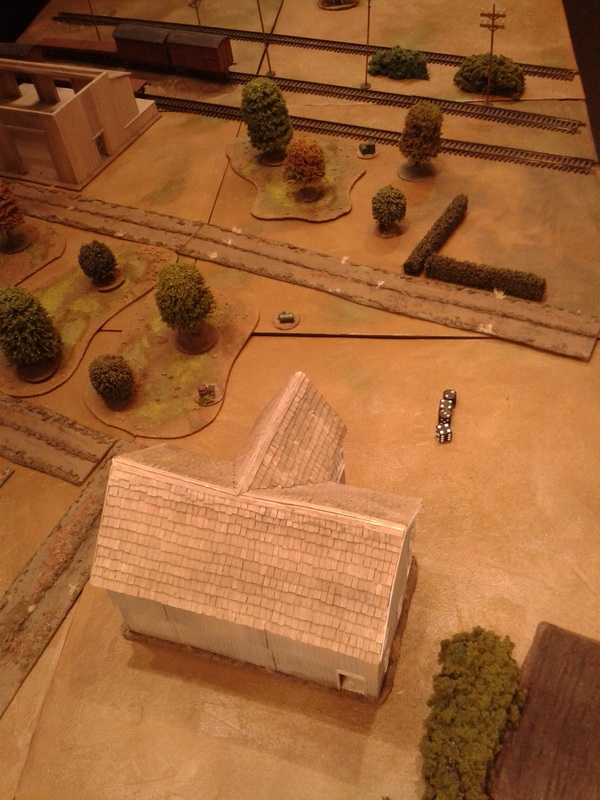 Here you see the battlefield from the western table edge, with the rail-road tracks in the far end. You can see the three German JOPs in the centre of the picture, the barrels and fuel drums. The German player had the opportunity to hava one JOP in the big house in the foreground, which he probably should as the two in the wood in the middle are very close to each other (and the house is hard cover). Both players opted for a lot of additional infantry firepower - as I remember it, the "armour dice" came up with "no armour", so this was going to be a wholly infantry-based patrol! The Soviet platoon was armed with two Maxim MMGs and a section of SMG infantry. A SMG section consists of 10 men with SMG, including Junior Leader with SMG, for six Support - since we have house-ruled to alter the SMG range from 6"/12" to 9"/18", this is a really beefy option. The Germans took two MG34 on tripod (MMGs), as we allow MMGs being taken as sections with a reduced price as well.  The battlefield from the Eastern table edge. You can see that some Germans have hit the table, I presume they will deploy in the central wood in a moment. The game started of with a vicious clash in the central wood. One German section and MMG deployed and were countered by the Soviet SMG section. The Germans were forced to withdraw and lost their MMG in the process (all crew were "killed" and the Soviets hold the ground, so we decided this MG34 was a total loss for the Germans). This was actually little of a milestone in our campaign, as no heavy weapons or vehicles had been completely lost so far (in six games!). As you may have picked up we use fixed support pools for this campaign, so such losses will start to hurt in the long run. Then the Soviets tried to make a flanking manoeuvre (you can see it in the top right) but they were stopped dead in their tracks by a German MMG deployed in the open (centre-top of photo). But at this time the flow of the battle was in Soviet hands after the victory in the central wood, and the Germans withdrew from the table to avoid more losses. 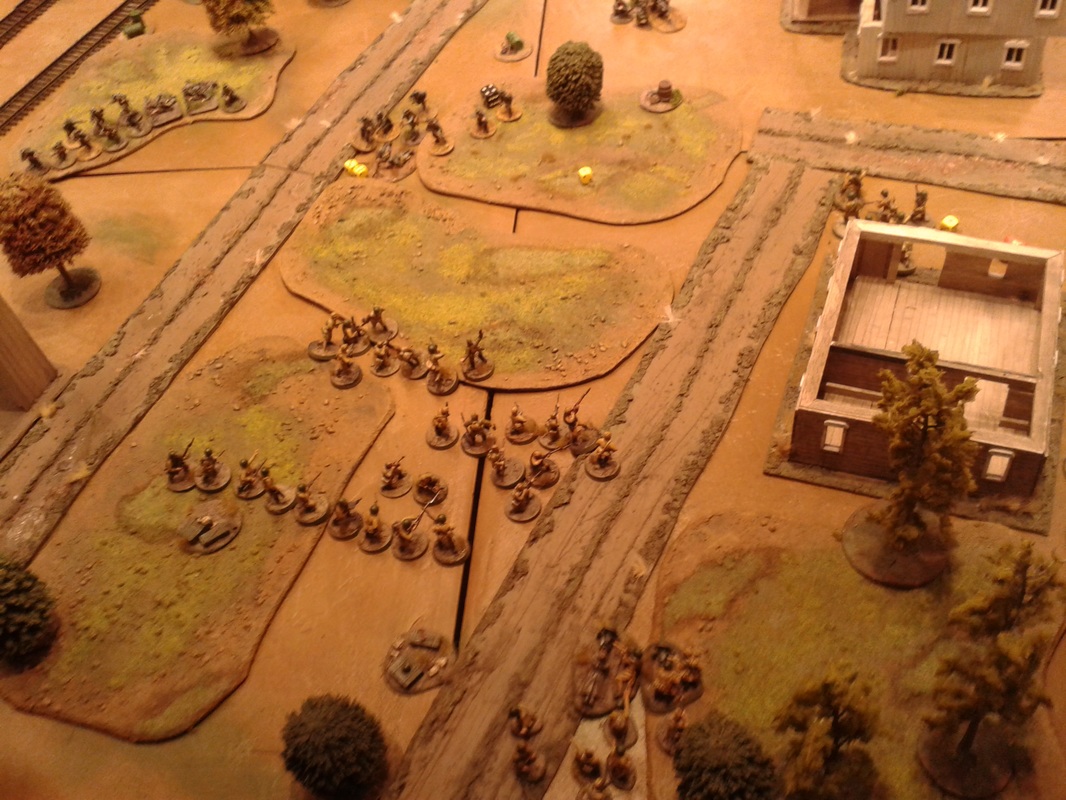 The Soviets push down the central wood overrunning a German MMG (removed in this picture). The Soviets furthest into the wood is the SMG section followed by two sections of the platoon and the Leytenant. The battle for the south end of rail station was over (for this time at least) and it was in Soviet control! Captain Kolomiets was quietly swearing as Leytenant Fadeevich carried home the attack he had failed with one more time... this did not in any way stop the Brigade Headquarters to celebrate the victory. The same night a telegraph was sent to the 12th Army Headquarters: "In the fighting for Stalino West Station, the 15th Tank Brigade has taken its objective, killed numerous enemies and captured a heavy machine gun with 1204 rounds of ammunition." Cheers! /Shirty
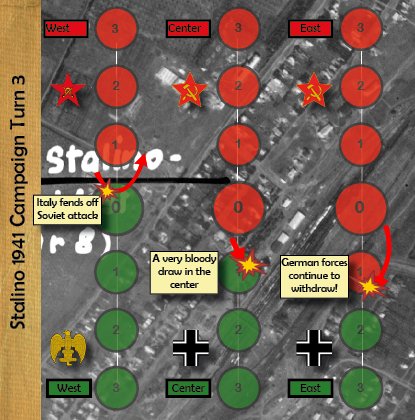 The third campaign turn could be summaried in one phrase: full scale Soviet attack! The Soviet players pushed hard after winning their games in turn 2, with mixed effects. The attack on the western front was pushed back completely, with the Italians retaking the initiative for round 4. The center saw a draw, with the Soviets unable to dislodge the Germans, but ready to give it a new shot as soon as they can re-organize for a new attack. Meanwhile, the eastern flank is starting to become a Soviet playground, as their troops steamroller the motorized German troops. Will they be able to continue their progress, as the victory condition is becoming visible? We'll see in the next couple of rounds! /Jonas  Worrisome images for the Germans on the east flank! |
WW2 Campaign BlogThis blog follows the second Chain of Command club campaign, set in the intense fighting over Stalino in October 1941. Archives
January 2018
Categories |
 RSS Feed
